Free tools Windows power users keep installed
One-click scans. No signup required.
A reliable Wi‑Fi panorama-camera installation starts before you drill: identify the camera’s actual viewing method, test its network and recording functions beside the router, then mount, calibrate, secure, and document it. “360-degree” can mean a true fisheye image, a motorized camera that turns through a stated range, or simply a wide-angle lens, and each requires a different mounting strategy.
Know which type of panorama camera you have
True fisheye or panoramic cameras
These capture a very broad scene at once, often from a ceiling or high central point. The raw image may look circular or distorted; the app dewarps it into a conventional view or lets you navigate digitally. Reolink’s FE‑W, for example, is specified with 180-degree horizontal and vertical viewing angles, rather than relying on mechanical rotation (manufacturer specifications).
Motorized pan-and-tilt cameras
These move horizontally and vertically. A “360-degree” claim normally describes the horizontal travel, not simultaneous visibility in every direction. TP-Link’s Tapo C510W is specified at 360 degrees horizontally and 130 degrees vertically (product page). A wall, shelf, cable, or tracking behavior can still limit the useful view.
Outdoor and dual-network models
Outdoor units need suitable ingress protection, temperature ratings, power routing, seals, and wind-resistant mounting. Some cameras support both Wi‑Fi and Ethernet; wired networking is preferable where wireless interference or uptime makes Wi‑Fi marginal.
#1 Best Overall

- 🌙 AUTOMATIC INFRARED NIGHT VISION: Equipped with four infrared LEDs, the camera auto switches to night vision mode in low light. Clear monitoring within 3–5 meters, delivering visible footage day and night.
- 🚨 HUMANOID MOTION DETECTION & REAL-TIME ALERTS: Once movement is captured, your mobile APP instantly receives alert notifications. You can open live stream anytime to check the on-site situation for effective home security protection.
- 🔍 130° WIDE-ANGLE HD MONITORING: Adopts large-aperture lens, supports 1080P HD image output and digital zoom function. The 130° wide field of view reduces blind spots and covers more monitoring range. Multiple picture quality modes can be freely switched.
- 📶 BLUETOOTH ASSISTED FAST WIFI PAIRING: Intelligent Bluetooth matching simplifies network setup. The device pops up automatically for one-tap connection, enabling quick remote viewing via mobile phone anytime and anywhere.
- 💾 DUAL STORAGE WITH LOOP RECORDING: Supports local TF card loop recording and cloud storage for dual data backup. Old videos will be automatically overwritten when storage is full to continuously capture surveillance footage for various indoor and vehicle scenarios.
Before you begin: installation checklist
- Camera, mounting plate, template, screws, anchors, power adapter, and cable.
- Manufacturer’s mobile app, account credentials, and a phone or tablet with Bluetooth and local-network permissions enabled when requested.
- Wi‑Fi name and password; verify whether the camera is 2.4GHz-only or dual-band. Wyze Pan v2 is 2.4GHz-only, while Pan v4 supports 2.4GHz or 5GHz (Pan v2 guide; Pan v4 guide).
- Compatible high-endurance microSD card if local recording is required.
- Drill, screwdriver, pencil, level, ladder, and anchors matched to the wall or ceiling material.
- For exterior work: weatherproof box or cable glands, protected power, drip loops, and sealed wall penetrations.
- A second person for high, awkward, or exterior mounting.
Check privacy, workplace, tenant, landlord, and local audio-recording requirements before positioning the lens. Do not aim into bedrooms, bathrooms, neighboring homes, or private work areas without a legitimate reason.
Step 1 — Test the camera before mounting it
Bench testing beside the router prevents drilling for a camera with defective power, incompatible Wi‑Fi, bad firmware, or an unsuitable view.
Rank #2

- 2K HD Live Video, Picture & Color Night Vision: The security cameras wireless outdoor provide a degree wide angle, 2K quality video and image. Regarding night vision, it has two modes, full color night vision and infrared night vision with a 33ft visible range. Whether it is night or day, it will provide a clear wide video of any area you wish to monitor. With the included app, the system’s live or recorded video can be accessed anywhere at any time. (Not support 5GHz WiFi)
- Rechargeable & Waterproof & Wire-Free: This wireless rechargeable outdoor/indoor camera can provide 1 to 5 months of worry free use for once charge. The security cameras wireless outdoor with IP65 waterproof can work in any weather. Since the WIFI cam is completely wireless, no power cords or network cable is needed, allowing install virtually anywhere with the provided, bracket and screw.
- PIR Motion Detection with AI Analysis Recognition: This outdoor camera wireless with advanced smart AI motions detection, it can clear analysis and recognition person, vehicle, pet and package. The AI PIR sensor will be triggered in real time once the outdoor security cameras detect motion, at the same time, the notification will be pushed to your phone via the app. And this security camera can be shared with multiple users.
- Two-Way Talk & Smart Instant Siren: This outside camera has a built-in microphone and speaker that supports real-time, two-way, audio calls. With the mobile App you can warn off thieves, screen visitors at your door or communicate directly with your family or friends. Siren, flashing white light or 2-way talk that both allow you drive away thieves and unwanted visitors.
- 15 FPS, Support Micro SD Card and Cloud Storage: The home security camera supports both SD card and cloud storage. Our security cameras wireless outdoor do not equipped with the SD card, any Micro SD card not exceed 128G is OK for the cameras. You can also opt for cloud storage to securely store your footage online, providing flexibility based on your preference.
- Plug the camera into its supplied power adapter beside the router.
- Install or update the official app.
- Sign in or create the required vendor account.
- Tap the app’s add-device control and put the camera into setup mode.
- Connect to the camera’s supported Wi‑Fi band and confirm a live image.
- Test pan, tilt, dewarping, audio, night vision, detection, recording, and playback.
- Apply firmware updates and confirm the intended mounting orientation.
TP-Link’s general flow is to open Tapo, tap the plus button, select the model, and follow the prompts (installation guide). Wyze Pan v4 uses Home → + → Device → Cameras → Pan and Tilt Camera → Wyze Cam Pan v4, then requests setup-mode confirmation, Bluetooth permission, Wi‑Fi credentials, calibration, and naming (setup guide).
Step 2 — Prepare the Wi‑Fi network
- Test signal at the intended mounting point, not only beside the router.
- Use a stable home or business network. Guest networks can block local discovery or device-to-device access.
- If a 2.4GHz-only camera will not pair, temporarily separate the 2.4GHz SSID or disable band steering.
- Keep the camera away from large metal objects, thick masonry, appliances, ducts, and electrical equipment.
- Use a dedicated IoT network where practical, but verify that the app still discovers or reaches the camera.
- Do not use unnecessary port forwarding. Prefer the vendor’s secured remote service, a unique password, and multifactor authentication.
Distinguish three connections: camera-to-router Wi‑Fi, local-network access from your phone or recorder, and remote cloud access. Cloud viewing may continue even when local discovery or local recording behaves differently.
Do these 3 things before closing this tab:
1Repair Windows errors before they cause bigger problems2Fix the driver behind crashes, sound loss and screen glitches3Clear out junk files and repair common Windows errorsRank #3

- 360° Panoramic Coverage: This WiFi indoor camera delivers complete 360° fisheye viewing with 180° field angle, eliminating blind spots in shops, offices or warehouses without manual repositioning.
- Crisp 1080p Resolution: The wireless security camera captures clear 2MP footage using H.265+ encoding, reducing bandwidth/storage needs by 50% H.264 while maintaining full HD clarity.
- Smart AI Detection: The HD smart monitor identifies people, vehicles and pets via advanced algorithms, with customizable detection zones and 15 second motion tracking alerts to your app/email.
- Quad View Monitoring: This ceiling mounted camera supports simultaneous 4 split screen viewing, allowing real time observation of all 360° angles without missing critical moments.
- Extended Local Storage: The indoor security camera supports 24/7 continuous recording via 128GB storage card (not included), enabling event playback and downloadable footage for evidence.
Step 3 — Choose the best position
Indoor placement
- Use a high wall or ceiling for broader coverage; a true fisheye often performs best near the center of a ceiling.
- Avoid bright windows and direct sun that defeat exposure and night vision.
- Leave clearance for a moving head; a camera that rotates freely on a table may be blocked when placed against a wall or shelf.
- Keep the reset button and card slot accessible where possible.
- Route power so it cannot create a trip, snag, or strangulation hazard.
Outdoor placement
- Prefer an eave or sheltered location, while avoiding reflections from soffits and nearby walls.
- Use weatherproof connections, drip loops, sealed penetrations, and a mount strong enough for wind.
- Keep the lens away from sprinklers, steam, condensation, and direct rain where possible.
- Confirm that the camera, adapter, cable, and operating-temperature range are all outdoor suitable. Night vision alone does not make an indoor camera weatherproof.
Step 4 — Mount the camera securely
- Hold the camera at the proposed height and use live view to confirm coverage.
- Check for hidden wiring, plumbing, and structural hazards.
- Mark the centerline and screw holes using the supplied template.
- Drill pilot holes suited to the surface. Use drywall anchors for drywall and rated masonry anchors for brick or concrete; for ceilings, fasten to a joist or use a rated anchor.
- Fasten the plate without overtightening, attach the camera, and lock or twist it into position.
- Route and secure the power cable, adding outdoor strain relief and weather sealing.
- Confirm that the lens, vents, and moving mechanism are unobstructed. Do not rely on adhesive for a heavy or exterior camera unless the manufacturer explicitly permits it.
TP-Link’s documented method uses a template, drilled holes, anchors when needed, screws, and a twist-to-secure attachment (guide).
Step 5 — Complete app setup at the final location
- Power the mounted camera and wait for its LED or voice prompt.
- In the official app, choose Add device, +, or the model-specific equivalent.
- Scan the QR code or use Bluetooth/local-device discovery.
- Select the correct SSID and enter its password carefully.
- Name the camera descriptively, such as
Front Door,Garage, orShop Floor. - Wait for an online status, live view, and responsive controls.
Close and reopen the app to confirm that the name and settings persist. A working live image is not proof that recording, alerts, or remote access are configured.
Rank #4
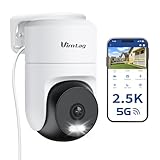
- 𝟑𝟔𝟎° 𝐕𝐢𝐬𝐮𝐚𝐥 𝐂𝐨𝐯𝐞𝐫𝐚𝐠𝐞, 𝐒𝐦𝐚𝐫𝐭 𝐌𝐨𝐭𝐢𝐨𝐧 𝐓𝐫𝐚𝐜𝐤𝐢𝐧𝐠 & 𝐂𝐫𝐢𝐬𝐩 𝟐.𝟓𝐊 𝐐𝐇𝐃: Remotely control pan/tilt for 360° horizontal and 90° vertical coverage. This outdoor camera for home security features smart motion tracking that auto-tracks moving objects in real time. 2560×1440 QHD resolution exceeds standard 1080p, while 8x digital zoom lets you inspect faces and license plates. A security camera outdoor for monitoring your house
- 𝐒𝐦𝐚𝐫𝐭 𝐀𝐈 𝐃𝐞𝐭𝐞𝐜𝐭𝐢𝐨𝐧, 𝐂𝐮𝐬𝐭𝐨𝐦 𝐀𝐜𝐭𝐢𝐯𝐢𝐭𝐲 𝐙𝐨𝐧𝐞𝐬, 𝟐-𝐖𝐚𝐲 𝐀𝐮𝐝𝐢𝐨 & 𝐒𝐢𝐫𝐞𝐧: AI accurately distinguishes people, pets, and vehicles—ignoring false alarms from leaves or bugs. Set up to 4 custom activity zones. These house cameras outdoor let you talk to visitors via built-in mic and speaker, while bright LED spotlights plus a loud siren actively deter intruders. A reliable outside camera for home security
- 𝐏𝐥𝐮𝐠-𝐈𝐧 𝐏𝐨𝐰𝐞𝐫, 𝐃𝐮𝐚𝐥-𝐁𝐚𝐧𝐝 𝐖𝐢𝐅𝐢, 𝐅𝐮𝐥𝐥-𝐂𝐨𝐥𝐨𝐫 𝐍𝐢𝐠𝐡𝐭 𝐕𝐢𝐬𝐢𝐨𝐧 & 𝐈𝐏𝟔𝟔 𝐖𝐚𝐭𝐞𝐫𝐩𝐫𝐨𝐨𝐟: Reliable 5GHz/2.4GHz Wi-Fi with a 9.8ft power cable ensures 24/7 recording and non-stop monitoring. This outdoor security camera features full-color night vision (65ft range) via IR and white LEDs. IP66 waterproof for rain and dust. A versatile outdoor wifi camera for driveway, front door, porch, backyard, patio, garage, apartment, or chicken coop
- 𝐓𝐰𝐨 𝐒𝐭𝐨𝐫𝐚𝐠𝐞 𝐎𝐩𝐭𝐢𝐨𝐧𝐬, 𝐍𝐨 𝐌𝐨𝐧𝐭𝐡𝐥𝐲 𝐅𝐞𝐞 & 𝐄𝐚𝐬𝐲 𝐒𝐞𝐭𝐮𝐩: Save footage to a microSD card (up to 512GB) or use cloud storage with a 30-day free trial. This no subscription security camera's AI detection and alarm features work with NO monthly subscription required. Setup takes minutes—download Canny Cam app, scan the QR code, and mount on desk, ceiling, or wall. A practical choice among cameras for home security
- 𝐀𝐥𝐥-𝐢𝐧-𝐎𝐧𝐞 𝐀𝐩𝐩, 𝐖𝐨𝐫𝐤𝐬 𝐰𝐢𝐭𝐡 𝐀𝐥𝐞𝐱𝐚 & 𝐔𝐒-𝐁𝐚𝐬𝐞𝐝 𝐂𝐮𝐬𝐭𝐨𝐦𝐞𝐫 𝐒𝐮𝐩𝐩𝐨𝐫𝐭: Manage up to 32 home security cameras from the Canny Cam app on iOS/Android. Share access with family, use smart playback tagging. This in home camera works with Alexa for hands-free voice control. Need help? Call our US-based support team at +1 (978) 437-5767, Mon–Fri 9am–6pm ET
Step 6 — Calibrate the panoramic view
- Remove any lens film and level the camera.
- Run the in-app calibration routine.
- Set a home position and save a known-good preset.
- Check every major direction for walls, columns, furniture, glare, and blind spots.
- Enable image rotation or flip settings if the mounting orientation requires them.
- Set patrol limits and decide whether auto-tracking should be disabled so the camera does not leave a critical view.
Wyze Pan v4 includes calibration and home-waypoint selection in its setup sequence (official guide). For a fisheye model, distinguish the original circular image, dewarped panorama, digital PTZ navigation, and actual mechanical movement.
Independent reader supportYour contribution helps us test, update, and keep practical guides available for everyone.Step 7 — Configure recording and storage
microSD recording
Insert the card and initialize or format it in the camera app. Tapo documentation describes in-app initialization and support up to 512GB for the referenced model family (guide); Reolink FE‑W lists microSD up to 512GB plus Wi‑Fi NVR and Home Hub storage (specifications). Confirm the exact hardware revision and card limit before purchase.
Best Value

- 16MP UHD VIEW & TWO NIGHT VISION MODES: 16mp security camera with two 4K image sensors delivers ultra-clear 16MP visuals. 8 spotlights and F1.6 aperture capture vivid full-color details at night. Switch easily to IR mode.
- 180° PANORAMA & MOTION TRACK: 180 degree security camera with dual-lens stitching creates a seamless 180° panorama with minimal distortion. Motion Track shows the full movement path in one frame.
- SMART DETECTION & DUAL ALERTS: Smart Detection identifies humans, vehicles, and animals to reduce false alarms. Customize siren, spotlights, and voice messages to deter intruders.
- WI-FI 6 & LOCAL STORAGE: Outdoor wifi camera with Wi-Fi 6 (5GHz) delivers fast, stable connections for smooth live viewing and instant alerts. Supports up to 512GB microSD local storage. No monthly fee.
- FLEXIBLE INSTALL & IP67: Plug-in camera supports wall and ceiling mounting. IP67 weatherproof design delivers reliable outdoor performance in dust, rain, and harsh weather.
- Advantages: no recurring cloud fee and recording can continue during an internet outage if power and local networking remain.
- Risks: cards wear out, fill, fail, or can be removed with the camera. Continuous video consumes capacity quickly.
Cloud, NVR, or local server
Cloud storage provides off-site evidence if the camera is stolen but depends on an account, upload bandwidth, vendor retention, and a subscription where required. An NVR or server centralizes multiple cameras but requires checking codecs, authentication, firmware, and exact compatibility. RTSP or ONVIF availability is useful, not a guarantee that every feature works with every recorder. Tapo C510W lists RTSP and ONVIF (product page), while Reolink FE‑W lists RTSP, RTMP, and other protocols (product page).
Step 8 — Tune motion detection and notifications
- Begin with low sensitivity or detection disabled while observing normal activity.
- Create activity zones around doors, walkways, driveways, or valuable equipment.
- Mask roads, sidewalks, trees, windows, and other false-alert sources.
- Choose person, vehicle, pet, or general motion detection according to the model’s features.
- Set event duration or pre-event buffering when available.
- Test alerts in daylight and darkness, then create schedules for occupied, work, or sleep periods.
- Disable audio recording when it is unnecessary or creates additional privacy exposure.
Step 9 — Secure the installation
- Replace default or weak credentials with a unique account password.
- Enable multifactor authentication and install current app and firmware updates.
- Review shared users, connected devices, login alerts, and public links; remove former household members, contractors, or employees.
- Use privacy masks or a physical privacy mode where available.
- Avoid direct public-internet exposure through unnecessary port forwarding.
Reset and password behavior is model-specific. Reolink notes that some NVR workflows assign a random camera password while a standalone camera may initially have a blank password depending on setup state; verify credentials rather than assuming one universal rule (Reolink documentation).
Step 10 — Run the professional final test
- Daylight and night images are clear, level, and free of glare.
- Live view, playback, audio, and dewarped or pan-and-tilt controls work.
- Motion alerts arrive during a real test and respect activity zones.
- Remote access works from cellular data or another external network.
- The timestamp, time zone, and daylight-saving behavior are correct.
- The camera remains online after several hours at the final location.
- Power cables are secure, protected, and not under strain.
- Camera name, location, storage method, account owner, and reset procedure are recorded for future maintenance.
Troubleshooting
| Symptom | Likely cause | Recovery |
|---|---|---|
| Wi‑Fi network is not listed | Wrong band, band steering, hidden SSID, unsupported authentication, weak signal, or camera bound to another account | Move beside the router, verify the model’s band, create a clearly named 2.4GHz SSID temporarily, disable VPN or cellular handoff, grant Bluetooth/local-network permissions, and reset Wi‑Fi settings only if the manual directs it. |
| Camera works beside router but goes offline when mounted | Weak signal, metal or masonry blockage, power fault, overheating, or poor outdoor connection | Measure signal at the mount, reposition the access point or add a wired-backhaul mesh node, use Ethernet if supported, test the supplied adapter, and inspect cable seals. |
| Live view works but playback is empty | Card missing, unsupported, uninitialized, full, or motion zones exclude the subject; cloud recording may require a plan | Inspect and format the card in the app, confirm recording mode and time zone, check capacity and overwrite settings, and verify the cloud plan. |
| Night image is hazy or white | Lens film, glass or nearby-wall reflection, dirt, condensation, insects, or infrared exposure | Remove film, move away from glass and reflective surfaces, clean and dry the lens, and reposition or reduce IR illumination if supported. |
| Pan or tilt stops early | Mount, wall, shelf, cable, patrol limit, or failed calibration blocks movement | Clear the mechanism, reroute the cable, review limits and privacy zones, and recalibrate. |
| Router has been replaced | Camera still stores the old SSID and password | Keep the old credentials when possible. If the camera remains online, use a supported Change Network control; otherwise run setup again. Wyze recommends retaining the same SSID and password where possible (Wi‑Fi-change guide; Change Network support). |
Factory reset is a last resort because it removes configuration. For Wyze Pan v4, remove the microSD card and hold SETUP for 10–20 seconds (official procedure). Tapo’s cited guide distinguishes five seconds for Wi‑Fi settings from ten seconds for a factory reset; timing varies by model (guide).
When Wi‑Fi is no longer the right tool
Choose Ethernet or PoE where the camera is far from the access point, interference is severe, continuous recording is evidence-critical, or a business cannot tolerate wireless downtime. A Wi‑Fi camera still needs wired power unless it is specifically battery- or solar-powered. Consider a professional installer for exterior penetrations, new electrical work, multiple cameras with centralized retention, business VLANs and NVRs, or complex privacy and workplace requirements.
Quick wins for a faster PC:
Repair Windows errors before they cause bigger problemsFix Now →Scan for outdated or missing drivers - takes under a minuteDriver Scan →Maintenance schedule
- Monthly: check live view, playback, storage health, timestamps, and alerts.
- Quarterly: review firmware, users, passwords, privacy zones, and detection schedules.
- After a router change: verify every camera, recorder, and remote-access path.
- After storms or construction: inspect outdoor mounts, seals, cable strain, condensation, and camera alignment.
The Bottom Line
The professional sequence is simple: verify the camera and Wi‑Fi on the bench, choose a position that matches its real field of view, mount it with the correct anchors and weather protection, calibrate it, configure redundant recording and restrained alerts, then secure and test every function.
Quick Recap
Product prices and availability are accurate as of the date/time indicated and are subject to change. Any price and availability information displayed on Amazon at the time of purchase will apply.