What’s actually slowing this PC down?
Pick the symptom - the matching free tool is one click away.
Some links on this page are affiliate links: if you buy through them we may earn a commission, at no extra cost to you.
Making and installing cabinet doors is one of the most cost-effective ways to change a kitchen without tearing out the cabinet boxes. If the boxes are square, dry, well anchored, and still laid out the way you want, replacing the doors can save thousands compared with a full cabinet replacement. If the boxes are swollen, racked, delaminating, or poorly planned, new doors will only dress up a bad foundation.
On our job sites, the successful cabinet door projects all start the same way: we make a door schedule before anyone cuts wood, orders hardware, or buys paint. That schedule lists every cabinet opening, door size, overlay, hinge type, bore location, swing direction, and pull location. Cabinet doors look simple, but the tolerances are tight. A 1/16-inch mistake repeated across a kitchen becomes very visible.
As an Amazon Associate I earn from qualifying purchases.
This guide covers how to make basic slab and Shaker cabinet doors, how to measure for overlay or inset doors, how to bore and install concealed hinges, what the project costs in 2026, and when it makes more sense to hire a cabinet shop or finish carpenter.
Start With the Cabinet Boxes, Not the Doors
Before replacing doors, inspect the existing cabinet boxes. Door replacement and cabinet refacing work best when the structure is already sound. Check that the boxes are fastened securely to the wall, the face frames are not loose, shelves are not sagging badly, and there is no active moisture damage under the sink or near appliances.
Popular on Amazon

- Quantity & Accessories: Each hinge comes with four 15.5mm mounting screws. For easy installation, a installation instructions specifically designed for these cabinet door hinges is also included
- Quiet and Soft Self-Closing: Each concealed hinge has a built-in damper for soft-close. The door automatically closes quietly when the angle is less than 30 degrees, avoiding abrupt noises and safeguarding cabinets
- Adjustment: The screw holes distance on the door is 32mm, the distance from the hole to the edge of frame is 10mm.The two screws raised on the hinges can adjust the gap between the door seams by about 2 mm. The opening angel can up to 105 degrees
- Solid & Long-Lasting: The full overlay hidden kitchen cabinet door hinges are made of premium steel with a nickel-plated finish, providing a strong and heavy-duty material. They can be used in kitchens, bathrooms, and other face frame cabinets
- 100-Day Evaluation: We believe you'll value these cabinet hinge. And if they don't meet your needs, we're here to assist
Use a 4-foot level and a framing square to check the cabinet run. A small amount of age-related movement is normal, especially in older kitchens. A face frame that is out by 1/16 inch can usually be handled during hinge adjustment. A box that is twisted by 1/4 inch, pulling from the wall, or swollen from water damage should be repaired or replaced before you spend money on doors.
Also look at the layout. If the sink base is failing, the refrigerator opening is too small, or the drawers do not meet your storage needs, replacing doors may be the wrong investment. Cabinet doors improve the surface and function of the existing cabinetry; they do not fix poor cabinet design.
Choose the Right Cabinet Door Style
Most homeowners considering DIY cabinet doors are choosing between slab doors and Shaker doors. Both can look clean and current, but they are built differently and behave differently over time.
Slab Cabinet Doors
Slab doors are flat panels with no frame detail. They are the simplest style visually, but that does not always make them the easiest to build well. A large, flat door has to stay flat. For paint-grade slab doors, an MDF-core or engineered panel is usually more stable than plywood. Plywood can work for small doors, but larger plywood slabs are more likely to cup or twist if the panel is not perfectly balanced and stored flat.
For a basic painted slab door, common thickness is 3/4 inch. Edges can be eased with a small roundover bit or square-sanded slightly so paint holds without feeling sharp. If you use MDF, pre-seal the edges carefully because raw MDF edges drink primer and can look fuzzy after painting.
Shaker Cabinet Doors
Shaker doors are frame-and-panel doors: two vertical stiles, two horizontal rails, and a recessed center panel. For paint-grade Shaker doors, we often prefer hardwood rails and stiles with an MDF center panel. The hardwood gives better screw holding at the hinge side and crisper outside edges, while the MDF panel stays flatter and reduces seasonal cracking in the painted panel field.
Quick wins for a faster PC:
Clear out junk files and repair common Windows errorsFree Scan →Scan for outdated or missing drivers - takes under a minuteDriver Scan →For stain-grade Shaker doors, use a stable hardwood species and allow the center panel to float in the frame. Solid wood expands and contracts across the grain as humidity changes. If a solid panel is glued tightly on all four edges, it can split the frame or show cracks in the finish. Frame-and-panel doors exist for a reason: the frame provides structure while the panel is allowed to move.
Raised Panel, Glass, Beadboard, and Inset Doors
Raised-panel doors, glass-panel doors, beadboard doors, and inset doors all raise the difficulty. Raised panels require more tooling and careful profiles. Glass doors require proper rabbets, retaining clips or stops, and safer handling. Inset doors require the most precise fit because the door sits inside the face frame opening with an even reveal around all sides. A simple overlay Shaker door may tolerate a cabinet box that is a little imperfect. An inset door will expose every out-of-square opening.
Understand Overlay, Inset, Face-Frame, and Frameless Cabinets
Door sizing depends on cabinet construction. Do not measure one existing door and assume the whole kitchen matches. Older kitchens often have several slightly different openings, especially where cabinets were modified around appliances.
Face-frame cabinets have a wood frame on the front of the cabinet box. They can use partial-overlay, full-overlay, or inset doors. Frameless cabinets, sometimes called European-style cabinets, do not have a front face frame; the door hinges mount directly to the cabinet side panel and usually use full-overlay concealed hinges.
Free tools Windows power users keep installed
One-click scans. No signup required.
Partial Overlay
Partial-overlay doors cover part of the face frame and leave more frame visible between doors. A common traditional overlay is 1/2 inch, but always confirm the existing hinge and reveal pattern. If the opening is 14 inches wide by 28 inches tall and you want a 1/2-inch overlay on all four sides, the door size would be 15 inches wide by 29 inches tall.
Full Overlay
Full-overlay doors cover most of the face frame or frameless box edge, leaving tight gaps between adjacent doors. Reveals may be around 1/8 inch between pairs of doors and drawer fronts, but this depends on the hinge system, cabinet layout, and clearances at walls and appliances. Full overlay looks clean, but it requires more accurate sizing and hinge selection.
Also popular on Amazon
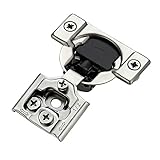
- Installation specification: Cup diameter is 35mm; Cup depth is 11.6mm, Screw holes distance is 45mm; Opening angle is 105 degrees
- Quiet Soft close: Soft close hinges have a mechanism that when activated allows the cabinet door to gently close before completely closing
- 3-way adjustable upgrade: Easiest to install and can be easily adjusted with the turn of a screwdriver 3-way adjustable will make sure that your new custom-made cabinet doors don't sag, align correctly and open and close smoothly
- All you need is in the Package: 60x hinges, 120x Plastic dowel, 60x mounting screws
- Designed for Heavy Duty: Tested hundreds of thousands of times, made of premium steel with a nickel-plated finish, built for long-lasting use
Inset
Inset doors sit inside the cabinet opening. A common target reveal is around 3/32 inch to 1/8 inch around the door, but that only works if the openings are square. For inset work, we usually build or order one test door before committing to a full kitchen. A 1/16-inch error in an inset door is not hidden by overlay; it is the reveal.
Make a Door Schedule Before Cutting Anything
A door schedule is the difference between controlled work and expensive guessing. Label each cabinet opening with painter’s tape: B1 for base cabinet 1, W1 for wall cabinet 1, P1 for pantry, and so on. Then record every measurement individually.
Your schedule should include cabinet ID, opening width, opening height, final door width, final door height, overlay or inset reveal, hinge type, number of hinges, top hinge bore distance, bottom hinge bore distance, swing direction, and knob or pull location. For paired doors, note whether there is a center stile or whether the two doors meet with a small gap.
Measure width at the top, middle, and bottom of each opening. Measure height at the left, center, and right. If the numbers vary, use the smallest practical opening dimension and decide whether the reveal can absorb the difference. On older face-frame cabinets, it is common to see openings vary by 1/16 inch to 1/8 inch.
Tools and Materials You Need
For a basic DIY cabinet door project, you need accurate layout tools more than you need exotic equipment. At minimum, plan on a tape measure, combination square, reliable straightedge, clamps, drill/driver, sanding equipment, hinge-boring jig, hardware jig, and a level. For Shaker doors, you will also need a table saw or track saw, router table or shaper setup for rail-and-stile work, and enough clamps to keep the doors flat during glue-up.
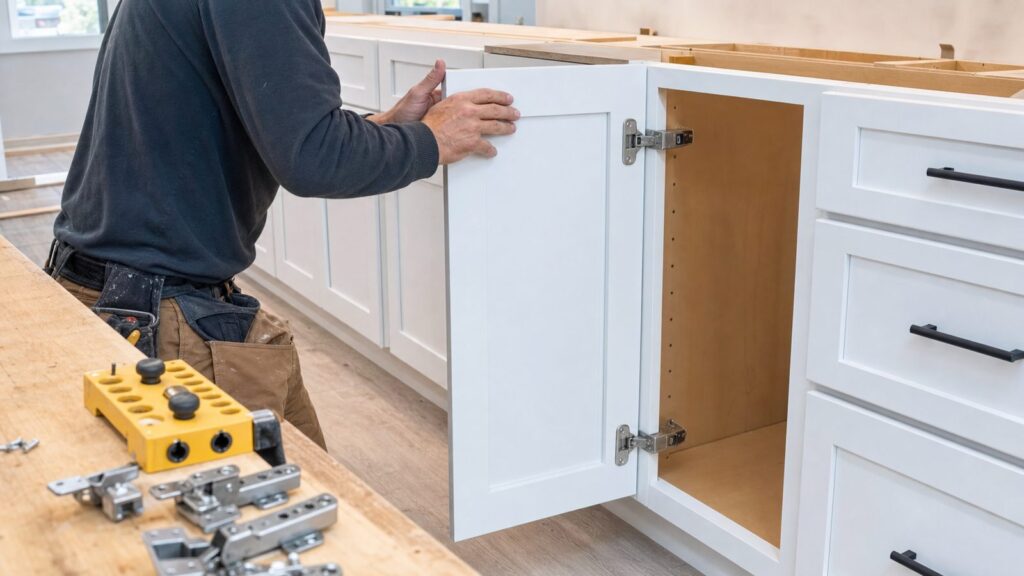
A concealed hinge usually uses a 35 mm cup bore. Do not freehand that hole. A bore that is tilted, too deep, or too close to the edge can telegraph through the face or make the hinge impossible to adjust. Set the hinge-boring jig from the actual hinge manufacturer’s instructions. Many concealed hinge cups are bored roughly 1/2 inch deep, but the exact depth, edge distance, and screw pattern depend on the hinge.
For hinges, soft-close concealed hinges are the best upgrade for most modern kitchens. They reduce door impact, feel better in daily use, and are forgiving during adjustment. Match the hinge to the cabinet type: face-frame or frameless, inset or overlay, desired opening angle, and door thickness.
How to Make Simple Shaker Cabinet Doors
The most reliable DIY Shaker door is a true rail-and-stile frame with a floating center panel. Pocket-screw Shaker doors can work for utility spaces, but visible kitchen doors deserve stronger, cleaner joinery. Cope-and-stick or rail-and-stile joinery gives the corners more glue surface and aligns the inside profile cleanly.
1. Mill the Rails and Stiles
Start with straight, dry stock. For paint-grade doors, poplar, maple, or similar hardwoods are common choices for rails and stiles. A typical Shaker frame uses 2-inch to 2 1/2-inch wide stiles and rails, though proportions depend on door size. Keep all frame stock the same thickness, usually 3/4 inch.
Let the material acclimate in the home or shop environment before milling. A few days is better than bringing lumber in from a damp garage and cutting it immediately. Wood that changes moisture content after milling is more likely to move after assembly.
The Tool Desk
Outbyte Driver Updater FREEFix the driver behind crashes, sound loss and screen glitchesFind Drivers →Outbyte PC Repair FREERepair Windows errors before they cause bigger problemsFix Now →2. Cut Grooves and Joinery
Use a rail-and-stile router bit set or a cope-and-stick setup. The center panel groove is often 1/4 inch wide, sized for a 1/4-inch MDF or plywood panel. Cut the inside profile and cope the rail ends according to the bit manufacturer’s sequence. Run test pieces before cutting production parts.
Dry-fit the first door and measure corner to corner diagonally. If the diagonals match, the door is square. If they differ by more than 1/16 inch on a typical cabinet door, fix the setup before making the rest of the batch.
Also popular on Amazon

- ★⚠⚠⚠ Important Note: For FACE FRAME cabinet, the hinges will overlay 1/2" of the frame. For FRAMELESS cabinet, the hinges will overlay 1/2" of side panel. The video on the product page can help you check if the hinge you need is a 1/2". Size: 35mm Cup, 1/2" Overlay. Not sure about the size? Try our 2-pack first to check the fit before buying larger sets. If you're uncertain about the appropriate size before ordering or encounter problems during installation, please reach out to us. We're here to help!
- ★ Material: Made from stainless steel with a nickel plated finish for long-lasting durability.
- ★ Application: Intended for use with face frame and frameless style cabinets; Installation instructions included for easy installation.
- ★ Features: An integrated dampening system provides soft-close functionality; 105 degree opening angel; 6-way adjustability allows for seamless leveling once installed.
- ★Buy With Confidence: Thank you very much for your great support. Product quality and customer satisfaction is our top priority. If you're not completely satisfied with anything you get from us, contact us and we'll make it right.
3. Size the Center Panel
The center panel should fit the groove without forcing the frame apart. For MDF paint-grade panels, leave enough room for assembly and finish film. For solid wood panels, leave expansion space so the panel can move seasonally. Do not glue a solid center panel tight on all four sides.
4. Glue and Clamp Flat
Apply glue to the rail-and-stile joints, not across the full width of a floating solid panel. Clamp the door on a flat surface and check diagonals before the glue sets. Keep clamp pressure firm but not excessive; too much pressure can bow the frame or squeeze joints out of alignment.
Recommended Free Tools
After glue-up, scrape or sand dried glue before finishing. Glue residue near inside corners will reject stain and can show through paint as a ridge.
How to Make Slab Cabinet Doors
For slab doors, start with stable 3/4-inch material. MDF is common for painted slab doors because it is flat, smooth, and economical. MDF-core panels or other engineered slabs are usually better than plain plywood for larger painted doors because they resist telegraphing and warping.
Cut the slab to final size with a sharp blade and a straight guide. Label the back immediately with the cabinet ID and swing direction. Ease the edges slightly with sandpaper or a small router bit. Sharp edges chip and do not hold finish well.
If you are painting MDF slab doors, seal the edges with a suitable primer or edge sealer, sand smooth, and prime again if needed. The face may look ready after one coat, while the edges may need more work. That edge preparation is one of the details that separates a shop-looking door from a homemade-looking door.
Finish the Doors Before Installation When Possible
Prefinishing doors flat gives you better control and fewer runs. Finish the fronts, backs, top edges, bottom edges, and hinge-side edges. A door finished on only one face can absorb and release moisture unevenly, which increases the chance of warping.
For painted doors, use a high-bond primer and a cabinet-grade enamel or 2K-style professional coating if your setup supports it. Many DIY finishes are dry to the touch in hours but need days to cure hard enough for handling and hardware installation. Follow the product’s recoat and cure schedule. Rushing reassembly often leaves fingerprints, hinge marks, or stuck bumpers in the finish.
Store finished doors flat with spacers between them so air can circulate. Do not lean a stack of fresh doors against a wall for a week. Tall doors and wide slab doors are especially vulnerable to bowing if stored improperly.
Install Hinges, Hang the Doors, and Adjust the Reveals
Once the finish is cured enough to handle, bore the hinge cups with a jig. A common concealed hinge cup is 35 mm, but the distance from the door edge and the drilling depth must match your hinge. Bore test holes in scrap from the same material and mount one hinge before drilling the whole batch.
Do these 3 things before closing this tab:
1Fix the driver behind crashes, sound loss and screen glitches2Clear out junk files and repair common Windows errors3Scan for outdated or missing drivers - takes under a minuteMost standard upper and base cabinet doors use two hinges. Taller doors need more. As a practical rule, doors over about 40 inches tall often need three hinges, and tall pantry doors may need four or more depending on height, weight, and hinge rating. Heavy glass doors also need hardware selected for the extra load.
Install from a consistent reference line. On a run of upper cabinets, we check the cabinet boxes, establish the reveal strategy, and work across the run instead of adjusting each door in isolation. Concealed hinges usually provide three-way adjustment: side-to-side, up-and-down, and in-and-out. Some systems provide broader six-way adjustment through the hinge and mounting plate combination.
Also popular on Amazon
- Installation specification: Cup diameter is 35mm; Cup depth is 11.6mm, Screw holes distance is 45mm; Opening angle is 105 degrees
- Quiet Soft close: Soft close hinges have a mechanism that when activated allows the cabinet door to gently close before completely closing
- 3-way adjustable upgrade: Easiest to install and can be easily adjusted with the turn of a screwdriver 3-way adjustable will make sure that your new custom-made cabinet doors don't sag, align correctly and open and close smoothly
- All you need is in the Package: 10x hinges, 20x Plastic dowel, 10x mounting screws
- Designed for Heavy Duty: Tested hundreds of thousands of times, made of premium steel with a nickel-plated finish, built for long-lasting use
Set pairs of doors with an even center gap, commonly around 1/8 inch if the hinge and layout allow. Check wall clearances, appliance handles, corner cabinet swings, and any door that opens against a wall. Add clear bumpers after final adjustment so doors close quietly and do not print against the face frame.
Install Knobs and Pulls Last
Hardware holes should be drilled after the doors are hung and adjusted. Use a hardware jig, not a tape measure alone. On a kitchen with 20 doors and drawer fronts, even a 1/16-inch drift from pull to pull will stand out.
Crashes, No Sound, or Screen Glitches?
Random freezes, missing sound and display glitches usually trace back to one bad driver. Find and replace yours safely.Free scan · under a minutePC Slower Than It Used to Be?
A free scan shows the junk files, broken settings and background clutter dragging Windows down - then fixes them in one click.Free scan · Windows 10 & 11For knobs on Shaker doors, a common placement is on the stile near the lower corner of upper doors and near the upper corner of base doors. For pulls, align consistently with the stile or rail depending on the design. Before drilling, open every door and make sure the pull will not hit an adjacent wall, appliance, or neighboring handle.
2026 Cabinet Door Cost Guide
Cabinet door costs vary by material, style, finish, hardware, and labor market. In 2026, replacement cabinet doors installed commonly run about $180 to $330 per door, with broader ranges around $200 to $400 per door. For an average kitchen, that often puts door replacement around $2,200 to $6,600, with some projects landing closer to $2,000 to $7,000 depending on size and finish level.
Professional refacing costs more because it usually includes new doors, drawer fronts, matching veneer on exposed face frames, hardware, and installation. Many refacing projects land around $4,484 to $10,586, while some installed refacing programs report totals closer to $7,600 to $14,900, with average projects near $15,000. Full cabinet replacement is wider still, commonly around $4,000 to $13,000 for a standard kitchen, and roughly $80 to $800 per linear foot depending on stock, semi-custom, custom, layout changes, and local labor.
| Project Type | Typical 2026 Cost | Best Fit |
|---|---|---|
| DIY slab doors | Lowest material cost; varies with MDF, finish, hinges, and tools | Small kitchens, laundry rooms, paint-grade updates |
| DIY Shaker doors | Moderate material cost; higher if buying router bits, clamps, and finish equipment | Skilled DIYers with accurate tools and time |
| Replacement doors installed | About $180 to $330 per door; often $2,200 to $6,600 per kitchen | Good cabinet boxes with no layout change |
| Professional refacing | Commonly about $4,484 to $10,586; some programs $7,600 to $14,900 | Door and drawer replacement plus matching face-frame veneer |
| Full cabinet replacement | Often $4,000 to $13,000; about $80 to $800 per linear foot by tier | Damaged boxes, poor layout, major remodels |
Do not overlook hidden costs. Hinges, hinge boring, knobs, pulls, pull templates, fillers, primer, sanding discs, spray supplies, router bits, clamps, touch-up kits, damaged box repairs, and disposal can move the budget quickly. If the work expands into electrical, plumbing, gas, ventilation, or layout changes, permit costs and licensed trades may become part of the project.
Permits, Safety, and Code Boundaries
Replacing cabinet doors only is usually treated as finish work and often does not require a building permit. That changes when the scope expands. Moving cabinets, altering plumbing, changing electrical outlets, adding under-cabinet lighting, modifying gas appliance clearances, relocating a range hood, or opening walls can trigger permits and inspections depending on the city or county.
Local rules vary. Some jurisdictions allow simple cabinet replacement without a permit but require permits for electrical, mechanical, plumbing, or structural changes. Others define kitchen remodel work more broadly. Before starting a larger project, check with the local building department, especially if the kitchen includes gas appliances, new circuits, ventilation changes, or sink relocation.
For safety, control dust when cutting MDF or sanding finish. Use eye protection, hearing protection, and a respirator rated for fine dust or finish fumes. Spray finishes need proper ventilation and fire-safe handling. Do not spray solvent-based products near ignition sources, pilot lights, or occupied living areas.
Independent reader supportYour contribution helps us test, update, and keep practical guides available for everyone.When to DIY and When to Hire a Pro
DIY makes sense for slab doors, simple overlay Shaker doors, small kitchens, laundry rooms, garages, and homeowners who already have accurate tools. If you can measure carefully, build square assemblies, follow hinge specifications, and tolerate a few test pieces, the savings can be real.
What’s actually slowing this PC down?
Pick the symptom - the matching free tool is one click away.
Hire a pro for inset doors, large kitchens, sprayed finishes, glass doors, tall pantry doors, expensive hardwoods, or any kitchen where the cabinet boxes are not square. Professional cabinet shops also make sense when you need factory finishing. A sprayed cabinet finish is not just about paint; it is about prep, dust control, cure time, and handling dozens of parts without damaging them.
A good middle path is to order unfinished or prefinished doors from a cabinet door supplier and install them yourself. That avoids the hardest milling and joinery while still saving on labor. For tricky kitchens, order one test door first. It is much cheaper to solve hinge overlay, reveal, and finish questions on one door than on 28 doors.
Also popular on Amazon

- UPGRADE YOURS TODAY: The beautiful finish on our semi concealed brushed nickel cabinet door hinges matches your style of cabinet pulls or any nickel decorative hardware that will lift the appeal of your tired-looking cabinets.
- SELF CLOSING CABINET HINGES : Our proprietary metal spring Satin Brushed Nickel Cabinet Hinges gives you outstanding functionality and product performance. Your cabinet door hinge will automatically close under 30 degrees. Silicon dampers also ensure every close is a quiet one.
- ½ INCH or VARIABLE OVERLAY CABINET HINGES. It means your cabinet door "overlays" or overlaps the cabinet face frame. These self closing cabinet hinges are also known as the surface mount cabinet door hinges or flush mount hinges for cabinet door.
- NEWLY UPGRADED HINGE SCREWS. The Decobasics bulk cabinet hinges satin nickel come with newly strengthened 5/8 screws to ensure a perfect fit, even using with power tools. Separately packed with silicon cabinet door bumpers for your convenience.
- BUILT TOUGH FOR AMERICAN FAMILIES. Our silver hinges for kitchen cabinets can take the everyday grind of large families. Thick stainless steel and an electroplated outer coating of nickel mean they are durable, rust-proof cupboard hinges made to last.
Common Mistakes That Ruin Cabinet Door Projects
The first mistake is confusing opening size with door size. Overlay doors must be larger than the opening by the intended overlay. Inset doors must be smaller than the opening by the intended reveal. Those are opposite sizing problems.
The second mistake is measuring one door and copying the size across the kitchen. Measure every opening and label every door. Cabinet runs settle, face frames vary, and previous repairs are common.
PC Slower Than It Used to Be?
A free scan shows the junk files, broken settings and background clutter dragging Windows down - then fixes them in one click.Free scan · Windows 10 & 11Outdated Drivers Are Slowing You Down
One free scan finds every outdated or missing driver and matches the right update for your exact hardware.Free scan · exact hardware matchThe third mistake is buying the wrong hinge. Face-frame and frameless cabinets use different mounting systems. Inset, partial overlay, and full overlay require different hinge geometry. Opening angle matters too, especially near walls and appliances.
The fourth mistake is finishing only the visible face. Doors need balanced finishing on all sides and edges. Uneven finish and poor storage are major reasons homemade doors warp.
The fifth mistake is drilling pulls too early. Hang and adjust the doors first, then drill hardware with a jig. Once a pull hole is wrong, repair is slow and sometimes still visible.
A Practical Job-Site Sequence
For a clean cabinet door replacement, use this order: inspect the cabinet boxes, identify face-frame or frameless construction, decide overlay or inset, make a door schedule, build or order one test door if the kitchen is tricky, build or order the full batch, prefinish flat, bore hinges with a jig, mount hinges and plates, hang doors from a consistent reference, adjust reveals across the whole run, then install pulls and bumpers.
Do these 3 things before closing this tab:
1Clear out junk files and repair common Windows errors2Fix the driver behind crashes, sound loss and screen glitches3Repair Windows errors before they cause bigger problemsA small door-only swap may take 1 to 2 days once the doors are ready. A larger refacing project can take 2 to 5 days or more depending on the number of doors, drawer fronts, veneer work, finish touch-ups, and hardware. Making and finishing doors yourself adds more time because milling, glue-up, sanding, priming, painting, and curing cannot all be compressed into one weekend without quality suffering.
The best cabinet door work is not rushed. Accurate measuring, stable materials, balanced finishing, and careful hinge adjustment are what make new doors look like they belonged on the cabinets from the start.
Frequently Asked Questions
How much does it cost to replace cabinet doors in 2026?
In 2026, replacement cabinet doors commonly cost about $180 to $330 per door installed, with broader ranges around $200 to $400 per door. A typical kitchen often lands around $2,200 to $6,600, depending on door count, material, finish, hinges, and labor.
Can I make my own cabinet doors?
Yes, if the doors are simple slab or overlay Shaker doors and you have accurate tools. Inset doors, glass doors, sprayed finishes, and large kitchens are better handled by a cabinet shop or finish carpenter because the tolerances and finish requirements are much tighter.
How do I measure cabinet doors for overlay cabinets?
Measure each cabinet opening individually, then add the desired overlay to both sides. For example, a 14-inch by 28-inch opening with 1/2-inch overlay on all sides needs a 15-inch by 29-inch door. Always confirm hinge compatibility before ordering or cutting.
What is the best material for DIY Shaker cabinet doors?
For paint-grade Shaker doors, hardwood rails and stiles with an MDF center panel are a strong choice. The hardwood holds screws well and gives crisp edges, while the MDF panel stays flatter and reduces seasonal paint cracking.
Do I need a permit to replace cabinet doors?
Door-only replacement is usually considered finish work and often does not require a permit. Permits may be required if the project expands to electrical, plumbing, gas, ventilation, structural work, or cabinet layout changes. Check the local building department before starting a larger remodel.
What size hole is used for concealed cabinet hinges?
Many concealed cabinet hinges use a 35 mm cup bore. The exact depth, edge distance, and screw layout depend on the hinge manufacturer, so set the hinge-boring jig from the actual hinge spec sheet instead of using a generic dimension.
Quick Recap
Product prices and availability are accurate as of the date/time indicated and are subject to change. Any price and availability information displayed on Amazon at the time of purchase will apply.

