Free tools Windows power users keep installed
One-click scans. No signup required.
Yes—you can build a useful backyard Dobsonian with ordinary woodworking tools. For a first project, buy a finished parabolic primary and matching secondary mirror, then build the optical tube and plywood alt-azimuth mount. A 6-inch f/8 is the most forgiving choice; an 8-inch f/6 gathers substantially more light while keeping a similar 48-inch focal length. Do not cut wood until the actual mirror dimensions and focal length are known.
What you are building
A Dobsonian is normally a Newtonian reflector on a simple manual alt-azimuth mount. The primary mirror at the rear collects light, a small elliptical secondary mirror redirects it to the side-mounted focuser, and the tube rests in altitude bearings inside a rocker box. The ground board rotates on an azimuth pivot.
- Altitude: up-and-down movement.
- Azimuth: left-and-right rotation.
- Optical tube assembly (OTA): primary, cell, tube, spider, secondary, focuser and finder.
- Dobsonian mount: rocker box, altitude bearings, ground board and bearing surfaces.
This arrangement puts money and weight into aperture instead of a tripod, gears or an equatorial drive. It is excellent for visual observing, lunar and planetary work, and short lunar or planetary exposures. It is not a practical platform for conventional long-exposure deep-sky imaging because an alt-azimuth mount introduces field rotation and manual tracking becomes difficult at high power.
Stellafane treats the OTA and mount as separate but compatible projects, so you can mix purchased and homemade parts according to your skills and budget: Stellafane Dobsonian project.
Quick wins for a faster PC:
Scan for outdated or missing drivers - takes under a minuteDriver Scan →Repair Windows errors before they cause bigger problemsFix Now →#1 Best Overall

- Large 150mm aperture delivers crisp, contrast-rich views of the Moon, planets, and so much more
- Fast f/5 focal ratio, 750mm focal length
- Borosilicate parabolic primary mirror with Sky-Watcher’s proprietary Radiant Aluminum Quartz (RAQ)
- Collapsible tube design retains collimation while providing increased portability and easy storage
- 1.25-inch helical focuser
Choose the size before buying materials
The focal length is calculated as:
focal length = primary diameter × focal ratio
| Design | Mirror and focal length | Strengths | Trade-offs |
|---|---|---|---|
| 6-inch f/8 | 152 mm; 48 in (1,219 mm) | Forgiving collimation and eyepieces; good planets and brighter deep sky; manageable weight | Less light than 8 inches; tube is still about four feet long |
| 8-inch f/6 | 203 mm; 48 in (1,219 mm) | Strong general-purpose aperture; about 1.78 times the light-gathering area of a 6-inch mirror | Heavier mirror, larger tube and more demanding balance |
| 10-inch f/5 | Actual dimensions determine focal length | More light in a shorter tube | More coma, tighter collimation tolerances and harder geometry |
| 12-inch solid tube | Actual dimensions determine focal length | Powerful visual instrument | Weight and transport become major problems; simple solid-tube construction approaches its practical limit |
For a first mirror, staying at approximately f/6 or slower is sensible. Faster mirrors demand more accurate figuring, more exact secondary and focuser geometry, more frequent collimation and better eyepieces. Stellafane’s selection guidance explains the trade-off: mirror and telescope selection.
Decide what to make and what to buy
Best first project: buy the optics, build the structure
Buy a finished parabolic Newtonian primary and an elliptical secondary. Make the cell, tube, rocker box and ground board, and usually buy the focuser and spider. This gives you the learning, customization and repairability of a homemade telescope without turning the first build into a precision optics apprenticeship.
Agena Astro lists GSO primaries, secondaries, cells, spiders and related parts; stock changes, so verify availability immediately before ordering: Agena Astro mirrors and holders.
Make the mirror as a separate optics project
Grinding, polishing, testing and figuring require a glass blank, grinding tool, progressively finer abrasives, a pitch lap, polishing compound, a Foucault or comparable test setup, a stable workspace and repeated corrections. The completed surface must be professionally aluminized. Stellafane’s mirror-making sequence covers the process: Stellafane amateur telescope making.
Rank #2

- LARGE APERTURE: Get a bright, bold viewing experience at a fraction of the cost of other optical designs.
- PROPRIETARY TENSION CONTROL HANDLES: These patented handles allow for accurate movement without the need for perfect balance.
- 94% REFLECTIVE MIRRORS: Fully multi-coated borosilicate primary and secondary mirrors deliver exceptional views.
- TEFLON BEARINGS: Proprietary Teflon bearings ensure smooth azimuth movement.
- COMES COMPLETE: All accessories such as, 2-inch Rack-and-Pinion focuser with 1 1/4-inch adapter, two super wide-angle eyepieces (25mm and 10mm), and 6x30 straight-through finder scope are included with purchase.
Consider a secondhand or club mirror carefully
Measure, rather than trust a label. Confirm diameter, focal length, focal ratio, thickness, parabolic figure, coating condition, chips, scratches and whether a compatible cell exists. A used “8-inch mirror” is not a design specification.
Let the mirror determine every dimension
- Select the primary and record its measured diameter, focal length, thickness and edge condition.
- Choose or calculate the secondary minor axis for the illuminated field you actually want.
- Calculate primary-to-secondary spacing, secondary-to-focal-plane distance, tube inside diameter, focuser height, tube length and vignetting with a design calculator such as Stellafane’s tools: Dobsonian design resources.
- Only then design the mirror cell, spider, focuser board, cradle, bearings and rocker box.
- Build, install the optics, balance, collimate and test before applying final finish.
Generic dimensions copied from another 8-inch telescope can fail when your mirror is a different focal ratio, thickness or diameter. Keep the focuser drawtube out of the light path and provide enough illuminated field for your lowest-power eyepiece without making the secondary unnecessarily large.
Parts, materials and tools
Optical parts
- Parabolic primary mirror.
- Elliptical secondary mirror, holder and spider.
- Focuser, finder or red-dot sight, eyepieces and optional 2× Barlow.
- Collimation cap, Cheshire or combination tool; a laser is optional.
Mechanical parts
- Primary mirror cell with collimation hardware.
- Tube, end rings or reinforcement and focuser board.
- Altitude bearings, tube cradle or side panels, rocker box and ground board.
- Azimuth pivot bolt, washers, locknut, feet and friction or tension adjustment.
- Dust caps, handles, counterweights and optional ventilation fan.
Materials and workshop equipment
- Exterior-grade or Baltic-birch plywood; cardboard concrete-form tube, plywood, aluminum, composite or a truss structure.
- PTFE or other low-friction pads and a durable laminate such as Formica for bearing surfaces.
- Machine screws, bolts, threaded inserts, washers, locknuts, paint or flocking and edge protection.
- Tape measure, square, compass, saw, drill, bits, clamps, sanding equipment and safety glasses.
Build the primary mirror cell
A full-thickness small mirror can use a rigid back plate with three axial support points, three collimation screws and spring-loaded or locking adjustment points. Add soft lateral restraints so the mirror cannot shift, and retaining clips just above the edge. Clips must not touch the optical face or press the glass.
- Never clamp the mirror tightly.
- Do not place hard metal directly against glass.
- Verify that the mirror cannot fall out when the tube is near horizontal.
- Use more sophisticated support analysis for a thin or large mirror; the simple three-point arrangement is not automatically suitable.
Build the optical tube assembly
Choose a tube material
| Tube | Advantages | Limitations |
|---|---|---|
| Cardboard concrete form | Inexpensive, light, easy to cut and traditional | Needs moisture protection, end reinforcement and careful support |
| Plywood | Strong, customizable and easy to dimension around the optics | Heavier and more labor-intensive |
| Aluminum or composite | Durable, light and dimensionally stable | Harder to cut, drill and reinforce cleanly |
| Truss | Compact for transport and useful at larger apertures | More geometry, balance and light-shielding work; rarely the best first build |
Stellafane’s OTA guidance covers roughly 4- to 12-inch mirrors and identifies about 12 inches as the point where a truss becomes increasingly worthwhile: Newtonian OTA design.
Rank #3

- SMARTPHONE-POWERED SKY TOUR: No experience needed! Just dock your phone, launch the StarSense Explorer app, and follow the on-screen arrows to locate stars, planets, nebulae, and more.
- PATENTED STARSENSE TECHNOLOGY: Unlike other astronomy apps, StarSense Explorer uses sky recognition technology to turn your phone into a celestial navigation system, analyzing star patterns overhead to pinpoint your telescope’s position.
- TONIGHT’S BEST TARGETS, INSTANTLY: The app generates a curated list of the top objects to see based on your time and location. See planets, bright nebulae, galaxies, and star clusters from the city—and even more from dark skies.
- SIMPLE SETUP, SMOOTH TRACKING: Features a manual altazimuth tabletop Dobsonian-style base. Follow the on-screen arrows to your target; when the bullseye turns green, you can view it clearly through the eyepiece.
- 150MM REFLECTOR WITH IMPRESSIVE VIEWS: The 6" Newtonian reflector with high-reflectivity coatings delivers sharp, vivid views of the Moon, planets like Jupiter and Saturn, and deep-sky favorites like the Orion Nebula and Andromeda Galaxy.
Mount the focuser at the calculated focal-plane height, not by eye. A commercial 1.25-inch or 2-inch focuser is usually worth buying because flexure, backlash or poor alignment can ruin otherwise good optics. The commercial focuser must match the required travel, mounting curvature and load. Blacken the tube interior with flat paint or securely attached flocking, and add a front light shield where streetlights or the Moon can illuminate the secondary.
Install the spider and secondary
Use a rigid, adjustable spider that resists flexure and provides enough tilt adjustment for collimation. A conventional three- or four-vane spider is easier for a first build; a curved vane is an optional diffraction-spike refinement. Support the secondary without edge pressure or adhesive creep.
Build the Dobsonian mount
- Ground board: make it wide enough to resist tipping and attach three or four feet.
- Azimuth bearing: center a pivot bolt and use compatible low-friction pads; tight enough to prevent wobble, not so tight that rotation sticks.
- Rocker box: keep the sides square, parallel and stiff.
- Altitude bearings: align both bearings on the same axis and attach them to a rigid cradle or tube reinforcement.
- Friction control: adjust pad material, contact area and tension until the tube moves smoothly but stays put when released.
Larger altitude bearings generally make balance and tracking smoother, although they increase size. Small bearings are more sensitive to eyepiece and finder changes. A mount that is mechanically simple still needs accurate joints, aligned bearings and adequate stiffness.
Balance the completed telescope
Balance with the primary, spider, secondary, focuser, finder, a typical eyepiece and the observing dust-cap configuration installed. Measure the actual OTA balance point; do not estimate it from the bare tube.
Rank #4

- LARGE APERTURE: The Heritage 130mm provides users with over 5 inches of aperture, delivering breathtaking views at a fraction of cost of other telescopes.
- ALL-IN-ONE COMPACT DESIGN: By combining the base and optical tube into a single tabletop package, this telescope is easy to transport and ready to use at any given moment.
- NO ASSEMBLY REQUIRED: Fully assembled right out of the box, the Sky-Watcher Heritage 130 combines full-sized optics with ease of operation, perfect for budding astronomers.
- FULLY LOADED WITH ACCESSORIES: Box includes two 1.25-inch eyepieces (10mm and 25mm) and a starpointer finderscope.
- TWO-YEAR WARRANTY: Sky-Watcher warrants your telescope to be free from defects in materials and workmanship for a full two years.
- Move the tube in a sliding cradle.
- Use larger altitude bearings.
- Add removable or magnetic counterweights.
- Use springs or tension straps where appropriate.
If the scope balances without an eyepiece but dives when one is installed, the assembly was balanced in the wrong configuration.
Collimate and align the optics
Collimation aligns the focuser axis, secondary and primary. It is a recurring adjustment after transport, temperature changes and mechanical work.
- Set the focuser at its normal observing position.
- Center the secondary under the focuser with a sight tube or combination tool.
- Tilt the secondary until the primary appears correctly centered.
- Adjust the primary collimation screws until the reflected axes coincide.
- Secure locks without shifting the adjustment, then recheck.
- Confirm with a high-power star test when seeing permits.
A Cheshire, combination tool or collimation cap is a sound starting point. A laser only helps when the laser itself is aligned and the focuser is mechanically sound; a misaligned laser can worsen the result.
Independent reader supportYour contribution helps us test, update, and keep practical guides available for everyone.Useful observing calculations
For a 48-inch (1,219-mm) focal-length telescope:
| Eyepiece | Magnification | Exit pupil in an f/6 telescope |
|---|---|---|
| 25 mm | About 49× | 4.2 mm |
| 10 mm | About 122× | 1.7 mm |
| 6 mm | About 203× | 1.0 mm |
magnification = telescope focal length ÷ eyepiece focal lengthexit pupil = eyepiece focal length ÷ telescope focal ratiofocal ratio = focal length ÷ mirror diameter
Crashes, No Sound, or Screen Glitches?
Random freezes, missing sound and display glitches usually trace back to one bad driver. Find and replace yours safely.Free scan · under a minuteWindows Errors? Fix Them Before They Spread
Repair common Windows errors and clear accumulated junk for a smoother, more stable PC - no reinstall needed.Free scan · no reinstallBest Value
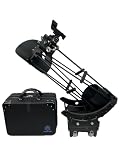
- Travel-Ready 6-Inch Dobsonian Telescope – HandyDob6 is a portable 6" Dobsonian reflector telescope designed for stargazers on the go. Assembles in minutes and fits neatly in a carry-on-sized bag.
- Crisp, Bright Views with 150mm Optics – The 150mm (6") primary mirror with 750mm focal length delivers sharp, high-contrast images of the Moon, planets, and deep-sky objects.
- Innovative Modular Design – Lightweight and sturdy 3D-printed carbon fiber-reinforced frame offers easy disassembly without tools, making it perfect for travel and quick setup.
- Smooth Manual Tracking – Enjoy fluid motion in both altitude and azimuth thanks to PTFE bearings and precision-balanced construction for smooth celestial navigation.
- Ready for Push-To Upgrades – Seamlessly integrates with the Push-To Air system (sold separately) for smartphone-assisted object tracking via apps like SkySafari.
An 8-inch mirror has approximately (8 ÷ 6)² = 1.78 times the light-gathering area of a 6-inch mirror, before transmission losses and central obstruction. These are design calculations, not guarantees of visual performance; seeing, transparency, cooling, collimation and observer experience matter.
First light and troubleshooting
- Confirm smooth altitude and azimuth motion.
- Align the finder with the main telescope.
- Start on the Moon with a low-power eyepiece.
- Check that the focuser reaches focus without the drawtube entering the light path.
- Increase magnification only after the image is stable.
- Test near the horizon and near the zenith to expose flexure or balance errors.
- Recheck collimation after the session.
| Symptom | Likely cause | Correction |
|---|---|---|
| No focus | Focal-plane or travel error | Recalculate; use an extension, move the focuser or rebuild its board |
| Wobbly image | Flexible mount or rocker | Stiffen joints, panels, bearings or ground board |
| Triangular star images | Pinched primary | Loosen clips and remove edge pressure |
| Image shifts with altitude | Tube, spider, focuser or cell flexure | Reinforce and compare collimation at different elevations |
| Scope swings after changing eyepiece | Incorrect balance | Move the cradle or add removable counterweight |
| Blurry immediately outdoors | Mirror not at ambient temperature | Wait; add a low-vibration rear fan if the cell allows |
| Vignetting at low power | Secondary too small or spacing incorrect | Recalculate the illuminated field and optical layout |
Solid tube, split tube or truss?
A solid tube is the simplest and stiffest choice for most 6- to 10-inch first builds. A split tube eases transport but adds joints and alignment checks. A truss packs smaller and becomes increasingly practical at larger apertures, but it needs a light shroud, careful truss geometry and more involved balance work. Ultra-portable designs have tightly interacting dimensions; changing one part can force others to be rebuilt. See Sky & Telescope’s ultra-portable Dobsonian discussion.
Build versus buy
DIY is not automatically cheaper. Tool ownership, shipping, replacement material, purchased optics, your time and mistakes can erase savings. Building is worthwhile for craftsmanship, customization, learning and repairability; buying is better for immediate observing, compatibility, warranty support and predictable resale.
As a U.S. price reference checked August 18, 2026, Explore Scientific listed a 6-inch tabletop Dobsonian at a $445 sale price versus a $499.99 regular price. The page specified a 152-mm, 760-mm f/5 optical system, 22-pound 1-ounce assembled weight, 25-mm and 10-mm Plössl eyepieces, a red-dot finder, a 2-inch focuser with 1.25-inch adapter and a smartphone adapter. Prices, stock and promotions change: Explore Scientific 6-inch tabletop Dobsonian.
Do these 3 things before closing this tab:
1Scan for outdated or missing drivers - takes under a minute2Clear out junk files and repair common Windows errors3Fix the driver behind crashes, sound loss and screen glitchesIf a complete telescope costs close to your parts total, choose the project for the making process rather than assuming guaranteed savings. Explore Scientific’s current Dobsonian range is listed at Explore Scientific Dobsonians.
Maintenance and sensible upgrades
- Check collimation after moving the telescope.
- Keep dust caps on and clean the mirror only with an appropriate procedure.
- Protect the tube and plywood from dew and rain.
- Inspect bearing pads, pivot tension and fasteners periodically.
- Add flocking, a front light shield, better handles or a fan when experience identifies the need.
- For a truss, use a secure shroud and protect the separated components during transport.
- Upgrade eyepieces and the finder only after the balance and optical alignment are stable.
A reliable first-build recipe
Buy a verified 6-inch f/8 or 8-inch f/6 parabolic mirror set. Measure it, calculate the complete optical layout, and build a stiff solid tube with a commercial focuser and a plywood Dobsonian mount. Use a non-pinching mirror cell, rigid spider, properly sized secondary, smooth bearings and an adjustable balance system. Collimate with a dependable tool, let the mirror cool, and test methodically on the Moon before chasing high magnification. Save mirror grinding for a second project or a club-supported build.
Quick Recap
Product prices and availability are accurate as of the date/time indicated and are subject to change. Any price and availability information displayed on Amazon at the time of purchase will apply.