Recommended Free Tools
Chain link fencing is one of the most practical ways to define a yard, contain pets, protect a garden, or add basic security without spending what wood, vinyl, aluminum, or masonry fencing can cost. A homeowner with a straight run, normal soil, and basic hand tools can install a short chain link fence, but the job is less forgiving than it looks. The difference between a fence that stays tight for years and one that sags after the first season usually comes down to layout, post depth, concrete, tensioning, and gate alignment.
For 2026, most professionally installed residential chain link fences in the United States land somewhere around $8 to $40 per linear foot, with some location-based estimates closer to $29 to $45 per linear foot for basic installed work. Typical homeowner totals commonly run from about $1,300 to $5,000, depending on length, height, coating, gates, terrain, soil, and labor market. DIY materials often fall around $3 to $15 per linear foot before concrete, tool rental, permits, gates, waste, and your time.
If you want the short version: confirm your property line, check local fence rules, call 811 before digging, mark gates first, set strong terminal posts, keep line posts no more than 10 feet apart, stretch the fabric with a come-along or fence puller, and do not treat the gate as an afterthought. Those are the pieces that make or break the job.
What a Chain Link Fence Is Best For
Chain link is a utility fence. That is not a criticism. It does certain jobs very well: dog containment, side-yard enclosure, playground separation, garden protection, pool equipment screening, back lot boundaries, rental properties, and basic access control. It is durable, repairable, and usually one of the lowest-cost permanent fence options.
The Tool Desk
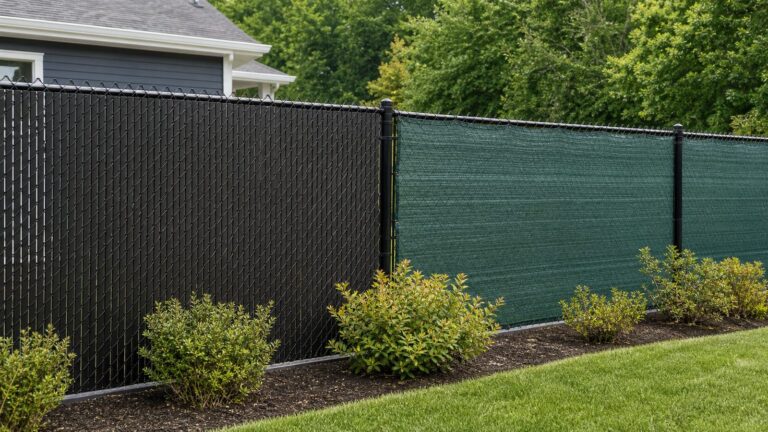
Outbyte PC Repair FREEClear out junk files and repair common Windows errorsFree Scan →Outbyte Driver Updater FREEScan for outdated or missing drivers - takes under a minuteDriver Scan →The tradeoff is privacy. Standard chain link is see-through. If you need a private backyard, you will need privacy slats, a screen, hedges, or a different fence style. Slats and screens add cost and wind load, so they should affect your post spacing and post sizing. On our job sites, we treat a slatted or screened chain link fence more like a heavier fence, especially in open, windy yards.
#1 Best Overall

- Professional design: Upgrade chain link fence stretcher with reinforced lining is more stronger and can be divided into three parts, easy to carry and store, easy to assemble. Fence stretcher are specially designed for chain link fabric fences and are an indispensable professional tool in fence installation and maintenance projects. It can ensure the efficiency and stability of the fence installation process.
- Balanced tension maintenance: The innovative design of the 6 hook fence stretcher can achieve uniform tension maintenance during the fence tensioning process to ensure the robustness and consistency of the fence installation.
- Durability and rust prevention: Chain link fence stretcher is carefully made of steel, and the surface is treated with black powder coating, which not only improves the durability of the product, but also effectively prevents rust and ensures the long term use of the fence tools.
- Safety tip: In order to enhance the use experience and ensure the safety of the user, we recommend wearing gloves when operating the fence stretcher, which can not only protect your hands from injury, but also make you feel more comfortable and secure while working.
- After sales service: We stand behind the quality of our product, if you find any problem in product quality after purchase, please communicate with us in time, we will provide you with the best quality service to solve the problem for you.
Common residential heights are 4 feet, 5 feet, and 6 feet. A 4-foot fence is common for front or side yards where allowed. A 5- or 6-foot fence is better for dogs, backyards, and general security. An 8-foot fence is possible, but it often triggers more code, zoning, wind-load, or commercial-grade material considerations. Taller fences need more serious posts and footings.
2026 Chain Link Fence Cost
Chain link pricing depends heavily on local labor, fence height, coating, gauge, gates, corners, and site conditions. A short, straight, 4-foot galvanized fence on clear soil is a different project than a 6-foot black vinyl-coated fence with two gates, tree roots, slope, demolition, and limited access.
| Fence item | Typical 2026 cost range | Notes |
|---|---|---|
| DIY materials | $3-$15 per linear foot | Does not include all tool rental, permits, waste, gates, or unexpected site work. |
| Installed galvanized chain link | $8-$40 per linear foot | Basic national range; local labor can move this sharply. |
| Higher location-based installed estimate | $29-$45 per linear foot | Reflects markets and assumptions where labor and overhead are higher. |
| Black or vinyl-coated chain link | $15-$45 per linear foot installed | Costs more than galvanized but improves appearance and corrosion resistance. |
| 100 linear feet installed | $800-$4,500 | Low end assumes basic 4-foot galvanized fencing and simple conditions. |
| 150 linear feet installed | $1,500-$6,000 | Gate count, height, coating, slope, and soil conditions drive the spread. |
| Common total project range | $1,300-$5,000 | Many residential projects fall in this range, but large or difficult jobs exceed it. |
Labor is often roughly half the installed price. It rises when crews hit rocky soil, large roots, old concrete, fence removal, hauling, grade changes, tight side-yard access, or concrete cutting. Gates also matter. A simple walk gate costs far less than a double-drive gate with larger posts, upgraded hinges, latch hardware, and careful alignment.
What’s actually slowing this PC down?
Pick the symptom - the matching free tool is one click away.
Budget for items that are easy to forget: bottom tension wire, upgraded terminal posts, privacy slats, self-closing pool gate hardware, locks, permit fees, old fence disposal, private utility locating, core drilling through concrete, and survey or property pin locating. If your fence is near a property line and the pins are missing, paying for a survey is cheaper than moving a finished fence.
Before You Buy Materials, Confirm the Rules
Do not start with a shopping cart. Start with the site. Fence projects fail early when the layout ignores property lines, easements, utilities, HOA rules, or local code.
Check property lines and easements
Find your plat, survey, property pins, or local GIS information before laying out the fence. If there is any doubt, hire a surveyor to locate the line. Also check for drainage easements, utility easements, access easements, and sight-triangle rules near driveways or street corners. Some areas allow fences in easements but reserve the right to remove them for utility work. Others restrict them entirely.
Call 811 before digging
Call 811 or submit an online locate request before you dig. In many states, you need to request utility marking at least 2 to 3 business days before excavation, but timing varies by state and utility. Public utility locates normally mark electric, gas, water, sewer, and communications lines up to the service point.
Free tools Windows power users keep installed
One-click scans. No signup required.
811 does not always mark private lines. Sprinkler lines, landscape lighting, pool plumbing, gas grill lines, detached garage feeds, and homeowner-installed drainage lines may require a private utility locator. If an 811 mark lands where you planned a post hole, do not guess. Shift the layout if allowed, hand-dig carefully within the tolerance zone, or get professional help.
Check permits, HOA rules, and pool barrier code
Fence rules vary by city, county, HOA, and subdivision. Common rules cover height, front-yard location, finished side orientation, corner visibility, materials, setbacks, and permits. Pool fences are a separate category. If the fence is part of a pool barrier, confirm the exact local code before buying fabric, gates, mesh, hinges, and latches. Mesh size, climbability, gate swing, self-closing hardware, self-latching hardware, and latch height can decide whether the fence passes inspection.
Tools and Materials You Will Need
A chain link fence is a system. Buying fabric and posts is not enough. The hardware is what lets the fence hold tension and stay aligned.
Core materials
- Chain link fabric, commonly 4, 5, or 6 feet tall for residential yards
- Terminal posts: end posts, corner posts, and gate posts
- Line posts
- Top rail and sleeves
- Rail end cups
- Brace bands and tension bands
- Tension bars for each fabric end
- Tension wire for the bottom, especially for dogs or uneven grade
- Tie wire or fence ties
- Post caps, loop caps, and rail caps
- Gate frame, hinges, latch, fork latch or lockable latch, and gate posts
- Concrete mix and gravel as needed
Useful tools
- Tape measure, marking paint, stakes, and mason line
- Post hole digger or auger
- Level and post level
- String line
- Come-along, fence puller, or stretcher bar setup
- Fence pliers, socket set, wrenches, and bolt cutters
- Wheelbarrow or mixing tub
- Shovel, digging bar, and tamper
- Work gloves and eye protection
For wire gauge, remember that a lower number means thicker wire. Heavier 9-gauge fabric is stronger than lighter residential fabric and is worth considering for dogs, longer runs, rental properties, or higher-abuse areas. Galvanized is the budget standard. Black or vinyl-coated chain link costs more, but it looks cleaner in residential landscapes and adds a layer of corrosion protection. In coastal or high-moisture environments, we prefer upgraded galvanized or vinyl-coated material and extra care not to scrape coatings during installation.
Layout: Mark Gates First, Then Corners, Then Line Posts
Good layout saves more time than any tool. Start with gates because gate openings control post placement, latch clearance, swing direction, mower access, and driveway usability. A walk gate might be 3 to 4 feet wide. A double-drive gate could be 10, 12, or 14 feet wide depending on the equipment or vehicles that need access. Plan the actual opening width before setting posts.
Mark each gate post location, then mark corners and end posts. These are terminal posts. Terminal posts carry fabric tension and gate loads, so they need to be stronger than ordinary line posts. After terminal posts are marked, run a string line to establish straight fence runs and mark line posts between them.
Line posts are commonly spaced no more than 10 feet apart. For a cleaner fence, privacy slats, windy yards, tall fabric, or short runs where spacing would look awkward, use 6- to 8-foot spacing. Keep spacing consistent where possible, but do not place a post directly over a marked utility, drainage structure, large root, or concrete conflict without resolving it first.
On our job sites, we also mark the intended fabric side and hardware side before digging. That avoids turning a gate or tension band the wrong way once the concrete is already set. Many neighborhoods expect the finished face to look clean from the street or neighboring property. Nuts, bolts, and cut wire ends should face the inside or less visible side where practical, while still keeping the fence safe and serviceable.
Dig and Set the Posts
Post setting is the structural part of the job. If the posts are shallow, out of plumb, misaligned, or set in poor concrete, no amount of fabric tensioning will make the fence professional.
Post hole depth depends on fence height, soil, frost depth, wind load, and local practice. A common residential rule is to bury roughly one-third of the post length, while also meeting local frost requirements. For a 4-foot fence, many holes are around 24 to 30 inches deep. For 5- and 6-foot fences, 30 to 36 inches is common. Taller fences, soft soils, gate posts, corners, and terminal posts may need deeper or larger footings.
Rank #2

- Precision Stretching: Fence stretcher to achieve uniform tension distribution along your fence line with the unique 5-hook design, ensuring a professional finish every time
- Versatile Compatibility: Removable sturdy steel hooks and a 2.9-inch diameter ring offer compatibility with a variety of tug ropes, allowing for seamless integration into your existing fencing setup
- Optimal Length: At 36 inches long, this stretcher provides the perfect balance between maneuverability and coverage, making it suitable for a wide range of chain link fence sizes
- Built to Last: Constructed from heavy-duty steel, this fence stretcher is engineered to withstand the toughest conditions, ensuring years of reliable performance in any environment
- Essential for Every Project: Whether you're repairing existing fences or embarking on new installations, this fence stretcher is a must-have tool for achieving professional results efficiently and effectively
Terminal, corner, and gate posts need larger footings because they carry the pull of the stretched fabric and the load of swinging gates. Line posts mainly support the fence vertically. That difference matters. A gate post set like a line post is one of the most common reasons a gate starts dragging.
Set terminal posts first
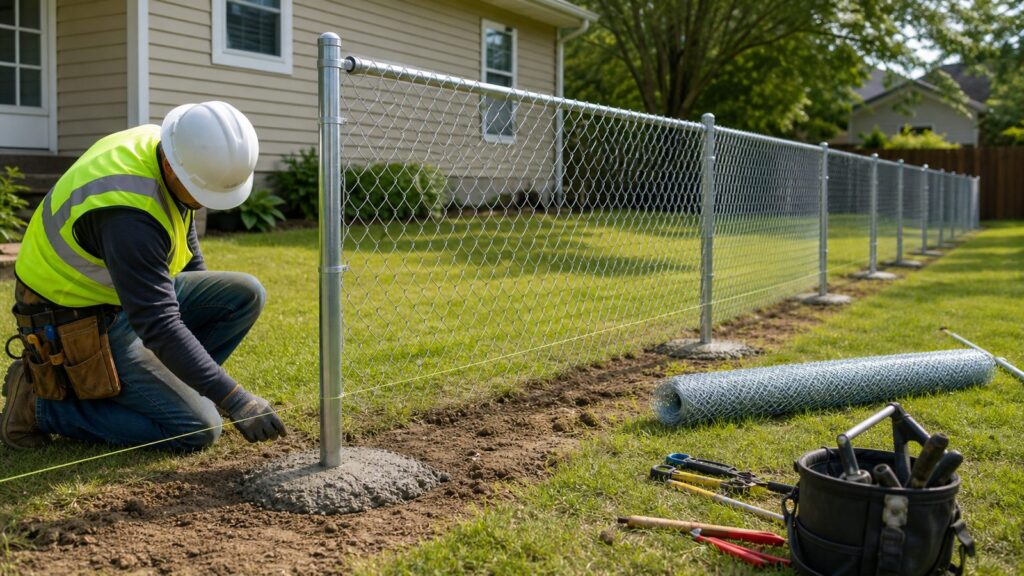
Set end, corner, and gate posts first. Plumb each post in both directions and brace it while the concrete sets. Use a string line between terminal posts to control line post placement and height. Keep the string tight and offset it slightly from the post faces so it does not get pushed out of alignment.
Do these 3 things before closing this tab:
1Scan for outdated or missing drivers - takes under a minute2Repair Windows errors before they cause bigger problems3Fix the driver behind crashes, sound loss and screen glitchesCrown the concrete above grade so water sheds away from the steel post. Flat or dished concrete holds water at the post, which speeds corrosion and freeze-thaw damage. The crown does not need to be dramatic; it just needs to slope away from the post.
Set line posts to the string
Once the terminal posts are stable, set the line posts. Keep them plumb, aligned, and at the correct height for your top rail and fabric. The top of line posts usually sits lower than terminal posts because loop caps and top rail hardware sit above them. Follow the hardware manufacturer’s height guidance for the system you bought.
Concrete cure time matters. Some fast-setting products allow light work the same day, but a fence that will be tensioned should not be rushed. As a practical schedule, many DIY installations work best over two weekends: layout and posts on the first work period, fabric and gates after the concrete has had time to firm up.
Install Fittings, Top Rail, and Bottom Tension Wire
After the posts are set, install the hardware in the right order. Terminal posts get tension bands, brace bands, rail ends, and caps. Line posts get loop caps. Top rail runs through the loop caps and connects with sleeves. Rail ends attach the top rail to terminal posts.
The top rail gives the fence a straight, rigid upper edge. Without it, a residential chain link fence feels unfinished and is easier to deform. Make sure the rail joints are seated and the rail follows the line cleanly.
Bottom tension wire is optional on some basic fences, but we recommend it for pet containment and uneven yards. It helps keep the fabric tight to the ground and makes it harder for dogs to push under the mesh. Install it near the bottom of the fence before tying the fabric. Pull it tight between terminal posts and secure it properly; loose bottom wire does not do much.
Stretch and Attach the Chain Link Fabric
This is where many DIY fences go wrong. Chain link fabric must be stretched, not just pulled by hand. Hand-pulling leaves wrinkles, bellies, and loose sections that get worse as the fence sees wind, pets, kids, and seasonal movement.
Start at a terminal post. Slide a tension bar vertically through the end of the fabric and attach that bar to the terminal post with tension bands. Do not wrap loose wire around the post as a shortcut. The tension bar distributes load down the full height of the mesh and keeps the edge straight.
Quick wins for a faster PC:
Fix the driver behind crashes, sound loss and screen glitchesFind Drivers →Clear out junk files and repair common Windows errorsFree Scan →Scan for outdated or missing drivers - takes under a minuteDriver Scan →Unroll the fabric along the outside of the fence line. Stand it up against the posts and loosely tie it in a few places so it does not fall while you work. For long runs, stretch in manageable sections. Avoid stretching around corners as if the corner were just another line post. Corners should break the tension direction with a proper terminal post and hardware.
At the far terminal post, insert a temporary stretch bar into the mesh a few feet short of the post. Connect the stretch bar to the terminal post with a come-along or fence puller. Tighten until the fabric is firm and the diamonds are aligned without over-stressing the mesh. The fence should not sag, but it also should not be pulled so hard that posts lean or fabric distorts.
Once the fabric is tight, cut it to length by untwisting a wire picket, remove the excess fabric, insert the final tension bar, and attach it to the terminal post with tension bands. Then tie the fabric to the top rail and line posts. A common pattern is tie wire every 24 inches along the top rail and every 12 inches on each line post. Keep ties consistent. It looks better, and it spreads load more evenly.
Finish by checking for sharp wire ends. Bend or orient cut ends toward the safer, less exposed side where practical. A fence should not snag clothing, scratch kids, or catch a dog’s collar.
Hang and Adjust the Gate
Gates deserve more planning than they usually get. Before digging, decide swing direction, latch side, lock access, mower clearance, driveway slope, and how the gate will behave after rain or frost movement. A gate that opens perfectly on day one but drags across a sloped driveway is not finished correctly.
Gate posts should be larger and better supported than line posts. The wider and heavier the gate, the more important this becomes. A walk gate is forgiving compared with a double-drive gate. Drive gates need careful post spacing, level hinge alignment, and enough clearance between the two leaves so the latch works without binding.
Install hinges so the gate swings freely and lands square at the latch. Check the top gap, bottom clearance, and latch engagement. If the gate is part of a pool barrier, verify self-closing and self-latching operation from every open position required by local code. Do not assume a standard yard latch will pass pool inspection.
Rank #3

- 【Unique Design】 Can be split into three sections for easy carrying and storage; easy to assemble.
- 【6 Thickened Hooks Design】 The fence stretcher is 31.5 inches long, with 6 hooks design to ensure even tension when stretching the fence, perfect for all kinds of fences.
- 【High Quality】 The fence stretcher tool is made of high quality durable galvanized steel. Finished with a black powder coat finish to prevent rust and make it durable.
- 【Safety Reminder】 It is recommended to wear protective gloves when using the fence stretcher tool.
- 【Customer Service】 If you have any questions, please feel free to contact us, we will help you as soon as possible.
Handling Sloped or Uneven Yards
Most yards are not perfectly flat. Chain link can handle slope well, but you need to choose the method before the posts are set.
Racked chain link
Racking follows the grade. The fabric diamonds shift slightly so the fence runs with the slope rather than stepping down in panels. This usually looks best on gradual slopes and helps keep the bottom of the fence closer to the ground. For pet containment, racking is often the better choice because it avoids large triangular gaps.
Stepped chain link
Stepping keeps each section more level and drops the fence in increments. It can look clean on sharper grade changes, but it may create bottom gaps at the low side of each step. Those gaps need planning, especially with dogs. You may need small grade adjustments, additional bottom wire, landscape edging, or custom fabric cuts.
Do not solve grade problems by leaving a 6-inch opening under the fence and hoping it will not matter. If the fence is meant to contain pets, protect a garden, or satisfy a pool barrier requirement, bottom gaps are not cosmetic. They are functional failures.
Quality Checks Before You Call It Done
A professional-quality chain link fence is easy to spot. The posts are plumb. The top rail is straight. Spacing is even. Concrete is crowned. The mesh is tight without leaning posts. Ties are consistent. Gates swing, latch, and clear the ground. There are no exposed sharp ends. The fabric follows grade intentionally instead of wandering.
Outdated Drivers Are Slowing You Down
One free scan finds every outdated or missing driver and matches the right update for your exact hardware.Free scan · exact hardware matchPC Slower Than It Used to Be?
A free scan shows the junk files, broken settings and background clutter dragging Windows down - then fixes them in one click.Free scan · Windows 10 & 11Walk the full fence line and check these items:
- Terminal posts remain plumb after tensioning
- Line posts are aligned to the string line
- Top rail joints are seated and secure
- Fabric diamonds are even and not wrinkled
- Tension bars are installed at terminal posts
- Tie wires are spaced consistently
- Bottom tension wire is tight where used
- Gate latch works without lifting or forcing the gate
- Gate clears the ground through its full swing
- Concrete slopes away from each post
- No cut wire or bolt end creates a safety hazard
If the mesh sags, the usual cause is under-stretching, too much post spacing, weak terminal posts, or a corner that was not treated as a terminal point. If a gate drags, look first at the gate post, hinge alignment, and slope clearance. If pets can push under the bottom, add or tighten bottom tension wire and address low spots in the grade.
When to DIY vs When to Hire a Pro
A chain link fence can be a good DIY project, but not every chain link fence should be a DIY project. The decision comes down to risk, layout complexity, and how much correction would cost if the first attempt goes poorly.
DIY can make sense when:
- The run is short, straight, and under about 100 to 150 linear feet
- The yard is mostly level
- You only need one simple walk gate
- Soil is diggable without heavy rock or large roots
- Property lines are clearly known
- The fence is not serving as a pool barrier
- You have time to let posts set correctly before tensioning fabric
Hire a professional when:
- The fence is long, tall, slatted, screened, or exposed to wind
- The yard has major slope changes
- You need double-drive gates or multiple gates
- The fence is near uncertain property lines or easements
- You have rocky soil, concrete work, roots, or demolition
- The fence must pass pool barrier inspection
- You need the job completed quickly and cleanly
On our crews, we do not view chain link as complicated because it is fancy. We view it as exacting because every small layout error shows up later. A terminal post out of plumb affects fabric tension. A gate post that is undersized becomes a dragging gate. A skipped bottom wire becomes a dog escape route. A post set over a private irrigation line becomes a repair bill.
How Long Installation Takes
A small DIY fence may take a full weekend or two, depending on concrete cure time and site prep. A 100-foot project with one gate might take a homeowner 2 to 4 working days spread across curing time. A professional crew may complete a straightforward residential fence in 1 to 3 days, but complex layouts, permits, demolition, or hard digging can extend the schedule.
Crashes, No Sound, or Screen Glitches?
Random freezes, missing sound and display glitches usually trace back to one bad driver. Find and replace yours safely.Free scan · under a minuteWindows Errors? Fix Them Before They Spread
Repair common Windows errors and clear accumulated junk for a smoother, more stable PC - no reinstall needed.Free scan · no reinstallThe best schedule is usually not the fastest schedule. Layout and utility marking happen first. Post setting comes next. Fabric stretching waits until the posts can resist the load. Gates are adjusted at the end. Rushing those steps is how a budget-friendly fence turns into a crooked one.
Final Advice From the Field
Chain link fence installation is a measured project, not a muscle project. Spend the time on layout. Use real terminal posts and tension bars. Keep line posts within the right spacing. Crown the concrete. Stretch the fabric with the proper tool. Plan gates before digging. Confirm code before building around pools. Add bottom tension wire when pets are involved.
If you get those details right, chain link gives you a durable, affordable fence that does its job without demanding much maintenance. If you skip them, the fence will usually tell on you quickly: sagging mesh, leaning posts, uneven top rail, dragging gates, and gaps along the ground. The materials are simple, but the installation still rewards careful work.
Frequently Asked Questions
How much does it cost to install a chain link fence in 2026?
Most residential chain link fences cost about $8 to $40 per linear foot installed, with some location-based estimates closer to $29 to $45 per linear foot. Common total project costs run about $1,300 to $5,000, depending on length, height, coating, gates, soil, slope, and labor.
How far apart should chain link fence posts be?
Line posts are commonly spaced no more than 10 feet apart. Use 6- to 8-foot spacing for privacy slats, windier sites, taller fences, heavier fabric, or short runs where tighter spacing looks cleaner.
Can I install a chain link fence myself?
Yes, if the layout is simple, the yard is mostly level, the soil is workable, and the fence is not part of a pool barrier. Hire a pro for long runs, slopes, rocky soil, uncertain property lines, drive gates, pool code requirements, or screened/slatted fences.
Do I need concrete for chain link fence posts?
For a permanent residential fence, concrete is strongly recommended, especially for terminal, corner, and gate posts. Crown the concrete above grade so water drains away from the steel post.
How do you keep a chain link fence from sagging?
Use properly sized terminal posts, set posts deep enough, keep line post spacing within limits, install top rail, use bottom tension wire where needed, and stretch the mesh with a come-along or fence puller instead of hand-pulling.
Do these 3 things before closing this tab:
1Fix the driver behind crashes, sound loss and screen glitches2Repair Windows errors before they cause bigger problems3Scan for outdated or missing drivers - takes under a minuteIs galvanized or black chain link better?
Galvanized chain link is usually the lowest-cost option and works well for utility fencing. Black or vinyl-coated chain link costs more, commonly about $15 to $45 per linear foot installed, but it has better curb appeal and added corrosion protection.
Quick Recap
Product prices and availability are accurate as of the date/time indicated and are subject to change. Any price and availability information displayed on Amazon at the time of purchase will apply.