Quick wins for a faster PC:
Fix the driver behind crashes, sound loss and screen glitchesFind Drivers →Clear out junk files and repair common Windows errorsFree Scan →A Speed Square helps mark or check short right angles on fence rails and pickets, but it cannot establish a straight fence run by itself. For the long runs, use a taut mason’s line; check planned corners with the 3-4-5 method, then mark post locations to suit the fence system and the string’s reference point.
The square is a useful local layout tool, not a substitute for site planning, string lines, or accurate post placement. This guide explains how to use each tool for the job it does best and how to account for posts, gates, slopes, and durability.
Start With the Site Walk, Not the Material
Before ordering materials, walk the proposed fence line. Decide what the fence needs to do, where gates belong, and how the ground changes along the run. Confirm the intended boundary and check local code, permit, and neighborhood requirements before setting the layout.
Measure the runs, identify corners and gate locations, and note slopes, drainage, and access constraints. Plan gateposts and end sections before marking repetitive post intervals. If the fence location is legally important, confirm the boundary rather than assuming an existing fence follows it.
What’s actually slowing this PC down?
Pick the symptom - the matching free tool is one click away.
#1 Best Overall

- Made in the USA: Swanson Tool Company makes the Speed Square in the United States.
- CNC Machined: Every Speed Square is CNC machined to a perfect 45° and 90° corner. Square marks that read true right off the pivot, cut after cut, year after year.
- Heavy-Gauge Die-Cast Aluminum Alloy: A heavy-gauge aluminum alloy die-cast body, 15 times stronger than standard aluminum construction. Holds its 90° tolerance under drops, dust, and jobsite abuse.
- Matte Finish: Glare-free reading in direct sunlight. The body doesn't blind you on a roof deck at midday like a polished square will.
- 7/8 in. Heel and 1/4 in. Scribe Bar: The 7/8 in. heel holds the square against the board edge for square and 45° marks or to guide a circular saw. The 1/4 in. scribe bar rips parallel layouts off that same edge.
Call 811 Before Any Post Hole
Before excavation, contact 811 or your state 811 center to have underground utilities identified. Lowe’s includes calling 811 in its fence-building guidance. Utility markings do not necessarily identify every private line on a property, so account for known irrigation, lighting, and other private services separately.
What the Speed Square Actually Does Well
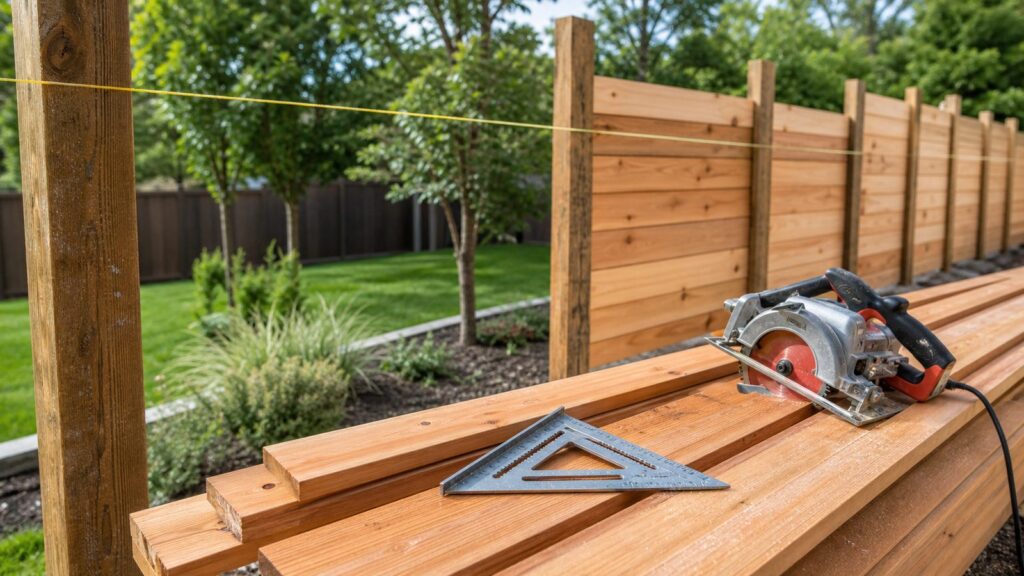
A speed square is useful for short, local right-angle marks and checks on fence components. Keep it aligned against the board’s edge when marking rails or pickets. Lowe’s lists a rafter or speed square among the tools for building a wood fence.
Use the square at the cutting station for component work; use string and layout controls for the long run. A hand tool cannot establish a straight perimeter or confirm a yard corner by itself.
The Professional Layout Sequence
Separate long-run alignment from local angle marking. The string establishes the run, corner checks establish the geometry, and post marks are set according to the selected fence system.
Recommended Free Tools
1. Plan the Fence and Verify the Site
Confirm the intended boundary, gate positions, and applicable local requirements. Call 811 before digging, and plan the fence type and ground clearance before fixing post heights.
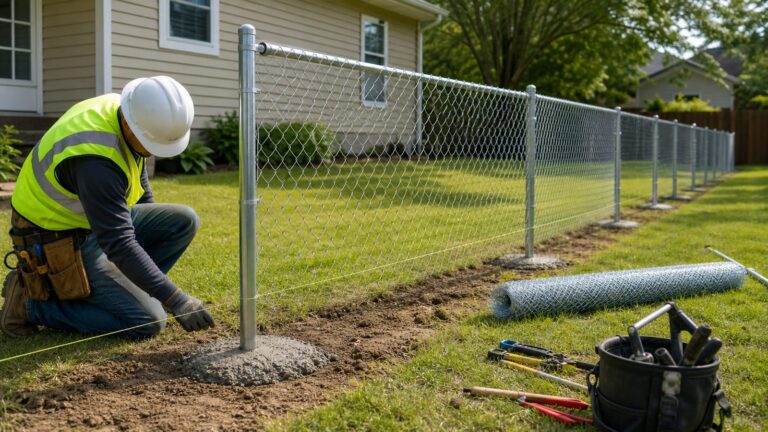
2. Set Up the Long Runs
Stretch a tight guide string between stakes or on batter boards. Keep the string’s meaning consistent: it may represent the outside post face, for example, rather than the hole center. If it marks a post face, account for the post-width offset when marking hole centers. Treated Wood’s fence guidance recommends tight guide strings and describes extending a run beyond the corners.
3. Square the Corners
From the intersection of the two run lines, measure 3 feet along one line and 4 feet along the other. Adjust the lines until the marks are 5 feet apart. The same relationship can be scaled up for a larger check. For a rectangular layout, equal diagonal measurements provide another way to check that the corners are square.
Rank #2

- Double stud wall width layout with ease
- 3/8”, 1/2”, 3/4” and 1-1/2” guides incorporated into the square walls for speedy marking
- A quick 22-1/2 degree pitch guide for octagons and 5 pitch rafters
4. Mark Posts for the Fence System
Post spacing depends on the chosen rails, panels, height, slope, and installation system. Lowe’s gives 6 to 8 feet on center as typical for its component-built wood-fence example. PostMaster’s guidance bases spacing on rail length plus 2 inches, with adjustments for conditions such as fence height and slope. These are system-specific examples, not interchangeable universal rules. Plan end and gateposts before marking the remaining positions.
Outdated Drivers Are Slowing You Down
One free scan finds every outdated or missing driver and matches the right update for your exact hardware.Free scan · exact hardware matchWindows Errors? Fix Them Before They Spread
Repair common Windows errors and clear accumulated junk for a smoother, more stable PC - no reinstall needed.Free scan · no reinstall5. Use the Speed Square for Local Marks
Use the square for short 90-degree marks on rails or pickets, or to check a small component. Keep it aligned with the material edge. Continue to use the string as the reference for the fence run.
6. Set and Brace Posts
Align posts to the layout reference and brace them as concrete is placed and sets. Follow the requirements of the selected fence system for post alignment. Post embedment depends on local code, frost depth, soil, and expected wind; the general guideline of at least one-third of a post in the ground is not a universal specification.
7. Protect the Installation
Shape concrete tops and trim exposed post tops so water drains away rather than pooling. Use appropriately sized hot-dipped galvanized or stainless fasteners to reduce corrosion, following the guidance for the treated wood and hardware. Keep debris from accumulating against the fence, and do not rely on ordinary rails or pickets as retaining members unless the product is designed for that use.
Post Holes, Concrete, and Why Straight Fences Fail
Post stability depends on the site and fence system. Do not treat one hole depth or diameter as suitable for every fence. Local frost depth, soil, wind exposure, code, post dimensions, and the selected system all affect the required embedment.
Brace posts while concrete is placed and sets, and follow the product instructions before loading posts with gates or fence components. Shape exposed concrete so water drains away from wood. Persistent water accumulation at exposed ends can promote wood-damaging fungi, according to Treated Wood’s fence guidance.
Use compatible, corrosion-resistant fasteners. Treated Wood recommends appropriately sized hot-dipped galvanized or stainless fasteners to reduce corrosion and related staining or failure.
Rank #3

- MULTIPLE GRADATIONS: Make the exact mark you need! Gradations Included For Marking Common, Hip, Valley, And Jack Rafters; Useful For Determining And Marking Angles And Making Square Cuts On Boards
- FEATURES: Get More Bang For Your Buck With This Value Pack Of Two Of Our Best Selling Speed Squares - the 7 inch Speed Square and the 12 inch "Big 12" Speed Square - and you also get the very useful Blue Book.
- DURABLE MATERIAL: Heavy-Gauge Billet Aluminum Alloy Construction means You Have a Rugged Tool. And Its Die-Cast Design Provides Increased and Reliable Accuracy Versus Laser-Etched And Extruded Stamped Rafter Squares
- EASY TO USE: When Used As A Saw Guide, The Speed Square Makes Truing Up A Board Easy
- MADE IN USA: The Speed Square, made in the USA since 1925, is essential for every carpenter, construction professional, roofer, and DIYer
Planning Gates Before You Dig
Plan gate locations before setting repetitive post intervals. Decide the opening and how the gate relates to the fence run and grade. Gateposts must suit the gate and its hardware; follow the chosen fence and gate system’s requirements rather than assuming line-post specifications will work.
Bekaert Fence Pro and Technical Support Manager Steven Sarson advises identifying challenging sections and gate locations before starting, saying, “It doesn’t need to be fancy. Spending a few minutes before the project begins to identify challenging sections or establish where gates will be needed saves time and frustration.”
Slope Strategy: Stepped or Contour-Following
Choose a slope approach based on the fence type and desired ground clearance before fixing post heights. Preassembled panels installed level can be stepped across a slope, which may leave gaps below. Rails and picket constructions can often follow the slope more closely, with more adjustment available in component-built picket fences. Wire fencing has its own installation considerations for maintaining spacing and tension over rises and dips.
There is no single profile that suits every sloped site. Bekaert discusses posts set perpendicular to the ground on steep hillsides in the context of its wire-fence methods; that advice should not be applied automatically to wood panels or gates. Follow the guidance for the particular fence system.
Fast Fence Workflow: Square the Cut, Square the Corner
Speed comes from using the right reference for each task, not skipping layout checks.
Square the Cut
Use the speed square for repeatable short marks on rails and pickets. Measure and mark components according to the fence design, keeping the square aligned with the material edge.
Square the Corner
Use stakes or batter boards and a taut string for the long runs. Check corners with the 3-4-5 method or verify a rectangular layout with equal diagonals. Mark posts in relation to the string and the fence system’s spacing requirements.
Rank #4

- Innovative Smart Mark Cutout – faster, easier, more accurate marks at critical dimensions
- Easily identifiable markings, cutouts, and notches for layout, scribing and marking cuts: 1-1/2", 3" and 4-1/2" mark stud or joist layouts; 1-3/4" and 3-1/2" mark LVL layouts; 3-1/2" and 5-1/2" mark 2x4 and 2x6 flat studs and blocking or 4x4 and 6x6 posts; 1/2", 3/4", 1-1/2" and 1-3/4" for scribing rip cuts and marking flat studs and blocking
- 22.5°, 30°, 45° and 60° slots for marking out commonly used angles
- Built-in level vial with 320° of visibility indicates level and plumb, and measures angle or roof pitch on existing structures, replacing a torpedo level in many applications
- 1" wide heel stays seated on split and irregular materials
Wood Fence Details That Save Time and Rework
For a component-built wood fence, plan rail and picket placement consistently along the run. Choose ground clearance and decide how the fence will follow any slope before setting posts. Keep debris from building up against the fence and allow water to drain away from exposed wood.
Use fasteners suited to the treated wood and exposure. Treated Wood recommends appropriately sized hot-dipped galvanized or stainless fasteners to reduce corrosion. Follow the lumber and coating manufacturers’ instructions for any finish or maintenance work.
When DIY Makes Sense
A straightforward fence layout may suit a homeowner who can verify the boundary, plan the gates, and work carefully with string lines and corner checks. The speed square is one useful tool for component marks, but it does not replace the layout controls or the requirements of the chosen fence system.
Do these 3 things before closing this tab:
1Clear out junk files and repair common Windows errors2Fix the driver behind crashes, sound loss and screen glitches3Repair Windows errors before they cause bigger problemsUse the fence manufacturer’s guidance for post spacing, alignment, slope, and embedment. Call 811 before excavation, and check local code and frost-depth requirements before setting posts.
When to Hire a Professional Fence Crew
Consider a professional when the boundary is uncertain, the terrain is steep, or the fence design or site conditions make layout and post installation difficult. A contractor can build to a confirmed line, but does not establish the legal property boundary; obtain survey clarification where needed.
For steep terrain or specialized wire fencing, use guidance for that fence type rather than applying wood-panel rules. Confirm applicable code and system instructions before work begins.
Independent reader supportYour contribution helps us test, update, and keep practical guides available for everyone.What to Confirm Before Building
Before installation, confirm the boundary, local requirements, utility markings, gate locations, fence type, slope approach, and the selected system’s post spacing and embedment guidance. Make clear which point the layout string represents so hole locations account for the post face or center as intended.
Best Value

- Mr. Pen rafter square comes as a 7-inch carpenter’s tool, ideal for marking angles, making square cuts, and guiding precise measurements.
- Built from solid aluminum, this square offers durability and rust resistance while remaining lightweight and easy to handle.
- The 7-inch size provides the perfect balance between portability and versatility for a wide range of carpentry, roofing, and framing tasks.
- Featuring easy-to-read laser-etched markings in contrasting yellow on a blue background, it ensures high visibility even in low-light conditions.
- Designed with a thick edge for use as a saw guide, it’s an essential tool for professionals and DIYers alike who demand accuracy and reliability.
Also confirm how posts will be braced, how water will drain away from exposed wood, and which fasteners are compatible with the materials. A few clear decisions at layout time can prevent avoidable adjustments after posts are set.
The Bottom Line
A speed square is useful for short component marks and checks, but it cannot make a long fence run straight. Use a taut string for alignment, the 3-4-5 method or diagonal checks for corners, and spacing instructions for the fence system you are installing.
Verify the boundary and local requirements, call 811 before digging, plan gates and slopes in advance, and set and brace posts according to site conditions and product guidance. Those steps help the fence follow a deliberate line and suit its terrain.
FAQ
Can I lay out an entire fence with only a speed square?
No. A speed square is for local marks or checks on components. Use a taut mason’s line for long runs and the 3-4-5 method or diagonal checks to verify corners.
How do I make sure my fence line is straight?
Stretch a tight guide string between stakes or batter boards and use it consistently as the reference for the run. Account for any offset between the string’s reference point, such as the outside post face, and the hole center.
How far apart should fence posts be?
Spacing depends on the fence system, rails or panels, height, and slope. Lowe’s uses 6 to 8 feet on center as a typical example for a component-built wood fence; PostMaster specifies spacing based on rail length plus 2 inches. Follow the instructions for the system being built.
How do I square a fence corner?
Measure 3 feet along one run and 4 feet along the other from the corner. Adjust the lines until the marks are 5 feet apart. You can scale up the check; for a rectangular layout, equal diagonals are another squareness check.
How deep should fence posts be?
There is no one depth that applies to every site. Local code, frost depth, soil, wind exposure, post dimensions, and the fence system affect embedment. Follow local requirements and the system’s guidance.
Free tools Windows power users keep installed
One-click scans. No signup required.
How should I handle a fence on a slope?
Choose the approach for the fence type and desired ground clearance before fixing post heights. Level panels can be stepped across a slope and may leave gaps below; rails and pickets can often follow the slope more closely. Wire fencing has its own methods for maintaining spacing and tension.
Quick Recap
Product prices and availability are accurate as of the date/time indicated and are subject to change. Any price and availability information displayed on Amazon at the time of purchase will apply.