Recommended Free Tools
A bent-wire crank toy is a small hand-cranked automaton: turning a wire crankshaft drives a connecting rod and piston, making a bird or other figure bob. The Make project by Matt Mets uses five wire-made parts—frame, crankshaft, piston, connecting rod and art—and is rated Easy with a stated build time of 1–3 hours. See the project template and original instructions at Make.
What you need
- 20 AWG bare wire; ordinary fence wire is suggested by the project
- Wire snips
- Pliers
- Ruler
- Round-nose pliers for starting the frame’s cylindrical coil
- The downloadable project template from Make
Use wire that remains bendable while holding its shape. The specified material is 20 AWG bare wire; changing wire can alter how easily the bends form and how rigid the finished mechanism feels.
The five-part mechanism
| Part | Specified wire length | Function |
|---|---|---|
| Frame | About 24 inches | Supports the crankshaft and guides the piston |
| Crankshaft | About 8 inches | Provides the offset crank pin that converts rotation into reciprocating motion |
| Piston | 6 inches | Slides vertically through the frame’s top coil and carries the artwork |
| Connecting rod | 5 inches | Links the crankshaft to the piston |
| Art | Not specified | A bird or another figure attached to the piston |
The functional geometry is separate from the decoration, so you can replace the bird with another lightweight figure without redesigning the crank, rod or frame.
How to build it
-
Form the frame
Measure about 24 inches of 20 AWG bare wire. Begin with a cylindrical coil, using round-nose pliers to establish the circular bends. Continue shaping the wire into the frame shown on the template, including the loops that will hold the crankshaft and the top coil through which the piston will pass.
Special offer. See more information about Outbyte and uninstall instructions. Please review EULA and Privacy policy.#1 Best Overall
 Hand Crank Generator Dc Electric Motor Kit for Stem Science Experiments DC Electrical Motor Assemble Kit Physics Education Tool Portable Emergency Power Generator for School Labs and Learning DIY DIY
- Stem educational hand crank generator: this 17.3x8.8x12cm diy electric generator demonstrates energy conversion through hands-on, great for physics experiments. students crank to generate electricity while learning electromagnetic principles, making it ideal for classroom labs and homeschool stem activities with its portable, lightweight (120g) design
- Sturdy construction for classroom use: built with metal gears and impact-resistant plastic, this dc generator withstands repeated student use. the 6.8x4.7x3.5" compact size stores easily but delivers measurable power output for experiments on circuits, voltage, and relationships
- Complete Science Experiment Kit: Includes all components for conducting multiple physics demonstrations - from basic circuitry to energy transformation. The clear housing allows observation of internal workings during doing, enhancing the educational experience for scientists
- Safe & User-Friendly Design: Meeting child safety standards with no exposed wires, this quiet generator features an ergonomic crank handle for comfortable doing. great for science fairs, maker spaces, or emergency preparedness education for ages 3+
- Versatile Teaching Tool: This manual generator toy serves multiple educational purposes: school physics , DIY science projects, and demonstrating concepts. Includes experiment guide with 5 starter activities to explore fundamental electrical principles
-
Bend the crankshaft
Measure about 8 inches of wire. Form the zig-zag section with 180-degree bends, then add the flat coil and the perpendicular right-angle bends shown in the template. The offset portion acts as the crank pin, so keep the bends aligned enough that it can rotate in the frame loops.
-
Cut the piston
Measure and cut 6 inches of wire for the piston. Thread it through the frame’s top coil; it must be able to move up and down rather than bind against the coil.
-
Make the connecting rod
Measure 5 inches of wire and form the connecting rod. Hook it onto the crankshaft and arrange its other end to connect with the piston as shown in the template.
Rank #2
 Physics Science Lab Learning Circuit kit, Electricity Experiment Set,DIY DC Electrical Motor Model Wind Powered Carts Building Circuits for Kids Junior Senior High School Students (1 Set)
- Physics experiment model kit include hand-crank generator model toy, mini motor and DIY generator toy, each part has can do separate experiments. A series of physical science broaden kids and children horizon, stimulating their curiosity.(Battery Not Included)
- Electrical motor model can be installed separately fan, easy for people to observe, you can clearly see the internal structure of the motor, there are coils, magnetic blocks, it should be noted that the power supply is five dry cell batteries, or 5V DC power supply, too high a voltage may damage the device!
- The hand-crank generator model toy is to generate electricity through the external force to drive the rotation of the magnetic block, connect the generator to the motor can be achieved in the absence of power by rotating the handle to make the motor work. Or for lighting small light bulbs, this may take a bit of effort and you will need to keep rotating the handle. Kids can construct their very own powered mini fan that uses a hand crank gyrating motion to making the fan turn.
- The electric car wind power experiment physics learning student toy trolley comes with a battery compartment at the end, and two sections of wire, these sections can also be used directly for the motor connections, there is a whole little motor working on the wind trolley, it consumes electricity and converts it into power. Easy enough for junior students and kids to explore in advance and get interested in physics science.
- The three devices will be packed into a small cardboard box in the form of parts, you need to use what you have learn to assemble them yourself and do some simple assembling, when you see that the cart you have assembled can be driven by the wind, you will have a great sense of achievement and a greater love of physics, just through some small experiments you can get the fun of learning!
-
Add the figure
Shape a bird or another chosen piece of art and attach it to the piston. Keep the figure light enough that the piston can rise and fall freely.
Quick wins for a faster PC:
Scan for outdated or missing drivers - takes under a minuteDriver Scan →Repair Windows errors before they cause bigger problemsFix Now →Special offer. See more information about Outbyte and uninstall instructions. Please review EULA and Privacy policy. -
Test the crank
Turn the crankshaft slowly by hand. The crank pin should move the connecting rod, the rod should drive the piston vertically, and the attached figure should bob. Correct any crossing wires or tight loops before operating it faster.
How the bird-bobbing motion works
The crankshaft rests in loops on the frame. Its offset crank pin travels in a circle as you turn the handle. Because the connecting rod is hooked to that offset, it is pushed and pulled once per revolution. The rod transfers that motion to the piston, which is constrained by the frame’s top coil and therefore travels up and down. The bird follows the piston’s vertical movement.
Rank #3

- Pay attention: Please read the instructions or pictures carefully, use the correct circuit diagram to avoid short circuit, short circuit will produce high temperature and cause the battery Holder box to melt
- Color:Siler+Black;Voltage:DC 3V;Rated Speed:24000 RPM
- Motor Body Diameter:27mm/1.06";Mounting Hole Distance(center to center):15mm/0.59",Shaft Size:10x2.0mm/0.39"x0.08"(L*D);Motor Body Length;38mm/1.46"
- Great fun Motor,perfect for mini fan,electric toys and science experiments etc.Will work with many power sources batteries and solar cells work perfectly
- Package including:6pcs DC motor,6pcs battery holder,6pcs rocker switch,6pcs motor mounting Bracket,12pcs 9.8" Electronic wire,84pcs plastic gears(Random Color) ,4 pcs 4 vanes propeller,2pcs 3 vanes propeller and 40cmΦ3 Heat shrink tube
This is a compact crank-and-slider arrangement: rotary motion at the handle becomes reciprocating motion at the piston. The location and shape of the crankshaft bends determine the available travel, while friction and alignment affect how smoothly the figure bobs.
Adjusting the result
For smoother motion
- Ensure the crankshaft sits cleanly in both frame loops and can rotate without rubbing the frame.
- Keep the piston straight where it passes through the top coil.
- Recheck that the connecting rod hooks onto the crank pin without catching on neighboring bends.
For a different figure
Retain the five-part mechanism and change only the art attached to the piston. A different silhouette changes the appearance without changing the crank geometry.
For a different bobbing range
The crankshaft’s offset controls how far the connecting rod moves. Any alteration should preserve enough clearance for a full rotation and keep the piston guided by the frame coil.
Rank #4
- 1. ELECTRICITY SCIENCE KIT FOR KIDS Turn the hand crank to generate electricity, light the LED, or power the motorized car. Kids can see how motion creates electrical energy through a hands-on STEM experiment.
- 2. EXPLORE ENERGY CONVERSION & CIRCUITS Discover how mechanical motion can be converted into electrical energy. Kids explore simple circuits, electricity generation, motors, and energy transfer through building and testing.
- 3. BUILD WITH REAL STEM COMPONENTS Kids assemble and test gears, wires, motors, wheels, and LED components to create a working model while learning basic electricity, movement, and engineering concepts.
- 4. BEGINNER-FRIENDLY ENGINEERING KIT AGES 8-12 Step-by-step assembly makes this STEM electricity kit accessible to young builders while encouraging problem-solving, mechanical thinking, patience, and hands-on learning.
- 5. STEM PROJECT FOR HOME & CLASSROOM Designed for home learning, classroom demonstrations, science projects, and STEM activities. A practical way for kids to explore electricity, circuits, motors, energy conversion, and engineering.
Choosing tools and wire
Wire snips make the measured cuts, while ordinary pliers form the straight bends and hooks. Round-nose pliers are particularly useful for the frame’s initial cylindrical coil. A ruler matters because the project’s geometry starts with measured lengths—about 24 inches for the frame, 8 inches for the crankshaft, 6 inches for the piston and 5 inches for the connecting rod.
For the closest match to the documented build, use 20 AWG bare wire. Fence wire is offered as an ordinary-wire option, but any substitute should still bend cleanly and hold the finished angles.
Common problems
The figure does not move
Check that the crankshaft is actually seated in the frame loops and that the connecting rod is hooked to the crank pin and piston. A disconnected link leaves the handle free-spinning.
What’s actually slowing this PC down?
Pick the symptom - the matching free tool is one click away.
Best Value
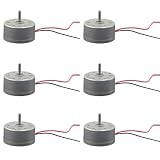
- Package Including: You will receive 6pcs DC Mini Electric Motors. Rated voltage: DC 3V; Rated speed: 4000RPM; Operating voltage: DC 1-4.5V; Motor body diameter: 24mm/0.94 inch; Shaft size: 8x2mm/0.32inchx 0.07inch.
- Easy to Wire and Assemble: Each electric motor includes flexible leads and clear terminals, making connections straightforward for students and hobbyists without needing advanced technical skills.
- Reliable Performance: Delivers stable rotation and consistent power output, supporting smooth operation for science demonstrations, engineering models, and interactive STEM experiments.
- Perfect for STEM Learning: This kit encourages hands-on science exploration, helping students build practical skills and deepen their interest in engineering, robotics, and school projects.
- Safe and User-Friendly: Designed with smooth edges and low voltage for added safety, these motors are suitable for supervised classroom use, home experiments, and educational activities.
The piston sticks
Inspect the top coil and straighten the piston where it passes through it. The piston needs a clear vertical path; nearby bends or a distorted coil can restrict travel.
The crank will not complete a rotation
Look for an intersecting frame, rod or crank bend. Rotate the mechanism slowly and correct the wire that catches, while preserving the crankshaft’s perpendicular bends and offset.
The bobbing is uneven
Uneven motion usually indicates misalignment between the crankshaft, connecting rod and piston. Re-seat the crankshaft in both loops and make sure the rod follows the crank pin without side-loading the piston.
Quick Recap
Product prices and availability are accurate as of the date/time indicated and are subject to change. Any price and availability information displayed on Amazon at the time of purchase will apply.