These 40 laser-cutter projects are arranged as a curriculum, not a random inspiration list. Start with flat engravings and simple cuts, then progress to joints, layered assemblies, curved work, tight tolerances, reliefs and repeatable products. Before choosing a project, match the material and operation to your laser: diode, CO₂ and fiber/infrared machines are not interchangeable.
Engrave removes or darkens a surface, score makes a shallow line, and vector cut travels through the material. Settings depend on the machine, lens or module, material, thickness, focus and airflow. Use your manufacturer’s database and a test grid rather than copying universal power-and-speed numbers. xTool’s training explains this machine-specific approach: https://support.xtool.com/academy/course?id=272.
Before project one: safety and setup
- Read the machine manual and confirm enclosure, exhaust or filtration, fire detection and emergency-stop procedures.
- Never leave an operating laser unattended. Keep a suitable fire extinguisher nearby and maintain a clean, nonflammable work area.
- Verify the exact material and supplier. Reject PVC, ordinary vinyl, unknown plastics, polycarbonate, ABS, polystyrene foam, unknown adhesives and chemically treated wood. Chlorine-containing materials can release corrosive fumes; xTool lists these hazards at https://support.xtool.com/article/1037.
- Measure stock with calipers, check that it is flat, set focus, and use framing or preview before starting.
- Separate engraving, scoring and cutting into clearly identified design layers. Remove duplicate lines, open paths and stray points.
- Run a small test grid on scrap. Record material, thickness, lens or module, settings, passes and result.
- Clean residue, debris, lenses, windows and the bed regularly. OSHA and FDA describe eye, skin, fire and processing hazards: https://www.osha.gov/laser-hazards/standards and https://www.fda.gov/radiation-emitting-products/laser-products-and-instruments.
Choose projects by laser type
| Machine | Good starting territory | Qualify or avoid |
|---|---|---|
| Open-frame diode | Wood, paper, cork, leather and some coated-metal marking | Unattended work, clear acrylic, thick stock and unknown plastics |
| Enclosed diode | Beginner and intermediate wood, paper, leather and selected materials | Clear, white or some blue acrylic; thick CO₂-oriented work |
| CO₂ | Wood, cast acrylic, leather, paper and larger layered models | Metal cutting and reflective materials unless specifically supported |
| Fiber or IR-capable | Metal marking and some hard plastics | Large wood or acrylic cutting unless a suitable cutting source is also fitted |
| Makerspace or industrial CO₂ | Large panels, architectural models and furniture-scale components | Requires formal training, local rules and machine-specific procedures |
For example, Glowforge describes 6-watt diode craft machines and 40–45-watt CO₂ Pro machines, while its specifications list materials that its blue-diode Spark cannot process, including glass and several acrylic types: https://glowforge.com/b/tech-specs/craft. xTool’s S1 lists 20W and 40W diode configurations, a 23.93-by-15.16-inch work area and passthrough options: https://www.xtool.com/products/xtool-s1-laser-cutter.
Level 1: beginner projects
Difficulty 1 means one material and flat geometry; 2 means a little repetition or several pieces. Complete each project on scrap first, then repeat it with a new material to build transferable skill.
What’s actually slowing this PC down?
Pick the symptom - the matching free tool is one click away.
#1 Best Overall

- 【10W High-Power Laser 】Equipped with a 10000mW optical power and a 450nm blue light diode laser, this engraver delivers deep, fast engraving on wood, bamboo, acrylic, leather, dark glass, and coated / anodized metal. Not for Bare Steel. Please note: bare stainless steel or uncoated metal is not recommended unless using a marking spray or surface preparation. This ensures you get the right tool for your actual material needs.
- 【Laser Cutter 300x300mm Work Area】TTS-10 Pro offers a 300x300mm (approx. 11.8x11.8 inches) engraving area, perfect for custom coasters, jewelry, keychains, phone cases, and small signage. If your project requires larger than 12 inches, Please measure your workpiece before purchasing to avoid size mismatches.
- 【Main Board Upgrade】 Laser engraving the mainboard adopts 32-bit dual-core MCU with various functions. Faster processing speed. It can engrave online and TF card offline. You can also use the mobile app and computer WEB for engraving.
- 【Full Metal Frame & Reliable Motion System】Built with aluminum alloy + injection-molded parts, dual Y-axis motors (42 stepper), and GT2-6mm synchronous belts. We take quality control seriously – every unit is tested before shipping.
- 【Software Compatibility and TF Card Offline Work】Comes with a detailed manual, TF card (4GB), card reader, and all necessary assembly tools. Supports LightBurn & LaserGRBL with simple .lbrn or .nc file export. Prefer offline? Just save your file to the TF card, insert, and start engraving via the control board. No complex setup required. If any steps are unclear, our online wiki (wiki.twotrees3d.com) provides video tutorials and FAQs.
| # | Project | Skills and material | Machine fit and challenge |
|---|---|---|---|
| 1 | Personalized key tag | Text, vector cut and hole placement; plywood, compatible acrylic or known laser-safe leather | Diode-friendly; check acrylic wavelength |
| 2 | Engraved coaster | Raster engraving, masking and cleanup; wood, slate or cork | Diode/CO₂; test for overburn |
| 3 | Plant marker | Repeated shapes and text; wood or acrylic | Diode-friendly; seal outdoor wood |
| 4 | Nameplate | Layout and alignment; wood, acrylic or anodized aluminum | Metal marking is source-dependent |
| 5 | Holiday ornament | Symmetry and hanging holes; plywood, cardstock or acrylic | Thin stock can warp or ignite |
| 6 | Bookmark | Fine cuts and decorative engraving; veneer, cardstock or leather | Diode-friendly; narrow parts scorch easily |
| 7 | Greeting card | Score-and-fold design; cardstock | Use a low-power score for folds |
| 8 | Fridge magnet | Small layout and adhesive backing; plywood or acrylic | Keep magnets out of the bed unless approved |
| 9 | Engraved ruler | Long-line layout and calibration; wood or acrylic | Check legibility after finishing |
| 10 | Photo engraving | Contrast, dithering and image preparation; wood, slate or coated metal | Results vary with image, focus and surface |
How to complete this level
Mask where cleanup matters, place the stock flat, frame the design, test one small area, then cut or engrave while watching the machine. Inspect pieces before removing them, peel masking, brush away debris and record the result. Upgrade any project by adding a second material or a controlled score line.
Level 2: early-intermediate projects
These projects introduce registration, multiple parts, simple joints and assembly order. Measure actual stock thickness instead of trusting the label.
| # | Project | Skills and material | Machine fit and risk |
|---|---|---|---|
| 11 | Two-piece phone stand | Slot design and assembly; plywood or MDF | Diode/CO₂; measure thickness |
| 12 | Interlocking coaster set | Repeated geometry and tab-and-slot joints; plywood or acrylic | Kerf becomes important |
| 13 | Layered wall sign | Registration, adhesive assembly and depth; plywood, veneer or acrylic | Mask before cutting |
| 14 | Gift box with lid | Box layout and lid fit; plywood or MDF | Test the lid first |
| 15 | Napkin holder | Symmetry and stability; plywood or acrylic | Consider grain direction |
| 16 | Simple puzzle | Nested shapes and controlled cuts; plywood or MDF | Monitor small pieces and flame |
| 17 | Desk organizer | Panels and assembly sequence; plywood or MDF | Label parts before removal |
| 18 | Leather patch or luggage tag | Leather handling and engraving; supplier-identified laser-safe leather | Confirm tanning and backing chemistry |
| 19 | Wall key holder | Components and hardware clearances; wood, acrylic and hooks | Attach hardware after checking fit |
| 20 | Stacking toy or shape sorter | Repetition and tolerance; unfinished wood | Do not claim child safety without addressing finishes, edges, small parts and regulations |
Trotec’s curriculum includes comparable foundational work such as puzzles, napkin holders, coasters, packaging and leather patches: https://www.mytrotec.com/us/edu-curriculum-guide/.
Level 3: intermediate projects
Here the process matters as much as the design: test kerf, plan alignment, control material behavior and document repeatable assembly.
Free tools Windows power users keep installed
One-click scans. No signup required.
Rank #2
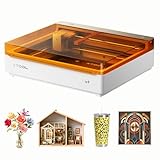
- NOTE: CMYK Inkjet module and RA3 Lite Rotary are not included in this M2 standalone, available separately as add-ons.
- Ultimate Versatility in One Machine: Innovative dual-mode architecture lets the M2 laser engraver add a CMYK Inkjet module((sold separately) to work with the laser. Transform 300+ materials—cardstock, felt, leather, wood, etc.—into masterpieces. Enjoy full-color printing (module required), precision cutting, and custom engraving with a seamless print-to-cut workflow in one setup.
- Smart Crafting with Dual-Camera: Built-in dual cameras, this M2 laser engraving machine offers a real-time preview of your workspace. Backed by ACS, it fuses this vision with motion control for a "Place & Go" experience-ensuring high accuracy while eliminating guesswork and wasted material.
- Effortless Software with Customizable Templates: Beginner-friendly xTool Studio offers hundreds of ready-to-use templates and an integrated AI image generator. Go from creative text ideas to finished personalized gifts and home decor in just minutes. No steep learning curve—just design, click, and create.
- Power Options for Every Creative Goal: Comes standard with 10W diode lasers. You can add the CMYK Inkjet module or 3W IR laser (both sold separately) to unlock full-color printing or fine engraving on metal/plastic. The M2 adapts to every project you imagine, from delicate engravings and high-speed batch cutting to full-color printing.
| # | Project | Skills and material | Machine fit and limitation |
|---|---|---|---|
| 21 | Finger-jointed storage box | Kerf compensation and joints; plywood or MDF | Test joints before final stock |
| 22 | Layered topographic map | Registration and finishing; plywood, veneer or acrylic | Large sheets magnify alignment error |
| 23 | Parametric living-hinge box | Flexible patterns and grain direction; plywood veneer | Test repeatedly; hinges can fail suddenly |
| 24 | Multi-layer lamp shade | Repeated panels and diffusion; veneer, plywood or laser-safe acrylic | Use low-heat lighting and prevent heat buildup |
| 25 | Shadow-box frame | Spacers, depth and light control; wood, cardstock or acrylic | Plan viewing angle and light bleed |
| 26 | Inlaid serving-board design | Inlay layout and finishing; wood, veneer and approved food-contact board | Food-contact material and finish require separate verification |
| 27 | Board-game insert | Batch cutting and compartments; plywood or MDF | Use only approved foam alternatives |
| 28 | Architectural model | Scale conversion and precision assembly; cardstock, chipboard or plywood | Dense sheets increase fire exposure |
| 29 | Miniature furniture | Small joints and detail; plywood, veneer or acrylic | Fragile parts need gentle deburring |
| 30 | Curved bottle or glass engraving jig | Rotary workflow and fixtures; compatible glass or coated bottles | Rotary support differs by machine |
Glowforge’s project library includes miniatures and miniature furniture, and Trotec documents architectural models, reliefs and display structures: https://glowforge.com/watch/projects and https://www.troteclaser.com/en-us/resources/laser-projects.
Level 4: advanced projects
Difficulty 4–5 reflects parametric design, mixed operations, curved or large work, tight tolerances and production control—not simply a more intricate picture.
| # | Project | Skills and material | Machine fit and limitation |
|---|---|---|---|
| 31 | Parametric press-fit box generator | Variables, automated layouts and tolerance tables; plywood or MDF | Validate every thickness |
| 32 | 3D layered relief map | Depth hierarchy, registration and finishing; plywood or veneer | More layers mean more alignment time |
| 33 | Lithophane or relief panel | Grayscale-to-depth conversion; compatible white or translucent stock | Verify machine and material first |
| 34 | Mechanical puzzle box | Hidden joints, sequencing and tight tolerances; plywood or veneer | Iterate and label every part |
| 35 | Multi-material illuminated sign | Acrylic, diffusion, wiring and assembly; wood, cast acrylic and LEDs | Isolate heat and electrical parts |
| 36 | Inlay or marquetry panel | Positive/negative fits and color planning; veneer, hardwood or acrylic | Compensate each material separately |
| 37 | Large-format layered wall art | Tiling, registration marks and panel joining; plywood, MDF or acrylic | Bed size and passthrough are decisive |
| 38 | Batch-produced product line | Jigs, quality control, packaging and cycle-time tracking | Track waste, rejects and finishing labor |
| 39 | Metal-marked personalized product | Surface preparation and source selection; stainless steel, aluminum, brass or coated metal | Blue diode, CO₂ and IR/fiber have different capabilities |
| 40 | Custom furniture or display structure | Design-to-production workflow, load planning and hardware; plywood, acrylic or hardwood | Many hobby lasers cannot process structural stock |
xTool distinguishes infrared processing for metals from blue-light processing for wood, acrylic, leather, glass, rock, paper and rubber: https://support.xtool.com/article/2246.
Kerf, fit and first-pass testing
Kerf is the width removed by the beam. It changes with beam profile, focus, material, thickness, speed, power and number of passes, so there is no universal kerf value.
Quick wins for a faster PC:
Fix the driver behind crashes, sound loss and screen glitchesFind Drivers →Clear out junk files and repair common Windows errorsFree Scan →Scan for outdated or missing drivers - takes under a minuteDriver Scan →Rank #3

- [Unbeatable Power & Productivity] With a powerful 40W (40,000mW) laser, this advanced laser cutter and engraver machine slices through 18mm cherry wood as easily as butter in a single pass. Engrave at blazing speeds up to 600mm/s on a spacious 23.93" x 15.16" bed—perfect for large projects like door signs or up to 119 dog tags in one go.
- [Exclusive xTool Patented Technologies] Achieve next-level precision on your precious items with the xTool S1 laser engraver, thanks to xTool’s patented Pin-point Positioning technology. Enjoy stunning 3D engravings on curved surfaces like spoons and plates. Effortlessly tackle projects up to 118 inches (3000mm) with AutoPassthrough Technology.
- [Your First Laser Engraver, Easier Than Ever] Ready to use right out of the box. Auto-focus and powerful, intuitive software—xTool Creative Space (XCS)—make it simple for anyone to start creating. We’ve pre-tested over 400 materials with optimal parameter settings; just preview, click, and engrave. No design skills? No problem—input a few words, and the AI-powered software will create a unique design for you. Plus, there are over 1,000 step-by-step project tutorials to guide you.
- [Class 1 Safety, Safe with Kids and Pets Around] The protective cover filters 99% of laser light, safeguarding your eyes without the need for goggles. The enclosed design blocks smoke and noise, ensuring a comfortable and secure workspace. Built-in 5 flame sensors automatically halt operation if a flame is detected. With an emergency stop button and a lid-open stop feature, you’re fully protected for peace of mind.
- [Premium Quality, Built to Last] This laser engraving machine has a 3mm aerospace-grade aluminum frame for exceptional stability and durability. xTool prioritizes quality with over 71,830 hours of rigorous testing, including laser tube aging, power stability, and extreme conditions. Every S1 unit undergoes 7 strict pre-shipment inspections and 100% scenario testing to ensure flawless performance.
- Cut a small comb, slot or joint test in the actual stock.
- Measure the result and decide whether the joint needs a press, glue or clearance fit.
- Adjust the drawing, not just the laser power.
- Recut the test and apply the validated compensation to the project.
Choose by goal, not appearance
- Learning: key tags, coasters, bookmarks, phone stands and puzzles.
- Home organization: boxes, organizers, key holders and board-game inserts.
- Gifts: ornaments, signs, engraved glass, leather tags and layered maps.
- School work: cards, plant markers, architectural models, puzzles and miniature furniture.
- Small business: personalized tags, ornaments, signs, packaging inserts and repeatable nameplates.
A sellable object needs more than visual appeal. Calculate material, machine time, finishing, packaging, design and customization labor, waste, failed pieces and repeatability. Confirm that designs are original or properly licensed, and do not make food-safe, child-safe or outdoor-durability claims without verifying the relevant materials, finishes and regulations.
When a job fails: diagnose one variable
Incomplete cut
Check thickness, flatness, focus, lens cleanliness, air assist, duplicated vectors and machine level. Test one changed variable on scrap. A second pass is safe only when registration is accurate; otherwise discard the piece rather than risk a shifted or burning rerun.
Excessive charring
Heat may be excessive because the pass is slow, airflow poor, masking heavy or stock resinous. Test a faster setting or fewer passes, improve approved air assist and clean only after confirming the material is safe.
Fire
Use the emergency stop and follow the machine’s fire procedure; keep the lid closed if the design requires it for oxygen control. If the fire is not immediately controlled, evacuate and call emergency services. Inspect and clean before restarting.
Do these 3 things before closing this tab:
1Clear out junk files and repair common Windows errors2Fix the driver behind crashes, sound loss and screen glitches3Repair Windows errors before they cause bigger problemsRank #4

- 【Custom Gifts & Crafts】 Create personalized cups, bags, wallets, signs, wood crafts, gifts, and more with this laser engraving machine. The 10W 10000mW laser delivers the power needed for detailed engraving across wood, coated metal, glass, leather, stone, and other compatible materials.
- 【Home DIY & Workshop Projects】 Designed for beginners and makers, this laser engraving machine features a 360° fully enclosed design that helps contain fumes, dust, and operating noise. Its five-part modular assembly simplifies setup without complicated belt adjustments, saving approximately 30–40 minutes.
- 【Detailed Designs & Fine Patterns】 For names, logos, text, artwork, and intricate patterns, this laser engraving machine uses advanced point-compression technology to achieve a fine 0.01mm square focus, producing sharp lines and crisp details.
- 【Faster Batch Engraving】 For personalized products and multiple custom pieces, the laser engraving machine reaches speeds of up to 20,000mm/min to help reduce engraving time and improve productivity. The 300×300mm work area also accommodates larger designs or multiple smaller items.
- 【Safer & More Flexible Operation】 For home, DIY, and workshop use, this laser engraving machine combines lid-open auto-stop, flame detection, emergency stop, safety lock, and 15° tilt-stop protection. It supports LightBurn, LaserGRBL, and CutLabX, with Wi-Fi, USB, APP, and TF-card offline control, plus optional Air Assist and Rotary Roller compatibility.
Blurry engraving
Recheck focus height, flatness, image contrast and dithering, raster interval, speed, grain and unintended image scaling.
Parts do not fit
Check actual thickness, kerf compensation, import scaling, grain, warp and whether the joint was designed as press-fit, glue-fit or clearance-fit. Never force a tight joint.
Build a personal material library
- Identify the exact material and supplier.
- Find a datasheet or manufacturer statement confirming laser compatibility.
- Check for chlorine, vinyl, unknown coatings and adhesives.
- Confirm machine-specific thickness guidance.
- Run a small grid and observe flame, smoke, melting, residue, edge and odor.
- Stop if behavior is unexpected, then record successful settings with the project file.
Manufacturer education can help with software and machine-specific workflows: https://support.xtool.com/academy. Official project generators and galleries are useful for adapting ideas, but compatibility still belongs to your machine and material: https://support.xtool.com/article/3248 and https://www.xtool.com/pages/gallery.
Quick Recap
Product prices and availability are accurate as of the date/time indicated and are subject to change. Any price and availability information displayed on Amazon at the time of purchase will apply.