Free tools Windows power users keep installed
One-click scans. No signup required.
A lasting flagstone patio starts with a stable, well-drained base—not with the stones. Plan where water will go, excavate for the full patio assembly, compact the base, and set each stone so it rests firmly without rocking. The nine steps below describe a dry-laid approach; exact base, bedding, and joint materials depend on the stone, soil, climate, intended use, and local requirements.
1. Plan the patio and its drainage
Measure the patio area and sketch its shape, nearby doors and paths, utility access, and a safe destination for runoff. Decide the finished surface elevation before digging. Grade the patio so water flows away from the house and does not collect in low spots or discharge where it could cause problems.
Oregon State University Extension’s general paver guide illustrates a downward fall and emphasizes accounting for the finished level when laying out excavation: 10-Step Guide to Installing Pavers. Iowa State University Extension and Outreach likewise discusses slope away from buildings in its older guidance for concrete pavers: Installing Concrete Pavers, Part Two. These are general paving examples, not a site-specific slope design for every flagstone patio; check local drainage requirements and conditions.
Before excavation, check the utility-marking requirements that apply where you live. Requirements vary by location, and the sources cited here do not establish one jurisdiction’s rules.
The Tool Desk
Outbyte PC Repair FREERepair Windows errors before they cause bigger problemsFix Now →Outbyte Driver Updater FREEScan for outdated or missing drivers - takes under a minuteDriver Scan →#1 Best Overall

- Premium Materials: 16oz Rubber mallet head is made of rubber, making it durable and able to withstand heavy use.
- Premium Hammer Head: rubber hammer is shockproof and wear-resistant, making it ideal for any job. Its double percussion surface is designed for long-term use, while its versatility makes it easier to use.
- Fiberglass Shock Absorbing Handle: PP+TPR handle can reduce vibration and damage to the arm, allowing for greater control during work.
- Firm Connection: Nonslip rubber grip is a directly integrated piece of the handle, ensuring it will never fall off.
- Widely Used: Rubber hammer is widely used for camping, flooring, tent stakes, woodworking, and soft blow tasks without damage, making it a great tool for any job.
2. Select stone and estimate the quantity
Choose flagstone based on the intended use, thickness, shape, surface finish, and joint style. Ask a local stone supplier which installation system they recommend for the specific stone. Measure the planned area and use the supplier’s stated coverage to estimate quantity. Irregular shapes and the planned layout affect how much cutting and waste to expect, so do not apply a generic paver overage as a guaranteed allowance.
Gather stakes and string, a level, rake, rubber mallet, and a hand tamper or plate compactor. For a larger patio, a plate compactor may be practical to rent. If the layout requires cuts, use suitable masonry cutting equipment and eye protection; avoid cutting until you have confirmed the tool is appropriate for the stone.
3. Mark the footprint and excavate
Mark the perimeter with stakes and string, then excavate deeply enough to fit the entire planned assembly: the flagstone thickness, bedding layer, and compacted aggregate base. Remove turf, roots, and other organic material, and prepare a consistent subgrade. Keep the planned drainage fall in mind as you establish the excavation depth.
Rank #2

- Durable rubber mallet hammer head for soft blow strike that doesn’t damage
- Extra strength fiberglass handle with shock absorption design
- Ergonomic non slip rubber grip
- Multi use rubber mallet for flooring, tent stakes, woodworking, jewelry, laminate, soft blow tasks, construction, auto work, carpentry
- Dimensions: 13" x 3 7/8" x 2 1/4" Weight: 1 Pound 9 Ounces
Oregon State’s guide gives a 4–6 inch aggregate base and about 1 inch of bedding sand as examples for its general paver method. Those figures are not universal flagstone specifications: required base depth varies with soil and use, and the stone supplier may call for a different assembly. Soft clay, heavier use, and other site conditions can change the design. Confirm the dimensions for your selected system before excavating.
Windows Errors? Fix Them Before They Spread
Repair common Windows errors and clear accumulated junk for a smoother, more stable PC - no reinstall needed.Free scan · no reinstallOutdated Drivers Are Slowing You Down
One free scan finds every outdated or missing driver and matches the right update for your exact hardware.Free scan · exact hardware match4. Build and compact the aggregate base
Use an aggregate suitable for the chosen patio system. Place it in manageable layers, compacting each layer before adding the next, and maintain the intended grade and drainage fall as you work. A hand tamper can be suitable for a small area; the Jordan Valley Water Conservancy District’s flagstone-chip path example notes that a plate compactor is practical for larger areas such as patios: Flagstone Chip Path Step by Step Installation.
Do not rely on a thick, loose layer to settle into place. Compaction helps create a firm, consistent foundation; adjust the base while it is accessible rather than trying to correct broad low spots after the stones are laid.
Rank #3
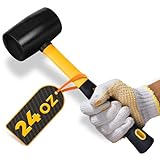
- 24 OZ = 1.5 LB = 680 G: Check the weight before you buy. This rubber mallet hammer weighs 24 oz (1.5 lb, 680 g), is 13 in long and has a 4.5 x 2.5 in head. A full-size mallet, not a light craft tool
- SOFT FACE RUBBER HAMMER: The solid black rubber head drives pavers, tiles and planks without dents or chips. On pale or glossy finishes, tap through a scrap block or cloth to avoid light rubber scuffs
- STEEL CORE HANDLE: A metal core inside the textured non-slip rubber grip gives a balanced swing and damps vibration. The hanging hole lets you store this mallet hammer on a pegboard or a hook
- WIDE USE: A rubber mallet for landscaping pavers, a rubber mallet for flooring and tile, rubber mallets for woodworking and furniture assembly, a rubber mallet for dorm bed lofting and camping
- MADE FOR SOFT BLOWS: A camping mallet for tent stakes, a flooring mallet and a woodworking mallet for joints. Not for splitting wood, striking steel wedges or prying, which can loosen the head
5. Install the perimeter restraint
Fit an appropriate edge restraint or designed perimeter detail to limit sideways movement. The right detail depends on the patio layout and the materials in the assembly. Oregon State’s paver guide explains that edging helps keep conventional pavers from moving apart. For flagstone, follow the supplier’s system guidance rather than assuming one type of edging suits every stone and site.
6. Prepare the bedding layer
Screed a consistent bedding layer compatible with the flagstone system. Its role is to let you adjust individual stones while supporting them evenly; it is not a substitute for a properly prepared base. Oregon State describes approximately 1 inch of bedding sand for its general paver method, but natural flagstone may call for different bedding material or instructions. Confirm the recommendation with the stone supplier before using sand.
7. Set, level, and stabilize the stones
Lay stones in small sections, keeping the planned pattern and joint widths in view. Adjust the bedding beneath each stone so it sits at the intended height and does not rock. Check alignment and height with a level across neighboring stones, tap stones into place with a rubber mallet, and test their stability by walking on them. The Jordan Valley Water Conservancy District’s path example demonstrates these adjustment and checking techniques; it is a useful installation example, not a complete engineered patio specification.
Rank #4

- 16oz Rubber mallet: Each pack comes with a 16oz rubber hammer that is shockproof, wear-resistant, and made for long term use while being versatile and easier to use making them ideal for any job.
- No Rebound Or Sparks: Soft, nonslip rubber grip is a directly integrated piece of the handle that can never pull loose.
- Made For Daily Use: The rubber mallet head is made of rubber,Exterior poly jacket protects handle core from missed strikes .
- Versatile and Multi-Purpose: Our multifunctional hammers use a double percussion surface design,Made for construction, woodworking, and automotive applications.
- Safe And Secure Grip: We designed this impact-absorbing hammer set with ergonomic handles that provide a safe, secure, and comfortable grip. They are non-slip and anti-skid so you can keep hammering away with peace of mind.
Reset any unstable stone by lifting it and correcting its support rather than packing material into a visible gap after the fact. Watch transitions at doors, paths, and edges so they are even and safe to walk across.
Independent reader supportYour contribution helps us test, update, and keep practical guides available for everyone.8. Fill the joints to suit the system
Choose joint material based on the stone system, desired appearance, drainage objective, and maintenance preference. Options are not interchangeable by default: the Jordan Valley flagstone-chip path example uses topsoil in joints, while Oregon State’s general paver guide describes sand. Use the material recommended for your patio rather than treating either example as a universal rule.
Permeable paving also depends on the whole assembly and the site, not just the material between stones. Snohomish County lists flagstone among permeable paving options and notes that many systems need an appropriately deep, free-draining gravel base and sometimes non-woven fabric; it also points to design restrictions: Permeable Paving Options. Check whether infiltration is suitable for your site and whether local design requirements apply.
Best Value
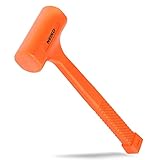
- DEADBLOW: The 2 lb hammer steel shot filled head adds extra force to hammer blows and eliminates rebound & spark, ideal for auto body work.
- HIGH IMPACT COVER: Unicast poly molded body prevents hammer from wearing away between the head and handle. Material prevents sparks upon impact.
- VERSATILE IN USE: This bright color Neiko 02847a 2 lb dead blow hammer makes it easy to locate and differentiate between other hammers in your tool kit. Use for automotive work, woodworking, sheet metal forming and other work.
- COMFORT GRIP: Our 2 lb dead blow hammer set has a diamond textured non-slip handle grip to help comfortably keep the hammer in your hands after impact.
- SPECS: Dead blow mallet dimensions: 2-1/8" x 3-7/8" Head, overall Length: 13-3/8"; 2-Pound Head
9. Inspect, clean, and maintain
Walk the patio and check for rocking stones, uneven transitions, loose joints, and water pooling. Reset unstable stones and address drainage problems rather than accepting recurring puddles. Clean the surface using a method appropriate for the stone and joint material. Sweep routinely and replenish or repair joints as needed; the frequency and materials depend on the system and site.
Choosing a dry-laid or permeable approach
Dry-laid describes an installation method, not a guarantee that rainwater will infiltrate into the soil. Drainage and permeability depend on the base, bedding, joints, soil, and site design working together. A permeable system may require a specifically designed free-draining gravel base and may not suit every location. Confirm the complete assembly and any local restrictions before choosing materials.
Quick Recap
Product prices and availability are accurate as of the date/time indicated and are subject to change. Any price and availability information displayed on Amazon at the time of purchase will apply.