Some links on this page are affiliate links: if you buy through them we may earn a commission, at no extra cost to you.
A good wood fence starts long before the first post hole. The work that determines whether a fence stays straight is the unglamorous part: confirming the property line, checking local rules, calling 811, setting a clean layout, choosing the right post material, and keeping water away from the wood.
For a typical 6-foot wood privacy fence in the U.S., installed pricing in 2026 commonly lands around $20 to $50 per linear foot, with many contractor-priced privacy fences falling closer to $33 to $53 per linear foot. Material-only budgets often run about $10 to $30 per linear foot before tools, delivery, waste, concrete, hardware, stain, and rework. A simple short run on level ground can be a reasonable DIY project. A long fence with slopes, gates, tight property lines, pools, frost-depth requirements, or high wind exposure is usually worth hiring out.
As an Amazon Associate I earn from qualifying purchases.
On our job sites, we treat fence building as layout and post work first, carpentry second. Rails and pickets are forgiving. Bad post placement is not. This guide walks through the full sequence so you can build a wood fence that looks clean on day one and does not start leaning after the first hard season.
Start With the Fence Plan, Not the Lumber Order
Before you price pickets or rent an auger, decide exactly what the fence needs to do. A privacy fence, a front-yard picket fence, a pool barrier, and a decorative garden enclosure all have different rules and construction details.
#1 Best Overall

- This level has a magnetic strip and a rubber strap for convenient hands-free installation of posts, railings, pipes, and more
- Allows you to plumb and level posts, poles, pipes, railings and more
- Molded frame is durable in all conditions
- Durable molded frame
Common wood fence styles include 6-foot dog-ear privacy fencing, board-on-board fencing, shadowbox fencing, horizontal fencing, picket fencing, post-and-rail fencing, split-rail fencing, and lattice-top privacy fencing. A basic dog-ear privacy fence is usually the most straightforward. Board-on-board gives better privacy as boards shrink, but it is heavier and catches more wind. Shadowbox looks finished from both sides but uses more material than a single-face privacy fence. Horizontal fences can look sharp, but they demand straighter lumber, tighter layout, and better post alignment.
Measure the full fence run in linear feet, then sketch the corners, gates, grade changes, trees, hardscape, utility boxes, drainage swales, and neighbor tie-ins. Mark where people actually need to pass through. A 36-inch pedestrian gate is common, but 42 inches feels better for yard equipment. Double gates often need 8 to 12 feet of clear opening for trailers, mowers, or service access.
The Tool Desk
Outbyte PC Repair FREEClear out junk files and repair common Windows errorsFree Scan →Outbyte Driver Updater FREEScan for outdated or missing drivers - takes under a minuteDriver Scan →Do not assume the old fence is on the legal boundary. We have seen existing fences wander several inches, and sometimes several feet, off the actual line. If the property line is uncertain, use a current survey or hire a surveyor before you build. Moving a finished fence is far more expensive than slowing down for the layout.
Check Permits, HOA Rules, Easements, and Utility Locates
Fence rules are local. Many cities allow backyard fences up to a certain height with minimal review, but front yards, corner lots, alleys, pools, retaining walls, and visibility triangles can trigger stricter requirements. Some jurisdictions require permits for fences above a height threshold. Others regulate material, opacity, setbacks, or how close a fence can be to a sidewalk or driveway. HOA rules may control style, color, height, and which side faces outward.
Before digging, call 811. The locate request is free nationwide, and most states require the request 2 to 3 business days before excavation. Photograph the utility marks, the locate ticket, permit approval, HOA approval, and property-line references before work starts. Those photos are useful if a neighbor questions the line later or if a utility mark gets disturbed during construction.
Hand-dig near marked utilities. An auger can tear through irrigation, low-voltage lighting, gas service, communications lines, and electric service before the operator has time to react. Utility locating does not make digging risk-free; it gives you the information needed to dig carefully.
Crashes, No Sound, or Screen Glitches?
Random freezes, missing sound and display glitches usually trace back to one bad driver. Find and replace yours safely.Free scan · under a minutePC Slower Than It Used to Be?
A free scan shows the junk files, broken settings and background clutter dragging Windows down - then fixes them in one click.Free scan · Windows 10 & 11Wood Fence Cost in 2026
Wood fence pricing varies heavily by region, height, wood species, soil, access, gate count, and whether an old fence must be removed. For planning, use a range instead of a single number.
| Fence type or scope | Typical 2026 cost range | What drives the price |
|---|---|---|
| Basic wood fence materials | $10 to $30 per linear foot | Posts, rails, pickets, fasteners, concrete, caps, waste, delivery |
| Installed wood picket fence | $20 to $40 per linear foot | Lower height, spaced pickets, fewer materials than privacy fencing |
| Installed 6-foot wood privacy fence | Commonly $33 to $53 per linear foot | More lumber, deeper posts, more labor, heavier gates |
| Premium hardwood privacy fence | $35 to $55 per linear foot or more | Species cost, specialty fasteners, layout precision, finishing |
| Whole-project national fence averages | About $1,860 to $4,841 across materials | Project size, material type, local labor, terrain, removal |
Retail material prices change by location, but 2026 browsing showed pressure-treated dog-ear pickets around $2.87 to $3.48 each, cedar dog-ear pickets around $3.58 to $4.18 each, and a 4x4x10 pressure-treated post listed around $13.99 from one fence supplier. Those numbers are helpful for rough estimating, but they are not a complete DIY budget.
A real DIY budget also includes 2×4 rails, ground-contact-rated posts, concrete or gravel, exterior-rated screws or ring-shank nails, gate hinges, latches, post caps, stain or sealer, string line, stakes, layout paint, tool rental, delivery, and extra material. Add waste for cuts, warped boards, mistakes, and sorting. For pickets, 5% to 10% extra is a sensible starting point. For long runs, gates, or horizontal designs, the waste factor can climb.
Rank #2

- Hands-Free Strip Magnets: Strip magnets lock the level onto steel posts and pull flat to the surface.
- Plumb + Level, Two Axes at Once: Wraps a post, pipe, or pole. Reads plumb on two perpendicular axes simultaneously so the buyer sets one tool instead of two.
- Elastic Strap for Non-Steel Surfaces: Elastic strap holds the level on wood, vinyl, or composite posts where the magnets have nothing to pull against.
- Two-Axis Plumb Read: Both plumb vials read at the same time. Set the face of the post and the side of the post in one wrap; rotate the level to check the third axis.
Choose the Right Wood, Posts, and Fasteners
The best fence material depends on climate, budget, appearance, and maintenance expectations. Pressure-treated pine is common because it is widely available and cost-effective. Cedar is popular in wet or insect-prone regions because it is naturally decay resistant above ground and tends to move less than lower-grade treated pine. Redwood is durable and attractive where available, but cost and supply vary by market. Tropical hardwoods can last, but they are expensive, dense, and harder on tools.
For buried wood posts, use ground-contact-rated pressure-treated material. The common treatment category to look for is UC4A for general-use wood in contact with ground or fresh water, including fence posts. Above-ground-rated lumber does not belong in a post hole. If a supplier cannot tell you the treatment rating, choose another product.
For a 6-foot privacy fence, many crews use 4×4 posts for standard line posts and upgrade to 6×6 posts for gates, corners, tall fences, exposed locations, or premium builds. Corner, end, and gate posts carry more load than line posts. Gates twist and pull every time they open. Board-on-board fences are heavier and catch more wind. In soft soil or high-wind areas, closer post spacing, deeper footings, larger posts, or steel-post systems can be the difference between a fence that stays put and one that racks out of plane.
Use fasteners compatible with treated lumber and exterior exposure. Hot-dip galvanized or stainless fasteners are common choices, depending on the wood treatment and environment. Avoid indoor screws, drywall screws, and light electroplated fasteners. They corrode, stain the wood, and fail early. Near coastal air or corrosive conditions, stainless hardware may be worth the added cost.
Tools and Materials You Will Need
For a standard wood privacy fence, plan on layout stakes, mason’s line, tape measure, marking paint, a level, post-hole digger or auger, digging bar, shovel, wheelbarrow or mixing tub, circular saw or miter saw, drill or impact driver, nailer if using one, clamps, spacer blocks, a story pole, and safety gear.
What’s actually slowing this PC down?
Pick the symptom - the matching free tool is one click away.
The core materials are posts, rails, pickets, concrete or compacted drainage gravel, exterior fasteners, gate frames or framing lumber, hinges, latches, drop rods for double gates, post caps, and stain or sealer. For a 6-foot privacy fence, a typical section might use posts spaced 6 to 8 feet on center, two or three horizontal 2×4 rails, and vertical pickets kept slightly off the soil. Three rails are often better for a 6-foot fence because they reduce picket movement and make the fence feel more solid.
Build simple jigs before you start installing boards. A spacer block keeps picket gaps consistent. A story pole marks rail heights so every section matches. A cut block helps set pickets above grade. These small controls make the final fence look like one continuous build instead of a series of improvised panels.
Layout the Fence Line Carefully
Set corner stakes first, then run tight string lines to represent the fence face. Square the layout where needed and check diagonal measurements for rectangular areas. If one diagonal is longer than the other, the layout is out of square. Adjust before digging.
Mark post centers along the string. For most wood privacy fences, 6 to 8 feet on center is common. Use closer spacing for high-wind locations, heavy board-on-board styles, soft soils, or horizontal boards that need more support. Do not let convenience decide spacing. A fence with random bay widths is harder to frame, harder to repair, and usually looks off.
Rank #3

- Strip magnets and rubber strap for hands-free work
- Constructed of high impact composite material
- Reflective backing increases vial visibility
- This tool is used to level and plumb posts, flagpoles, water pipes, railings and decks
- Recommended for heavy duty use
Think through how the fence will meet the ground. Pickets should not sit directly on soil. Leaving about 2 inches of clearance helps reduce moisture wicking and rot. In areas with mulch, irrigation spray, or poor drainage, more clearance may be wise. For pets, you may need a separate bottom detail, but burying untreated pickets into wet soil is not a good solution.
Dig and Set Fence Posts
Post holes do the structural work. A common rule of thumb is to bury about one-third of the total post length. For many 6-foot fences, that means holes around 30 to 36 inches deep. In frost climates, local frost depth can control, and deeper footings may be required. If your area has a 42-inch frost depth, a 30-inch hole is not enough just because it worked somewhere warmer.
Hole diameter depends on post size, soil, and wind exposure, but a typical 4×4 post often gets a hole around 10 to 12 inches wide. Gate posts and corner posts may need larger holes. Bell the bottom slightly in loose soil when appropriate, and clean loose dirt from the hole before setting the post.
Many wood fence posts are set in concrete, especially privacy fences and gates. Some builders use compacted gravel at the bottom for drainage, then concrete around the post. In certain soils and climates, gravel-packed posts are used, but they require proper compaction and are less forgiving for homeowners. The main point is water management: do not create a post base that traps moisture against the wood indefinitely.
Free tools Windows power users keep installed
One-click scans. No signup required.
Set corner, end, and gate posts first. Plumb them in both directions, brace them, and verify alignment against the string. For long runs, we prefer setting posts and letting them cure before loading the fence with rails and pickets. Concrete cure times vary, but waiting at least 24 to 48 hours before heavy loading is a practical minimum for many residential builds. Follow the concrete manufacturer’s instructions and adjust for temperature and moisture.
Install Rails, Pickets, and Panels
Once the posts are firm, mark rail heights with a story pole. For a 6-foot privacy fence, three rails are common: one near the top, one near the bottom, and one centered between them. Keep the bottom rail high enough to avoid constant splashback and trapped leaves. Fasten rails securely to posts with compatible exterior screws or approved nails.
Sort pickets before installation. Put the straightest, best-looking boards in the most visible runs. Use warped, cracked, or mismatched boards for cuts, short returns, less visible areas, or reject them if they compromise the work. This sorting step saves frustration and improves the finished appearance.
Use a spacer block or jig for consistent gaps. Even privacy fence boards need a plan because wood expands, shrinks, cups, and dries. If boards are installed wet and tight, they may open gaps as they dry. If installed too widely, privacy suffers from day one. Your local lumber moisture and fence style should guide the exact spacing.
For a dog-ear fence, set a consistent top line unless the grade forces another choice. Snap a chalk line or use a temporary guide board if needed. For a stepped fence on a slope, each panel stays level and drops at each post. For a racked fence, the rails and pickets follow the grade more continuously. Stepped layouts suit steeper grades and panelized styles. Racked layouts often look smoother on moderate slopes and maintain better bottom clearance, but they require careful planning. Do not improvise slope transitions panel by panel without a visual plan.
Rank #4
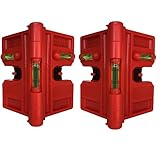
- For simultaneously determining the horizontal and vertical plane for posts, pipes, flag poles, railings.
- Foldable Design, Save time by quickly aligning ceiling joists for rafters.
- Includes three spirit level vials providing incomparable accuracy.
- With 4 magnetic strip and a elastic band for convenient hands-free install.
- Made of PVC for impact resistance. Package Includes: 2 Pack Foldable Post Level
Build Gates That Do Not Sag
Most fence problems show up at gates first. A gate concentrates movement, weight, and user abuse in one place. Use stronger posts than the surrounding line when the opening is wide or the fence is tall. A 6×6 post is often a better choice for gate openings, corners, and heavy designs.
Keep gate framing square and add diagonal bracing. The brace should transfer load from the latch side down toward the hinge side, depending on the brace style and hardware. Use heavy exterior-rated hinges sized for the gate weight, and mount them in plane so the gate does not bind. Leave enough latch clearance for seasonal wood movement. A gate that closes perfectly on a dry installation day may swell or shift after rain.
For double gates, plan for a center stop, cane bolt or drop rod, and enough ground clearance for the swing path. If the driveway or yard slopes across the opening, draw the gate swing before you build. A gate that drags six inches into its travel is not a hardware problem; it is a planning problem.
Quick wins for a faster PC:
Fix the driver behind crashes, sound loss and screen glitchesFind Drivers →Repair Windows errors before they cause bigger problemsFix Now →Trim, Cap, Seal, and Maintain the Fence
After the pickets are installed, trim uneven tops if the design calls for a straight line. Add post caps to reduce water entry at the end grain. Seal cut ends where appropriate, especially on treated posts and rails. End grain absorbs water quickly, and exposed cuts are one of the first places decay starts.
Let wet pressure-treated lumber dry before staining unless the coating manufacturer allows application to damp wood. Drying time can range from a few weeks to several months depending on weather, lumber moisture, and sun exposure. Cedar and redwood also benefit from proper finishing if you want to slow graying and checking.
Most wood fences need staining or sealing every 2 to 3 years, though harsh sun, coastal air, heavy shade, sprinklers, and freeze-thaw cycles can shorten that interval. Keep mulch and soil off the pickets. Redirect sprinklers that hit the fence every day. Trim vines and dense shrubs that trap moisture. Maintenance is not just cosmetic; it is part of the structure’s service life.
Independent reader supportYour contribution helps us test, update, and keep practical guides available for everyone.Common Mistakes That Shorten Fence Life
The biggest mistakes are usually made before the fence looks like a fence. Skipping 811, trusting an old fence line, ignoring permits, buying materials before checking HOA rules, and failing to plan gates can all turn a simple project into a dispute or rebuild.
Do these 3 things before closing this tab:
1Scan for outdated or missing drivers - takes under a minute2Repair Windows errors before they cause bigger problems3Fix the driver behind crashes, sound loss and screen glitchesConstruction mistakes are just as costly: shallow posts, no frost-depth consideration, above-ground-rated wood in post holes, indoor fasteners, pickets touching soil, inconsistent post spacing, weak gate posts, and slope transitions that were never drawn out. Another common issue is rushing rails and pickets onto posts before the concrete has cured enough to hold alignment. Once the run is loaded, small post errors become visible.
On our crews, we would rather spend another hour on string lines, post centers, and gate math than spend a full day correcting a crooked run. Fence work rewards patience at the beginning.
Best Value

- Set of 4 Magnetic Post Levels: each package includes 4 Magnetic post levels for pipes; The post level utilized for simultaneous determination of the horizontal and vertical planes, fast alignment to save time; This set equips you with extra levels for multiple projects or replacements when necessary
- Magnetic Edge for Secure Positioning: the post leveler tool comes with 4 powerful magnets which allows for secure positioning on metal surfaces; This helps in preventing the level from falling from high places while working, enhancing safety and precision
- Precision Measurement with 3 Vials: the post and pipe level features 3 vials, providing high precision in measurements; It is an ideal tool for leveling posts, poles, pipes, railings, flagpoles, and decks, offering comprehensive utilities for your versatile needs
- Extensive Uses: our magnetic post level is designed for decorative, home, and related alignment work, making it suitable for carpentry and personal woodworking; Plus, it allows you to erect straight posts for decks with ease
- Adjustable Elastic Band Design: the pipe level has 4 magnetic strips and an rubber band with an adjustable elastic design that fits most poles of different thicknesses; This makes it convenient for simple installation of posts, railings, pipes, and more
When to DIY and When to Hire a Pro
DIY makes sense when the fence is short, the ground is mostly level, the property line is clear, the design is simple, and there are only one or two basic gates. A homeowner with solid carpentry habits can build a straight run of dog-ear or picket fencing with rented tools and careful layout.
Hire a professional for long runs, hard clay or rocky digging, steep slopes, multiple gates, tight urban lots, shared boundaries, pool barriers, retaining-wall adjacency, corner-lot visibility concerns, high wind exposure, or commercial-facing work. A professional is also worth considering when documentation, warranty, and code compliance matter. Labor is not just paying someone to nail boards; it is paying for layout judgment, production speed, post-setting accuracy, and problem-solving when the site does not match the sketch.
Recommended Free Tools
If you are on the fence between DIY and hiring out, price both honestly. Include tool rental, delivery, dump fees, concrete, fasteners, stain, extra lumber, and your time. If the professional quote is $40 per linear foot and your true DIY cost is $24 per linear foot before two weekends of labor, the savings may still be worthwhile. If the site includes slopes, gates, utilities, and hard digging, the gap can close quickly.
Step-by-Step Wood Fence Build Sequence
Use this sequence for a typical wood fence project:
- Confirm the property line with a survey or reliable property documentation.
- Check city, county, HOA, easement, pool, and corner-lot rules.
- Call 811 and wait for utility marks before digging.
- Photograph approvals, utility marks, and property-line references.
- Mark corners, pull string lines, square the layout, and verify diagonals where needed.
- Mark post centers, usually 6 to 8 feet on center for standard privacy fencing.
- Dig holes to the required depth, commonly 30 to 36 inches for many 6-foot fences, or deeper where frost depth controls.
- Set corner, end, and gate posts first; use larger posts where loads are higher.
- Set line posts, brace them plumb, and allow concrete to cure before loading the run.
- Mark rail heights with a story pole and install rails.
- Sort pickets, then fasten them with consistent spacing and ground clearance.
- Build and hang gates with proper bracing, hinges, latch clearance, and stops.
- Trim tops, cap posts, seal cut ends, and stain or seal when the wood is ready.
A wood fence is a straightforward structure, but it is not casual work. The difference between a fence that lasts and a fence that leans is usually found in the first third of the job: layout, post depth, drainage, material rating, and gate planning. Get those right, and the visible carpentry has a solid chance to age well.
Frequently Asked Questions
How much does it cost to build a wood fence in 2026?
Installed wood fencing commonly runs about $20 to $50 per linear foot in the U.S. A 6-foot wood privacy fence is often closer to $33 to $53 per linear foot. Material-only planning ranges are commonly about $10 to $30 per linear foot before tools, delivery, hardware, stain, waste, and labor.
Crashes, No Sound, or Screen Glitches?
Random freezes, missing sound and display glitches usually trace back to one bad driver. Find and replace yours safely.Free scan · under a minutePC Slower Than It Used to Be?
A free scan shows the junk files, broken settings and background clutter dragging Windows down - then fixes them in one click.Free scan · Windows 10 & 11Do I need a permit to build a wood fence?
It depends on your city, county, HOA, fence height, location, and use. Front-yard fences, corner lots, pool barriers, retaining-wall areas, and fences near sidewalks or driveways often have stricter rules. Check local requirements before buying materials.
How deep should wood fence posts be?
A common rule of thumb is to bury about one-third of the total post length. For many 6-foot fences, post holes are around 30 to 36 inches deep. In cold climates, local frost depth may require deeper footings.
How far apart should wood fence posts be?
Most wood privacy fence posts are spaced 6 to 8 feet on center. Use closer spacing for high-wind areas, heavy board-on-board fences, soft soils, horizontal designs, and other higher-load conditions.
What is the best wood for a fence?
Pressure-treated pine is budget-friendly and widely available. Cedar is a strong choice for appearance and natural decay resistance above ground. Redwood is durable where available but often costs more. Buried posts should be ground-contact-rated pressure-treated wood, commonly UC4A for general ground-contact use.
How long does a wood fence last?
Service life depends on wood species, post treatment, drainage, fasteners, climate, and maintenance. Keeping pickets off soil, using compatible exterior fasteners, sealing cut ends, maintaining airflow, and staining or sealing every 2 to 3 years can significantly extend the life of the fence.
Quick Recap
Product prices and availability are accurate as of the date/time indicated and are subject to change. Any price and availability information displayed on Amazon at the time of purchase will apply.

