To get a more consistent color on pine, sand it evenly, test your full finishing schedule on representative scrap, then use gel stain or partially seal the wood with conditioner or a washcoat before applying liquid stain. For a darker, layered result, WOOD Magazine describes a dye–sealer–pigmented-stain sequence. None guarantees identical color across every board: pine’s growth rings absorb stain differently.
Why pine takes stain unevenly
Pine’s softer, less-dense earlywood can absorb stain more readily than its denser latewood, creating dark and light patches. Resin can also inhibit pigment absorption. As WOOD Magazine puts it, “However, that soft earlywood acts like a stain sponge, leaving behind a blotchy surface.”
The grain itself contributes to contrast, so reducing blotches does not necessarily make the growth rings disappear. The best approach depends on whether you prioritize a simpler process, a lighter color, or greater control over a darker finish.
Choose a method for the result you want
| Method | Why use it | Tradeoffs and technique |
|---|---|---|
| Gel stain | Its thicker consistency can limit penetration and reduce blotching compared with liquid stain. | Growth-ring contrast can remain. If the stain has separated, mix the liquid from the top back into the gel. Apply evenly, leave it for the time stated on the product label, then wipe off surplus with the grain. WOOD Magazine says the dwell is usually about three minutes, but the label for your product takes precedence. |
| Conditioner or washcoat, then liquid stain | Partially seals the most absorbent areas so liquid stain can penetrate more evenly. | The finished color may be lighter because less pigment lodges in the wood. Experiment on scrap. WOOD Magazine’s washcoat guidance gives overnight drying for an oil-based washcoat and three hours for a water-based washcoat; follow the specific product directions. |
| Dye, sealer, then pigmented stain | Builds color in layers and offers more control over shade and darkness. | It takes more steps and calls for careful, even sanding and sealing. Use the sequence below and test it before finishing the project. |
| Gel stain over a film finish | Can help conceal residual blotching after a base finish is in place. | This is a glazing approach, not a substitute for preparing bare pine. Apply evenly and confirm compatibility with the existing and planned finish products. |
Prepare pine and test before staining
- Sand evenly. WOOD Magazine’s pine-specific advice uses 180-grit sandpaper. Its broader blotch-prevention guidance specifies 180 grit on face grain and 220 grit on end grain, with a hand-sanding pass in the direction of the grain after random-orbit sanding.
- Check for sanding defects. Inspect the surface under angled light for scratches and swirl marks. WOOD Magazine recommends wiping with mineral spirits to reveal defects; check compatibility and follow safe-handling directions for any solvent you use.
- Make representative samples. Use the same stock and sanding steps as the project, and test the complete finish schedule, including the topcoat. If the project combines plywood and solid wood, test each separately because their results may differ.
- Apply the chosen method as directed. Follow the product label for application, dwell time, drying, cleanup, and compatibility with the next finish layer.
WOOD Magazine’s layered method for darker pine
This sequence uses dye for the base color, then a sealer and pigmented stain to build and adjust the result. Test the complete schedule on scrap first.
#1 Best Overall

- THICK, NO-DRIP FORMULA: Less mess than traditional wood stains and applies smoothly on horizontal and vertical surfaces including wood, metal, fiberglass and more
- LOW ODOR, WATER BASED GEL STAIN: Comfortably complete projects indoors including furniture, doors, trim and banisters
- FAST DRY TIME: Dries on wood in only 1 hour for quick project completion
- RICH, EVEN COLOR: Covers up to 250 square feet per quart
- INTERIOR AND EXTERIOR USE: Ideal for indoor and outdoor applications; not recommended for floors, decks or siding
- Sand the project to 180 grit.
- Dampen one surface at a time with a cloth so moisture reaches just beneath the surface, then immediately wipe it dry.
- Apply dye in the desired shade and let it dry overnight.
- Lightly sand with 220 grit to remove nibs, then wipe the surface clean.
- Seal with either half-pound-cut shellac or varnish thinned 75 percent with mineral spirits.
- Hand-sand the sealer evenly with 220 grit.
- Apply a pigmented stain close to the dye in color and darkness. If you want a darker result, repeat the sealer-and-stain combination.
- Cover the final stain with a clear finish.
Follow product directions for the materials you select, including drying and compatibility requirements.
Quick Recap
Best Value

- THICK, NO-DRIP FORMULA: Less mess than traditional wood stains and applies smoothly on horizontal and vertical surfaces including wood, metal, fiberglass and more
- LOW ODOR, WATER BASED GEL STAIN: Comfortably complete projects indoors including furniture, doors, trim and banisters
- FAST DRY TIME: Dries on wood in only 1 hour for quick project completion
- RICH, EVEN COLOR: Covers up to 250 square feet per quart
- INTERIOR AND EXTERIOR USE: Ideal for indoor and outdoor applications; not recommended for floors, decks or siding
Rank #4
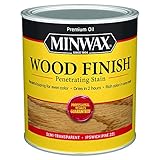
- RICH EVEN COLOR – Minwax Wood Finish is a deep penetrating, oil-based wood stain that provides beautiful color and enhances the natural wood grain in one coat. It’s perfect for interior staining projects such as wood furniture, cabinets, doors and more.
- QUICK DRYING – Staining interior wood has never been quicker. The special formula allows it to deeply penetrate wood pores within 5 minutes of application, resists lapping, and dries in two hours, making all your wood projects quick, beautiful and easy.
- EASY TO APPLY – Use a clean cloth or wood stain brush to apply this wood stain in the direction of the grain. Wait 5-15 minutes and wipe away excess stain. The longer you wait, the darker/richer the color. Reapply coats for deeper color.
- IPSWICH PINE WOOD STAIN – This natural wood stain provides a beautiful, light pine color. The light wood stain lets the natural beauty of the wood shine through, and it’s great for a wide variety of wood types.
- A BRAND YOU CAN TRUST – Minwax is America’s leading brand of wood finishing and wood care projects. Since 1904, we have been inspiring consumers to Keep on Finishing. We offer consumers a complete line of products to meet every wood finishing need.
Rank #3

- Ideal for use on all interior wood projects: furniture, cabinets, doors, trim and paneling
- One-coat coverage, fast-drying oil based formula
- Dries to the touch in just 1 hour and covers up to 70 square feet
- High performance stain system enhanced with nano pigment particles
- Highlights natural wood grain to reveal wood's beauty
Rank #2

- EFFECTIVE ON ALL WOOD SURFACES and QUICK DRYING: Furniture Clinic Wood Stain is a fast drying and highly concentrated wood stain making it effective on all indoor and outdoor wood surfaces. Our wood stain provides excellent coverage and ensures even color penetration. It's water based, environmentally friendly, and dries to a natural matte finish in only 10 minutes.
- COMES IN 12 COLORS - VISIBLE WITH ONE COAT: Our wood stain comes in 12 colors ranging from dark to light and can be purchased in multiple sizes. It evenly covers and stains wood in one coat, restoring old and tired wood with a new finish.
- COVERAGE: Available in three sizes to suit your needs, our 250ml bottle covers 3m², our 500ml bottle covers 6m², and our 2500ml (or 1 gallon) bottle covers 30m², making it easy to choose the right amount for your project.
- WATER BASED and SAFE TO USE: The water based formula of our stain is safer for your wood and the environment than other wood stains. It's low odor, non-toxic, easy to use, and easy to clean up! Ideal for use on all interior wood projects: furniture, cabinets, doors, trim, floors and more.
- USE IN COMBINATION WITH: After staining wood, you should finish the job by sealing the stain in with one of our Furniture Clinic Wood Waxes, Wood Varnishes or Wood Oils. These will bring out the color of the stain further, provide additional protection and can be used to alter the finish to either satin or gloss.
How to choose between the approaches
- For a simpler way to reduce blotching: try gel stain, while expecting that the rings may still contrast.
- For liquid stain: use a conditioner or washcoat to moderate absorption, and account for the possibility of a lighter color.
- For more control over a darker shade: use the layered dye, sealer, and pigmented-stain sequence.
- For any method: let a sample made from the project’s actual materials guide the choice; stain color and consistency are difficult to judge from the product label alone.
Product prices and availability are accurate as of the date/time indicated and are subject to change. Any price and availability information displayed on Amazon at the time of purchase will apply.