What’s actually slowing this PC down?
Pick the symptom - the matching free tool is one click away.
There is no universal best workbench height. For a general-purpose standing woodworking bench, start by measuring from the floor to your wrist or approximately the first thumb knuckle while standing naturally with your arms relaxed. Use that measurement for the finished top of the bench, then adjust it lower for heavy planing and chopping or raise the work for joinery, carving, and other close-detail operations.
This is a starting point, not a fixed standard. Your body proportions, footwear, floor surface, vise, workpiece thickness, and most common task all change the height at which your hands actually work. WOOD Magazine and Fine Woodworking both treat wrist or thumb-knuckle height as a useful personal reference rather than a universal answer.
As an Amazon Associate I earn from qualifying purchases.
Measure your own workbench height first
The woodworking rule of thumb is literal:
- Put on the shoes you normally wear in the shop and stand on the actual floor or shop mat.
- Stand upright without stretching, leaning, or lifting your shoulders.
- Let your arms hang naturally at your sides.
- Measure vertically from the floor to approximately the first thumb knuckle. You can also use the wrist crease, palm, or shirt-cuff height, as several woodworking references do.
- Use that measurement as the height of the finished, uppermost workbench surface.
WOOD Magazine uses the first thumb knuckle, while Fine Woodworking and Woodcraft refer to wrist, palm, or cuff-level landmarks. These landmarks are related, but they are not identical. Choose one method, identify the landmark consistently, and test the result before cutting your legs.
Measure to the top, not to the legs
If your target finished height is 35 inches and the benchtop is 3 inches thick, the supporting frame must place the top of that benchtop at 35 inches. Do not measure to the lower edge of the top, the apron, or the bottom of the vise. Account for replaceable tops, feet, leveling hardware, and any permanent surface covering.
#1 Best Overall

- [Save time] Pre-installed and structures without driling save your installation time easily. Detailed instructions come with the package. We also provide a detailed assembly video on this page. Customize your workbenches for garage, office, home, commercial, and Woodworking Shop.
- [Space-saving & Easy Storage] You can secure the Metal Storage Shelf under Tabletop to any metal hole on the legs, providing 13.4-inch of adjustable space and allowing you to customize the storage space underneath. The No Drilling Pegboard mounted on the workbench increases storage space and avoids wall damage. When you need to use the garage workbench away from the wall, the pegboard can move with it without additional setup.
- [Safely focus on creation] ETL Certification Built-in Power Strip with buttons and convenient access to power tools. There are 4 AC outlets, 2 USB-A ports on the power strip with 6.5 FT cables. And the socket is ETL-certified for safety and durability. The LED Lighting fixed on the pegboard provides ample illumination for you in the dark, allowing you to enjoy focused moments anytime.
- [Durability] The Max Load 2000 LBS Heavy Duty Rubberwood Tabletop is designed with an H-shaped frame with upper and lower crossbar supports, which improves stability and load-bearing capacity. Moreover, the metal shelf connects four 1.5mm-thick steel legs, enhancing stability and preventing wobbling.
- [Customized to your needs] The Heavy Duty 48" L x 24" W x 38.7 "H adjustable workbench boasts a 10-level height adjustment function with 360° Tool-free Knobs, each level offering a 1.34-inch lift. This feature allows you to customize the work table height to your preference, whether you prefer to stand or sit. Our workbenches ensure a comfortable working environment. Meanwhile, adjustable metal feet adapt to uneven ground to maintain stability.
Is 34 or 36 inches the standard?
Neither 34 nor 36 inches is a universal woodworking standard. Those numbers are useful reference points because they are common, not because they fit every woodworker or task.
- WOOD Magazine describes 34 inches as a common benchmark, in part because it often works with table-saw height.
- Fine Woodworking describes many standard benches as approximately 36 inches high.
- Woodworker’s Journal gives 33 to 36 inches as a common range for woodworkers around 5 feet 9 inches to 6 feet, while also emphasizing that the user and work determine the final choice.
- Lie-Nielsen describes many commercial benches as approximately 35 inches and offers customization in the general range of 32 to 38 inches.
- Paul Sellers shows a 38-inch bench as an individual traditional-workbench example and explains that the design can be scaled to the maker.
These examples show the spread of real benches and published conventions. They do not prove that 34, 35, 36, or 38 inches is right for you. A very tall or short user can be uncomfortable at a height that looks normal on a plan, and a bench designed mostly for small detail work may need to be higher than one designed for hand-planing rough boards.
Why half your height is only a rough shortcut
Some workbench advice uses half of the worker’s body height as a quick formula. It may land near a workable number for some people, but it does not account for arm length, torso length, leg length, footwear, or the operation being performed. Woodworker’s Journal itself presents the half-height idea as a general rule while noting that body and task ultimately determine the answer. Direct measurement is more useful than a formula.
Adjust the height for the work
The important measurement is not just the empty benchtop. It is the height of the hands while manipulating the tool and workpiece. A thick board, vise jaw, Moxon vise, jig, fixture, or raised auxiliary top can move the effective work height several inches above the bench.
For example, if the finished top is at your wrist, but a 2-inch board is clamped in a vise with its upper edge well above the top, your hands may be working near elbow level. Judge the actual hand position, not just the number attached to the bench.
| Primary use | Useful starting point | What to watch for |
|---|---|---|
| Heavy hand planing | Lower than your general-purpose measurement | A lower surface lets you get more of your upper body over the plane and transfer force through the body instead of working only with the arms. WOOD Magazine describes hand-tool benches as commonly 1 to 2 inches below its 34-inch benchmark, but that is not a universal subtraction formula. |
| Chiseling, mortising, and chopping | Usually lower for forceful downward work | Lowering the work can improve leverage and help keep the shoulders from rising. For delicate paring, however, a higher setup may improve visibility and control. |
| General mixed woodworking | Floor-to-wrist or first-thumb-knuckle height | This is the neutral compromise when planing, layout, assembly, sanding, and occasional joinery all matter. |
| Dovetail sawing and joinery | Raise the effective work surface toward elbow height or just below it | A low planing bench can make you stoop to see layout lines. Popular Woodworking recommends a joinery bench at or just below elbow height, rather than forcing a planing bench to do every job. |
| Carving, inlay, layout, and close detail work | Higher than the main planing surface | Raise the work with a bench-on-bench, Moxon-style vise, or auxiliary platform. Fine Woodworking describes an individual high auxiliary surface at 51 inches for carving and close work; that is an example, not a general target. |
| Power sanding and assembly | Often somewhat higher than a planing bench | A higher surface can reduce stooping, but stop if it makes you shrug, flare your elbows, or bend your wrists. Assembly height should also account for the size of the project. |
| Table-saw outfeed | Match the actual table-saw surface if outfeed is the priority | Thirty-four inches is a common table-saw-compatible benchmark, but matching the saw should not make the bench poor for its main woodworking task. A separate or rolling outfeed support may be the better compromise. |
| Seated work | Set the surface relative to seated elbow height | Do not transfer the standing thumb-knuckle measurement directly to a stool, chair, or wheelchair. Measure with the actual seat, and provide comfortable leg and knee clearance. |
Why planing and joinery often need different heights
One fixed surface cannot be optimized equally for heavy planing and close joinery. Planing benefits from leverage: a lower bench lets the user lean over the plane and use the legs, torso, and body weight. Fine sawing, paring, carving, and layout benefit from visibility and a less stooped posture: a higher surface brings the work closer to the eyes and hands.
Rank #2
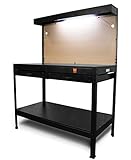
- Perfect for woodworkers, mechanics, or anyone else in need of reliable organization
- Features two drawers, upper and lower storage shelves, and a pegboard for easy organization
- Enamel-coated table top provides a spacious non-marring 220-pound capacity work surface
- Includes three built-in 13-amp power outlets and an overhead fluorescent light
- Measures in at 62 inches tall with a 25 by 48-inch footprint
Popular Woodworking’s height guidance separates a lower planing bench from a joinery bench. Fine Woodworking likewise describes higher auxiliary work surfaces instead of treating one bench height as a solution for every operation.
This does not necessarily mean building two full benches. A removable platform under the user can make a high bench behave like a lower one for planing. Fine Woodworking describes a platform that effectively lowers a 34-inch bench by about 3 inches. A Moxon-style vise or bench-on-bench raises a small workpiece for dovetails and carving without changing the main bench. Those solutions preserve the main bench’s stiffness and allow the effective height to follow the task.
Use general ergonomics as a check, not as a woodworking formula
General occupational-ergonomics guidance often relates work height to the elbow: precision work is around or slightly above elbow level, light work is slightly below, and heavy downward-force work is substantially below. That framework is useful, but it is not a woodworking-specific proof that every bench should be at elbow height.
Traditional hand-tool benches are deliberately lower than many precision-workstations because planing is a forceful operation. The apparent conflict disappears when you distinguish the bench top from the effective height of the work. A vise, thick stock, jig, or raised fixture may bring detail work toward elbow level while the main bench remains low enough for planing.
For general workstation principles, see CCOHS guidance on standing work, ILO workstation-design guidance, and OSHA’s guidance for fine work. OSHA notes that a surface that is too high can require raised elbows and contribute to shoulder or forearm discomfort, so “higher for detail work” does not mean “as high as possible.”
Outdated Drivers Are Slowing You Down
One free scan finds every outdated or missing driver and matches the right update for your exact hardware.Free scan · exact hardware matchWindows Errors? Fix Them Before They Spread
Repair common Windows errors and clear accumulated junk for a smoother, more stable PC - no reinstall needed.Free scan · no reinstallTest the height before cutting the legs
A temporary mock-up is more reliable than a height chart. Test the real tools and the real work rather than deciding from a drawing.
Rank #3
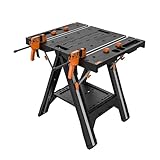
- FOLD AND GO: More than just a workbench for garage use, the Pegasus goes anywhere you need extra support . It’s easy to pop open for set up, it folds down compact to save on storage space, and fits under your arm for comfortable carrying
- TWO-IN-1 DESIGN: Seamlessly transition between a workbench and a sawhorse to tackle projects of all sizes
- HEAVY-DUTY SUPPORT: As a portable workbench, it offers a high load-bearing capacity up to 300 lbs. As a sawhorse, it supports an impressive 1000 lbs. From bulky lumber to potted plants and bikes to heavy equipment, Pegasus can handle the pressure
- EASILY EXPANDABLE: If you need more room, simply add another Worx support table—such as the Pegasus, the Sidekick, or Clamping Sawhorse. They’re all the same height and use the same connectors for seamless attachment
- LARGE SURFACE AREA: With a surface size of 31" × 25" and a working height of 32", this folding work table provides enough space to suit a variety of applications, from staining and woodworking to painting and repairs
- Choose the dominant operation. Decide whether the bench is mainly for hand-planing rough stock, joinery, assembly, sanding, carving, or a mixture. Give the most frequently repeated task the greatest weight.
- Take the body measurement. Measure to the first thumb knuckle or your chosen wrist/cuff landmark while wearing normal shop footwear.
- Build a temporary top. Use a sturdy pair of sawhorses, a temporary frame, scrap lumber, or a sacrificial top to try several heights. Make each test surface broad enough to represent the real bench.
- Reproduce the effective work height. Include the actual vise or a secure substitute, typical board thicknesses, clamping fixtures, and any raised platform you expect to use.
- Use the real tools. Plane a board, saw a joint, pare a chisel cut, sand, or assemble something representative. For forceful work, the mock-up must be braced and stable; do not chop or run power tools on a precarious stack of boxes.
- Test more than one height. Compare the neutral measurement with a slightly lower and slightly higher version. Small changes can be noticeable, particularly when the same task is repeated for a long session.
- Check force and visibility. A good planing height lets you apply force without shrugging or reaching. A good joinery height lets you see the line without rounding your back or bending your neck.
- Mark the result and delay the final cut. Woodworker’s Journal recommends making the legs long and cutting them shorter after the height has been tested. It is generally easier to remove a little height than to rebuild legs that were cut too short.
Posture signs that the height is wrong
Signs the bench is too low
- You bend or round your back to see the work.
- Your neck remains angled downward, especially during layout, dovetails, or carving.
- You reach forward rather than keeping the work close to your body.
- You cannot see the cutting line without stooping.
- Your shoulders, lower back, or neck fatigue before the tool or task requires it.
The UK Health and Safety Executive warns that spending the day stooped over an unsuitable woodworking bench can contribute to lower-back, shoulder, and neck problems. These are practical ergonomic warnings, not a diagnosis or a guarantee that changing height will eliminate pain.
Signs the bench is too high
- Your shoulders are raised or shrugged while working.
- Your elbows move away from your body.
- Your wrists bend noticeably rather than remaining relatively neutral.
- Planing feels like an arm exercise because you cannot get your upper body over the plane.
- Your arms and forearms fatigue before your legs and torso contribute to the work.
A high bench can be especially troublesome for hand planing. Popular Woodworking explains that excessive height prevents the user from getting the upper body over the plane. Lowering the main bench or standing on a safe, stable platform can help, depending on which part of the setup is easier to change.
Ways to create more than one working height
If your work varies, do not automatically compromise at one average height. The following options let you keep a stable primary bench while adapting the effective height.
Quick wins for a faster PC:
Fix the driver behind crashes, sound loss and screen glitchesFind Drivers →Repair Windows errors before they cause bigger problemsFix Now →- Standing platform: A secure platform under your feet raises the user and effectively lowers the bench. It is useful for a shorter user or for occasional planing at a bench that is otherwise comfortable. It must be wide, non-slip, and unable to rock or slide.
- Blocks or risers under the legs: These raise a low bench for a taller user or a different task. HSE guidance allows secure blocks beneath legs as a correction for a low bench only when the result remains stable and wobble-free. Improvised loose blocks are not an acceptable substitute for a rigid base.
- Bench-on-bench: A removable top or small auxiliary bench raises detail work while leaving the primary surface at a planing-friendly height.
- Moxon-style vise: A raised vise brings dovetails and small joinery closer to the user without rebuilding the bench. Judge the top of the clamped work, not merely the height of the vise base.
- Removable carving or detail platform: A dedicated raised surface can be sized for small work and stored when not needed.
- Separate planing and joinery benches: This is the clearest solution when both hand-planing and precision joinery are major parts of the work. The planing bench can stay low and massive while the joinery surface is higher.
- Height-adjustable base: This can suit multiple users or a shop that regularly alternates between seated, assembly, detail, and forceful work. An adjustable mechanism must be rigid enough for planing, chiseling, and sawing; adjustability without stiffness is not a successful woodworking bench.
CCOHS recommends adjustable workstations or platforms where fixed-height benches do not suit the worker or task, along with suitable vises and jigs to hold work at a usable height.
Special cases that change the answer
Vise-heavy work
If most of your work is done in a vise, measure the vise jaw and the usual clamped material. A bench top at wrist height can produce a much higher hand position once a tall workpiece is secured. Conversely, a low jaw and thin stock may leave the work too low for close joinery.
Small parts and mostly detail work
Small work often needs a higher effective surface because visibility matters more than planing leverage. Raise the part with a fixture, bench-on-bench, or Moxon vise before raising the entire bench. Watch for shrugged shoulders: if raising the work makes your elbows climb, the fixture has gone too high.
Rank #4

- Heavy-Duty 2000 LBS Load Capacity: Built with a all-steel frame, this workbench confidently supports up to 2000 lbs, so you can place heavy tools, vises, and equipment on it without worrying about wobbling or flexing during real work
- Durable Scratch-Resistant Work Surface: The scratch-resistant engineered wood tabletop stands up to dropped tools, sliding equipment, and everyday wear, making it a reliable surface for both rough tasks and detailed projects
- Smooth, Durable Drawer for Tools You Use Most: The full steel drawer, paired with heavy-duty smooth-glide slides, opens effortlessly and holds up to frequent use—keeping your most-used hand tools organized, protected, and always within reach
- Organized Storage That Keeps Your Garage Clear: A reinforced lower shelf gives you a dedicated place for toolboxes, paint cans, and garage supplies, while adjustable leveling feet keep the table stable on uneven concrete floors
- Comfortable Working Height with Ample Surface Area: The 39.4"W x 21.7"D work surface gives you plenty of room for repairs, assembly, and 3d printer, DIY projects, while the 35” working height helps reduce bending and back strain during long sessions in the garage.
Large panels and doors
Large workpieces can force you to stoop or reach even when the bench itself is correctly measured. A tilting support, adjustable workstand, or additional support surface may be more useful than changing the height of the whole bench. HSE woodworking guidance discusses adjustable and tilting workstands for large workpieces.
Table-saw outfeed
A bench that doubles as outfeed support should align with the actual saw table, but the saw should not dictate the bench if hand tools are its primary purpose. A rolling outfeed table or dedicated support can provide the match when needed. If the bench itself must do both jobs, test planing and joinery at the proposed saw-compatible height before committing.
Two users of different heights
Do not average two users’ measurements if both will work at the bench for extended periods. Use an adjustable base, a safe standing platform for the shorter user, a raised surface for detail work, or separate benches. Each solution needs to preserve stability and safe access to vises, dogs, drawers, and tools.
Seated work and accessibility
For seated work, measure with the actual chair, stool, or wheelchair in position. The work should be reachable without elevated shoulders, and the base should provide adequate knee and foot clearance. A standing measurement cannot be transferred directly to a seated workstation. ILO workstation guidance and CCOHS hand-tool guidance both support adapting the workstation to the person and the work object.
Footwear, floor, and standing fatigue
Measure and test in normal shop footwear. Thick soles, a resilient anti-fatigue mat, or an uneven floor can alter the effective height and your comfort. A foot rail, sit-stand stool, or nearby seat can let you change position during assembly, sanding, or repetitive work. CCOHS recommends varying posture and providing seating where feasible; no single bench height makes prolonged static standing harmless.
Free tools Windows power users keep installed
One-click scans. No signup required.
A practical decision rule
If you are building one general-purpose standing bench, measure to your first thumb knuckle or wrist with your normal shoes on and use that as the initial top height. If hand planing and chopping dominate, test a lower version. If joinery, carving, layout, or small work dominate, keep the main bench at a stable general height and raise the effective work surface rather than forcing yourself to stoop. If the bench must serve several users or radically different operations, design in a platform, auxiliary surface, separate bench, or genuinely rigid adjustment system.
Best Value

- Stable Structure: Tabletops made of rubber wood have a long lifespan and are environmentally beneficial. Premium carbon steel adjustable glides that can sustain heavy-duty tasks with a maximum load capacity of 2,000 pounds offer stability.
- Use of multiple features and scenarios:Both sides include pegboards, and one side is long enough to hang additional tools for convenience;Includes six hooks to hold additional tools, making your workstation neater and more efficient.
- Multi-level height adjustment:The adjustable workbench has six height settings, and 360° tool-free knobs help us adjust freely, ranging from 28.5" to 39", and no additional tools are required;The adjustable glides are adjustable to accommodate various flooring types. Working while standing or sitting is quite convenient.
- ETL Certification Power Strip:The ETL-certified built-in power strip features 4 AC outlets, 2 USB ports, and 1 switch, along with a 6.5 ft long wire that is both safe and durable. This design makes it easy to equip the worktable with various electrical tools and lamps.
- Easy to assemble:Using the aid of the accompanying instructions, it is quite easy to assemble and can be finished by one person.It could be flexibly placed in a workshop, garage, office, home, commercial, etc. It's extremely useful.
Before making the final cuts, work at a temporary mock-up with the actual tools, vise, workpieces, and footwear. The height that lets you apply force, see the work, keep your shoulders relaxed, and avoid excessive bending is more trustworthy than any number printed on a plan.
Sources and further guidance
- WOOD Magazine: Rule of Thumb Guides Best Workbench Height, updated December 17, 2024.
- Fine Woodworking: Work at the Right Height.
- Fine Woodworking: Raised Platform for Efficient Hand Planing.
- Popular Woodworking: The Best Height for a Workbench.
- Woodworker’s Journal: Building a New Workbench.
- Woodworker’s Journal: What’s the Right Height for a Workbench?.
- Lie-Nielsen workbench specifications and customization.
- Paul Sellers: How to Build a Workbench.
- Canadian Centre for Occupational Health and Safety: Basic Standing Ergonomics.
- Canadian Centre for Occupational Health and Safety: Hand-Tool Workspace Ergonomics.
- UK Health and Safety Executive: Manual Handling Solutions in Woodworking.
- International Labour Organization: Workstation Design Guidance.
- OSHA: Ergonomics for Fine Work.
Frequently Asked Questions
Should I build my workbench 34 or 36 inches high?
Use 34 or 36 inches only as comparison points, not as universal standards. Measure from the floor to your wrist or first thumb knuckle, test that height, and adjust it for your primary operation. A 34-inch height is commonly associated with table-saw compatibility, while 36 inches is a common general bench dimension.
What should I do if my finished bench is too low?
For a small correction, use a secure, broad, non-slip platform under the user or a rigid auxiliary surface above the bench. Blocks under the legs can raise the bench only if they are securely integrated and eliminate wobble. Do not rely on loose or unstable risers for planing, chopping, or sawing.
Can one workbench work for both planing and dovetailing?
Yes, but one fixed height is a compromise. Keep the bench near your general wrist or thumb-knuckle measurement, lower the effective stance for planing with a stable platform, and raise dovetail work with a Moxon vise or bench-on-bench. If both operations are central to your shop, separate planing and joinery benches are more comfortable.
The Bottom Line
Bottom line: Measure your normal standing height to the wrist or first thumb knuckle, use it as the finished benchtop height, and test before cutting. Go lower when leverage and heavy planing matter; raise the work when visibility and precision matter. A stable platform, auxiliary bench, Moxon vise, or second work surface is usually better than forcing one bench height to perform every job.
Quick Recap
Product prices and availability are accurate as of the date/time indicated and are subject to change. Any price and availability information displayed on Amazon at the time of purchase will apply.