Some links on this page are affiliate links: if you buy through them we may earn a commission, at no extra cost to you.
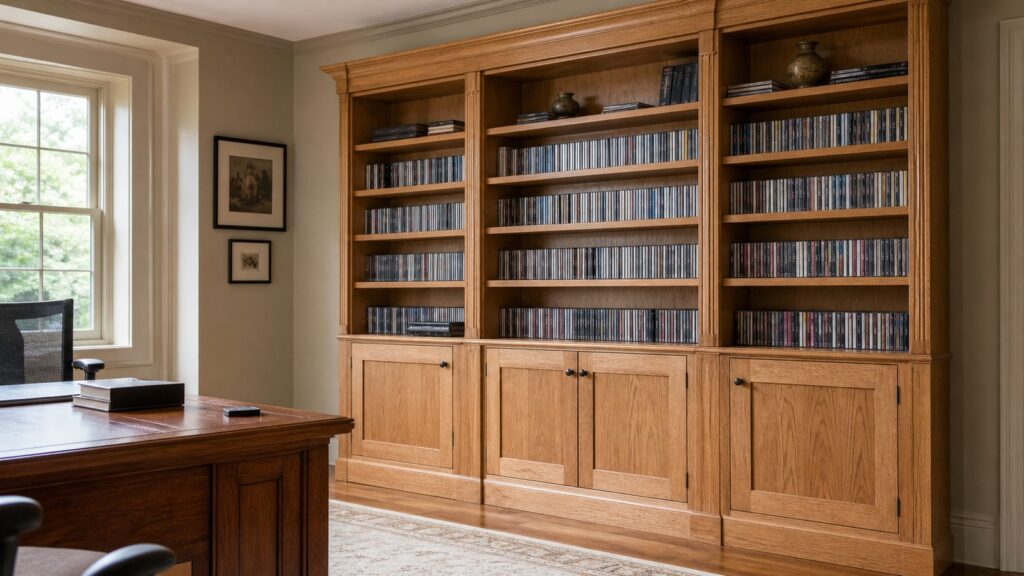
A good CD storage cabinet woodworking plan starts with capacity, not style. Decide whether you are storing 80 CDs, 160 CDs, 300 CDs, or a mix of CDs, DVDs, Blu-rays, games, and display items. From there, the cabinet dimensions, shelf spacing, drawer depth, hardware, and anchoring details become much easier to get right.
For a homeowner with basic woodworking tools, a small freestanding CD cabinet is a reasonable weekend-to-week project. Treat it like finish carpentry instead of a quick box project: use stable material, keep the carcass square, size the shelves for real weight, and anchor the finished cabinet to the wall. A loaded 160-CD collection can weigh roughly 35 to 45 pounds before the cabinet itself is counted, so tall narrow storage deserves more structure than its small footprint suggests.
As an Amazon Associate I earn from qualifying purchases.
Crashes, No Sound, or Screen Glitches?
Random freezes, missing sound and display glitches usually trace back to one bad driver. Find and replace yours safely.Free scan · under a minutePC Slower Than It Used to Be?
A free scan shows the junk files, broken settings and background clutter dragging Windows down - then fixes them in one click.Free scan · Windows 10 & 11On our job sites, the difference between a homemade-looking cabinet and a clean custom piece usually comes down to layout, square assembly, edge treatment, and finish prep. The woodworking is not complicated, but the tolerances matter.
Start With Capacity and Cabinet Dimensions
A standard CD jewel case is about 5.6 inches tall, 4.9 inches deep, and 0.4 inch thick. That means the inside of the cabinet should be designed around clear interior space, not just the outside dimensions that look good on paper.
#1 Best Overall
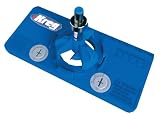
- Concealed Hinge Jig: Dedicated jig for drilling precise 35mm cup holes for European-style concealed cabinet door hinges using any hand drill
- Precision 35mm Boring System: Four-cutter carbide-tipped bit with stop collar drills clean, accurate hinge cup holes with controlled depth
- Adjustable Hinge Positioning: Supports 3mm, 4mm, 5mm, and 6mm hinge offsets with adjustable placement on the door
- Flexible Door Layout: Allows hinge positioning from 2 in (50mm) from the door edge to unlimited spacing for custom cabinet designs
- Premium Kreg Tools: We offer products that help woodworkers close the gap between idea and outcome
For open shelves, allow at least 5-3/4 inches of clear shelf height for CDs. If you want easier finger clearance, use 6 inches. For DVDs and Blu-rays, plan larger openings. DVDs are taller than CDs, so a CD-only cubby layout can become frustrating if your collection changes later.
A practical small cabinet for roughly 160 CDs can be around 38 inches high, 11 inches wide, and 14 inches deep. One commercial-style plan uses dimensions close to 38 inches high, 10-7/8 inches wide, and 14-1/8 inches deep. That is a compact footprint, but it is also tall and narrow, so it needs a stable base and a wall anchor.
The Tool Desk
Outbyte PC Repair FREERepair Windows errors before they cause bigger problemsFix Now →Outbyte Driver Updater FREEFix the driver behind crashes, sound loss and screen glitchesFind Drivers →For a more flexible home cabinet, we like these target ranges:
- 80-CD cabinet: about 24 to 30 inches high, 12 to 18 inches wide, and 7 to 10 inches deep for open shelves.
- 160-CD cabinet: about 36 to 42 inches high, 11 to 18 inches wide, and 10 to 14 inches deep.
- 300-CD cabinet: about 42 to 60 inches high, 20 to 30 inches wide, and 10 to 14 inches deep, preferably with adjustable shelves or divided bays.
- Mixed media cabinet: use 14 to 16 inches of overall depth if drawers, doors, or DVD storage are included.
If you are adding doors, remember to account for hinge clearance, overlay or inset gaps, pulls, and the space needed to remove a CD without scraping the case. If you are using drawers, account for slide thickness, drawer-box side thickness, and the loaded weight of the drawer.
A Practical Freestanding CD Cabinet Plan
This plan is for a furniture-style freestanding cabinet that can hold approximately 150 to 180 CDs depending on shelf spacing and case thickness. It uses a plywood carcass for stability, a solid-wood face frame for a finished look, and a structural back for stiffness and anchoring.
Recommended finished size
- Height: 38 inches
- Width: 16 inches
- Depth: 12 inches
- Interior shelf depth: about 10-1/2 to 11 inches after back and face-frame allowances
- Clear shelf opening: 6 inches for CDs, or adjustable shelf pins for mixed use
This size is wide enough to feel more stable than a skinny tower, but still compact enough for a hallway, office, den, listening room, or built-in media wall. If your CDs will sit spine-out in rows, the 12-inch depth gives you room for doors, a back panel, and some finger clearance.
Core materials
- One sheet of 3/4-inch cabinet-grade plywood for sides, top, bottom, and shelves
- 1/4-inch or 1/2-inch plywood back
- 1×2 poplar, oak, maple, or other hardwood for the face frame
- Hardwood edge banding or solid nosing for exposed shelf fronts
- Wood glue, 1-1/4 inch screws or brads, and clamps
- Shelf pins or fixed dadoes, depending on whether shelves are adjustable
- Optional overlay doors, hinges, pulls, and magnetic catches
- Anti-tip strap, small French cleat, or metal L-brackets rated for furniture anchoring
For a painted cabinet, poplar and paint-grade plywood are efficient choices. For a stained cabinet, oak, maple, cherry, or walnut can look excellent, but the cost rises quickly. We avoid rough construction plywood for furniture-scale cabinets because voids, uneven faces, and unstable panels make finishing harder than it needs to be.
Cut List and Layout Notes
Always verify your final dimensions before cutting. Plywood thickness varies slightly, and that small difference matters when you are stacking shelves and face-frame parts. On our crews, we use a full-size story stick for repeated shelf spacing instead of measuring every opening separately. It is faster and reduces layout errors.
For a 38-inch high by 16-inch wide by 12-inch deep cabinet using 3/4-inch plywood, a basic cut list looks like this:
- Sides: two pieces at 38 inches by 12 inches
- Top and bottom: two pieces at 14-1/2 inches by 12 inches, assuming the top and bottom fit between the sides
- Fixed center shelf or divider: one piece at 14-1/2 inches by 11-1/2 inches
- Adjustable shelves: four to five pieces at about 14-3/8 inches by 10-3/4 inches, adjusted for shelf-pin clearance
- Back: one piece at about 38 inches by 16 inches if applied to the rear, or sized to fit a rabbet
- Face-frame stiles: two pieces at 38 inches by 1-1/2 inches
- Face-frame rails: top, bottom, and intermediate rails cut to fit between stiles
If you rabbet the back into the carcass, reduce the back-panel size to fit the recess. A rabbeted back gives a cleaner result and helps the cabinet stay square. A surface-applied back is easier and still works if it is glued and fastened well.
For shelves longer than about 18 inches, use 3/4-inch material with a hardwood front lip. CDs are small, but dense when packed tightly. A 3/4-inch shelf with a 3/4-inch by 1-inch hardwood nosing is much more resistant to sag than a thin unsupported shelf.
Joinery That Keeps the Cabinet Square
There are several acceptable ways to build this cabinet. The right choice depends on your tools and the finish level you want.
Rank #2

- 【DURABLE AND ACCURATE】All metal cabinet hinge jig made of high quality aluminum alloy is more durable and accurate than plastic jigs. The all metal concealed hinge jig bulit-in double bearings provides continuous hinge hole drilling and much easier. The 35mm carbide tipped bit is solid and sharp for cabinet door hinges installation. Concealed cabinet hinge jig wood hole puncher locator help you drill accurate and fast as drill press.
- 【WORK WITHOUT DUST】The built in metal dust bracket of GOINGMAKE concealed hinge jig is suitable for 1-3/8 inch vaccum hose and easy to connect with your vaccum. The world's latest dust vacuum adapter makes cabinet hinges drilling without any dust for woodworking. Greatly improves the efficiency and accuracy of installing cabinet hinges. The 1-3/8 inch dust adapter is perfect for most vaccum dust collector.
- 【EASY AND FAST】GOINGMAKE cabinet hardware jig provides quick cabinet hinge hole depth setting without any measuring. The 35mm concealed hinge jig provides drill depth from 0-0.6 inch. Perfect for 1/2 inch overlay hinges or any others. GOINGMAKE cabinet hinges mounting tool is perfect for drill holes for cabinet hinges and hardware installation.
- 【VERSATILE CABINET HINGE JIG】The concealed door hinge jig can work with 2mm, 3mm, 4mm, 5mm and 6mm hinge offsets for most concealed hinges. Have no difficulty on any concealed hinges installation with 35mm hinge hole drilling jig. Our 5/64 inch drill guides provides 4 kinds of hinge screw holes spacing including 42x11mm, 48x6mm, 52x5.5mm, 45x9.5mm for most hidden cabinet door hinges installation. 5/64 inch drill bits is included.
- 【QUICK CLAMP DESIGN】We provide quick clamp on the GOINGMAKE 35mm hinge hole drilling jig pro max type. You can clamp and fix the concealed hinge jig on the workpiece easier and fast. Save a lot of time and make woodworking easier.
Dadoes and rabbets are the cleanest approach for casework. A 1/4-inch deep dado for fixed shelves helps align parts during glue-up and adds mechanical strength. Rabbets at the top, bottom, and back also make assembly easier because the panels register in place.
Cabinet screws or confirmat screws can work well for plywood if you predrill accurately and keep the holes hidden or plugged. Pocket screws are useful for face frames, but we do not like relying on pocket screws alone for visible refined casework unless the layout is carefully controlled.
Recommended Free Tools
During glue-up, measure diagonals before the glue sets. If the two diagonal measurements match, the case is square. If they are off by more than about 1/8 inch on a cabinet this size, correct it immediately with clamps. A racked carcass will make doors look crooked, adjustable shelves bind, and drawer fronts reveal every mistake.
Shelves, Drawers, or Doors: Which Storage Style Works Best?
Open shelves are the simplest and cheapest. They make it easy to scan titles and keep the cabinet shallow. The downside is dust. If the cabinet sits near an entry, HVAC return, workshop, or sunny window, the cases will need regular cleaning.
Doors add dust control and make the cabinet read more like furniture. Overlay doors are more forgiving than inset doors because the gaps do not need to be quite as perfect. Inset doors look refined but require more precise fitting, especially after paint or finish builds up on the edges.
Drawers are excellent for large collections because they let you pull the media out into view. They also raise the cost and complexity. A loaded CD drawer can get heavy, so use full-extension slides rated for the expected load. Light-duty slides are often $10 to $25 per pair, while better full-extension or soft-close slides commonly run $20 to $60 or more per pair.
What’s actually slowing this PC down?
Pick the symptom - the matching free tool is one click away.
| Storage type | Best use | Typical added cost | Builder notes |
|---|---|---|---|
| Open adjustable shelves | Simple CD, DVD, and book storage | $10-$40 for shelf pins and drilling jig | Most flexible and easiest to build |
| Fixed cubbies | Dedicated CD collection | Low material cost, higher layout time | Clean look, but less adaptable later |
| Overlay doors | Dust control and furniture appearance | $25-$150+ for hinges, pulls, catches, and door stock | More forgiving than inset doors |
| Drawers | Large collections and easy browsing | $40-$180+ depending on slides and pulls | Requires accurate boxes and slide layout |
2026 Cost to Build a CD Storage Cabinet
For a DIY small freestanding CD cabinet, realistic 2026 material cost is usually about $100 to $350 for paint-grade plywood or MDF, edge treatment, screws, glue, basic hardware, sandpaper, primer, paint, or polyurethane. A stained hardwood version with premium slides, better hinges, and a furniture-grade finish can reach $350 to $700 or more.
Cabinet-grade plywood is the main swing item. Big-box sheathing plywood can show broad pricing from roughly $4.74 to $90 per sheet, with common listed prices around $30 for basic panels, but sheathing is not the same as cabinet-grade material. Published 2026-style hardwood plywood ranges are commonly about $40 to $60 for 1/4-inch, $60 to $100 for 1/2-inch, and $100 to $150 for 3/4-inch 4×8 sheets.
Hardware also adds up. Basic pulls may cost $2 to $8 each. Better knobs and pulls are often $8 to $25 or more each. Hinges commonly run $5 to $25 per pair, and drawer slides can range from $10 to $60 or more per pair depending on quality and features.
Do not forget consumables. Glue, brads, screws, filler, sandpaper, stain, primer, paint, polyurethane or lacquer, tack cloths, brushes, and rollers can add $40 to $150 even on a small project.
| Project level | Typical 2026 cost | What it includes |
|---|---|---|
| Basic DIY painted cabinet | $100-$250 | Paint-grade plywood or MDF, simple shelves, basic finish |
| Better DIY furniture cabinet | $250-$500 | Cabinet plywood, hardwood face frame, doors or improved hardware |
| Premium DIY hardwood version | $350-$700+ | Oak, maple, cherry, walnut, premium slides, stained finish |
| Professional custom cabinet | $500-$1,200+ per linear foot installed | Shop or site-built fabrication, finish, installation, scribing |
| One-off built cabinet benchmark | $1,256-$1,534+ per cabinet | High-end custom pricing before local adjustments and options |
Step-by-Step Build Sequence
1. Make a story stick
Mark the finished cabinet height, top and bottom thickness, shelf openings, face-frame rail locations, and any door or drawer breaks on one straight scrap board. Use that same stick for both cabinet sides. This is one of the simplest professional habits a homeowner can borrow.
2. Break down panels accurately
Cut the sides, top, bottom, and shelves from flat stock. Label every part. If using plywood, keep the better face oriented outward or upward where it will show. Check parts for square before moving to joinery.
Rank #3

- 【High Precision】 All metal cabinet hinge jig made of high quality aluminum alloy,The bottom surface is very flat, Is more durable and accurate than plastic jigs. The all metal concealed hinge jig bulit-in double bearings ,the lateral shaking is reduced, and the drilling is more stable and accurate.provides continuous hinge hole drilling and much easier, making drilling more accurate.
- 【Easy and Fast】cabinet hardware jig provides quick cabinet hinge hole depth setting,Move the hole puncher to the mark and drilling position of the board, lock the quick clip,it easy to use and greatly improves the efficiency and accuracy of installing cabinet hinges. You can easily clamp and fix the concealed hinge jig, quickly drill holes and install hidden cabinet door hinges.
- 【Widely application】The 35MM hinge opener is suitable for 12-25mm wood, 35mm hole to edge distance of 5mm, comes with 35mm hole saw and 2mm drill bit, can be used with any electric drill, 35MM hinge positioning opener is suitable for cabinet/kitchen/closet/cabinet door hinge punching and positioning,which is suitable for most common hinges.
- 【Installation steps】The kitchen hinge jig positioning hole opener installation steps 1. Adjust the drilling depth of the limit ring, normally 12-13MM. 2. Adjust the size to adapt to the thickness of the clamped board. 3. Quickly clamp the locking plate according to the drill mark. 4. Drill 35mm and left and right 2mm screw holes 5. Installation Hinge
- 【Packing list】:1 *Hinge drilling locator body, 1 *35MM drill bit, 1* 2mm Drill bit,2 *small wrenches, 1 *hexagonal tool, 1 screw, 1 limit ring . Concealed cabinet hinge jig wood hole puncher locator help you drill accurate and fast as drill press.And saves you time and effort.
3. Cut rabbets or dadoes
Use a table saw, router, or straightedge guide to cut rabbets for the back and dadoes for fixed shelves. A 1/4-inch deep dado is enough for alignment on a small cabinet. If using adjustable shelves, drill shelf-pin holes with a jig so the rows line up exactly.
4. Assemble the carcass
Dry-fit first. Then glue and fasten the top, bottom, and any fixed shelves. Check diagonals and clamp the cabinet square. Install the back while the case is square because the back locks the shape in place.
Free tools Windows power users keep installed
One-click scans. No signup required.
5. Add face frame and edging
Build the face frame from straight 1×2 stock. Pocket screws, dowels, biscuits, or careful glue-and-clamp assembly can all work. Attach it to the carcass with glue and clamps, then use brads only as temporary holding help if needed. Add hardwood nosing or edge banding to exposed shelf fronts.
6. Fit doors or drawers
If using doors, leave consistent reveals and test the swing before finishing. If using drawers, build square drawer boxes and install slides with a spacer block or jig. Full-extension slides are worth the cost when the cabinet is used often.
7. Sand and finish
Sand through the grits instead of jumping straight to paint or stain. For paint-grade work, fill nail holes and plywood edges, prime, sand again, and apply two finish coats. For stain-grade work, test stain and clear coat on scrap from the same board or plywood before touching the cabinet.
Pre-finish interior parts if the cabinet has doors, narrow cubbies, or drawer banks. It is much easier to spray, brush, or wipe finish on shelves before final assembly than to fight corners afterward. Let finishes cure according to the product label before loading the cabinet with media; dry-to-touch is not the same as cured.
Do these 3 things before closing this tab:
1Clear out junk files and repair common Windows errors2Scan for outdated or missing drivers - takes under a minute3Repair Windows errors before they cause bigger problemsSafety: Anchor the Cabinet
Freestanding CD towers are a tip-over risk because they are often tall, narrow, and front-loaded when drawers or doors are open. The cabinet may look small, but once it holds 160 CDs and hardware, it can carry 50 pounds or more of combined load.
Use a wall strap, metal bracket, or French cleat attached to studs or solid blocking. Drywall anchors alone are not our first choice for a loaded narrow cabinet when a stud connection is available. If the cabinet will be in a home with children, anchoring should be treated as a standard part of the plan, not an optional add-on.
A wider base also helps. A small recessed toe kick looks clean, but a slightly projecting base or plinth can improve stability. If you build drawers, use stops and avoid opening multiple loaded drawers at once.
Independent reader supportYour contribution helps us test, update, and keep practical guides available for everyone.Permit and Code Considerations
A freestanding CD storage cabinet is furniture, so it typically does not require a building permit. The project changes when the cabinet becomes a built-in that affects electrical, HVAC, fireblocking, structural framing, or egress. Under common residential code treatment, ordinary cabinet installation and finish work are usually minor, but concealed utility changes are not.
For a built-in media wall, locate studs, map outlets and low-voltage lines, and check whether any electrical relocation is needed. Adding lighting, moving receptacles, cutting into walls, or modifying mechanical registers can bring in licensed trades and local permit requirements. Local rules control, so check with the authority having jurisdiction before opening walls or altering utilities.
When to DIY and When to Hire a Pro
DIY makes sense when the cabinet is freestanding, the finish can be paint-grade, and you already have basic tools: a circular saw or table saw, drill, clamps, square, sander, and a way to make clean repeatable cuts. A careful homeowner can build a useful CD cabinet over two or three weekends, especially with adjustable shelves and overlay doors.
Rank #4

- 【Premium Aluminum Alloy Material】The 35mm concealed hinge jig is made of high-quality aluminum alloy material, This is a set of guide tools for installing concealed hinges very accurate.
- 【Adjustable Double Cleat Design】Adjustable double clamping plate for accurate positioning, clamping 15-25mm thickness of wood panels, convenient for fast multi-angle drilling, and installation of cabinet door hinges.
- 【Focus On Practicality】Suitable for most 35mm cabinet hinge jig clamps, with an adjustable opening depth of 10-15mm and adjustable drilling edge distance of 3-7mm.
- 【Upgrade Three Bearing Drill Sleeve】Upper, middle, and lower 3 bearing drill sleeve, the total height of drill sleeve 2cm, the small swinging amplitude of drill bit for accurate hole opening.
- 【Perfect Choice】Easy to use with any drill, you don't have to be a well-equipped woodworker to install these hinges. Perfect for any handyman who needs hinges made.
Hire a carpenter or cabinetmaker when the cabinet needs to match existing millwork, fit tightly between uneven walls, integrate with baseboard or crown molding, include inset doors, or become part of a larger built-in. Professional custom cabinetry is commonly priced around $500 to $1,200 per linear foot installed in 2026, with some custom work running $1,400 or more per linear foot depending on material, finish, and location.
A one-off custom cabinet can cost far more than its size suggests because setup, design, material sourcing, finishing, delivery, and installation all take time. That is why a small built-in media cabinet can land near the same price range as larger cabinet work, especially when it requires scribing to walls or matching an existing stain.
Quick wins for a faster PC:
Repair Windows errors before they cause bigger problemsFix Now →Scan for outdated or missing drivers - takes under a minuteDriver Scan →Clear out junk files and repair common Windows errorsFree Scan →Common Mistakes to Avoid
The biggest mistake is designing from outside dimensions only. Interior clearance has to include the CD case, shelf thickness, back thickness, face frame, door swing, drawer slides, and finger room. A cabinet that is 6 inches deep outside may not hold CDs comfortably once real parts are installed.
The second mistake is skipping anti-tip hardware. A tall narrow cabinet loaded with dense media needs a positive connection to the wall. This is especially true in bedrooms, playrooms, hallways, and any space used by children.
Other common errors include using warped construction plywood, failing to predrill screws into plywood edges, skipping square checks during glue-up, under-sizing shelves, staining without a test sample, and building tight to uneven walls without filler or scribe allowances.
If you mix solid wood with plywood, allow for seasonal movement. Plywood is dimensionally stable; wide solid panels are not. Solid-wood tops, doors, and decorative panels need joinery that lets the wood expand and contract without splitting or pushing the cabinet out of alignment.
Quick wins for a faster PC:
Repair Windows errors before they cause bigger problemsFix Now →Scan for outdated or missing drivers - takes under a minuteDriver Scan →Clear out junk files and repair common Windows errorsFree Scan →Final Builder Notes
A CD storage cabinet is a small project, but it rewards the same discipline as larger cabinet work. Start with the collection size, use stable 3/4-inch cabinet material, make the back structural, keep shelves short or reinforced, and anchor the final cabinet to the wall.
For most homes, the best plan is not a CD-only tower with fixed cubbies. It is a compact custom media cabinet with adjustable shelves, a durable finish, dust-control options, and enough depth to adapt as the collection changes. Build it square, finish it patiently, and it will look like furniture instead of storage squeezed into a corner.
Frequently Asked Questions
How many CDs can a DIY storage cabinet hold?
A compact 38-inch tall cabinet can usually hold about 150 to 180 CDs depending on shelf spacing and case thickness. Wider cabinets with adjustable shelves can hold 300 CDs or more.
What are the best dimensions for a CD storage cabinet?
For a small freestanding cabinet, a practical size is about 38 inches high, 16 inches wide, and 12 inches deep. Allow at least 5-3/4 to 6 inches of clear shelf height for standard CD jewel cases.
The Tool Desk
Outbyte PC Repair FREERepair Windows errors before they cause bigger problemsFix Now →Outbyte Driver Updater FREEScan for outdated or missing drivers - takes under a minuteDriver Scan →What wood should I use for a CD storage cabinet?
Use 3/4-inch cabinet-grade plywood for the carcass with a 1/4-inch or 1/2-inch plywood back. Add poplar for a painted face frame, or oak, maple, cherry, or walnut for a stained furniture look.
How much does it cost to build a CD storage cabinet in 2026?
DIY materials typically cost about $100 to $350 for a small paint-grade cabinet. Hardwood, premium hardware, doors, drawers, and furniture-grade finish can raise the cost to $350 to $700 or more.
Do I need a permit to build a CD storage cabinet?
A freestanding CD cabinet usually does not require a permit because it is furniture. A built-in may require review if it involves electrical work, HVAC changes, wall modification, or other trade work.
How do you keep a tall CD cabinet from tipping over?
Use a wall strap, metal bracket, or French cleat fastened into studs or solid blocking. Do not rely on drywall anchors alone for a tall, narrow, loaded cabinet when a stud connection is available.
Free tools Windows power users keep installed
One-click scans. No signup required.
Quick Recap
Product prices and availability are accurate as of the date/time indicated and are subject to change. Any price and availability information displayed on Amazon at the time of purchase will apply.

