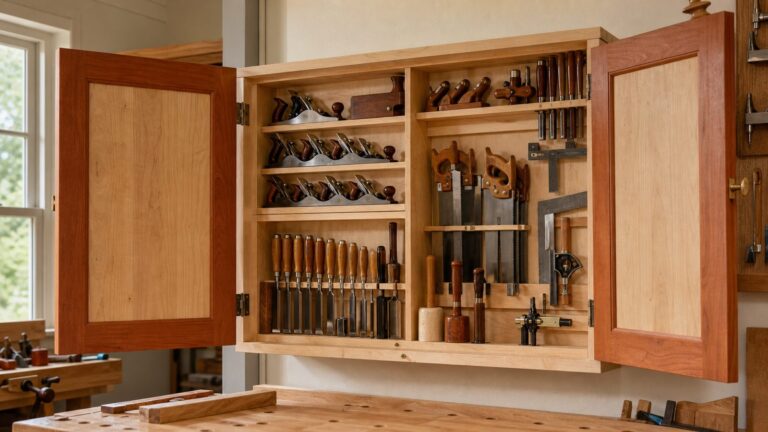
To cut a mortise by hand, mark and secure the work, then use a sharp chisel and controlled mallet blows to remove waste in stages while preserving the layout lines. A dedicated mortise chisel is designed for deeper chopping and levering; drilling a starter hole is optional, not a requirement.
Choose a chisel that suits the mortise
Match the chisel width to the mortise and the joint you are making. For deeper mortises that require substantial chopping, a dedicated mortise chisel is the most direct fit: its robust blade is made for striking and levering out loosened waste. A bevel-edge chisel can still be useful for lighter work and cleanup; the available maker guidance does not establish one type as best for every mortise.
Tool designs vary. Lie-Nielsen describes its mortise chisels as cabinetmaking tools with parallel sides and blades thicker than they are wide to help the chisel track straight. Its guidance for the cited 1/4-inch chisel gives a 30-degree primary bevel and says a secondary bevel around 35 degrees may be advisable depending on the wood and use. Veritas specifies blades more than 1/2 inch thick at the heel of the bevel, relieved sides, a 25-degree primary bevel and a 35-degree secondary bevel. These are the makers’ product specifications, not independent comparative test results: Lie-Nielsen mortise chisel and Veritas mortise chisels.
Prepare the layout and secure the work
- Use a marking gauge to establish the mortise’s parallel sides. A knife or another sharp marking tool can define the ends clearly.
- Clamp the stock or hold it securely in a vise so it cannot shift under mallet blows.
- Check that the mortise boundaries are visible and that the chisel will travel within them. Keep your hands out of the chisel’s path.
Clear layout lines make it easier to judge each cut and avoid widening the mortise accidentally. Common Woodworking’s chopping instructions place the chisel just inside the layout, with the bevel facing the waste; Woodcraft likewise emphasizes controlled chopping and workholding: Common Woodworking’s mortise-chopping instructions and Woodcraft’s chisel-and-mallet guide.
#1 Best Overall

- Premium Blades: Drop forged CR-V steel with heat-treated edges ensures sharp precision and long-lasting durability, can be used to make finish or paring cuts on wood surfaces, as well as cut mortises
- Beveled Edge for Versatility: 25° Bevel edge for woodworking multi-purpose use, ideal for soft wood, hard wood, and laminated wood products
- Ergonomic PVC Handle: HURRICANE wood chisel set with Lightweight yet durable regular size impact PVC Handle, feels natural in your hand for everyday fixes, yet tough enough for mallet strikes—great for door locks or DIY use
- Safety & Portability: This four sizes (1/4"; 1/2"; 3/4"; and 1") chisel set with blade guards protects edges during storage
- Widely Function: this HURRICANE wood chisel set empowers beginners to tackle DIY projects while meeting the demands of hobbyists & Home use
Cut the mortise in controlled stages
- Start near the center. Set the chisel just inside one long layout line, with its bevel facing the waste, and keep the blade vertical. Make a controlled chop rather than trying to remove a large bite.
- Loosen the waste progressively. Make successive cuts in layers, allowing the chips to break free. Remove loosened waste as you go instead of levering against material that is still firmly attached.
- Work toward one end. Woodcraft recommends starting near the center and working toward an end. Keep the chisel within the marked sides and approach the end without cutting through its boundary.
- Reverse orientation and work toward the other end. Turn the chisel so its bevel faces the waste as you work from the center toward the opposite end. Leave a little material at the ends rather than chopping directly through the final lines.
- Approach the intended depth in layers. Continue removing waste under control, checking the mortise as it deepens. Keep the tool vertical and preserve the sides and ends for final cleanup.
- Pare to the layout. Use careful paring cuts to bring the ends to the marked lines and refine the walls. Do not use force to make a cut that the chisel is not taking cleanly.
This center-out sequence is an instructional approach, not the only valid order for chopping. Woodcraft and Common Woodworking both describe staged chopping, while Woodcraft specifically recommends leaving a small amount at the ends for paring: Woodcraft’s guide and Common Woodworking’s lesson.
Successive cuts or a drilled starter hole?
Both approaches still rely on the chisel to shape and clean the mortise. Lee Valley describes successive chisel cuts in layers as one method. Its alternative, called the “Maynard” technique, begins with a drilled hole the same width as the mortise; the opening gives waste room as chopping begins, but the remaining mortise is still cut and cleaned with the chisel.
Rank #2
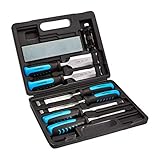
- 8-piece wood carving chisel set includes 6x chisels 1/4 inch (6mm), 1/2 inch (13mm), 3/4 inch (19mm), 1 inch (25mm), 1-1/4 inch (32mm) and 1-1/2 inch (38mm), 1x honing guide and 1x sharpening stone (120/240 grit)
- Heat treated, chrome vanadium steel alloy blades with narrow side bevels
- Comfortable contoured handles reduce hand strain and improve accuracy
- Blow-molded storage case keeps tools organized and secured
| Approach | How it begins | What to keep in mind |
|---|---|---|
| Successive-cut method | Chop in layers with the chisel, removing loosened waste as you work. | No starter hole is required; preserve the layout and finish the ends carefully. |
| Maynard method | Drill a hole the same width as the mortise before continuing with the chisel. | The hole is a starting aid, not a replacement for chiselling and cleanup. |
Lee Valley presents these as alternative techniques rather than establishing that drilling is necessary or universally preferable: Lee Valley’s mortising techniques.
Keep the edge sharp and adjust for hard wood
A sharp edge cuts predictably; a dull chisel is harder to control, so do not compensate by forcing it. Lie-Nielsen advises lighter cuts in hard woods such as oak or hard maple and recommends a higher secondary bevel for that use. Follow the care guidance for the specific chisel: Lie-Nielsen also cautions against striking its cited mortise chisel with a metal hammer. Woodcraft says not to use a hammer, so check the maker’s instructions for the chisel and handle you own and use a suitable mallet where specified: Lie-Nielsen’s product and care guidance.
PC Slower Than It Used to Be?
A free scan shows the junk files, broken settings and background clutter dragging Windows down - then fixes them in one click.Free scan · Windows 10 & 11Outdated Drivers Are Slowing You Down
One free scan finds every outdated or missing driver and matches the right update for your exact hardware.Free scan · exact hardware matchRank #3
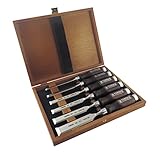
- 6 piece set comes on a wooden presentation box
- Blades are made from fine-grained, nicely tempered chrome-manganese steel and hardened to Rc 59
- Contains the following sizes: 6, 10, 12, 16, 20 and 26 mm
- Bevel ground at a 25 degree bevel.
- Handles are made from stained European Beech
For sharpening, a dedicated honing guide jaw may help hold a mortise chisel during honing; Lie-Nielsen and Veritas describe sharpening accessories for this purpose: Lie-Nielsen mortise-chisel honing guide jaw and Veritas Sharpening System.
Independent reader supportYour contribution helps us test, update, and keep practical guides available for everyone.Work safely and clean up square corners if needed
Secure the stock before striking, use controlled blows, and keep your hands clear of the cutting path. Handle the edge carefully when clearing chips or changing grip. The cited instructions are technique and tool-care guidance, not a comprehensive shop-safety standard; follow the safety directions for your own chisel, handle and mallet.
Rank #4

- 10PCS WOOD CHISEL SET: Includes 6 common sized wood chisels(6mm/13mm/19mm/25mm/32mm/38mm), sharpening stone, honing guide, 2 carpenter pencils & a pencil sharpener, fit for the home owner, beginning caver or professional woodworker to do repairing around the house, furniture assembling, woodworking and DIY projects
- PREMIUM MATERIAL: Wood chisels are made from chrome vanadium steel. Chrome vanadium steel body is vacuum heat-treated, 2 times more durable than ordinary carbon steel, suitable for oak / walnut and other high-density carvings
- HONING GUIDE & SHARPENING STONE: Sharpening stone with 25°-30° adjustable angle calibrator for chisel sharpening. Whether for wood carving or mortise and tenon grooving, the chisel sharpener maintains a consistent edge, minimizing the risk of splintering the wood and extending the life of the tool
- COMFORTABLE HANDLE: The chisel handle is made of non-slip PVC and is ergonomically designed to ensure precise control without fatigue over a long period of time. Chisel blades are precision-ground, sharp and durable, making it easy to handle wood carving and wood chisel sets, increasing work efficiency
- DESIGNED FOR DURABILITY: The heavy-duty striking cap at the end of the chisel can withstand high-frequency strikes with a mallet or hammer, and has excellent deformation resistance, making it suitable for high-intensity woodworking tools
If the joint calls for square internal corners, a corner chisel can be used after the mortise has been roughed out to clean them up. It is a finishing aid, not a substitute for the main chopping process.
Quick Recap
Best Value

- Thick metal strike cap with flat surface for effective strikes
- Durable construction with lacquered blade to help protect against corrosion
- Tempered, carbon-steel blade with long lasting edge
- Lightweight design with ergonomic handle
Product prices and availability are accurate as of the date/time indicated and are subject to change. Any price and availability information displayed on Amazon at the time of purchase will apply.
The Tool Desk
Outbyte Driver Updater FREEFix the driver behind crashes, sound loss and screen glitchesFind Drivers →Outbyte PC Repair FREEClear out junk files and repair common Windows errorsFree Scan →