Recommended Free Tools
A tambour is a flexible wooden door made from narrow slats that travel through two opposing tracks. Instead of swinging into the room like a hinged door, it slides along a curved path and may disappear into a concealed pocket. That makes tambours useful for roll-top desks, breadboxes, appliance garages, sideboards, consoles, and other cabinets where door clearance is limited.
For a first project, the most forgiving approach is a canvas-backed tambour: mill consistent slats, align them in a simple jig, and glue flexible canvas to their backs. An interlocking ball-and-socket version eliminates the canvas, but requires specialized router bits, accurate stock preparation, and more testing. Whichever method you choose, design and test the track before making the complete panel. A beautiful set of slats will still bind if the track radius, clearance, or end geometry is wrong.
As an Amazon Associate I earn from qualifying purchases.
What a tambour is—and why the track comes first
A conventional tambour cabinet has a pair of matching tracks, normally routed into the cabinet sides, top and bottom rails, or a separate framework. The slatted panel is captured by the tracks as it moves through a straight section and around a curve. In a larger cabinet, the open panel may continue into a concealed inner case or pocket.
That hidden travel path has an important construction consequence: the tambour often has to be installed after the cabinet is assembled. Plan a removable back, rail, entry slot, or other access point so the panel can be inserted, removed, repaired, or refinished later. Permanently trapping the tambour inside a closed case makes an otherwise repairable cabinet needlessly difficult to service.
#1 Best Overall
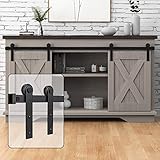
- √Brand: WINSOON; Condition: New; Our super mini barn door hardware is made of carbon steel with frosted black surface; Door Weight Capacity: 100 lbs; Fit door panel width: 18"each door; Perfect for door panel thickness: 4/5" to 1-1/8".
- √Package Include:One set of supper mini barn door Hardware kit - 2x12.4'' Rail+4x11.8''Rail,7xTrack Support,4xRoller,4xDoor Stopper,4xAnti-Pad,2xL Door Guide,2xU Door Guide,1xHex Wrench; All other necessary hardware is included as you see in the pictures. The track has been predrilled holes for 16 inch stud; ONLY the hardware is for sale, Cabinet, doors and TV stands are NOT INCLUDED.
- √Hardware Demensions: Rail: 72"(L)(Connected by two 12.4" rails+four 11.8''rails) x 1"(W) with 1/8" thickness; Door Roller Mounting: 6-11/16"(H) x 1"(W); Wheel Diameter: 1-1/2"; Please see pictures for reference.
- √Easy to Install. Detailed installation manual included. This mini hardware is simple to install and our professional customer service team could help you solve all installation problems in time.
- √Service - The product comes with service. WINSOON is the manufacture of the sliding door hardware. And if there is any part missed or defectived during shipping, we will send replacement for the missing or defect parts at the first time.
The panel and its tracks are one mechanism, not two independent parts. Track width, slat width, slat thickness, edge profile, end tongues, curve radius, wood movement, and clearance all interact. The tightest curve is the controlling dimension. Wood Magazine describes approximately a 2-inch minimum curve radius for its conventional canvas-backed approach, but that is not a universal limit: tighter curves generally require narrower slats, a different edge treatment, or another construction system. See the Wood Magazine tambour construction reference for the source method and dimensions.
Choose the construction method
| Method | How it works | Best suited to | Main trade-off |
|---|---|---|---|
| Canvas-backed | Separate wooden slats are glued to flexible canvas on their backs. | First tambours, custom sizes, conventional curves, and shops with ordinary woodworking tools. | Requires careful glue-up and leaves a backing that must be protected from finish and abrasion. |
| Interlocking ball-and-socket | Specially routed profiles mechanically join adjacent slats. | Canvas-free panels, repeated production, and makers who need a clean mechanical joint. | Requires a dedicated bit system, accurate setup, suitable stock, and extensive scrap testing. |
Neither method is automatically better. Canvas-backed construction is usually easier to adapt and less expensive to set up. Interlocking slats can look cleaner and may travel around both convex and concave curves, but the cutter geometry is product-specific. Select the method after establishing the cabinet’s tightest radius and the panel’s width and weight.
Design and test the track before milling the panel
- Draw the complete travel path. Show the closed position, the curved section, the open position, the concealed pocket, and the location of the lead strip or handle. Include the actual available depth inside the cabinet.
- Identify the tightest radius. Measure the centerline of the tambour’s travel path rather than guessing from the outside of the cabinet. The panel must have enough room to bend without the slats or backing rubbing the case.
- Make a full-size template. A hardboard or plywood template lets you check the curve, entry slot, pocket depth, and clearances before routing the cabinet itself.
- Rout a short test track in scrap. Use the intended track width and depth. Do not rely on a loose slat held against an uncut drawing; the slat ends, shoulders, and curve all affect the result.
- Mill several sample slats. Make enough pieces to represent a short section of the real panel. Test the tightest curve first, then the straight sections.
- Adjust the system, not just one symptom. If the samples bind, try more clearance, narrower slats, a smaller edge round-over, a different tongue length, or a larger radius. Repeat the test before producing all the slats.
For a conventional track, Wood Magazine describes a track width of approximately 1/4 to 5/16 inch for slats around 1/2 to 3/4 inch wide. Treat those figures as a starting point, not a guaranteed specification. Your stock thickness, species, finish, curve, and router setup may require different dimensions.
Mill the slats
Start with straight, stable, straight-grained stock. Rip more material than the project strictly requires so bowed, twisted, badly figured, or visually inconsistent pieces can be rejected. Let the stock stabilize where practical before final milling; a small change in width or straightness becomes conspicuous when repeated across an entire door.
Mill the slats to a uniform thickness and width. Consistency matters more than a particular species or decorative profile. Thinner slats produce a lighter panel and usually negotiate curves more readily. Thicker slats can reduce sag and flex across a wide opening, but they increase panel weight and may need a larger radius.
For a simple convex curve, a small round-over or chamfer on the exposed slat edges can provide clearance as adjacent pieces rotate. A half-round profile is more suitable where the panel must negotiate concave curves or an S-bend. Long horizontal tambours, such as roll-top desk covers, may need an interlocking profile that resists separation and excessive flexing.
Rank #2

- Easy installation: we provide you with and installation screws, which can be installed with simple tools, making your sliding door slide more easily and labor-saving.
- High quality material: it is made of high-quality ABS and nylon materials. It is durable and environmentally friendly. It has strong toughness and wear resistance. It can be used for a long time and is not easy to be damaged.
- Smooth pushing and pulling: the built-in metal bearing structure makes sliding more smooth and stable. Nylon wheels can effectively reduce noise and will not disturb your quiet and comfortable atmosphere.
- Widely used: widely used in sliding doors, drawers, windows, closets, cabinets, wardrobes, etc. Suitable for families, hotels, classrooms, offices, etc.
- Package content: you will receive 2 sets (4 pieces in total) of sliding door rollers and some mounting screws to meet your use needs. Please confirm the product size before purchasing.
Make several extra slats and sort them before assembly. Put the most consistent pieces in the visible area, and reject any part that is twisted enough to make the panel leave square. Mark the face orientation so the slats do not get mixed during glue-up.
Quick wins for a faster PC:
Fix the driver behind crashes, sound loss and screen glitchesFind Drivers →Repair Windows errors before they cause bigger problemsFix Now →Scan for outdated or missing drivers - takes under a minuteDriver Scan →Build a canvas-backed tambour
Materials and basic equipment
- Uniform wooden slats, plus several spares
- Flexible canvas or comparable fabric backing
- Yellow woodworking glue or liquid hide glue
- A flat assembly surface and a simple U-shaped frame or fence
- Masking tape, a straightedge, scissors or a sharp trimming knife, and a laminate roller or smooth block
- Router and suitable bit or cutter setup for the track and slat ends
- Fine abrasive and paraffin wax for final tuning
The backing does not need to be stretched like upholstery fabric. It needs to hold the slats together while allowing them to hinge relative to one another. Use a fabric with enough flexibility for the intended curve, and test a sample if its stiffness or weave is unfamiliar.
Assembly procedure
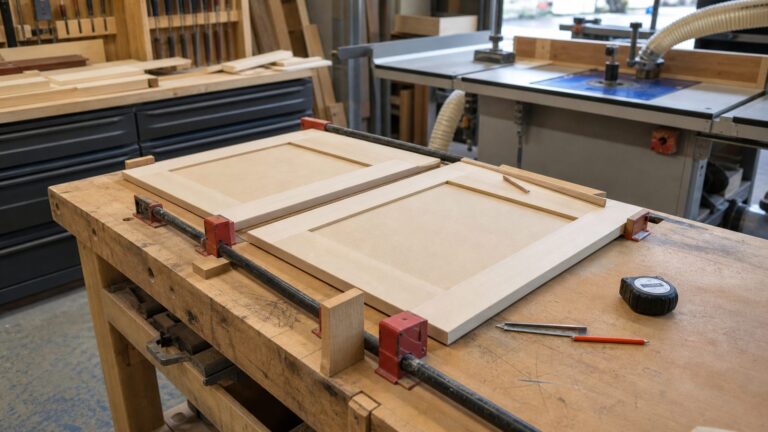
- Make an assembly frame. A simple U-shaped frame keeps the slats aligned and square while the backing is applied. Its inside dimension should register the slat ends without forcing them into a bow.
- Lay out the slats face down. Arrange them in order, keep the ends flush, and inspect the visible faces before applying adhesive. The panel should be square at this stage.
- Protect the edges. Mask or otherwise protect areas where stray glue could bond the slats to the frame or to one another. The slats must remain flexible at their joints.
- Apply adhesive to the backs. Spread a consistent, not excessive, coat of yellow glue or liquid hide glue. Too much adhesive can squeeze through the fabric and lock neighboring slats together.
- Lay on the canvas. Set the backing down carefully, then smooth it from the center outward with your hands or a laminate roller. Remove wrinkles without pulling the slats out of square.
- Check the joints immediately. If glue has squeezed between slats, separate the affected pieces before the adhesive cures. Once the glue hardens, a flexible panel can become a rigid, broken panel.
- Allow the adhesive to cure. Follow the adhesive manufacturer’s curing guidance. Keep the assembly flat and undisturbed during this period.
- Trim the backing. Cut away excess canvas after curing, but preserve any lead or attachment flap needed to connect the panel to its leading strip.
Do not apply finish over the track surfaces or allow finish to build up in the grooves. Finish the slats before final installation whenever possible, while keeping the tongues and track contact surfaces clean and accurately sized.
Shape and tune the slat ends
The slat ends need tongues, rabbets, or another profile that fits the opposing tracks. Their purpose is to retain the panel while allowing it to turn freely. A tongue that is too short can disengage; one that is too long or too thick can rub the shoulder of the track and cause binding.
As a starting point for a conventional arrangement, Wood Magazine describes making the tongues approximately 1/16 to 1/8 inch longer than the track depth, then sneaking up on the final fit. This is a tuning dimension, not a license to cut every tongue to one fixed length. Make test pieces, check engagement at the tightest curve, and remove material gradually.
The Tool Desk
Outbyte Driver Updater FREEFix the driver behind crashes, sound loss and screen glitchesFind Drivers →Outbyte PC Repair FREEClear out junk files and repair common Windows errorsFree Scan →Chamfer and smooth the tongue ends so they enter the track without catching. The target is a panel that moves with light, even pressure. If it needs to be forced, stop and correct the fit; pulling harder can damage the canvas, split a slat, or distort the cabinet.
Rank #3

- Multiple Choices: This small barn door hardware kit includes 2 types of floor guides suitable for different designed cabinet doors. It can be compatible with both grooved and non-grooved doors, is very beautiful, and ensures minimal shaking when sliding
- Package Contents: 5 Spliced Tracks, 6 Spacers, 4 Hangers, 4 Anti Jump Pads, 2 Door Stoppers, 2 Type A Floor Guide, 2 Type B Floor Guide, some different lengths of roller bolts to accommodate door thickness from 4/5 to 1-1/8 inch. CABINET IS NOT INCLUDED
- We are here to help: Our Barn Door Hardware Kit for Cabinets offers a professional step by step user friendly manual guide, it's easy to install. Any questions or concerns, our customer service team is more than happy to assist you
Optional canvas-free construction with interlocking bits
A dedicated interlocking system forms a ball-and-socket joint between adjacent slats. The joint allows the slats to articulate without canvas, glue, or—in some traditional systems—wire. The method can produce a clean, mechanically joined panel, but it is less forgiving of inaccurate stock or router setup.
Amana’s documented system uses three bits: one forms the slat face and ball, a second forms the socket, and a third shapes the end for attaching a pull. Its published setup uses stock approximately 1/2 inch thick and produces slats around 1/2 by 1 inch, with a stated minimum curve radius of approximately 3 1/2 inches. Those are specifications for that product system, not general rules for all interlocking tambours. Review the manufacturer’s tambour door router-bit information before designing around it.
Woodline describes a similar carbide-tipped ball-and-socket set, including an approximately 3 1/2-inch minimum radius and a recommended maximum strip width of 60 inches to limit sag. The listed 1/2-inch shank must be compatible with your router and collet. Check the current product documentation rather than assuming that any router can accept the set.
If you choose this route, make a complete test section before milling the project stock. Verify the bit height, fence position, profile alignment, joint engagement, curve radius, and end treatment. A small setup error repeated across every slat can make the entire panel unusable.
For readers who want the canvas-free method, a tambour door router-bit set is an optional specialist tool—not a requirement for the canvas-backed approach. Confirm the shank size, stock dimensions, minimum radius, router capacity, and current manufacturer instructions before buying or cutting material.
Install the panel and make it serviceable
- Dry-fit the panel. Insert it through the planned entry point and move it slowly through the full travel path. Check both sides rather than testing only the closed position.
- Finish before final installation where possible. This avoids trying to brush or spray evenly inside a curved track. Keep finish off the tongues and track grooves unless the finish system specifically requires otherwise.
- Wax the contact surfaces. A light application of paraffin wax to the tongues can reduce friction. Do not use wax to disguise a fundamentally incorrect radius or binding track.
- Attach the lead strip. A detachable lead strip gives the panel a strong place for a finger pull or handle. For a heavier canvas-backed panel, a two-piece lead strip can sandwich the canvas and be screwed together.
- Fit a removable stop. The lead strip can limit travel, but the stop should remain accessible and removable. Avoid a stop that makes the tambour impossible to extract.
- Test the complete operation. Move the panel repeatedly, checking for tight spots, sag, rubbing, disengagement, and noise. Make small corrections while the panel and cabinet are still accessible.
Troubleshooting
<
| Problem | Likely causes | Correction |
|---|---|---|
| Panel binds at the curve | Radius is too tight, slats are too wide, edge treatment lacks clearance, or the track is too narrow. | Test a larger radius or narrower sample slats. Ease the relevant edges and remove only enough material to create consistent clearance. |
| Panel binds in a straight section | Track width varies, tongues are too long, a slat is twisted, or finish has built up in the groove. | Inspect the track with a sample slat, clean the groove, tune the tongues, and replace distorted slats. |
| Slats are glued together | Excess adhesive squeezed through the canvas or was left between adjacent pieces. | Separate the slats before the adhesive cures. Use less adhesive and protect the slat edges during the next glue-up. |
| Panel sags | Panel is too wide or heavy, slats are too thin, the backing is inadequate, or an interlocking system is being used beyond its recommended width. | Reduce unsupported width, use more substantial slats or a stronger construction, add appropriate support, or follow the product system’s width guidance. |
| Slat ends disengage | Tongues are too short, track depth is inconsistent, or the panel is being pulled sideways. | Verify track depth and tune the tongues incrementally. Keep the panel square and make sure both tracks remain parallel. |
| Panel is difficult to remove | There is no entry slot or removable cabinet component, or the stop was installed permanently. | Add a removable back, rail, or access panel during the redesign. Do not trap the panel before confirming full operation. |
Safety when routing tambour parts
Use secure workholding, eye and hearing protection, dust control, and careful router-table setup. Confirm bit height, fence position, collet engagement, feed direction, and stock support before making a cut. Keep hands clear of the cutter, use push blocks or other appropriate aids, and make setup cuts in scrap first. Follow the router, bit, and adhesive manufacturers’ safety instructions; the dimensions in this article do not replace those instructions.
Which method should you use?
- Choose canvas-backed construction for a first tambour, a custom-size cabinet, a conventional curve, or a project where flexibility and low tooling cost matter most.
- Choose interlocking slats if you want to avoid canvas, plan to make multiple panels, or need the appearance and mechanical action of a ball-and-socket joint.
- Choose a larger curve rather than forcing a very tight turn with a conventional profile. Test the actual radius with several short slats.
- Use a specialist kit or supplier only after checking its current dimensions, shank requirements, width limits, track compatibility, availability, and suitability for your cabinet geometry.
“Tambour” can also mean a textile embroidery technique worked with a hook and stretched fabric. This article uses the woodworking meaning: a flexible slatted cabinet door or panel. Embroidery is a separate subject and should be treated as a different project.
Free tools Windows power users keep installed
One-click scans. No signup required.
Rank #4

- Material: Sliding door wheel is made of thickened plastic, good quality, smooth surface without burrs, durable.
- Features: Nylon material pulley, silent sliding, wear-resistant and durable, easy to push and pull.
- Scope of Application: Sliding Door Pulley are widely used in barn doors, closet doors, cabinets and other sliding doors.
- Package Contains: You will get 4 pairs of black sliding door pulleys. Size is about 58mmx31mmx14.5mm/2.3 "x1.2 "x0.57"(L*W*H).
Frequently Asked Questions
What is the easiest way to make a tambour?
For most first projects, mill consistent slats and glue them to flexible canvas on their backs. This canvas-backed method avoids specialized interlocking cutters and is adaptable to custom cabinet dimensions, provided the track is tested first.
How tight can a tambour curve be?
There is no universal minimum radius. Wood Magazine describes approximately 2 inches for its conventional canvas-backed approach, while the Amana and Woodline interlocking systems describe approximately 3 1/2 inches. The usable radius depends on the slat width, profile, track, backing or joint, and clearance.
Can I make a tambour without canvas?
Yes. A dedicated ball-and-socket router-bit system can mechanically interlock adjacent slats. It requires accurate stock preparation, a compatible router and shank, careful setup, and scrap testing. It is optional; canvas is not needed for the interlocking method, but it remains the simplest approach for many custom projects.
Why is my tambour binding?
The usual causes are an undersized curve, insufficient track clearance, tongues that are too long, inconsistent track width, twisted slats, or finish buildup in the groove. Test the tightest curve, inspect the tracks, and correct one variable at a time rather than pulling harder.
Outdated Drivers Are Slowing You Down
One free scan finds every outdated or missing driver and matches the right update for your exact hardware.Free scan · exact hardware matchWindows Errors? Fix Them Before They Spread
Repair common Windows errors and clear accumulated junk for a smoother, more stable PC - no reinstall needed.Free scan · no reinstallThe Bottom Line
Build the track and test it before making the full panel. For a first tambour, a square canvas-backed assembly with carefully tuned slat ends is usually the most forgiving path. Interlocking router-bit systems are a useful specialist option, but their published dimensions and radius limits apply to the specific system—not to tambours in general. Keep the panel removable, keep the tracks clean, and tune the mechanism until it moves with light pressure.
Quick Recap
Product prices and availability are accurate as of the date/time indicated and are subject to change. Any price and availability information displayed on Amazon at the time of purchase will apply.