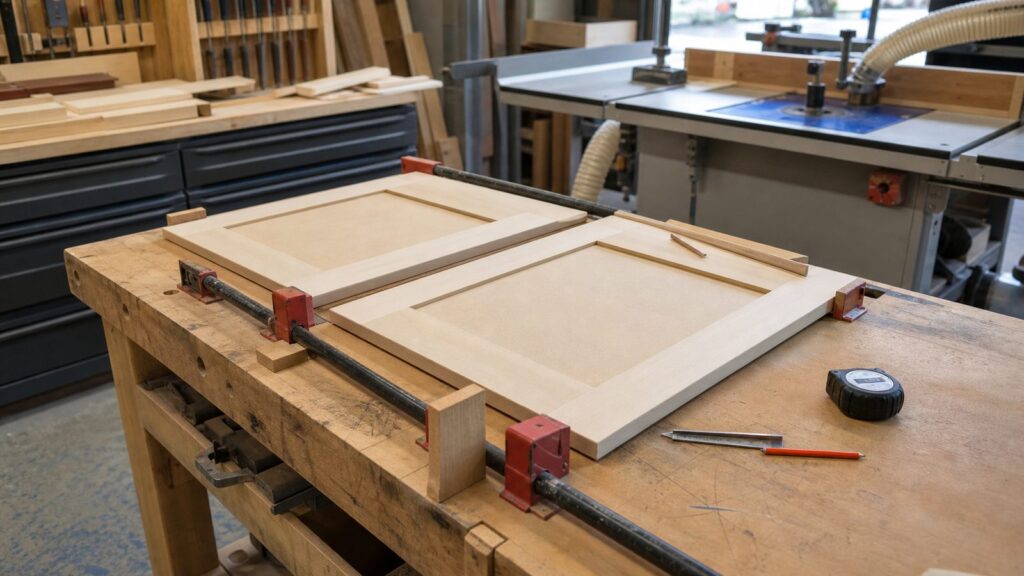
A simple frame-and-panel cabinet door can be assembled in about 30 minutes, but that number only tells the truth when the work is batched. The measuring, cut list, stock milling, router or table-saw setup, test cuts, sanding, hinge boring, and finishing plan all have to be handled before the clock starts on one door.
On our job sites, we treat fast cabinet door work like production trim work: measure every opening, confirm every reveal, label every part, set stop blocks once, and cut matching rails and stiles in groups. That is how a basic Shaker-style door becomes repeatable instead of fussy.
As an Amazon Associate I earn from qualifying purchases.
This guide is for homeowners who want contractor-grade results, not a shortcut that falls apart after one humid summer. We will cover the door math, material choices, joinery options, 2026 cost ranges, hinge decisions, glue-up sequence, finish planning, and when it makes more sense to order replacement doors or hire a cabinet shop.
What a 30-Minute Frame-and-Panel Door Really Means
A frame-and-panel cabinet door is made from two vertical stiles, two horizontal rails, and a center panel captured in grooves. That construction is common in kitchen cabinets, built-ins, furniture, wainscoting, and finish carpentry because the panel is held by a stable frame instead of behaving like one wide slab.
#1 Best Overall
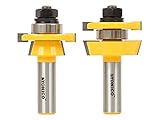
- These bits cut shaker rail and stile cabinet door frames at a depth of 3/8" in stock up to 7/8". They feature 1/2" shanks and come in a wooden box.
- Create rail and stile cabinet door frames
- Premium C3 micro-grain tungsten carbide blades for a sharper & longer lasting edge
- For use on table mount router
- Silver induction brazing for maximum strength and durability
For a fast flat-panel Shaker door, the usual build is 3/4-inch frame stock with a 1/4-inch plywood, MDF, hardwood veneer, or solid-wood center panel. The cleanest production pace comes from paint-grade poplar or maple frames and an MDF or plywood panel. Those panels are dimensionally stable, easy to size, and do not need the same movement clearance as a solid raised panel.
The 30-minute claim is realistic per door only after setup. A first-time homeowner should expect several hours for layout, test cuts, glue-up, sanding, hinge boring, and finish work. If you are making one door, the setup time dominates the job. If you are making 12 doors, the setup time gets spread across the batch.
A realistic time budget
For a batch of simple painted cabinet doors, a practical schedule looks like this:
Free tools Windows power users keep installed
One-click scans. No signup required.
- Measure openings and build the cut list: 45 to 90 minutes for a typical kitchen.
- Mill rails and stiles from 3/4-inch stock: 60 to 120 minutes depending on tools and board condition.
- Set up grooves, tenons, or cope-and-stick cuts: 30 to 75 minutes including test pieces.
- Cut parts for 10 to 20 doors: 60 to 150 minutes with stop blocks.
- Assemble each door: about 20 to 35 minutes once parts are ready.
- Sand, prime, paint, and cure: often 2 to 5 calendar days, even when hands-on time is modest.
The hidden lesson is simple: fast cabinet doors come from repeatable setup, not rushing the glue-up.
Measure the Cabinet Opening Before You Cut Anything
Do not size new doors from the nominal cabinet width. A 24-inch cabinet is not a door size. Face frames can be out of square, old hinges may have been adjusted around a bad opening, and refacing work can change reveals by 1/16 inch or more.
Measure each opening at the top, middle, and bottom for width. Then measure left, center, and right for height. Use the actual opening and the hinge overlay you plan to install.
Overlay door sizing formula
For overlay doors, use this formula:
Door width = opening width + left overlay + right overlay
Do these 3 things before closing this tab:
1Scan for outdated or missing drivers - takes under a minute2Clear out junk files and repair common Windows errors3Fix the driver behind crashes, sound loss and screen glitchesDoor height = opening height + top overlay + bottom overlay
Example: if the opening is 18 inches wide by 30 inches tall and you want a 1/2-inch overlay on all four sides, the door should be 19 inches wide by 31 inches tall.
For a pair of doors covering one opening, calculate the total coverage first, then subtract the center gap. Example: a 36-inch-wide opening with 1/2-inch left and right overlay gives 37 inches total door coverage. If you want a 1/8-inch gap between the two doors, each door is 18 7/16 inches wide: 37 inches minus 1/8 inch, divided by 2.
Inset door sizing formula
Inset doors sit inside the cabinet opening, so the math runs the other direction:
Inset door width = opening width – left reveal – right reveal
Inset door height = opening height – top reveal – bottom reveal
A common inset reveal is 3/32 inch to 1/8 inch per side. Inset doors demand a straighter cabinet, more careful hinge layout, and tighter finishing. A 1/16-inch mistake that disappears on an overlay door can look obvious on an inset door.
Rank #2

- These bits cut shaker rail and stile cabinet door frames at a depth of 3/8" in stock up to 7/8". They feature 1/4" shanks and come in a wooden box.
- Create rail and stile cabinet door frames
- Premium C3 micro-grain tungsten carbide blades for a sharper & longer lasting edge
- For use on table mount router
- Silver induction brazing for maximum strength and durability
Label every part
Before cutting, assign every door a number. Mark each rail and stile with door number, inside face, top or bottom, and left or right position. This matters once you start routing. A reversed stile or mismatched rail can waste a finished part, especially on stained doors where grain direction and color matching matter.
Choose Materials That Match the Door and Finish
The fastest simple cabinet door is usually paint-grade: 3/4-inch poplar rails and stiles with a 1/4-inch MDF or plywood panel. Poplar machines well, takes paint cleanly, and is widely available. MDF panels stay flat and produce a smooth painted center field. Plywood panels are tougher at the edges and can be a better choice where moisture or handling abuse is expected.
For stained doors, the material decision gets more expensive. Use matching hardwood frames and veneer-core panels so the center panel looks like it belongs with the rails and stiles. Maple, oak, cherry, walnut, alder, and custom veneer panels can all work, but grain matching and waste raise the cost quickly.
Solid panels need room to move
A plywood or MDF panel can be glued into a simple Shaker frame if the joinery and finish plan support it. A solid-wood panel should usually float in the groove. Wood expands and contracts across the grain as humidity changes. If a solid panel is glued hard into the frame, it can split the panel, bow the door, or crack the joint line.
When we use floating panels, we seal or pre-finish the panel edges before glue-up. That way, if the panel moves slightly with the seasons, raw wood does not appear as a pale line at the inside reveal.
What’s actually slowing this PC down?
Pick the symptom - the matching free tool is one click away.
Cost to Build, Buy, or Replace Cabinet Doors in 2026
DIY cabinet doors can be economical, but only if you already have the right tools or plan to build enough doors to justify the setup. A single paint-grade DIY door may use only $18 to $60 in materials before finishing. That assumes poplar or other paint-grade frame stock, a 1/4-inch plywood or MDF panel, glue, sandpaper, and basic hardware.
In 2026, big-box pricing commonly put poplar 1×3 boards around $1.98 to $2.44 per linear foot, and 1/4-inch 2-foot by 4-foot project panels around $16 to $17, with real pricing varying by store, species, and grade.
Stain-grade doors are different. DIY material cost commonly runs $40 to $150 or more per door once you account for hardwood species, veneer panels, grain matching, and waste.
| Option | Typical 2026 Cost | Best Use | Main Tradeoff |
|---|---|---|---|
| DIY paint-grade frame-and-panel door | $18 to $60 per door before finish | Custom sizes, small kitchens, built-ins, painted work | Requires accurate tools, setup, sanding, and finishing |
| DIY stain-grade door | $40 to $150+ per door | Furniture-grade work or matching existing hardwood | Material waste and grain matching raise cost |
| Online replacement door slab | $30 to $200+ per door for many common options | Consistent sizing, factory profiles, large batches | Finish, hinge boring, shipping, and lead time vary |
| Custom premium replacement door | $150 to $500+ per door | Special wood, profiles, inset sizing, high-end finishes | Higher cost but better consistency and support |
| Installed door replacement or refacing | About $180 to $330 per door in many estimates; some 2026 models start around $416 to $602 per door | Measured, finished, installed work with less homeowner risk | Labor, finish quality, hardware, and project minimums drive cost |
The spread is not a typo. Replacement-door cost data varies because sources count different scopes. Some quote unfinished door slabs only. Others include measuring, finishing, hinge boring, hardware, removal, installation, disposal, travel, and warranty risk.
Windows Errors? Fix Them Before They Spread
Repair common Windows errors and clear accumulated junk for a smoother, more stable PC - no reinstall needed.Free scan · no reinstallCrashes, No Sound, or Screen Glitches?
Random freezes, missing sound and display glitches usually trace back to one bad driver. Find and replace yours safely.Free scan · under a minuteFor context, full kitchen cabinet installation often runs $4,000 to $14,000 in 2026, with a national average around $7,000 in some cost guides. Door-only replacement or refacing can be a lower-cost refresh if the boxes are sound and the layout still works.
Pick the Right Fast-Build Method
There are several ways to make a simple frame-and-panel door. The right method depends on the tools you own, how visible the door is, and whether the finish is paint or stain.
| Method | Speed | Skill Level | Finish Quality | Best For |
|---|---|---|---|---|
| Table-saw groove and stub tenon | Fast after setup | Intermediate | Clean Shaker look | Paint-grade or simple stain-grade doors |
| Router cope-and-stick set | Very fast in batches | Intermediate to advanced | Professional profile options | Multiple matching doors |
| Pocket-hole faux frame with applied panel | Fastest for basic utility work | Beginner to intermediate | Acceptable for paint, less traditional | Shop cabinets, laundry rooms, budget built-ins |
| Ordered replacement doors | Fastest hands-on time | Low woodworking skill | Consistent factory machining | Large kitchens, tight timelines, warranty needs |
Table-saw stub-tenon doors
A table-saw groove and stub-tenon door is a reliable job-site method. Cut a centered 1/4-inch groove in the rails and stiles. Then cut short tenons on the rail ends to fit the groove. The panel sits in the groove, and the frame joints glue at the rail-to-stile connections.
This method gives a clean Shaker profile without buying a dedicated door-bit set. The keys are consistent stock thickness, a tuned saw, featherboards, test cuts, and stop blocks.
Quick wins for a faster PC:
Scan for outdated or missing drivers - takes under a minuteDriver Scan →Repair Windows errors before they cause bigger problemsFix Now →Fix the driver behind crashes, sound loss and screen glitchesFind Drivers →Router cope-and-stick doors
A cope-and-stick router bit set cuts the inside profile and mating rail ends. This can be very fast for a batch, but only after the router table is dialed in. Use test pieces from the same thickness stock. A tiny height error can create a proud joint that costs time later in sanding.
Pocket-hole utility doors
Pocket-hole doors are not the traditional frame-and-panel method, but they can be useful for shop cabinets, rental-grade utility rooms, and quick painted built-ins. They are less refined at the joint and usually rely on an applied or recessed panel strategy. For a main kitchen, we prefer true frame-and-panel construction or ordered doors.
Rank #3

- 【PREMIUM QUALITY】Made from premium alloy steel with precision-ground blades, this tongue and groove router bit delivers smooth, burr-free cuts. Built with sturdy hardened steel body and upgraded 1/4 shank, our adjustable 3 teeth T shape tongue groove router bit is durable, long-lasting and not easy to bend or break. The anti-kickback design adds safety during use, while the corrosion-resistant coating reduces heat and friction, helping extend the bit's service life. (Tip: Before usage, please ensure your handheld router bit compatible with 1/4'' shank router bit)
- 【TIGHT FIT LIKE A GLOVE】This 1/4 shank tongue and groove router bits cut perfect 1/4" x 1/2" tongues for boards up to 3/4" thick—ideal for shaker doors, cabinet doors, and tight-fitting joints. Pieces lock together smoothly, like a glove. You can fine-tune the cutter spacing by adjusting the included spacers and nut for a customized fit to your project needs.
- 【SAFETY & USAGE TIPS】Clamping at least 2/3 of minimum shank, the short clamping on this product might result in bending. Keep your tool level and grip steady to avoid any potential danger. To achieve a perfect match, set the cutting depth properly and route no more than 1/4" at a time. Let the cabinet door router bits cool during long use. Always wear safety goggles or a face shield to protect from flying wood chips.
- 【VERSATILE WOODWORKING TOOL】Junreox router bits are perfect for edging, veining, and grooving in all woodworking projects for both professionals and DIYers, such as cabinet doors, drawers, closets, shelving, T/G siding, shaker style doors, porch floor, vanity, frame doors, rail and stile, raised panel, joinery etc. This shaker door router bit set works with a wide range of woods, such as cedar, pine, poplar, mdf, particle board, plywood, hardwood and composite material.
- 【UNIVERSAL COMPATIBILITY】These cabinet router bits can be used on CNC and other automatic routers as well as hand-held and table-mounted portable routers. For optimal results, use at ≤24,000 RPM and ensure proper shank clamping. Move slowly when routing to get a cleaner finish and avoid burns, especially with hardwoods.
The 30-Minute Door Workflow
This workflow assumes paint-grade Shaker doors with 3/4-inch rails and stiles, a 1/4-inch MDF or plywood panel, and table-saw or router-table joinery. Adjust dimensions for your hinge overlay and profile.
1. Mill the frame stock
Start with straight 3/4-inch stock. For many cabinet doors, 2 1/4-inch-wide rails and stiles look balanced. Narrow doors may look better with 2-inch frames. Tall pantry doors may need 2 1/2-inch or 3-inch rails and stiles for visual weight.
Recommended Free Tools
Mill enough material for the whole batch before cutting final lengths. If one board is 1/32 inch thicker than the next, your routed joints and sanding time will suffer.
2. Build the cut list
For a simple stub-tenon door, the stile length usually equals the final door height. The rail length depends on door width, stile width, and tenon length.
Example: for a 19-inch-wide door with 2 1/4-inch stiles and 3/8-inch tenons, rail length is 15 1/4 inches. The visible opening between stiles is 14 1/2 inches, and the two 3/8-inch tenons add 3/4 inch total.
Panel sizing depends on groove depth and whether the panel floats. If the opening inside the frame is 14 1/2 inches by 26 1/2 inches and the grooves are 3/8 inch deep, a stable MDF or plywood panel can be close to 15 1/8 inches by 27 1/8 inches, leaving a small allowance. For a solid panel, leave more movement room across the grain.
3. Cut grooves and tenons with test pieces first
Never start with finished parts. Use scrap from the same stock to confirm groove width, groove depth, tenon fit, and shoulder alignment. The panel should fit without forcing. Rail tenons should seat fully without splitting the stile.
Once the setup is correct, cut all matching grooves before changing the fence or bit height. Then cut all rail tenons in one setup. This is where the production time is won.
4. Dry-fit every door
Dry-fit the frame and panel before glue. Confirm the door lands on its final width and height, the joints close, and the panel is not trapped too tightly. Mark any correction while the parts are still dry.
5. Glue only what should be glued
For plywood or MDF panels, many builders glue the panel lightly in the groove to stiffen a simple door. For solid-wood panels, glue the rail-and-stile joints and let the panel float. Use space balls, small rubber spacers, or a controlled allowance so the panel does not rattle but can still move.
The Tool Desk
Outbyte PC Repair FREERepair Windows errors before they cause bigger problemsFix Now →Outbyte Driver Updater FREEFix the driver behind crashes, sound loss and screen glitchesFind Drivers →Do not flood the groove with glue. Excess glue squeeze-out in an inside corner is slow to clean and will telegraph under paint or stain.
6. Clamp square, then check diagonals
Bring the door together with even clamp pressure. Measure diagonals from corner to corner. If the diagonals match, the door is square. If they differ, adjust clamp pressure while the glue is still wet.
This step matters more than many beginners expect. A light frame can rack under clamp pressure. If you discover the problem after the glue cures, you are usually trimming the door smaller, remaking it, or living with uneven reveals.
Hinge Boring and Hardware Layout
A good door can still look amateur if the hinges are poorly placed. Most modern concealed European hinges use a 35 mm cup hole, but the exact boring distance from the door edge depends on the hinge model, overlay, and mounting plate. Do not guess from an old door unless you are reusing the same hinge style and cabinet geometry.
The Tool Desk
Outbyte PC Repair FREERepair Windows errors before they cause bigger problemsFix Now →Outbyte Driver Updater FREEFix the driver behind crashes, sound loss and screen glitchesFind Drivers →Common cabinet hinge layout places the top and bottom hinge centers roughly 3 to 4 inches from the door ends. Tall pantry doors may need a third hinge near the center, and very tall or heavy doors may need four. Soft-close hinges add cost, but they also reduce slamming and stress on the cabinet box.
Rank #4

- Shaker Rail & Stile Cutter Router Bit Set of 2: A distinctive chamfered edge makes our rail and stile router bits an excellent candidate for Shaker-style doors and drawers.
- Ensures Perfect Fit: This style and rail router bit cut tight-fitting cope and stick joints for shaker-style door frames. Our cabinet making router bits are bearing-guided to prevent dips and to ensure a perfect fit.
- High-Grade Carbide: Sturdy 1/2" shanks and precision balancing ensure stability while routing, while the high-grade carbide provides a long cutting life.
- Set up and Make the Cope Cuts: You can make the profile/groove cuts in the rail and style router bit set first, but we recommend that you start with the cope cuts. That way, the long edges are still flat and square, and you can use a flat-edged backer board to prevent tear-out at the end of the cut.
- Instructions to Follow for Shaker Cabinet Doors: Use only in a table-mounted router at reduced RPMs. Do not bottom out router bits in your router collet. Allow at least a 1/8" gap between the bottom of the bit shank and the bottom of the router collet. Keep hands clear of the router bit. Wear eye protection at all times.
Before boring every door, drill one test door or scrap setup. Mount it to the cabinet, check overlay, reveal, swing clearance, and adjustment range, then proceed with the batch.
Pulls and knobs
For hardware, make a drilling template or buy a jig. A knob that is off by 1/8 inch will be visible across a bank of doors. On Shaker doors, knobs often land on the stile near the rail intersection, while pulls may center on the stile. Keep hardware screws clear of panel grooves and rail tenons.
Sanding, Finishing, and Paint Sequencing
For painted doors, sand frame parts before assembly to 120 or 150 grit, then do a final pass after glue-up. Do not round over crisp Shaker inside edges unless that is the intended look. A tiny eased edge helps paint durability, but a heavy hand makes the door look soft and uneven.
Quick wins for a faster PC:
Fix the driver behind crashes, sound loss and screen glitchesFind Drivers →Repair Windows errors before they cause bigger problemsFix Now →Scan for outdated or missing drivers - takes under a minuteDriver Scan →If you are spraying, finish quality depends as much on dust control and cure time as on the door build. Prime all faces and edges. Sand primer lightly. Apply two finish coats when the coating system calls for it. Let doors cure before stacking, hanging, or adding bumpers.
For stained doors, do more prep before assembly. Stain-grade glue squeeze-out is unforgiving. Pre-finish floating panels or at least seal the hidden edges so seasonal movement does not expose raw wood. Use matching filler sparingly, and test stain on offcuts from the same boards.
Independent reader supportYour contribution helps us test, update, and keep practical guides available for everyone.Common Mistakes That Ruin Fast Cabinet Doors
The most common failure is measuring the cabinet label instead of the actual opening. Door replacement is finish work. A 1/16-inch miss can be obvious when reveals are lined up across an entire kitchen.
The second mistake is believing the first door will take 30 minutes. It will not. The first door is the setup door. It proves the math, tooling, hinge layout, and finish sequence. The following doors are where speed appears.
Crashes, No Sound, or Screen Glitches?
Random freezes, missing sound and display glitches usually trace back to one bad driver. Find and replace yours safely.Free scan · under a minuteWindows Errors? Fix Them Before They Spread
Repair common Windows errors and clear accumulated junk for a smoother, more stable PC - no reinstall needed.Free scan · no reinstallAnother common mistake is gluing a solid center panel into the frame. Solid wood needs seasonal movement room. Stable MDF and plywood panels are more forgiving, which is why they are common on fast paint-grade cabinet doors.
We also see doors clamped without checking diagonals. The frame may look square on the bench and still be racked by clamp pressure. Check diagonals during glue-up, before the glue sets.
Finally, do not skip labels. When 40 rails and stiles are stacked on a bench, guessing which piece belongs where wastes time and creates inconsistent grain, profiles, and fit.
Safety, Lead Paint, and Permit Notes
Replacing cabinet doors usually does not require a building permit when the cabinet boxes, plumbing, electrical, walls, and structural elements are not being altered. The 2021 International Residential Code includes categories of work that are exempt from permits, but local rules control. Some cities publish kitchen remodel guidance that treats cabinet-only work differently from projects involving electrical, plumbing, gas, structural changes, or layout changes.
If the project includes moving outlets, adding lighting, relocating plumbing, changing walls, or replacing exhaust systems, check with the local building department before work starts. Rules vary by city and county.
Lead paint is a separate issue. In homes built before 1978, renovation work that disturbs painted surfaces may trigger EPA Renovation, Repair and Painting rules for contractors. Cabinet door replacement by itself may seem minor, but sanding old painted face frames, scraping trim, or disturbing coated surfaces can require lead-safe practices. For a pre-1978 kitchen, test first and use certified help when required.
For shop safety, use eye protection, hearing protection, dust collection, push sticks, featherboards, and a stable router-table or table-saw setup. Small rails and stiles are exactly the kind of parts that tempt people into unsafe hand positions. Use hold-downs and stop blocks instead.
Best Value

- Precision Cutting - Designed to produce perfect-fitting rail and stile joints in doors from 5/8" to 1-1/4" thick, this high-performance bit delivers clean, accurate, and repeatable cuts for professional-quality cabinet and furniture work.
- Versatile Use - Ideal for doors, windows, veneered plywood, hardwoods, and softwoods; works in table-mounted routers and delivers smooth, stable, and efficient performance across various woodworking materials and profiles.
- Adjustable Design - Features precision shims that allow groove adjustment from 7/32" to 3/8", enabling compatibility with both thin plywood and thick, solid wood raised panels for flexible, detailed project applications.
- Durability Boost - Built with premium TiCo Hi-Density Carbide for extended bit life and superior material finish; Freud Perma-SHIELD coating reduces heat, pitch build-up, and corrosion for long-lasting, consistent performance.
- Extended Tenon Joints - Freud’s patented system produces extra-strong, durable long tenon joints with reduced tearout, enhancing structural integrity and long-term strength for high-end doors, panels, and cabinetry projects.
When to DIY vs When to Hire a Pro
Build your own doors if you already own a table saw or router table, need custom sizes, plan to paint, and can tolerate a few test pieces. DIY also makes sense for built-ins, laundry rooms, garage storage, and older cabinets where standard replacement sizes do not fit cleanly.
Order replacement doors if you need many identical doors, a factory profile, hinge boring, a warranty, or a tight schedule. Online unfinished slabs may run roughly $30 to $80 for many MDF, thermofoil, or paint-grade options, $80 to $150 for common hardwoods like maple, alder, or oak, and $150 to $200 or more for cherry, walnut, or custom options. Broader custom configurations can reach roughly $50 to $500 per door.
Hire a cabinet shop or finish carpenter when the doors are inset, stain-grade, oversized, matched to existing cabinetry, or part of a larger kitchen refresh. A shop bill is not based only on the 30-minute assembly window. It includes field measuring, shop setup, material yield, waste, finishing, hinge boring, hardware, travel, installation adjustments, insurance, callbacks, and warranty risk.
Labor pricing also reflects market pressure. The Bureau of Labor Statistics reported a May 2025 median carpenter wage of $59,310 annually, while 2026 cabinet-maker wage trackers commonly show average base pay around $21 to $29 per hour. Customer pricing is higher than wages because a legitimate shop carries overhead, equipment, finishing space, insurance, vehicles, supervision, and profit.
Bottom Line
A simple Shaker-style frame-and-panel door is a fast project only when the process is organized. Use actual opening measurements, calculate overlay or inset reveals, choose stable materials, batch every repeated cut, test your joinery, label parts, dry-fit before glue, and check diagonals while the clamps are still adjustable.
Free tools Windows power users keep installed
One-click scans. No signup required.
For a painted kitchen, 3/4-inch poplar frames with 1/4-inch MDF or plywood panels are the practical fast-build choice. For stained work, expect more cost, more waste, and more attention to grain and panel movement. If the kitchen needs a factory finish, pre-bored hinges, many matching doors, or tight inset reveals, replacement doors or a cabinet shop may be the better value.
The 30-minute door is not a magic trick. It is the result of good measurements, controlled setup, and repeatable shop habits.
Frequently Asked Questions
Can you really build a frame-and-panel cabinet door in 30 minutes?
Yes, but only per door after measuring, milling, setup, test cuts, and batching are already done. A first-time builder should expect several hours before the first usable door is assembled.
What size should I make a cabinet door for overlay hinges?
Use this formula: door width equals opening width plus left overlay plus right overlay. Door height equals opening height plus top overlay plus bottom overlay. For a 18 by 30 inch opening with 1/2 inch overlay on all sides, make the door 19 by 31 inches.
Is it cheaper to build cabinet doors or buy replacement doors?
DIY paint-grade doors can cost roughly $18 to $60 per door before finishing if you already own the tools. Ordering is often better for large batches, factory finishes, hinge boring, warranties, and tight timelines.
What wood is best for simple painted cabinet doors?
Poplar frames with MDF or plywood center panels are a practical paint-grade choice. Poplar machines cleanly, takes paint well, and MDF or plywood panels stay flatter than solid wood.
Should the center panel be glued into the door frame?
MDF or plywood panels may be glued lightly in some simple painted doors. Solid-wood panels should usually float in the groove so seasonal movement does not split the panel or rack the frame.
Do I need a permit to replace cabinet doors?
Door-only replacement usually does not require a permit, but local rules control. Permits may apply if the project changes plumbing, electrical, walls, structure, ventilation, or other regulated work.
Quick Recap
Product prices and availability are accurate as of the date/time indicated and are subject to change. Any price and availability information displayed on Amazon at the time of purchase will apply.

