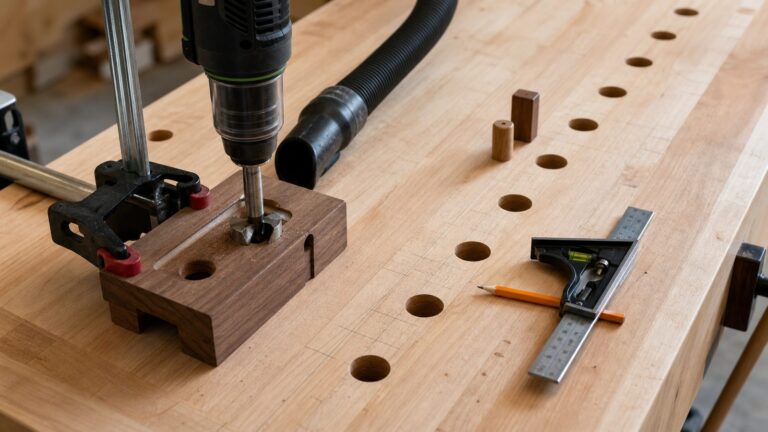
For most cured epoxy tabletops and river tables, the best all-around choice is a variable-speed 5-inch random orbital sander with reliable dust extraction and hook-and-loop discs. Use it to level and refine broad surfaces, beginning with coarse grit and progressing without skipping. A belt sander is useful only for substantial stock removal; transparent epoxy usually needs wet sanding and careful hand or low-speed polishing for its clearest finish.
Choose the sander by the job
| Sander or method | Best use | Main limitation |
|---|---|---|
| Variable-speed random orbital, 5-inch | General leveling, scratch removal and medium-to-fine sanding on tabletops and large casts | Removes material more slowly than a belt sander |
| Belt sander | Rapid removal of substantial high spots or excess epoxy | Harder to control, with a narrower useful grit range; change to a random orbital after medium grit |
| Router flattening jig | Severe unevenness or major misalignment across a slab | Setup-intensive and not a finishing tool |
| Hand-held power planer or thickness planer | Initial reduction of large high areas when appropriate for the workpiece | Epoxy can quickly dull blades; a maximum planing cut of 1/32 inch (0.08 cm) or less is recommended by Smooth-On |
| Detail or finishing sander | Small areas, edges and corners | Small pad covers little surface and can leave inconsistent scratch patterns on broad panels |
| Hand sanding and polishing | Final transparent finish, edges and areas where machine control is risky | Slower and physically demanding |
Features worth prioritizing
- Variable speed: lets you reduce heat and control the cut as the surface becomes clearer and more delicate.
- Stable five-inch pad: suits most tabletops while remaining easier to control than a larger, more aggressive setup. Six-inch systems are also documented by 3M.
- Vacuum or sealed dust-bag connection: improves visibility and reduces airborne dust. 3M reports up to 99% dust extraction, up to twice the cut rate and up to six times abrasive life in specified tests; those figures are not universal epoxy results.
- Durable hook-and-loop abrasives: make it practical to work through many grits and replace contaminated discs quickly.
Before sanding: cure and inspect the epoxy
Sand only fully cured resin. Soft or partially cured epoxy clogs discs, smears instead of cutting and generates damaging heat. Follow the resin maker’s cure schedule rather than relying solely on the surface feeling hard.
Inspect the casting for high spots, deep voids, drips and wood-to-resin steps. Minor unevenness can be handled with a random orbital. Major misalignment may call for a router flattening jig; a planer or belt sander can remove stock faster but demands careful depth control.
Wear a NIOSH-approved respirator, protective eyewear and clothing to minimize inhalation and skin contact when machining, sanding or polishing cured epoxy. Use local extraction or wet sanding where practical. Keep water away from electrical equipment unless the tool and setup are specifically designed for it.
#1 Best Overall
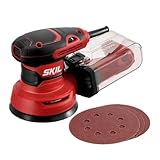
- POWERFUL - With a 2.8 amp motor and 13,000 orbits per minute, it's able to deliver a smooth performance over a variety of sanding applications.
- EASY TO CLEAN DUST CONTAINER - The X-flow dust collector uses cyclone force to collect dust in it's easy-to-empty transparent container.
- SPEED CONTROL - Variable speed control provides the right amount of power and control across different materials.
- LOW VIBRATION - Through its ergonomic design and a soft rubber grip your hand stays comfortable while counterweight balance reduces hand fatigue from vibration. All so that you can work longer.
- SAND IN TIGHT PLACES - With a compact size and ergonomic design This sander can get into tight spaces easily and maximizes user control.
A grit sequence that produces a clear finish
Use each grit until the previous grit’s scratches are gone. Cleaning the surface and the work area between steps prevents stray coarse particles from creating new defects. The following sequence is Smooth-On’s clear-Epoxacast tabletop procedure and is a useful starting framework, not an unchangeable rule for every resin or wood species.
- Dry 60, 80, 100 and 120 grit: level saw marks, ridges and heavy scratches. Smooth-On limits the sanded depth per pass to 1/64–1/32 inch (0.04–0.08 cm). WEST SYSTEM says 80- or 100-grit paper on a heavy-duty random orbital works for initial stipple, sags and other unevenness on well-cured epoxy.
- Dry 180, 240 and 320 grit: remove the coarser pattern while keeping the sander moving and pressure light.
- Dry 400, 600, 800 and 1000 grit: refine the haze before introducing water. At this stage the surface should be evenly scratched and slightly hazed, not covered with isolated shiny valleys.
- Wet 1200, 1500 and 2000 grit: use waterproof silicon-carbide paper, plenty of clean water and a hand block or suitable wet-sanding setup. Wet sanding also removes amine blush, according to WEST SYSTEM.
- Wet 3000 and 4000 foam-backed pads: refine the finish for polishing. Abralon 2000x is another Lee Valley recommendation before buffing.
Resin hardness, the amount of exposed wood and the intended coating determine whether you need every step. Do not skip a grit simply because the surface looks glossy in one direction; inspect under raking light and remove the full previous scratch pattern.
How to sand without swirls, heat or cloudy resin
Keep the tool moving
Set a moderate speed, use only enough pressure to keep the pad working and overlap passes methodically. Dwelling in one spot can dish the surface, soften the epoxy with heat or leave a visible orbit pattern.
Rank #2
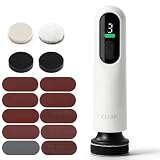
- Cordless Freedom & Multi-Angle Control: Say goodbye to tangled extension cords and bench restrictions. Powered by a high-capacity rechargeable battery, this cordless handheld detail sander lets you work freely on your workbench, balcony, or outdoors. The lightweight, ergonomic handle ensures a secure, single-handed grip, reducing fatigue during long sessions. Effortlessly flip, rotate, and inspect your resin work from any angle for precision contour and edge control.
- 3-Speed Settings: Driven by a built-in high-torque motor, this premium mini sander offers 3 adjustable speed levels to match your exact crafting needs. Shift seamlessly from low speed for delicate, fine grinding to high speed for intensive, large-area sanding—making it the ultimate adaptable tool for multi-material masterpieces.
- 104-Pc Ultimate Crafting & Polishing Kit: Ready to create straight out of the box! This all-inclusive kit includes the cordless sander, 100pcs of premium back-felt sandpapers across 10 essential grits (10 pieces each of 80/120/240/400/600/800/1000/2000/3000/5000), 2 sponge cushioning interface pads, and 2 premium wool polishing discs. From heavy coarse shaping to a glass-like mirror shine, we provide all the long-lasting consumables you need without extra trips to the hardware store.
- Versatile for All Resin Types & Crafts: Designed for wide application, this resin mixer works perfectly with AB resin, epoxy resin, crystal resin, UV resin, and more. Whether you’re crafting resin jewelry, coasters, or decorative art, it delivers reliable results and ensures your projects turn out flawless every time.
- Quick & Hassle-Free Cleaning: The resin mixer electric for epoxy is built with a smooth surface that’s easy to clean after each use. Simply wipe with a damp cloth to remove residue, or wait for the resin to dry and peel it off easily with the included tool. No sticky mess, making cleanup fast and effortless.
Use clean, sharp abrasives
Epoxy residue and embedded grit can gouge the next area. Replace loaded discs, clear the pad regularly and do not drag a dirty disc across a polished section. Aluminum oxide is an aggressive, durable general-purpose choice; silicon-carbide waterproof paper is suited to finishing and wet sanding.
Control dust and visibility
Connect the random orbital to a vacuum when possible and use perforated discs with a compatible backup pad. Extraction keeps the scratch pattern visible and reduces airborne dust, but it does not eliminate the need for respiratory protection.
Manage water safely
Wet-sand by hand or with equipment rated for the method. Keep electrical connections dry, change contaminated water and wipe the surface clean before judging the scratch pattern. A cloudy appearance during wet sanding is normal; trapped residue or an unremoved coarse scratch pattern is not.
Rank #3

- Automatic Sanding: No longer need for lengthy manual sanding by yourself. This electric resin sanding machine will totally liberates your hand. The sandpaper will rotate together with the sucker, getting epoxy resin sanding easily and perfectly even for large area sanding
- Adjustable Rotational Speed: You can adjust the rotational speed according to your different needs. Low speed for finer grinding, high speed for large area grinding. Simple and easy to use
- Portable Design: Size of the epoxy polishing machine is 5.5 x 4.3 x 2.4 inches, it is especially designed for most resin crafts, like resin jewerly, coasters, keychains, pyramid, dice, etc. It is not recommended for polishing super large resin work like resin tables
- Comes with 26 Sandpaper: 8 different sandpaper can meet all needs from changing the shape to polishing. Special velcro sandpaper are easy to install and replace. The machine is also compatible with other velcro sandpaper
- Stable and Safe: Equipped with thickened chassis and non-Slip padded feet, this resin polishing kit is very stable when working. No need to worry about the sliding in the working process, greatly improve your efficiency
When a belt sander or planer makes sense
A belt sander is appropriate when a cured surface has a large step or excess material that would take too long with an orbital. Work conservatively, keep the belt moving and switch to the random orbital after the coarse-to-medium stage because belt sanders offer less useful control for the finer sequence.
Planers can reduce stock quickly, but epoxy rapidly dulls blades. Smooth-On recommends a maximum planing cut of 1/32 inch (0.08 cm) or less. A router flattening jig is often the more predictable solution for severe slab-wide unevenness, followed by orbital sanding.
The Tool Desk
Outbyte PC Repair FREERepair Windows errors before they cause bigger problemsFix Now →Outbyte Driver Updater FREEFix the driver behind crashes, sound loss and screen glitchesFind Drivers →Polishing the transparent finish
Polish only after the finest sanding stage has removed the previous scratch pattern. Use a variable-speed polisher with wool and then foam pads, applying compound appropriate to the resin. Smooth-On’s procedure uses progressively lower pad speeds and Mirka Polarshine compounds; Lee Valley recommends a lamb’s-wool buff and polishing compound after Abralon 2000x.
Rank #4

- 【POWERFUL PERFORMANCE】DEKOPRO 2.5A Orbital Sander is assembled with a powerful DEKO motor that can reach speeds of up to 14,000 RPM, allowing it to provide smooth performance in a variety of sanding applications.
- 【SUPERIOR ADAPTABILITY】Electric orbital sander has 6 variable speeds and 16pcs sanding discs range from 60/80/120/240/400/1000 for coarse, medium and fine sanding, suitable for sanding or polishing wood and metal.
- 【HIGHLY EFFICIENT】Hook-and-loop design remains fast change function of sandpapers. And improved dust collection system with a detachable dust bag increases work efficiency by reducing clean-up time.
- 【EASY CONTROL & LOW VIBRATION】Orbital sander features an ergonomic rubber grip for maximum comfort and control.Meanwhile the balanced counterweight design reduces fatigue caused by vibration on the hands, thus prolonging the working time.
- 【LONG LIFESPAN】Reliable and sturdy ventilation design effectively dissipates heat and increases the orbital sander's overload capacity. Therefore, the unique structural design makes the orbital sander's service life longer than similar hand sander.
Keep the pad moving, use a small amount of compound and wipe the surface frequently. Compound cannot hide coarse scratches permanently; it merely makes an incomplete preparation look temporarily glossy.
A practical shopping checklist
- Variable-speed 5-inch random orbital sander
- Vacuum port, sealed dust bag or compatible extraction system
- Hook-and-loop discs from 60/80 through at least 1000 grit
- Durable aluminum-oxide discs such as Mirka Abranet or Galaxy for dry work
- Waterproof silicon-carbide paper for wet sanding
- Foam-backed 2000–4000 finishing pads
- Clean backup pads and replacement discs
- Polishing compound, wool pad and foam pad
- NIOSH-approved respirator, eye protection and protective clothing
Common problems and corrections
Swirl marks remain after sanding
The disc may be loaded, the sander may have been held in one place, or the next grit was started too soon. Replace the disc, clean the surface and return to the last grit that uniformly removes the visible pattern.
The epoxy turns cloudy
Cloudiness can be sanding haze, residue or heat damage. Stop, let the surface cool, clean it and inspect under angled light. Continue with the correct finer grit rather than adding polish over unresolved scratches.
Do these 3 things before closing this tab:
1Clear out junk files and repair common Windows errors2Scan for outdated or missing drivers - takes under a minute3Repair Windows errors before they cause bigger problemsThe disc clogs immediately
Stop and confirm the epoxy is fully cured. Partially cured resin must not be sanded. Once cured, improve extraction, reduce pressure and replace contaminated abrasives.
Edges become rounded
Use a hand block or controlled hand sanding near edges, and avoid letting the orbital pad hang over an edge. Detail sanders can reach corners but cover less area and require the same grit discipline.
Quick Recap
Product prices and availability are accurate as of the date/time indicated and are subject to change. Any price and availability information displayed on Amazon at the time of purchase will apply.