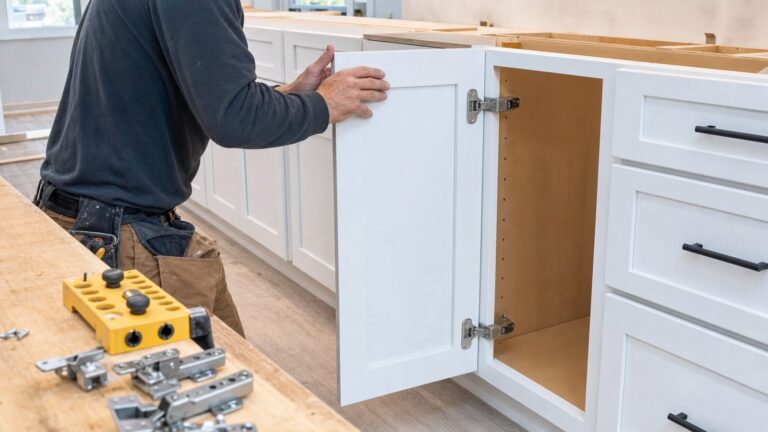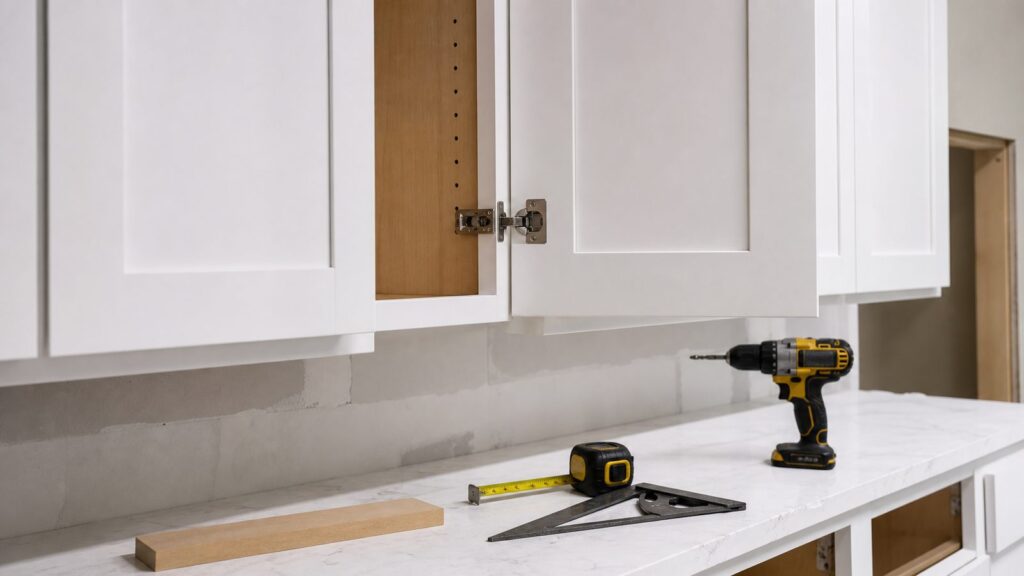
Overlay cabinet doors are sized to cover the cabinet opening by planned amounts; they do not fit inside the opening. Measure each installed cabinet, choose the reveal layout and compatible hinge system, then calculate the finished door size and test the hinge setup on matching scrap before drilling production doors.
The hinge system is part of the design: cabinet construction, overlay, door thickness, cup placement and mounting plate all have to work together. This guide covers measuring, building and installing overlay doors while keeping the exact hinge manufacturer’s instructions primary.
What an Overlay Cabinet Door Is
An overlay door sits in front of the cabinet opening and covers part of its edge. Use “overlay” precisely: it is the amount by which a door overlaps the cabinet opening on the hinge side. The desired outside reveals and the hinge system determine the final door dimensions.
Two common cabinet constructions require different hardware considerations:
#1 Best Overall
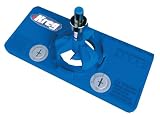
- Concealed Hinge Jig: Dedicated jig for drilling precise 35mm cup holes for European-style concealed cabinet door hinges using any hand drill
- Precision 35mm Boring System: Four-cutter carbide-tipped bit with stop collar drills clean, accurate hinge cup holes with controlled depth
- Adjustable Hinge Positioning: Supports 3mm, 4mm, 5mm, and 6mm hinge offsets with adjustable placement on the door
- Flexible Door Layout: Allows hinge positioning from 2 in (50mm) from the door edge to unlimited spacing for custom cabinet designs
- Premium Kreg Tools: We offer products that help woodworkers close the gap between idea and outcome
- Face-frame cabinets: A frame is attached to the front of the cabinet box. The hinge may attach to the frame or use a compatible plate and face-frame hinge system.
- Frameless cabinets: There is no front frame; hinges mount inside the cabinet to its side panel. The hinge and plate must suit the frameless application.
Doors with similar-looking overlays may not accept the same hinge hardware. Identify the cabinet construction before choosing hinges or plates.
Plan the Job Before You Cut or Order Doors
Survey every installed cabinet opening. Record its actual width and height, construction type, usable material around the opening, whether it takes a single door or a pair, and nearby doors, drawers, walls, pull-outs and appliances. Check older or site-built openings for square and measure at more than one point where needed.
Decide the outside overlays and reveals at the left, right, top and bottom before calculating door sizes. For pairs, choose a center gap deliberately and check that the doors can open without hitting each other or nearby objects. A cabinet schedule with opening numbers, measurements, hinge details, door sizes and clearance notes helps prevent mix-ups.
Tools and Supplies
- Tape measure and square
- Story stick or straight scrap board for repeated reveals
- Drill/driver and appropriate pilot-hole tools
- Hinge jig, if suitable for the selected hinge and its required offset
- Clamps and straightedge
- Sander and abrasives appropriate to the material
- Primer, paint or clear finish, as appropriate
- Hinges and compatible mounting plates selected for the cabinet and door
- Spacers, screws, door bumpers and pulls or knobs
A commonly used product category is a 35 mm concealed hinge jig. Use one only after confirming the chosen hinge has a 35 mm cup and the jig supports the hinge’s specified offset and boring setup.
Do these 3 things before closing this tab:
1Clear out junk files and repair common Windows errors2Fix the driver behind crashes, sound loss and screen glitches3Repair Windows errors before they cause bigger problemsHow to Measure Overlay Cabinet Doors
Measure the installed cabinet rather than relying only on an old door, which may be incorrectly sized. Choose the reveal layout and hinge first, and confirm that the hinge can deliver the intended overlay and clear nearby doors, walls, pull-outs and appliances.
For a single door:
Door width = opening width + left overlay + right overlay
Rank #2

- 【DURABLE AND ACCURATE】All metal cabinet hinge jig made of high quality aluminum alloy is more durable and accurate than plastic jigs. The all metal concealed hinge jig bulit-in double bearings provides continuous hinge hole drilling and much easier. The 35mm carbide tipped bit is solid and sharp for cabinet door hinges installation. Concealed cabinet hinge jig wood hole puncher locator help you drill accurate and fast as drill press.
- 【WORK WITHOUT DUST】The built in metal dust bracket of GOINGMAKE concealed hinge jig is suitable for 1-3/8 inch vaccum hose and easy to connect with your vaccum. The world's latest dust vacuum adapter makes cabinet hinges drilling without any dust for woodworking. Greatly improves the efficiency and accuracy of installing cabinet hinges. The 1-3/8 inch dust adapter is perfect for most vaccum dust collector.
- 【EASY AND FAST】GOINGMAKE cabinet hardware jig provides quick cabinet hinge hole depth setting without any measuring. The 35mm concealed hinge jig provides drill depth from 0-0.6 inch. Perfect for 1/2 inch overlay hinges or any others. GOINGMAKE cabinet hinges mounting tool is perfect for drill holes for cabinet hinges and hardware installation.
- 【VERSATILE CABINET HINGE JIG】The concealed door hinge jig can work with 2mm, 3mm, 4mm, 5mm and 6mm hinge offsets for most concealed hinges. Have no difficulty on any concealed hinges installation with 35mm hinge hole drilling jig. Our 5/64 inch drill guides provides 4 kinds of hinge screw holes spacing including 42x11mm, 48x6mm, 52x5.5mm, 45x9.5mm for most hidden cabinet door hinges installation. 5/64 inch drill bits is included.
- 【QUICK CLAMP DESIGN】We provide quick clamp on the GOINGMAKE 35mm hinge hole drilling jig pro max type. You can clamp and fix the concealed hinge jig on the workpiece easier and fast. Save a lot of time and make woodworking easier.
Door height = opening height + top overlay + bottom overlay
For example, if a 14-inch-wide opening is assigned 1/2 inch of overlay on both sides, the calculated door width is 15 inches. That is an example, not a universal overlay prescription; the cabinet and hinge determine the suitable layout.
Quick wins for a faster PC:
Clear out junk files and repair common Windows errorsFree Scan →Scan for outdated or missing drivers - takes under a minuteDriver Scan →Repair Windows errors before they cause bigger problemsFix Now →Measuring Double Doors
For a pair, preserve the chosen outside overlays and deduct the planned center gap before dividing or allocating the available width. Do not add extra material at the center and expect hinge adjustment to prevent a collision. Confirm the planned gap with spacer shims against the cabinet before drilling.
For an existing door, one way to identify its hinge-side overlay is to close it and mark where the hinge side crosses the opening edge. Open the door and measure from the inside edge of the opening to that mark.
Use a Story Stick for Consistent Reveals
A story stick records door positions and reveal decisions so repeated locations can be laid out consistently. It is especially useful on older cabinets, where openings may not be identical. Check the cabinet run as a whole and make sure the intended alignment looks consistent, rather than assuming each opening is perfectly square or level.
Choosing Door Material and Style
A simple slab door suits a flat, modern look; finish or edge-band exposed edges as appropriate to the selected material. A frame-and-panel door suits a traditional look. For either style, the hinge maker’s door thickness, edge and clearance requirements take precedence over general rules of thumb.
The Tool Desk
Outbyte PC Repair FREERepair Windows errors before they cause bigger problemsFix Now →Outbyte Driver Updater FREEScan for outdated or missing drivers - takes under a minuteDriver Scan →Rank #3

- 【High Precision】 All metal cabinet hinge jig made of high quality aluminum alloy,The bottom surface is very flat, Is more durable and accurate than plastic jigs. The all metal concealed hinge jig bulit-in double bearings ,the lateral shaking is reduced, and the drilling is more stable and accurate.provides continuous hinge hole drilling and much easier, making drilling more accurate.
- 【Easy and Fast】cabinet hardware jig provides quick cabinet hinge hole depth setting,Move the hole puncher to the mark and drilling position of the board, lock the quick clip,it easy to use and greatly improves the efficiency and accuracy of installing cabinet hinges. You can easily clamp and fix the concealed hinge jig, quickly drill holes and install hidden cabinet door hinges.
- 【Widely application】The 35MM hinge opener is suitable for 12-25mm wood, 35mm hole to edge distance of 5mm, comes with 35mm hole saw and 2mm drill bit, can be used with any electric drill, 35MM hinge positioning opener is suitable for cabinet/kitchen/closet/cabinet door hinge punching and positioning,which is suitable for most common hinges.
- 【Installation steps】The kitchen hinge jig positioning hole opener installation steps 1. Adjust the drilling depth of the limit ring, normally 12-13MM. 2. Adjust the size to adapt to the thickness of the clamped board. 3. Quickly clamp the locking plate according to the drill mark. 4. Drill 35mm and left and right 2mm screw holes 5. Installation Hinge
- 【Packing list】:1 *Hinge drilling locator body, 1 *35MM drill bit, 1* 2mm Drill bit,2 *small wrenches, 1 *hexagonal tool, 1 screw, 1 limit ring . Concealed cabinet hinge jig wood hole puncher locator help you drill accurate and fast as drill press.And saves you time and effort.
| Door approach | Suitable use | Considerations |
|---|---|---|
| Slab | Flat, modern appearance | Finish or treat exposed edges as appropriate to the material. |
| Frame and panel | Traditional appearance | Keep parts consistent and allow for material movement where applicable. |
One published cabinet project uses hardwood frames with groove-and-stub-tenon joints around a 1/4-inch plywood panel; its plywood panel can be glued because plywood does not move seasonally like a solid-wood panel. That is one documented construction, not a requirement for every door.
How to Make Overlay Cabinet Doors
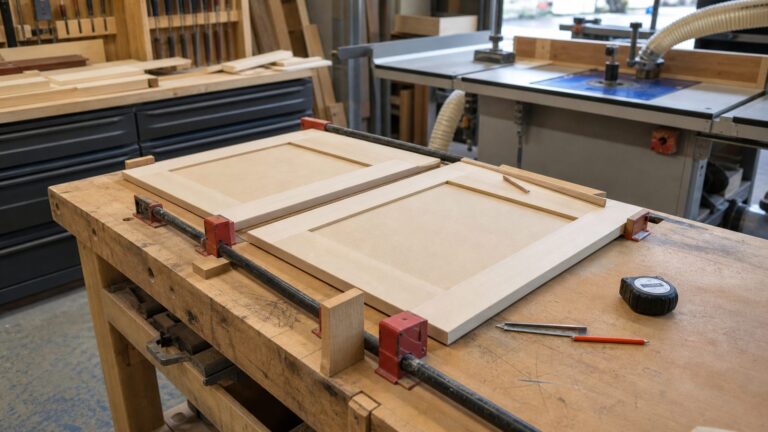
Build each door to the calculated outside dimensions and selected style. Mill enough extra stock for setup and hinge-boring samples, keep a consistent reference face, and label the door orientation. A sample door can reveal problems with fit, finish or hinge motion before you commit to the full set.
Build Sequence
- Cut and label parts, retaining extra material for setup and testing.
- Mill the parts consistently for the chosen door design.
- Dry-fit the door before assembly and verify its finished width, height, diagonals and flatness.
- Assemble according to the selected design and check for square.
- Sand and finish according to the material and finish system.
- Keep hinge cups and mounting surfaces clean enough for secure seating.
- Test paired doors against the cabinet using spacers for the intended gaps.
Solid wood moves with humidity. A solid-wood center panel should be allowed to move within its frame; do not glue it tight on all edges. Follow the chosen construction method and material guidance.
Hinge Selection and Boring
Specify the complete hinge system, not just “concealed hinges.” Confirm cabinet construction; application (full overlay, partial overlay, inset or special application); door thickness and edge profile; cup diameter, depth, setback and fastener pattern; compatible mounting plate and cabinet-side fixing; opening angle and clearance; adjustment range and closing mechanism; and the hinge quantity recommended for the finished door’s dimensions and weight.
Some concealed hinges use a 35 mm cup, but that is not universal. For context, Salice’s Series 200 94° wooden-door hinge is a 35 mm cup system with an 11 mm cup depth, a 3–9 mm drilling-distance range and a stated 19–35 mm door-thickness range. These specifications describe that hinge family only. Blum’s CLIP top 110° documentation likewise describes a particular overlay-capable system with compatible plates and 3D adjustment when used with the relevant plate.
Bore Concealed-Hinge Cups with a Test-First Process
- Obtain the exact hinge and compatible plate before laying out doors.
- Read the current hinge instructions for cup diameter and depth, edge setback, cup position from the door ends and fastener holes.
- Prepare a scrap test piece that matches the door material and thickness.
- Set the jig or drill-press stop as directed and keep the bit perpendicular to the door face.
- Bore the test piece, install the hinge and attach its plate to a cabinet-side test piece.
- Open the test assembly through its full motion; check for breakthrough, weak remaining material, binding, clearance and the intended overlay.
- Repeat the verified setup on production doors only after the test succeeds.
A jig can help repeat a setup, but it does not replace the hinge specification. For example, Kreg’s 35 mm Concealed Hinge Jig is designed for 35 mm cup hinges and offers multiple offset settings and a depth-stop collar. Confirm that the selected hinge uses a 35 mm cup and that the jig supports its required offset.
Rank #4

- 【Premium Aluminum Alloy Material】The 35mm concealed hinge jig is made of high-quality aluminum alloy material, This is a set of guide tools for installing concealed hinges very accurate.
- 【Adjustable Double Cleat Design】Adjustable double clamping plate for accurate positioning, clamping 15-25mm thickness of wood panels, convenient for fast multi-angle drilling, and installation of cabinet door hinges.
- 【Focus On Practicality】Suitable for most 35mm cabinet hinge jig clamps, with an adjustable opening depth of 10-15mm and adjustable drilling edge distance of 3-7mm.
- 【Upgrade Three Bearing Drill Sleeve】Upper, middle, and lower 3 bearing drill sleeve, the total height of drill sleeve 2cm, the small swinging amplitude of drill bit for accurate hole opening.
- 【Perfect Choice】Easy to use with any drill, you don't have to be a well-equipped woodworker to install these hinges. Perfect for any handyman who needs hinges made.
Hinge Quantity
Do not assume every door needs the same number of hinges. Use the current chart for the exact hinge, taking account of door height, width and weight, plus decorative panels, glass and heavy pulls. Blum notes that hinge count depends on front height and weight, and that its planning data relates to a standard 600 mm front width. Follow the actual product’s guidance.
Dry-Fit Before Finishing
Test the hinge system on matching scrap before drilling the doors. Then dry-fit the doors against the cabinet with spacers representing the planned reveals. Check the overlay, full hinge motion and clearances to adjacent doors, walls, pull-outs and appliances. A trial fit can show whether the selected system and layout work before final installation.
Where the finish system permits, finish doors before final installation and keep hinge cups and mounting surfaces clean enough for secure seating. Follow the finish maker’s instructions for handling and cure time.
Installing Overlay Cabinet Doors
- Fasten the hinge cups to the backs of the doors using the hinge maker’s fastener and pilot-hole instructions.
- Mark and predrill cabinet mounting-plate locations using the selected hinge’s installation data and the actual overlay.
- Support the door at its intended bottom reveal with a spacer block or helper.
- Fasten the plates, attach the door and open it slowly to check clearance.
- Install the second hinge before evaluating alignment; a door cannot be aligned reliably on one hinge.
- Install neighboring doors and adjust the run together.
- Add bumpers and pulls or knobs after alignment is complete, then recheck swing and clearance.
Blum’s H002 instructions follow the essential order—cup to door, plate to cabinet—and derive the mounting-plate centerline from the actual bottom overlay and hinge-cup centerpoint. Use the current instructions for your selected hinge and plate.
Independent reader supportYour contribution helps us test, update, and keep practical guides available for everyone.Adjust the Doors in a Repeatable Order
Many modern concealed-hinge systems offer side, height and depth adjustment, but the screw functions and travel differ by brand and plate. Blum describes side, height and variable-depth adjustment for its CLIP top system; Salice publishes ranges for its own systems and plates. Consult the instructions for the exact hardware.
- Height: Establish the top and bottom reveals across the run.
- Side: Set the vertical gaps and intended center gap between paired doors.
- Depth: Make the closed door sit consistently against the cabinet or face frame.
- Recheck all gaps after each adjustment; a change in one location can affect the appearance of others.
If a door needs extreme adjustment, stop and check the cup location, plate height, hinge type and door size. Adjustment screws are for final tuning, not for correcting a mismatched hinge or drilling pattern.
Best Value

- 【2-in-1 Hinge & Door Jig】: Compatible with kitchen cabinets, bathroom vanities, wardrobes, TV stands, and more. Functions as both a 35mm hinge drilling guide and a cabinet door mounting jig. The built-in alignment system keeps doors perfectly flush for stable one-person installation.
- 【Flawless Hole Precision】: Snap-on ruler system eliminates manual measuring errors. Adjustable edge margins (3/4/5/6mm) and pilot spacing (45/48/52mm) ensure identical, perfectly aligned hole placement across multiple doors, accommodating most standard 35mm concealed hinges.
- 【Seamless Mounting Support】: Utilize the detachable cabinet door mounting supports to hold heavy doors in perfect alignment with the frame. Fine-threaded adjustment rods allow you to dial in the exact height, turning a difficult two-person task into a stable, one-person cabinet door installation.
- 【Deviation-Free Drilling】: The rigid CNC aluminum body and quick clamp securely hold boards up to 38mm thick. Non-marring rubber pads prevent slipping, ensuring precise 90° tear-out free cup holes even on dense hardwoods like Oak or Maple.
- 【Built-In Dust Extraction Port】: Keep indoor workspaces spotless. The standard 1-3/8" dust port connects directly to shop vacs to remove chips instantly. This reduces heat buildup, prevents twist-lock clogging, and significantly extends the drill bit's life.
Common Mistakes to Avoid
- Using a universal overlay measurement instead of measuring the actual cabinet and choosing reveals deliberately.
- Relying only on old door dimensions rather than checking the installed opening and clearances.
- Forgetting to plan the center gap on a pair of doors.
- Choosing hinges by appearance without confirming cabinet type, application, plate compatibility and door specifications.
- Drilling hinge cups without checking the exact maker’s boring instructions and testing on matching scrap.
- Assuming every door needs the same hinge count.
- Expecting adjustment screws to fix a fundamentally wrong door size or drilling pattern.
- Failing to check the full swing against adjacent doors, walls, pull-outs and appliances.
Overlay door work starts with a measured cabinet and a chosen hinge system. Set the reveals, calculate the door dimensions, test the hardware on scrap, then install and adjust using the manufacturer’s instructions.
FAQ
What does overlay mean on a cabinet door?
Overlay is the amount by which a door overlaps the cabinet opening on the hinge side. The complete reveal layout includes the planned gaps or overlaps around the door and, for a pair, at the center.
How do I calculate a single overlay door’s size?
Add the left and right overlays to the opening width, and add the top and bottom overlays to the opening height. Measure the installed cabinet and check that the chosen hinge system can provide the intended overlay.
How should I size a pair of overlay doors?
Choose the outside overlays and center gap first. Deduct the center gap from the space allocated to the pair, then divide or allocate the remaining width according to the design. Test the layout with spacers before drilling.
Recommended Free Tools
Are 35 mm hinge cups universal?
No. Many common concealed hinges use a 35 mm cup, but some applications use other sizes or special hardware. Check the exact hinge instructions for cup size, depth, setback and fastener layout.
How many hinges does each cabinet door need?
There is no single count for every door. Follow the selected hinge maker’s current chart for the door’s dimensions and weight, accounting for additional weight from panels, glass or hardware.
Can a hinge jig replace the manufacturer’s instructions?
No. A jig can help make repeatable bores, but the selected hinge’s instructions control cup size, depth, setback and fastener placement. Confirm that the jig supports the hinge’s required cup and offset, then test on matching scrap.
Quick Recap
Product prices and availability are accurate as of the date/time indicated and are subject to change. Any price and availability information displayed on Amazon at the time of purchase will apply.
Free tools Windows power users keep installed
One-click scans. No signup required.