Do these 3 things before closing this tab:
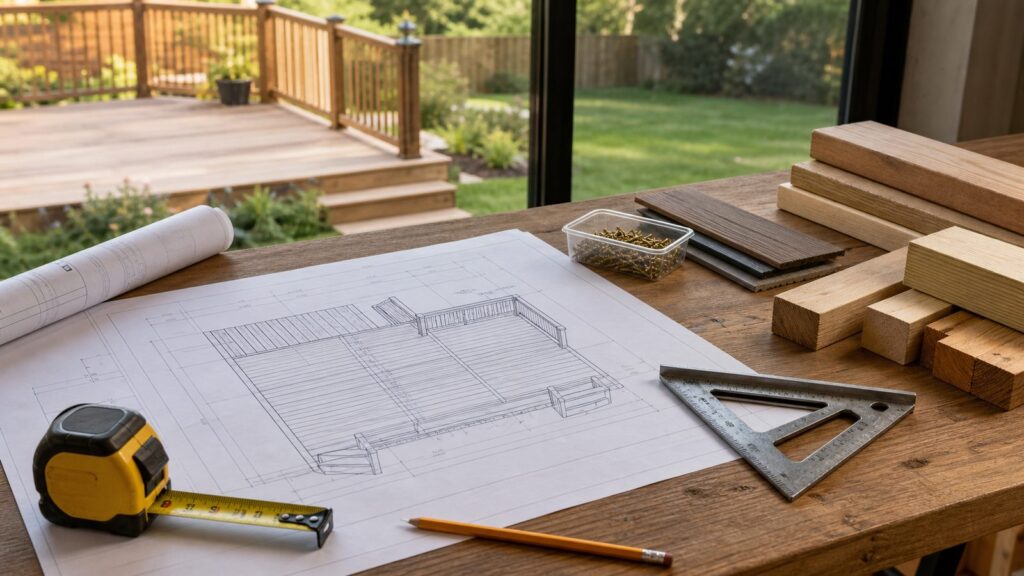
1Fix the driver behind crashes, sound loss and screen glitches2Clear out junk files and repair common Windows errors3Scan for outdated or missing drivers - takes under a minuteA DIY paver patio can be built in one day, but only if the project is the right size and the prep work is done before sunrise. The realistic one-day version is a small, ground-level, square or rectangular patio for foot traffic only. Think 50 to 120 square feet, no steps, no retaining wall, no outdoor kitchen, no roof posts, no major grading, and no surprise utility conflicts.
On our job sites, the difference between a patio that lasts and one that ripples after the first winter is rarely the paver itself. It is the excavation, drainage, base, edge restraint, and compaction. A one-day schedule does not excuse skipping those details. It means choosing a simple design, staging materials, and using methods that match the soil and intended use.
This guide gives you the practical version: what a one-day paver patio can and cannot be, what it should cost in 2026, how to lay it out, how much slope to build in, and when the smart move is to stop and call a contractor.
Can You Really Build a Paver Patio in One Day?
Yes, for a small pedestrian patio, but the word build has to be understood correctly. If utilities are already marked, the material is delivered, the layout is simple, and the weather cooperates, a homeowner with one helper can install a 10 ft. by 10 ft. paver patio in a long day. That is 100 square feet, which is about the upper middle of what we would call realistic for a first-time DIY one-day project.
The Tool Desk
Outbyte PC Repair FREERepair Windows errors before they cause bigger problemsFix Now →Outbyte Driver Updater FREEScan for outdated or missing drivers - takes under a minuteDriver Scan →#1 Best Overall

- HEAVY-DUTY INTERLOCKING PAVER SYSTEM: Strol's reinforced honeycomb cell structure locks gravel securely, supporting up to 600,000kg/m (122,889.6 lbs/f) for driveways, walkways, patios, and erosion-prone areas
- VERSATILE OUTDOOR APPLICATIONS: Suitable for residential or commercial projects such as parking pads, patios, fire lanes, RV spots, event paths, and large landscape edging layouts that require stability and long-lasting durability
- PERMEABLE DRAINAGE DESIGN: These pavers allow natural water flow through every panel, preventing pooling, puddles, and erosion, offering a sustainable solution for landscaping and stormwater control
- FAST TOOL-FREE INSTALLATION: The snap-lock system connects each panel without tools, making it easy for contractors and DIYers to quickly build driveways, patios, pathways, fire pits, and parking areas
- DURABLE RECYCLED POLYPROPYLENE PANELS: Made from UV-stable recycled plastic, these pavers resist cracking, weathering, and chemicals, providing long-lasting strength for demanding outdoor flooring and mud control projects
The traditional method uses excavation, compacted aggregate base, about 1 inch of bedding sand, edge restraints, pavers compacted into the bedding, and joint sand swept and compacted into the joints. That is the most familiar professional approach for interlocking concrete pavers. It is also labor-heavy. Excavating a 100 square foot patio 3 to 7 inches deep means moving roughly 1 to more than 2 cubic yards of soil before you bring in base material. That alone can eat half a day if access is poor.
The faster approach uses paver-base panels designed for pedestrian patios and walks. These panels can reduce excavation depth and hauling, which is why many one-day patios rely on them. They are not a universal replacement for an engineered aggregate base. Do not use them for driveways, heavy loads, retaining structures, questionable soils, or projects where the manufacturer does not approve the application.
One-Day Readiness Checklist
Before you buy a single paver, run the project through this checklist. If you miss more than one item, plan on a weekend instead of one day.
- Size: 50 to 120 square feet. A 10 ft. by 10 ft. patio is 100 square feet.
- Shape: square or rectangle, with no curves and few or no cuts.
- Use: chairs, a small table, grill, and foot traffic only. No vehicles or structural loads.
- Site: accessible, mostly flat, and not draining toward the house.
- Utilities: marked before the workday. Call 811 several days ahead.
- Materials: pavers, base, sand, edge restraint, spikes, and joint sand already on site.
- Labor: at least two able adults for excavation, hauling, screeding, and setting pavers.
- Weather: dry ground and no rain during polymeric sand installation.
- Design: paver dimensions chosen to avoid wet-saw cuts.
- Base decision: traditional compacted aggregate or panel base chosen before work starts.
Designing around full paver modules is one of the best time-savers. If your pavers are 12 inches by 12 inches, a 10 ft. by 10 ft. layout can work cleanly. If you use mixed-size pavers, a running bond, a herringbone border, or a diagonal pattern, order extra and budget time for cuts. For most concrete pavers, order 5% to 10% extra for cuts, breakage, and pattern waste. Use more for curves, diagonal layouts, natural stone variation, or complex borders.
DIY Paver Patio Cost in 2026
For a basic 10 ft. by 10 ft. DIY concrete paver patio, a realistic 2026 budget is about $700 to $1,800. That includes pavers, base or panels, bedding sand, edge restraint, spikes, polymeric sand, delivery, and tool rental. Reusing pavers or choosing basic concrete can lower the number. Premium colors, porcelain, natural stone, disposal fees, delivery charges, wet-saw rental, and bad access push it higher.
Installed professional paver patios cost much more because labor, excavation, base prep, compaction, grading, disposal, access, and warranty risk are built into the price. Current national figures put many professional paver patios in the $2,400 to $7,000 range. Lawn Love lists a $3,350 national average for a 280 square foot paver patio, with a typical range of $2,275 to $6,950. HomeGuide commonly lists installed paver patios around $10 to $17 per square foot, while Fixr lists about $10 to $25 per square foot.
| Cost Item | Typical 2026 Range | Notes |
|---|---|---|
| Concrete pavers | $2 to $6 per sq. ft. for many common choices | Material-only pricing varies widely; HomeGuide lists pavers from $1 to $15 per sq. ft. |
| 10 ft. x 10 ft. paver pallet | About $589 in a current Home Depot example | Roughly $5.89 per sq. ft. before delivery and accessories. |
| Base aggregate or panels | $150 to $500+ | Panels cost more per unit but save excavation and hauling time. |
| Bedding and joint sand | $75 to $250 | Polymeric sand costs more than regular joint sand and must be installed carefully. |
| Edge restraint and spikes | $75 to $200 | Do not skip this. Unsupported edges spread and settle. |
| Tool rental and delivery | $150 to $500+ | Plate compactor, wet saw, and delivery fees can dominate a small project. |
| DIY 100 sq. ft. total | $700 to $1,800 | Assumes a simple ground-level concrete paver patio. |
| Professional installation | Often $10 to $25 per sq. ft. | Higher for difficult access, drainage work, premium pavers, or complex layouts. |
Small patios can be surprisingly inefficient from a cost standpoint. A plate compactor rental, delivery fee, and wet saw rental may cost nearly the same for 80 square feet as for 250 square feet. That is why avoiding cuts and choosing locally available pavers can matter as much as the paver price itself.
Materials and Tools for a One-Day Patio
For a 100 square foot patio, start with 105 to 110 square feet of pavers. If you are using a border or pattern with cuts, increase that allowance. Pull pavers from multiple bundles or pallet layers as you install. Concrete pavers often have color variation, and blending from different layers prevents obvious light and dark blocks.
Crashes, No Sound, or Screen Glitches?
Random freezes, missing sound and display glitches usually trace back to one bad driver. Find and replace yours safely.Free scan · under a minuteWindows Errors? Fix Them Before They Spread
Repair common Windows errors and clear accumulated junk for a smoother, more stable PC - no reinstall needed.Free scan · no reinstallYou will also need base material or paver-base panels, bedding sand, edge restraint, 8 inch to 10 inch landscape spikes, polymeric sand or joint sand, marking paint, stakes, mason line, a tape measure, a square, a level, screed rails, a straight screed board, shovel, rake, wheelbarrow, hand tamper, broom, hose, and hearing and eye protection. For traditional aggregate base, rent a plate compactor. For textured or delicate pavers, use a protective pad when compacting if the paver manufacturer recommends it.
Do not build directly on topsoil. Organic soil moves, holds water, and decays. For a traditional base, excavation depth commonly includes the paver thickness, 1 inch of bedding sand, and several inches of compacted aggregate. Exact depth depends on soil, climate, paver thickness, and manufacturer guidance. In freeze-thaw regions or wet clay soils, poor drainage is often the real failure point, so prioritize base depth, soil separation fabric where appropriate, and a clear path for water to leave the patio.
Step-by-Step One-Day Build Plan
1. Mark the Patio and Confirm the Finished Height
Set stakes at the corners and run mason line around the patio. Check for square by measuring diagonals; matching diagonals mean the rectangle is square. Decide the finished surface height before you dig. The final paver surface should sit slightly proud of adjacent lawn or soil before compaction and settlement, but it must not create a trip hazard at walks, doors, or steps.
Rank #2

- DURABLE: This plastic sheet is made from waterproof corrugated plastic, smooth surface, sun-resistant, reusable, can be used indoors and outdoors for a long time.
- DOUBLE-SIDED: With a smooth and blank surface on both sides, use your creativity to decorate the poster blank board for your yard, show your neighbours and passersby from different angles.
- CUSTOMIZABLE: You can decorate the black corrugated plastic boards with markers, pigment, paint, stickers, also you can stick the poster on it.
- PACK OF 10: You will receive 10 pieces plastic boards with the standard size of 24" x 36", 4mm thickness, can be easily cut to your preferred size and shape.
- TWO YEAR WARRANTY: If you have any problems with our corrugated plastic signs, please feel free to contact us, we will get back to you as soon as possible and solve the problem.
If the patio meets a house, do not bury siding, weep screeds, door thresholds, vents, or trim. Leave proper clearance and maintain drainage away from the structure.
2. Build in the Correct Slope
Drainage is not optional. Impervious patios near a house should slope away from the foundation. A common residential target is 2%, which equals about 1/4 inch per foot. The simple math is: patio run in feet x 0.25 = total fall in inches.
For a 10 foot patio running away from the house: 10 x 0.25 = 2.5 inches of fall. That means the outer edge should be about 2 1/2 inches lower than the house-side edge. Set your strings to that slope and check them repeatedly. A patio that looks flat to the eye can still drain correctly if the slope is consistent.
3. Excavate Cleanly
Remove sod, roots, organic material, and loose soil. Keep the excavation wider than the paver field so the edge restraint has support. A common mistake is digging exactly to the patio size, laying pavers, and then attaching edge restraint over soft soil. The perimeter carries real lateral force. Overbuild it.
For panel-base systems, follow the panel manufacturer depth and layering instructions. For traditional aggregate, excavate deep enough for compacted base, bedding sand, and paver thickness while preserving slope. Keep the subgrade smooth and firm. If you hit saturated soil, pumping clay, buried debris, or major roots, stop and reassess.
Recommended Free Tools
4. Compact the Subgrade and Base
Run the plate compactor over the subgrade before base material goes in. Then place aggregate in lifts rather than dumping one thick layer and hoping it tightens up. For small patios, 2 inch lifts are easier to compact consistently. Make multiple passes in overlapping rows, checking slope as you go.
If you use paver-base panels, the usual sequence is compacted soil, a thin leveling sand layer, panels, then pavers. That saves time because you are not hauling and compacting several inches of gravel. It still requires a firm, sloped subgrade. Panels do not fix bad drainage or unstable soil.
5. Screed the Bedding Sand
For a traditional paver base, place a nominal 1 inch layer of bedding sand over the compacted aggregate. Set screed rails to the correct slope, pull a straight board across them, and remove the rails carefully. Fill the rail voids with sand and smooth them without overworking the surface.
Do not walk directly on screeded sand. Work from the laid pavers or from boards. Disturbed bedding creates low spots, tilted pavers, and uneven joints.
6. Lay Pavers From a Square Corner
Start from a fixed, square corner and work outward. Keep consistent joints and check alignment every few rows. A string line across the face of the pavers will show drift before it becomes a visible curve. If a paver rocks, lift it and correct the bedding. Do not hammer it into a hollow and hope compaction solves it.
For speed, use a simple running bond, stack bond, or modular pattern recommended by the paver supplier. A soldier-course border looks finished, but it can add cuts unless the field dimensions were planned around it.
Rank #3

- HEAVY DUTY WOVEN DRIVEWAY FABRIC: True 4 oz woven geotextile with 200 lb rated tensile strength; strong enough for cars and trucks to drive on; stabilizes gravel driveways and roads
- UNDER GRAVEL: Lay this woven geotextile fabric under gravel or rock for separation and stability; helps avoid ruts and potholes in driveways, roads, paver bases and sidewalks
- LONG LASTING: Heat-sealed ends keep the edges from unraveling; dimensionally stable; made to last up to 50 years when properly buried
- EASY TO INSTALL: Save time and money; we stock many sizes to cut down on scrap, so you can use one single piece cut to exact dimensions; this size ships folded
- RIGHT FABRIC FOR THE JOB: Woven geotextile separates and stabilizes under driveways and roads; for French drains and water filtration choose our Super Geotextile Non Woven fabric
7. Install Edge Restraint
Once the pavers are placed and aligned, install edge restraint tight to the outside edge. Spike it into the supported base, not loose soil. This is one of the cheapest parts of the project and one of the most important. Without it, the outside rows can creep, joints open up, and the patio starts to lose its shape.
8. Compact, Sand the Joints, and Finish
Sweep sand into the joints, compact the pavers if the manufacturer allows it, then sweep more sand until the joints are filled. For polymeric sand, the surface must be clean and dry before activation. Follow the bag instructions exactly for watering. Too little water can leave weak joints. Too much water or sloppy cleanup can leave haze or staining on the paver face.
Free tools Windows power users keep installed
One-click scans. No signup required.
Finish by backfilling around the edge restraint and grading soil so water continues away from the patio. Do not pile mulch or soil above the paver surface at the edge; that traps water and dirt against the patio.
Pro Details That Keep the Patio Flat
The patio surface is only as good as what is underneath it. We look for four things on paver work: controlled water, compacted support, locked edges, and clean joints. If those are right, the patio has a fair chance. If one is wrong, the paver pattern will not save it.
For freeze-thaw climates, drainage deserves extra attention. Water that sits in the base can freeze, expand, and lift the surface. When it thaws, the pavers settle unevenly. In clay soils, water can move slowly, so an open drainage path and proper aggregate matter. In sandy soils, compaction and edge support still matter, but drainage may be less difficult.
Keep transitions practical. At a lawn edge, the patio can sit slightly above grade so soil does not wash onto it. At a walkway, threshold, or step, keep the transition flush enough to avoid a trip hazard. A small height mistake at a patio door can become a daily nuisance.
What’s actually slowing this PC down?
Pick the symptom - the matching free tool is one click away.
Finally, use the right compactor setup. Some pavers can be compacted directly. Others need a urethane pad or other protective pad to prevent scuffs, especially textured, tumbled, or premium finishes. Check the paver manufacturer guidance before the rental clock starts.
Permits, Utilities, and Stormwater Rules
Many ground-level patios do not need a traditional building permit, but that is not the same as no rules. Cities and counties may regulate setbacks, impervious surface coverage, stormwater runoff, drainage discharge, work near easements, flood zones, and patios attached to other structures. Some jurisdictions treat patios differently depending on height, whether they are covered, whether they support a roof, or whether they change drainage.
Examples vary widely across the U.S. Some local rules focus on whether the patio is ground-level and uncovered. Others review the amount of new impervious surface. Some areas offer stormwater credit for properly designed permeable paving, but that usually requires specific base layers, documentation, and inspection. Do not assume a standard concrete paver patio qualifies as permeable just because water can enter the joints.
Call 811 before digging. Marking utilities is not optional on a professional site, and it should not be optional at home. Irrigation lines, landscape lighting, gas lines to grills, and buried electrical can all be shallow. If your patio area crosses utilities or cleanouts, redesign before you dig.
When to DIY vs. When to Hire a Pro
DIY makes sense when the patio is small, simple, accessible, and low risk. A 10 ft. by 10 ft. seating area in a flat backyard, built with square concrete pavers and no cuts, is a reasonable homeowner project. If you have a helper, staged materials, and a panel-base system approved for the use, one long day is possible.
Rank #4

- DURABLE AND ECO-FRIENDLY: Crafted from 100% recycled PPE plastic, our gravel paver system delivers exceptional strength and longevity; This set includes 22 units with a 1-inch depth, covering an area of 65 square feet
- IMPRESSIVE LOAD CAPACITY: With the capacity to handle up to a staggering 27,000 lbs (depending on the base and fill used), HexPave gravel grids ensure stability and support for your outdoor projects; Each unit measures 22 7/8" l x 19 7/8" w x 1 1/8" h
- VERSATILE APPLICATION: Whether you're dreaming of a charming grass patio, a driveway, serene walkway or a sturdy shed base, HexPave's adaptability makes it an ideal choice for a wide range of outdoor projects
- EASY INSTALLATION: Our user-friendly gravel grid simplifies installation, saving you time and effort; Achieve professional-looking results with ease
- SUSTAINABLE WALKING PATH CHOICE: These permeable pavers allow rainwater to seep through the surface and be naturally filtered by the ground, reducing runoff and helping to recharge groundwater
Hire a pro when the patio touches the foundation, the yard drains toward the house, the soil is expansive clay or stays saturated, there are large tree roots, the grade is steep, or the patio sits over utilities. Also call a contractor for steps, retaining walls, outdoor kitchens, fire features, roof or pergola attachments, complex drainage, permeable paver credit, or anything that must pass permit inspection.
The cost difference is real, but so is the risk. A failed DIY patio can require pulling every paver, hauling out contaminated base, correcting grade, and rebuilding from the subgrade up. Paying for professional installation is often cheaper than paying twice when the site has drainage or structural complications.
Maintenance After the First Day
Do not judge the patio only by how it looks at sunset on installation day. Watch how it handles the first hard rain. Water should move away from the house and off the paver field without ponding. A small damp area after rain is normal; standing water that lingers points to a slope or settlement problem.
Keep joints filled. Top up joint sand as needed, especially after the first season. Sweep debris before it decomposes in the joints. Avoid aggressive pressure washing that blasts out sand. If polymeric sand hazes, follow the manufacturer cleanup guidance rather than using harsh chemicals blindly.
Expect minor settlement around the edges if backfill was loose. Correct it early before water starts using that low spot as a channel. The best paver patios are not maintenance-free, but they are serviceable. Individual pavers can be lifted and reset, which is one reason they remain a practical choice for patios, walks, and outdoor seating areas.
Bottom Line
A one-day DIY paver patio is realistic when it is small, rectangular, pedestrian-only, and planned around full pavers. The work is not complicated, but it is physical and unforgiving. The patio needs the same fundamentals a professional crew pays attention to: stable subgrade, correct slope, compacted support, strong edge restraint, and clean joint sand installation.
If your goal is a simple 100 square foot backyard seating area, budget $700 to $1,800 in 2026 and plan one long day with a helper. If the site has drainage problems, steep grade, structural features, permit complications, or questionable soils, stretch the schedule or bring in a professional. The right decision is the one that keeps water away from the house and keeps the pavers flat years after the first weekend is over.
Quick wins for a faster PC:
Scan for outdated or missing drivers - takes under a minuteDriver Scan →Clear out junk files and repair common Windows errorsFree Scan →Frequently Asked Questions
Can you really build a paver patio in one day?
Yes, if it is small, simple, and prepared in advance. The best one-day candidate is 50 to 120 square feet, square or rectangular, ground-level, pedestrian-only, with materials delivered, utilities marked, and at least one helper.
How much does a DIY paver patio cost in 2026?
A basic 10 ft. by 10 ft. DIY concrete paver patio typically costs about $700 to $1,800 for pavers, base or panels, sand, edging, spikes, delivery, and rented tools. Premium materials, cuts, disposal, and difficult access increase the cost.
What slope should a paver patio have away from the house?
Use a 2% slope, or about 1/4 inch per foot, for impervious patio surfaces near a foundation. Multiply the patio run in feet by 0.25 to get the fall in inches. A 10 foot run needs about 2.5 inches of fall.
Do I need a permit for a ground-level paver patio?
Many uncovered ground-level patios do not need a standard building permit, but local rules vary. Check setbacks, impervious surface limits, stormwater requirements, easements, flood zones, and rules for patios attached to roofs, decks, or other structures.
Are paver-base panels better than gravel?
Paver-base panels can save time and reduce excavation for pedestrian patios and walkways, but they are not universal. Traditional compacted aggregate is often better for poor soils, freeze-thaw regions, heavy loads, and projects requiring engineered details.
When should I hire a contractor for a paver patio?
Hire a pro if the patio touches the foundation, the yard drains toward the house, soil is saturated or expansive clay, the grade is steep, utilities are involved, or the project includes steps, retaining walls, outdoor kitchens, fire features, or a roof structure.
Quick Recap
Product prices and availability are accurate as of the date/time indicated and are subject to change. Any price and availability information displayed on Amazon at the time of purchase will apply.