Recommended Free Tools
Fall leaves are one of the best free building materials a homeowner gets every year. They are carbon-rich, easy to collect, and valuable in the garden once they break down. The catch is that a heap of whole leaves is not the same thing as a well-built compost pile. Whole leaves mat together, shed water, limit oxygen, and can sit for a year or more before turning into useful leaf mold.
For fast, balanced compost, treat the pile like a small construction project: right footprint, right material mix, right moisture, and enough air. A practical target is a pile at least 3 feet wide by 3 feet deep by 3 feet tall, built with roughly 2 to 3 parts shredded leaves or other browns to 1 part greens by volume. Keep it as damp as a wrung-out sponge, turn it when it cools or smells, and aim for an active temperature around 130 to 150 degrees F.
As an Amazon Associate I earn from qualifying purchases.
Done well, a managed fall leaf pile can produce usable compost in about 6 to 12 weeks under good conditions. A cold, mostly leaf pile may still be worthwhile, but expect 6 to 18 months or longer. Both have a place. The difference is whether you want finished compost soon or a low-effort leaf mold pile for future soil conditioning.
Why Fall Leaves Make Excellent Compost Material
Leaves are mostly carbon, which makes them the brown side of composting. Browns give the pile structure and energy for microbes. Greens, such as grass clippings, coffee grounds, fruit and vegetable scraps, fresh garden trimmings, and some manures, provide nitrogen. Composting works best when both are present.
#1 Best Overall
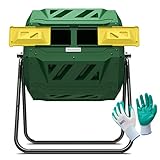
- ✅Speed Up Composing Process: More advanced models use rotating to bring oxygen to the center of the bin and paddles inside the chamber to help mix and aerate the composting materials when turned. These improvements or modifications are designed for one reason: to speed the composting process.
- ✅How do Compost Tumblers work? Simple. You load them with green and brown waste from your yard and kitchen. When full, you give them time to work, in other words, heat up. Turning a compost pile mixing the organic materials and the organisms it contains with heat-producing oxygen is the traditional method of keeping the process going full steam. By turning the tumbler, the organic materials are mixed and infused with fresh oxygen.
- ✅Easy to Access Finished Compost: Just Slide the door open and take the organic fertilizer out when the compost is ready. When a check reveals the compost is complete —and this can happen in a matter of weeks —the same access that allowed you to fill the tumbler lets you empty it. Now is the time to spread the results.
- ✅Dual-Bin Design: The dual bin design takes a different approach to the continuous-use composted concept, Two bins are set side-by-side into a single rotating chamber. Thickly insulated compartments conserve the heat generating by the decaying matter, and this greatly speeds the process. This design also allows you to add food waste to one chamber while the other is composting.
- ✅Totally Organic and Money-Saving: If you're looking for a fast, convenient way to compost your kitchen throw-outs, grass clippings, and organic yard waste, our outdoor kitchen compost bin is just right for you! The Compact Compost Tumbler quickly recycles it into nutrient-rich compost.
The scientific target for active compost is a carbon-to-nitrogen ratio around 25:1 to 30:1. Homeowners do not need to calculate that with a spreadsheet, because material values vary widely. Leaves often land somewhere around 30:1 to 80:1, depending on species and condition. Grass clippings are commonly closer to 12:1 to 25:1. That is why a simple job-site rule works: use about 2 parts leaves or browns to 1 part greens by volume, then adjust by smell, temperature, and texture.
The scale matters beyond your yard. The EPA’s latest national yard-trimmings benchmark remains the 2018 dataset: 35.4 million tons of yard trimmings were generated in the United States, and 22.3 million tons were composted or mulched, a 63 percent recovery rate. A backyard pile is a small move, but it keeps useful organic matter on-site instead of paying to haul it away and paying again to buy soil amendment later.
The Perfect Fall Leaf Compost Recipe
For most homeowners, the most reliable recipe is simple: shredded leaves, fresh greens, water, and air. Build the pile large enough to hold heat, but not so large that the center goes oxygen-starved. A 3-foot by 3-foot by 3-foot pile is the minimum working size for hot composting. A 4-foot cube is easier to keep hot in cold weather. Try to stay under about 5 feet high and 5 feet wide unless you have equipment or a serious turning system.
What’s actually slowing this PC down?
Pick the symptom - the matching free tool is one click away.
Basic Batch Formula
For one backyard hot batch, use this starting point:
- Two to three wheelbarrows of shredded dry leaves
- One wheelbarrow of greens, such as fresh grass clippings, coffee grounds, vegetable scraps, or fresh garden waste
- Enough water to bring the pile to 40 to 60 percent moisture
- A 4- to 6-inch base layer of coarse browns, such as small twigs, wood chips, or dry stalks
- A pitchfork, manure fork, compost aerator, or turning fork
Build in layers first, then mix. Start with the coarse brown base. Add 4 to 6 inches of shredded leaves, then 2 to 3 inches of greens. Wet each layer lightly as you go. Once the pile is built, fluff and mix it enough that you do not leave sealed sheets of wet grass or packed leaves. On our job sites, we treat airflow the same way we treat drainage: if the material is compacted, it will cause trouble later.
What Counts as Browns and Greens
Browns include fall leaves, straw, small wood chips, shredded plain paper, cardboard torn into small pieces, sawdust in modest amounts, and dry plant stalks. Greens include grass clippings, fruit and vegetable scraps, coffee grounds, fresh weeds before seed, fresh garden waste, and many animal manures from herbivores.
Do not add meat, dairy, fats, oils, pet waste, diseased plants, invasive weeds with seed heads, glossy paper, or clippings recently treated with persistent herbicides unless local extension guidance confirms they are safe. Persistent herbicide residues can survive ordinary backyard composting and injure tomatoes, beans, peas, peppers, and other sensitive garden plants later.
Shred the Leaves Before You Build
If there is one step that separates a slow leaf heap from a productive compost pile, it is shredding. Whole leaves behave like shingles. They overlap, shed water, and create flat mats with very little oxygen between them. Shredded leaves expose more surface area, hold moisture more evenly, and mix better with greens.
The simplest method is to run leaves over with a mulching mower. Spread them in a thin layer on the lawn and make one or two passes. If the mower has a bag, collect the shredded leaves directly. If not, rake or blow the chopped material into your pile area. A string trimmer can also shred leaves inside a clean trash can. Electric leaf shredders work well for high volumes, but they are not required.
For 2026 budgeting, a DIY open pile can cost $0 to $25 if you already own a mower, hose, and fork. A homeowner-grade electric leaf shredder commonly runs about $80 to $250. If you already own a mulching mower, spend the money on a compost thermometer and a decent fork first. Those two tools will tell you more and save more labor than a shredder on a small property.
Choose the Right Compost Setup
Your bin does not make the compost; the material mix does. The bin’s job is to contain the pile, preserve heat, discourage pests, and keep the yard looking orderly. Pick the setup based on space, visibility, budget, and how much turning you are realistically willing to do.
Rank #2

- Twin chambers: Two separate chambers allow one side to finish composting while leaving the other side available to add fresh wastes; Constant alternation of the two sides will create an uninterrupted stream of nutritious compost
- 360⁰ Tumbling Design: The rotating design prevents you from digging or mixing the pile by hand; And the deep fins on eight panels make it easier to turn the compost bin
- Excellent Aeration: Air vents can make the air fully circulate and will not cause an explosion due to excessive internal pressure; Deep fins can better break the clumps, which is conducive to the full fermentation of oxygen
- Sturdy & Durable Construction: Constructed of premium metal frame and high-quality pp plastic body, this tumbling composter is corrosion-resistant, weathering-resistant, sturdy, and durable for long-lasting service life
- Garden Gloves Included: The gloves that not only protect your hands from injury, but are also waterproof, making them easy to clean; With 4 durable ABS plastic claws for easy digging, planting and other gardening work
| Setup | Typical 2026 Cost | Best For | Watch-Outs |
|---|---|---|---|
| Open pile | $0-$25 | Large lots, low-cost composting, easy turning | Can look messy and may attract animals if food scraps are exposed |
| Wire cylinder or wire bin | $20-$80 | Leaves, yard waste, simple containment | Needs stakes or ties if the wire is light gauge |
| Stationary plastic bin | $50-$150 | Smaller yards, tidier appearance, pest resistance | Harder to turn thoroughly in narrow units |
| Tumbling composter | $55-$250 | Kitchen scraps, small batches, limited mobility | Small capacity; can get too wet without enough dry browns |
| Wood or cedar bin | $100-$300+ | Permanent garden areas and higher curb appeal | Wood eventually weathers; removable slats are worth paying for |
| Compost thermometer | $15-$40 | Anyone trying to make hot compost | Use a 16- to 20-inch probe for useful center readings |
| Fork or compost aerator | $25-$80 | Turning, lifting, and correcting wet spots | Cheap flat shovels are poor tools for aerating compost |
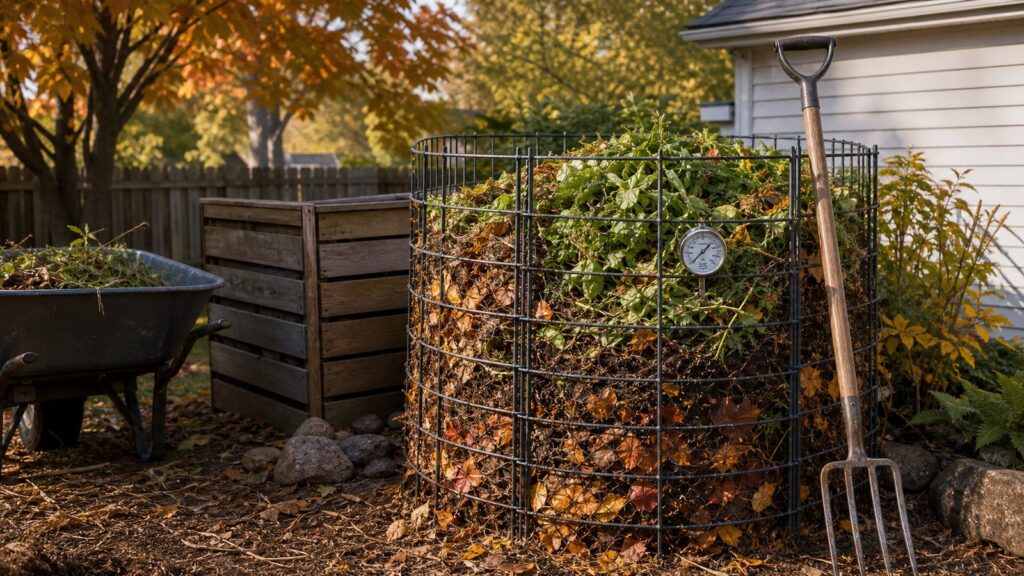
A wire cylinder about 3 to 4 feet across is one of the best values for fall leaves. Hardware cloth or welded wire holds the pile together, lets air move through the sides, and can be opened when it is time to turn. A three-bin wood system is better if you process a lot of leaves every year: one bay for fresh material, one for active compost, and one for curing or finished compost.
Where to Put the Pile
Place the pile on soil where possible. Soil contact helps with drainage and gives worms and microbes a direct path into the pile. A shaded or partly shaded location is easier to manage in summer, but fall leaf compost can work in sun or shade as long as moisture is controlled.
Keep the pile convenient. If it is 200 feet from the kitchen door, you will stop using it in February. A practical location is close enough to reach with food scraps, a hose, and a wheelbarrow, but not directly against siding, wood fencing, or deck framing. Leave room to stand beside it with a fork. For accessibility, a tumbler or waist-high bin may be better than a ground pile for older homeowners or anyone with back, knee, or grip limitations.
Also think like a drainage contractor. Do not place the pile where runoff can carry leachate into a storm drain, ditch, creek, pond, or neighboring property. Avoid low spots that stay soggy after rain. If you see standing water, the pile will likely smell sour and go anaerobic.
Free tools Windows power users keep installed
One-click scans. No signup required.
Build the Pile Step by Step
1. Stockpile Dry Leaves
Set aside more leaves than you think you need. Dry leaves are useful all winter for covering kitchen scraps and correcting wet, nitrogen-heavy additions. Store them in breathable paper lawn bags, a wire corral, or a dry corner of the shed. A separate leaf stockpile is one of the easiest ways to keep a pile balanced after the fall cleanup is over.
2. Start With a Coarse Base
Lay down 4 to 6 inches of twigs, small wood chips, coarse stems, or chunky browns. This base absorbs excess liquid and creates a little air space at the bottom. It is especially useful in plastic bins or heavy clay soils where drainage is limited.
3. Alternate Browns and Greens
Add shredded leaves in 4- to 6-inch lifts. Add greens in thinner 2- to 3-inch layers. Grass clippings are strong nitrogen material, so use them carefully. A thick mat of wet clippings can turn slimy fast. Break clumps apart and mix them with shredded leaves before they pack down.
4. Water as You Go
A common mistake is building a dry pile and trying to soak it later. Dry shredded leaves can repel water, especially after they compact. Lightly wet each layer during construction. The finished pile should feel like a wrung-out sponge: damp to the touch, with maybe a drop or two of water if squeezed hard, but not dripping.
Crashes, No Sound, or Screen Glitches?
Random freezes, missing sound and display glitches usually trace back to one bad driver. Find and replace yours safely.Free scan · under a minuteWindows Errors? Fix Them Before They Spread
Repair common Windows errors and clear accumulated junk for a smoother, more stable PC - no reinstall needed.Free scan · no reinstall5. Mix and Shape
After layering, use a fork to blend the pile enough that browns and greens are distributed. Shape it with a flat or slightly rounded top. In wet climates, a slight crown sheds excess rain. In dry climates, a shallow depression can help catch water, but do not create a bowl that stays saturated.
Moisture, Temperature, and Turning
Compost is managed by three field measurements: moisture, heat, and smell. You do not need lab equipment, but a thermometer removes guesswork. A 16- to 20-inch compost thermometer costs about $15 to $40 and is worth owning if you want predictable results.
Moisture Target: 40 to 60 Percent
Microbes need moisture to work. Too dry, and the pile sits unchanged. Too wet, and air spaces fill with water, causing odor and anaerobic conditions. The practical target is 40 to 60 percent moisture. Use the squeeze test: grab material from inside the pile and squeeze it. If it falls apart dry and dusty, add water. If water streams out, mix in dry leaves, straw, or shredded cardboard and turn the pile.
Rank #3

- FEATURED IN BON APPETIT & FORBES: Recognized by renowned magazines, EPICA’s compost bin is a perfectly sized marvel for your kitchen, compact yet spacious enough to hold days' worth of compostable organic waste. Measures 7.16" in diameter x 11" high.
- CONTROL KITCHEN ODORS NATURALLY: This indoor compost bin with a charcoal filter features an airtight lid and a replaceable activated-charcoal filter to help reduce odors. Enjoy a fresher kitchen with an odor-free compost bucket designed for daily use.
- EASY TO CLEAN & RESISTANT TO LEAKS: This countertop bin features a one-piece molded design that resists rust and leaks. The container's construction is easy to hand-wash with warm water and is built for everyday convenience. Empty & clean weekly for best results. Rinse the filters and air dry them to extend their life, or replace them (they last 3-6 mo. with regular use). Don't saturate the charcoal filters- gentle rinsing is enough.
- BUILT TO LAST A LIFETIME: Crafted from premium stainless steel, this stainless steel compost container resists scratches and rust for lasting durability. An ideal compost bin for kitchen counter use that combines style with everyday performance.
- REPLACEABLE CHARCOAL FILTER FOR ODORLESS COMPOSTING: Activated-charcoal filters help keep this countertop compost bin fresh by reducing odors. With proper care, each filter lasts 3–6 months, making this compost bucket easy to maintain.
Temperature Target: 130 to 150 Degrees F
A well-built hot pile often warms within 24 to 72 hours. The active range commonly used for backyard composting is about 130 to 150 degrees F. Around 135 to 140 degrees F is a strong working zone. At 130 to 150 degrees F, many weed seeds and pathogens are reduced when the pile is managed correctly, though backyard piles are less uniform than commercial systems.
Do these 3 things before closing this tab:
1Repair Windows errors before they cause bigger problems2Scan for outdated or missing drivers - takes under a minute3Clear out junk files and repair common Windows errorsIf the pile never heats, the usual causes are small size, dry material, not enough nitrogen, whole leaves, or poor mixing. Add greens, water, and more mass if needed. If the pile climbs above about 150 to 160 degrees F, turn it and add browns to cool it. Very high heat can reduce the organisms that do the work.
When to Turn
Turn the pile when the temperature drops after peaking, when the center smells bad, or when the outside material is not breaking down. For a fast fall batch, turn every few days early on, then weekly as the pile becomes more uniform. For a lower-effort pile, turn every 2 to 4 weeks and accept a longer finish time.
Turning means moving outside material into the center and center material toward the outside. Do not just poke holes in the same compacted mass and call it done. Poking helps, but a true turn rebuilds the pile with fresh oxygen and better distribution.
Leaf-Only Compost vs Balanced Hot Compost
A leaf-only pile is not wrong. It is just different. Leaves alone make leaf mold, a dark, crumbly soil conditioner that improves structure and moisture retention. It is excellent around shrubs, woodland plantings, and garden beds. But because leaves are high in carbon and low in nitrogen, a leaf-only pile is slower than balanced compost.
Quick wins for a faster PC:
Repair Windows errors before they cause bigger problemsFix Now →Scan for outdated or missing drivers - takes under a minuteDriver Scan →Clear out junk files and repair common Windows errorsFree Scan →If you want finished compost in the same season, add greens. If you want a low-maintenance way to store leaves and make future mulch, build a leaf mold pile. Shred the leaves, wet them thoroughly, contain them in a wire corral, and let time do the work. Expect 6 to 18 months or more, depending on leaf type, moisture, shredding, and climate.
Oak, beech, and sycamore leaves can be slower because they are tougher and may contain more lignin. Soft, thin leaves usually break down faster. Pine needles can be composted in moderation, but they break down slowly and are better used as a separate mulch in many landscapes.
How to Know Compost Is Finished
Finished compost is dark, crumbly, and earthy-smelling. The original leaves should be mostly unrecognizable. The pile should no longer heat significantly after turning, and the texture should be stable rather than slimy, sour, or full of intact food scraps.
Before using compost in vegetable beds, let it cure for a few weeks after active heating ends. Screening is helpful. Use 1/2-inch hardware cloth over a wheelbarrow to separate finished material from woody chunks, stems, and unbroken leaves. Return the coarse pieces to the next pile. They are already inoculated with microbes and help the new pile get started.
The Tool Desk
Outbyte PC Repair FREEClear out junk files and repair common Windows errorsFree Scan →Outbyte Driver Updater FREEFix the driver behind crashes, sound loss and screen glitchesFind Drivers →Use finished compost as a soil amendment, not as pure planting soil. Spread 1/2 inch to 1 inch over lawns, mix 1 to 2 inches into vegetable beds, or use it as part of a planting mix with mineral soil and other components. Too much compost can overload beds with nutrients, especially phosphorus, so be measured.
Common Problems and Fixes
The Pile Smells Like Ammonia
Ammonia means too much nitrogen or not enough carbon. This often happens after dumping in a heavy load of fresh grass clippings. Add shredded dry leaves, straw, or shredded cardboard and turn thoroughly. Keep future grass layers thin.
Rank #4

- Fast, Effortless Composting: This outdoor compost bin features a 360° rotating design with built-in mixing bars—just spin the drum for thorough mixing, no manual turning needed. Adjustable air vents let you control airflow, moisture, and temperature to reduce odors and accelerate decomposition, making this compost bin both efficient and low-maintenance.
- Dual Chamber, Continuous Composting: Enjoy non-stop composting with this 53-gallon compost bin outdoor system: add fresh kitchen scraps to one chamber while the other finishes decomposing. Perfect for eco-conscious gardeners, it produces nutrient-rich compost in as little as 4–6 weeks—ideal for your backyard or vegetable garden.
- Assembles in Minutes: Designed for hassle-free setup, this outdoor compost bin uses snap-together construction with minimal screws—no special tools required. Whether you're a beginner or seasoned gardener, you’ll have your compost bin ready in minutes. Includes a pair of gardening gloves for planting and yard work!
- Easy to Use: The ergonomic handle with gear-assist system ensures smooth, effortless rotation—even when fully loaded. Extra-large sliding doors make loading waste and harvesting compost simple, while dual-direction brake locks keep the drum stable during use. A truly user-friendly compost bin outdoor solution for everyday sustainability.
- Sturdy & Built to Last: Built to withstand the elements, this compost bin combines a heavy-duty steel frame with UV-resistant PP plastic that resists rust, cracking, and corrosion. Reinforced leg supports prevent barrel sagging, even under full load—making it the most durable outdoor compost bin for year-round composting.
The Pile Smells Rotten or Sour
Rotten odor means the pile is too wet, compacted, or oxygen-starved. Turn it, loosen dense clumps, and add dry browns. Check the site for drainage problems. If the pile sits in a wet low spot, move future batches to higher ground.
The Pile Will Not Heat
Check size first. A pile smaller than 3 feet by 3 feet by 3 feet often cannot hold enough heat. Next check moisture. Dry leaves can look active on the outside and be bone-dry inside. Finally, add greens if the mix is mostly leaves. Coffee grounds, fresh grass, and vegetable scraps can help.
There Are Flies or Animals
Food scraps should be buried in the center and covered with 4 to 6 inches of dry leaves or finished compost. Avoid meat, dairy, fats, and oily foods. In dense neighborhoods, use a lidded stationary bin or tumbler for food scraps and keep the open pile for leaves and yard waste.
The Pile Is Full of Whole Leaves After Months
That is usually a shredding and moisture problem. Pull the pile apart, run intact leaves through a mower if practical, rebuild with greens, and water each layer. Whole dry leaves can survive in a pile for a long time if they are compacted.
Independent reader supportYour contribution helps us test, update, and keep practical guides available for everyone.Safety, Codes, and Neighbor Considerations
Backyard composting is usually allowed, but rules are local. Some municipalities regulate pile placement, nuisance odors, setbacks, animal attraction, and what materials can be composted. Larger operations, commercial composting, or accepting outside waste can trigger state or local permitting. Homeowners should check city, county, or HOA rules before building a large permanent bin system.
As a practical starting point, keep piles away from property lines, wells, drainage swales, storm drains, and combustible structures. Do not build directly against a wood fence or shed wall. Keep the area clear enough that you can inspect for pests and turn the pile safely. Wear gloves, especially when handling manure, food scraps, or moldy material. If dust or mold bothers your lungs, wet the pile lightly before turning and use a mask.
Fire risk from a normal moist backyard compost pile is low, but dry piles, very large piles, and piles contaminated with ash or chemicals deserve caution. Do not add fireplace ash in large amounts, charcoal ash, treated lumber sawdust, solvents, or construction debris. Compost is a biological process, not a disposal site.
What It Costs Compared With Buying Compost
The cheapest compost you will ever use is usually the compost made from material already on your property. A basic fall leaf pile can cost nothing if you have leaves, a mower, a hose, and a fork. Even if you buy wire mesh, stakes, a thermometer, and a better fork, the first-year investment often stays under $150.
Buying finished compost is still useful when you need volume right now. In 2026, bulk finished compost commonly runs about $20 to $50 per cubic yard for material alone, and about $75 to $225 per cubic yard delivered and installed. Municipal compost can be much lower, with examples around $15 to $30 per cubic yard in some cities. Private specialty compost may run $55 to $70 per cubic yard or more, especially for screened, certified, or specialty blends.
Cost drivers include region, delivery distance, pickup versus delivery, municipal versus private supplier, screened versus unscreened material, organic certification, contamination testing, volume, fuel, and whether labor to spread the compost is included. For one raised bed, buying bags may be fine. For topdressing a lawn or improving several beds, bulk pricing usually makes more sense.
The Tool Desk
Outbyte PC Repair FREEClear out junk files and repair common Windows errorsFree Scan →Outbyte Driver Updater FREEScan for outdated or missing drivers - takes under a minuteDriver Scan →When to DIY vs When to Hire a Pro
Most leaf composting is a DIY job. If you can rake, mow, water, and turn material safely, there is no reason to hire a contractor just to build a small compost pile. A homeowner with a 1/4-acre lot can usually collect enough leaves for one or two cubic yards of composting material without special equipment.
Best Value

- ✅Speed Up Composing Process: More advanced models use rotating to bring oxygen to the center of the bin and paddles inside the chamber to help mix and aerate the composting materials when turned. These improvements or modifications are designed for one reason: to speed the composting process.
- ✅How do Compost Tumblers work? Simple. You load them with green and brown waste from your yard and kitchen. When full, you give them time to work, in other words, heat up. Turning a compost pile mixing the organic materials and the organisms it contains with heat-producing oxygen is the traditional method of keeping the process going full steam. By turning the tumbler, the organic materials are mixed and infused with fresh oxygen.
- ✅Easy to Access Finished Compost: Just Slide the door open and take the organic fertilizer out when the compost is ready. When a check reveals the compost is complete —and this can happen in a matter of weeks —the same access that allowed you to fill the tumbler lets you empty it. Now is the time to spread the results.
- ✅Dual-Bin Design: The dual bin design takes a different approach to the continuous-use composted concept, Two bins are set side-by-side into a single rotating chamber. Thickly insulated compartments conserve the heat generating by the decaying matter, and this greatly speeds the process. This design also allows you to add food waste to one chamber while the other is composting.
- ✅Totally Organic and Money-Saving: If you're looking for a fast, convenient way to compost your kitchen throw-outs, grass clippings, and organic yard waste, our outdoor kitchen compost bin is just right for you! The Compact Compost Tumbler quickly recycles it into nutrient-rich compost.
DIY is the right choice when the pile is under about 5 feet wide, the yard has decent access, drainage is simple, and you are not changing the landscape grade. A wire bin, plastic bin, or three-bin wood setup can be handled with ordinary tools.
Hiring help makes sense when composting is part of a larger landscape project: regrading a wet side yard, building a permanent garden service area, installing paths and bin pads, solving stormwater flow, removing large volumes of leaves, or spreading several cubic yards of finished compost. A pro can also help if the site has steep slopes, poor drainage, tight access, retaining walls, or code-sensitive placement near waterways and property lines.
On our construction and landscape-adjacent projects, the biggest difference is not the bin itself. It is site planning. A compost area that drains properly, has wheelbarrow access, is screened from view, and sits close to the garden will get used. A pile wedged behind a shed in a wet corner becomes a nuisance.
A Simple Fall Composting Schedule
In October or November, shred and stockpile leaves as they fall. Build one active pile as soon as you have enough material for a 3-foot cube. Add greens, water in layers, and check the temperature after two or three days.
During the first two weeks, turn whenever the pile peaks and starts to cool. Keep the moisture at wrung-out sponge level. Through winter, keep adding kitchen scraps only if you can cover each addition with dry leaves. In cold climates, build the pile larger in fall and insulate the outside with extra leaves or straw. Activity will slow when temperatures drop, then resume as weather warms.
By spring, screen any finished material and use it in beds or around plantings. Return coarse pieces to the next pile. If the material still looks like leaves, keep it moist, turn it, and give it more time. Compost is forgiving when the basics are right: shredded material, balanced browns and greens, enough mass, enough water, and enough air.
The best fall leaf compost pile is not complicated. It is built deliberately. Shred the leaves, size the pile correctly, balance carbon with nitrogen, keep it damp but not soaked, and turn it when the pile tells you to. Do that, and the bags of leaves at the curb become one of the most useful soil-building materials on the property.
Frequently Asked Questions
Can I make compost from leaves only?
Yes, but a leaf-only pile usually becomes leaf mold rather than fast balanced compost. Shred the leaves, keep them damp, and expect roughly 6 to 18 months or longer depending on leaf type, moisture, and climate.
Do I need to shred fall leaves before composting?
Shredding is strongly recommended. Whole leaves mat together and block water and oxygen. A mulching mower, leaf shredder, or string trimmer in a clean trash can can reduce particle size and speed breakdown.
What is the best ratio of leaves to grass clippings for compost?
Start with about 2 to 3 parts shredded leaves to 1 part grass clippings by volume. If the pile smells like ammonia, add more dry leaves. If it stays cold and dry, add greens and water.
How big should a backyard compost pile be?
For hot composting, build at least 3 feet by 3 feet by 3 feet, or about 1 cubic yard. Larger piles hold heat better, but most backyard piles should stay under about 5 feet high and wide to prevent oxygen-starved centers.
How wet should a compost pile be?
Aim for 40 to 60 percent moisture, which feels like a wrung-out sponge. The material should be damp, not dusty, and should not drip water when squeezed except perhaps a drop or two.
Do backyard compost piles need a permit?
Small backyard compost piles are usually allowed, but rules vary by city, county, and HOA. Check local requirements for setbacks, nuisance odors, animal attraction, drainage, and whether larger or commercial-scale composting needs a permit.
Quick Recap
Product prices and availability are accurate as of the date/time indicated and are subject to change. Any price and availability information displayed on Amazon at the time of purchase will apply.

