Free tools Windows power users keep installed
One-click scans. No signup required.
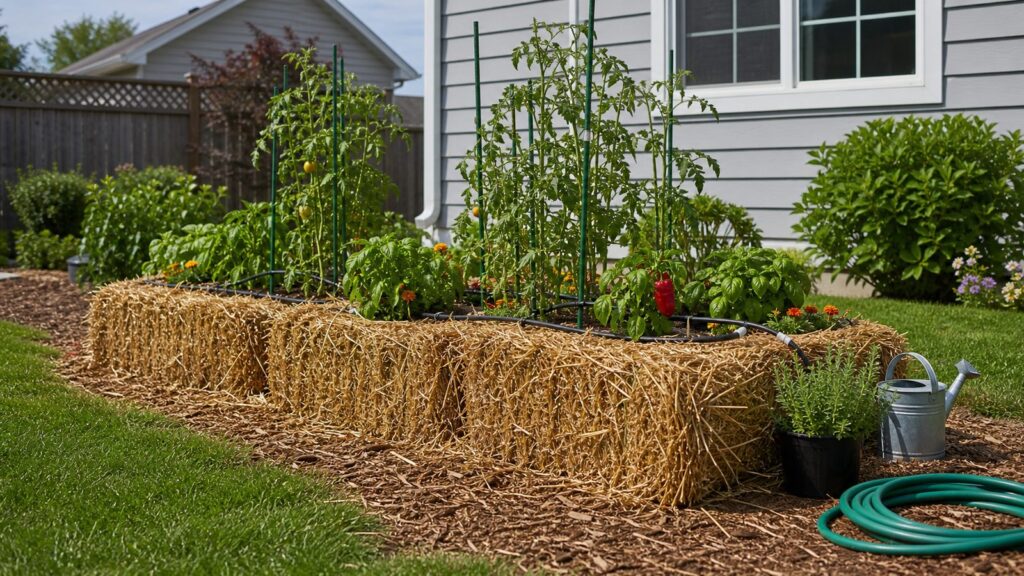
Straw bale gardening is a simple raised-bed-style method where you grow vegetables directly in conditioned straw bales instead of native soil. It is useful when your yard has poor soil, compacted clay, limited space, accessibility concerns, or a temporary growing area on gravel, concrete, or a driveway.
The short version: buy wheat straw, not hay; place the bales where they will stay; condition them with nitrogen and water for about 10 to 15 days; confirm the inside is warm but not hot; then plant transplants or seeds into compost pockets on top. A one-bale setup in the U.S. usually costs about $25 to $75 if you source locally and already own basic tools, or about $60 to $140 if you buy a delivered retail bale, fertilizer, compost, plants, and basic irrigation in 2026.
On our exterior projects, we think about a straw bale garden the same way we think about any small site improvement: water has to go somewhere, the layout has to be serviceable, and the finished installation should not create stains, rot, trip hazards, code complaints, or an eyesore. The gardening part matters, but the placement and setup matter just as much.
What Is a Straw Bale Garden?
A straw bale garden uses a rectangular bale of cereal straw as both the container and the growing medium. As the bale decomposes, it turns into a warm, moisture-holding, compost-like root zone. Vegetables grow into the loosened straw instead of the ground below.
#1 Best Overall

- Only product on the market specifically formulated for Straw Bale Gardening
- Contains all required nutrients to succeed, and to allow plants to produce a bountiful crop
- Easy to apply, sprinkle this product on the bales according to the instructions on the back of the package
- Dissolves quickly, allowing a small amount of water to be used to avoid overwatering the bales
- Includes enough volume for the entire season, because rain and water tend to leach out soluble nutrients additional applications of small amounts may be needed every second week
A common full-size rectangular bale is roughly 2 feet by 3 feet. One current retail example lists a full-size straw bale at 20 inches by 16 inches by 36 inches and about 40 pounds. Once saturated, that same bale becomes much heavier and awkward to move, so placement comes before watering and conditioning.
The method works well for renters, homeowners with rocky or compacted soil, and people who want a raised growing surface without building lumber beds. It is also useful where you want a one-season garden that can be broken down into compost or mulch at the end of the season.
Use Straw, Not Hay
The most common beginner mistake is buying hay instead of straw. Hay is cut grass or forage, often full of seed heads. It can sprout weeds and grasses all season. Straw is the dry stalk left after grain harvest, and wheat straw is commonly used because it breaks down predictably and usually contains fewer seeds.
Ask for tightly bound wheat straw bales with twine still firm around the sides. Set the bale so the twine wraps around the vertical sides, not across the planting face. That helps the bale hold together after it starts decomposing.
Also ask the supplier about herbicide history. Persistent pasture herbicides can move through straw or manure and damage sensitive crops such as tomatoes, peppers, beans, peas, and some flowers. The names homeowners should listen for include aminopyralid, clopyralid, and picloram. If the seller cannot answer, use the bale for mulch away from sensitive edibles or run a small bioassay before planting expensive transplants.
Best Location for a Straw Bale Garden
Choose the location before the first soaking. You want full sun, hose access, good drainage, and enough room to work around the bales. Most vegetable crops need at least 6 hours of direct sun per day, with 8 hours better for tomatoes, peppers, cucumbers, squash, and strawberries.
Keep bales away from siding, deck framing, wood fences, porch posts, and stored lumber. A conditioned bale stays damp for weeks, and constant moisture against wood or painted surfaces can cause staining, pest activity, or rot. We like at least 12 inches of air space from structures, and more if the area does not dry quickly after rain.
For access, leave at least 24 inches on one working side and 30 to 36 inches if someone needs easier mobility, a stool, or a walker. A single bale is manageable in a small yard, but a row of four bales should be treated like a small garden bed: plan the walking path, hose route, trellis height, and end-of-season cleanup before plants are in place.
Do these 3 things before closing this tab:
1Scan for outdated or missing drivers - takes under a minute2Repair Windows errors before they cause bigger problems3Fix the driver behind crashes, sound loss and screen glitchesCan You Put Straw Bales on Concrete or a Driveway?
Yes, but plan for water and staining. Straw bales can sit on concrete, asphalt, gravel, pavers, or compacted base, but they will release brown runoff during conditioning and irrigation. On concrete or pavers, use a slight slope, paver spacers, a breathable sacrificial mat, or a gravel strip so water does not puddle under the bale.
Do not trap moisture against finished wood decking. If you must use a deck, set the bale in a contained planter tray with drainage management, protect the walking surface, and confirm the deck can handle the saturated weight. One soaked bale, plants, wet compost, and support hardware can easily exceed the dry 40-pound starting weight.
Rank #2

- Proprietary formulation - BaleBuster was developed by the original Pioneer of the STRAW BALE GARDENS method, and has been adopted by many Straw Bale Gardeners around the world to assure success without the need to search for the correct products to use for conditioning bales properly. BaleBuster is an all-in-one solution, and is simple to apply. It works quickly, disolves as needed. , and contains beneficial bacteria and fungal spores that are activated by appllication of water. Recreating the BaleBuster formula would require purchasing four seperate products and mixing them accurately with a carrier for the microbials.
- Complete preparation of twenty bales with this package of BaleBuster. While many gardeners begin with a smaller number of bales, we found that almost every Straw Bale Gardener who uses BaleBuster has such success that they quickly grow the garden size, and thus we began offering the twenty bale package to accomodate those gardeners. We have many gardeners that grow hundreds of bales filled with vegetables, herbs and even flowers all around the world. BaleBuster guarantees success and makes it very simple and easy.
- Simple Step-by-step instructions are easy to follow and yet flexible enough that the prep process is almost impossible to screw up. Even the most inexperienced gardener can follow the simple day-by-day application instructions to prepare the bales. Once that ten day process is complete, taking 30-60 seconds per bale each day, the garden will be ready to plant. The maintenance after planting is very limited, especially if an irrigation system with drip applicators or a soaker system is installed. We promise you won't need to pull weeds!
- Bales are not included, you will buy them locally. Once a gardener becomes a fan of growing in bales, they seem to see bales for sale everywhere. Getting them in the fall as people discard their fall decorations is ideal. They can be set up outside in the garden where you will prepare them in the spring. Winter snow or rain won't hurt them at all. The best bales are free bales, but be assured that hay, grass, straw, corn stalks, bean stalks, or almost any other baled organic matter will work just fine for the garden.
- Bountiful fresh vegetables for your family all summer, without all the weeding. One of the biggest advantages of growing in bales with BaleBuster is that you won't spend time pulling weeds in your garden as is normally the case. People rave about the results they get in regard to produce size and quality, but they really love not having all the maintenance that comes with a regular garden grown the old fashioned way in the soil. Nutrient content in the vegetables is absolutely identical to the same vegetables grown in old fashioned soil. The key thing to remember is that the interior of the bales is quickly composting into soil as the growing season unfolds.
2026 Straw Bale Garden Cost Breakdown
Costs vary sharply by how you buy the bale. Local farm and feed-store bales are often about $5 to $12 each when available. Big-box delivered retail can be much higher; one 2026 full-size wheat straw bale listing is $36.22 delivered. National straw market context is lower by the ton, about $70 to $150 per ton in a July 2026 informal survey, but small-bale retail pricing includes handling, packaging, delivery, seasonality, and urban scarcity.
| Item | Typical 2026 Cost | Notes |
|---|---|---|
| Straw bale | $5-$12 local; about $36 retail delivered | Buy wheat straw, not hay. Fall sourcing is often cheaper than spring. |
| Conditioning fertilizer | $5-$20 | Urea, blood meal, fish meal, or lawn fertilizer without weed killer. |
| Compost or potting mix | $5-$15 per bag | Needed for seed pockets and helpful around transplants. |
| Seeds or transplants | $2-$6 per seed packet; $3-$8 per transplant | One bale holds fewer plants than a large raised bed. |
| Irrigation | $0-$25 basic; $15-$60 drip or soaker kit | A timer is worth it in hot climates or paved locations. |
| Stakes or trellis | $5-$40 | Needed for tomatoes, cucumbers, beans, and heavy vines. |
For a practical one-bale garden, budget $25 to $75 if you buy a local bale and already own a hose, hand tools, and some supports. Budget $60 to $140 if you buy a delivered retail bale, new fertilizer, bagged compost, transplants, and a basic soaker hose or drip kit.
For multiple bales, the per-bale setup cost can drop to about $15 to $40 before plants if you buy farm bales in quantity and share fertilizer, compost, and irrigation across the row.
Materials and Tools
For one to four bales, you do not need much equipment. Gather the materials before conditioning starts, because the bale needs daily water once the process begins.
- Wheat straw bales held tightly with twine
- High-nitrogen fertilizer such as urea 46-0-0, blood meal, fish meal, or lawn fertilizer with no herbicide
- Balanced vegetable fertilizer, such as 10-10-10 or an organic equivalent, for later feeding
- Compost or potting mix for the planting surface
- Vegetable seeds or transplants
- Hose with spray nozzle, watering can, soaker hose, or drip tubing
- Thermometer or gloved hand to check bale heat
- Trowel or planting knife
- Tomato cages, stakes, cattle panel, or framed trellis for tall and vining crops
- Work gloves
Avoid weed-and-feed lawn products. Those contain herbicides designed to kill broadleaf plants, which is exactly what many vegetables are.
How to Condition Straw Bales
Conditioning is the make-or-break step. Fresh straw is too raw to plant into. You are starting decomposition inside the bale so it warms, softens, and begins releasing nutrients. Most homeowners should plan on 10 to 15 days before planting.
Quick wins for a faster PC:
Repair Windows errors before they cause bigger problemsFix Now →Scan for outdated or missing drivers - takes under a minuteDriver Scan →Place the bale with the cut straw face up and the twine around the sides. Soak it thoroughly until water runs through. Then apply nitrogen and water it in. A common synthetic schedule uses about 1/2 cup of high-nitrogen fertilizer per bale on several early conditioning days, then reduced rates or balanced fertilizer as the bale begins to heat.
Simple 10-Day Conditioning Schedule
| Day | What to Do | Goal |
|---|---|---|
| 1 | Soak bale and apply about 1/2 cup high-nitrogen fertilizer | Start microbial activity |
| 2 | Water thoroughly | Keep bale evenly moist |
| 3 | Apply about 1/2 cup nitrogen and water in | Feed decomposition |
| 4 | Water thoroughly | Prevent dry pockets |
| 5 | Apply about 1/2 cup nitrogen and water in | Build internal heat |
| 6 | Water thoroughly | Continue composting |
| 7-9 | Use a reduced fertilizer rate or balanced vegetable fertilizer, then water | Transition toward planting |
| 10-15 | Check temperature; plant when warm, not hot | Avoid burning roots |
Organic fertilizers work, but they usually require more product and can take longer because nitrogen release is slower. Blood meal, fish meal, and other organic nitrogen sources are valid choices, but expect the conditioning period to lean toward 12 to 15 days instead of the short end.
Do not plant while the inside is hot. A properly conditioned bale should feel warm and crumbly, not steaming or uncomfortable to the touch. If you use a compost thermometer, wait until the internal temperature drops into a plant-safe range, roughly below 90 degrees Fahrenheit.
Planting a Straw Bale Garden
For transplants, open a pocket in the top of the bale, add compost or potting mix around the root ball, and firm it in. For seeds, spread a 1- to 2-inch layer of compost or potting mix on top so seeds have fine material for germination. Straw alone is too coarse for reliable small-seed contact.
PC Slower Than It Used to Be?
A free scan shows the junk files, broken settings and background clutter dragging Windows down - then fixes them in one click.Free scan · Windows 10 & 11Crashes, No Sound, or Screen Glitches?
Random freezes, missing sound and display glitches usually trace back to one bad driver. Find and replace yours safely.Free scan · under a minuteRank #3

- 100% Organic
- Complete 5 Bale Preparation
- Simple Step-by-step instructions
- All you provide are the bales
- Bountiful fresh vegetables for your family all summer, without WEEDS!
Water after planting and keep the top consistently moist for the first week. The bale will behave more like a large container than an in-ground bed. It dries faster, leaches nutrients faster, and responds quickly when water is missed.
How Many Plants Per Bale?
Do not overplant. One standard 2-foot-by-3-foot bale can usually handle two tomato plants, two to three pepper plants, two cucumber plants with support, three to four lettuce or herb clusters, or several bean plants if trellised. Heavy feeders need more restraint than leafy greens.
Install stakes and trellises early. Once tomatoes or cucumbers get heavy, pushing supports into a decomposing bale can split the bale or disturb roots. For tall crops, we prefer supports that bear on the ground, not only in the straw. A cattle panel, T-posts, or a simple framed trellis is more stable than a light cage stuck into soft material.
Best Vegetables and Herbs for Straw Bales
Good straw bale crops include tomatoes, peppers, lettuce, herbs, cucumbers, squash, beans, and strawberries. Compact or determinate varieties are easier to manage than sprawling types. Bush beans, patio tomatoes, compact cucumbers, basil, parsley, chard, leaf lettuce, and peppers are strong choices for a first season.
Large sprawling crops are weaker fits unless you have room and support. Pumpkins, watermelons, cantaloupe, corn, and okra can overwhelm a bale or demand more root volume and structural support than the system offers. If you want to try squash or melons, give the vines space to run onto mulch and keep the fruit off wet pavement.
For a first-time homeowner, a dependable one-bale layout is two pepper plants, one basil plant, and leaf lettuce along the edge. A more ambitious layout is one compact tomato, one cucumber on a trellis, and herbs in the corners. Keep the plant count modest and you will get better airflow, easier watering, and fewer pest problems.
Watering and Fertilizing After Planting
Straw bales dry out like containers. In mild spring weather, watering once daily may be enough. In summer heat, especially on concrete, asphalt, or windy sites, bales may need water twice a day. The goal is evenly moist straw, not a constantly flooded bale.
A soaker hose or drip line on a timer is the best upgrade. For $15 to $60, it reduces hand watering, keeps leaves drier, and limits nutrient leaching compared with blasting the bale from above. On our job sites, any outdoor feature that depends on daily water gets a more reliable delivery method if the budget allows it. People travel, schedules change, and container-style gardens punish missed watering quickly.
What’s actually slowing this PC down?
Pick the symptom - the matching free tool is one click away.
Feed during the growing season with a balanced vegetable fertilizer according to label directions. Straw has very little native nutrition compared with good garden soil. Tomatoes, peppers, cucumbers, and squash will need steady feeding after the initial conditioning nutrients are used.
Drainage, Runoff, and Yard Appearance
A straw bale garden is low-build, but it is still an exterior installation. Water, decomposing organic matter, fertilizer runoff, and plant debris all affect the surrounding surface.
Rank #4

- Treats four straw bales for a garden
- All in one formula includes enough for the entire season
- The only product formulated specifically for Straw Bale Gardening
- Step-by-step application instructions on the bag
- Non-toxic and safe to use
On soil or mulch, set bales on a slight grade so water drains away from structures. On hardscape, keep them off low spots where runoff will collect. On pavers, use spacers or a gravel bed to let the underside breathe. On driveways, expect discoloration unless you protect the surface. Brown conditioning runoff is normal, but it can stain pale concrete.
If the garden is visible from the street, make it intentional. Group bales in straight rows, add a mulch apron, keep paths clean, and remove failed plants promptly. A neat border can make the difference between a tolerated front-yard vegetable garden and a complaint.
Recommended Free Tools
Permits, HOA Rules, and Front-Yard Gardens
Most straw bale gardens do not require a building permit because they are temporary, low, and not structural. That said, local rules vary. Front-yard gardening, visible-yard vegetable beds, nuisance vegetation, drainage impacts, and HOA appearance standards can all come into play.
Check three things before placing bales in a front yard or shared-view area: municipal yard maintenance rules, HOA covenants, and any setback or visibility rules near sidewalks, driveways, and intersections. Some cities allow front-yard gardens but still regulate height, weeds, obstruction, or neglected materials. A bale garden that looks organized in May can look like debris in September if it is not maintained.
Do not stack bales into retaining walls or use them to hold back soil. Once you start retaining grade, permit and engineering rules can apply. In many jurisdictions, retaining walls above certain heights or supporting surcharge loads need review. Straw bales are for growing, not structural retention.
Independent reader supportYour contribution helps us test, update, and keep practical guides available for everyone.When to DIY vs. When to Hire a Pro
A one- to four-bale garden is a good DIY project for most homeowners. If you can move dry bales, water daily during conditioning, and handle basic planting, you can build it yourself over a weekend plus the 10- to 15-day conditioning period.
The Tool Desk
Outbyte Driver Updater FREEFix the driver behind crashes, sound loss and screen glitchesFind Drivers →Outbyte PC Repair FREERepair Windows errors before they cause bigger problemsFix Now →Hire help when the garden becomes part of a larger exterior plan. That includes installing irrigation zones, protecting expensive pavers, solving drainage near a foundation, building permanent trellis structures, regrading a side yard, or creating an accessible garden area with stable paths and clearances. A contractor or landscape professional can also help when the site has slope, poor drainage, retaining walls, or surfaces you do not want stained.
As a rule, DIY the bale garden. Bring in a pro for water management, hardscape protection, accessibility work, and anything tied to structural elements or code-sensitive site changes.
End-of-Season Cleanup
Most straw bales last one growing season and sometimes two crop cycles. By fall, the bale may slump, split, and turn into loose composted material. That is useful organic matter, but it still needs to be managed.
Remove stakes, cages, drip lines, and plant debris. If the plants were healthy, break the bale down into compost, mulch, or soil amendment. If disease was severe, keep that material away from next season’s vegetable beds. Do not leave collapsing bales in a front yard through winter unless that is allowed and visually acceptable in your neighborhood.
Best Value
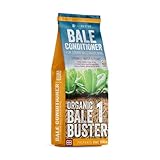
- Formulated Specifically for Straw Bale Gardening, BaleBuster is the only product formulated specifically for Straw Bale Gardening containing pecisely what is needed for microbial growth and colonization of the bales.
- Complete formulation of ideal nutrients, including nitrogen in the form of natural blood meal, which is a powerful source of nitrogen as the protein contents tend to decompose into nitrogen molecules which can be utilized by the plants growing in the substrate.
- Easy application allows the user to simply sprinkle the formulation over the bale from end to end and side to side, and then apply approximately 1 gallon of water. To reduce the smell and the presence of flies or other insects it can be beneficial to make some holes in the straw bales and try to sprinkle the BaleBuster organic down into the holes. This reduces the surface area thus reducing the smell.
- 100% organic formula allows the production of certified organic produce for sale. If the garden is used for personal consumption, then getting organic certification is not necessary but it may still provide some peace of mind that your garden is free of any non-organic substances that could potentially be suspect.
- Bales are ready to plant in 18 days. It takes a few extra days for the bacteria to break down the blood meal in the BaleBuster into nitrogen that is useable by plants. This early stage decomposition process is essential for any organic source of nitrogen to break down into a form that can be absorbed by the roots of a plant.
For paved areas, rinse and inspect the surface after removal. If runoff collected under the bale for months, clean staining before it sets deeper. For soil areas, rake the decomposed straw into a thin layer rather than leaving a wet mound that can attract pests.
Common Mistakes to Avoid
- Buying hay instead of straw and introducing weed seeds.
- Skipping conditioning or planting before the bale cools.
- Using weed-and-feed fertilizer or straw with herbicide carryover.
- Letting the bale dry out during conditioning.
- Putting vegetables in shade and expecting the bale method to compensate.
- Trying to move bales after soaking them.
- Planting too many heavy feeders in one bale.
- Adding weak supports after tomatoes and vines are already heavy.
- Placing bales directly against siding, wood fences, or deck framing.
- Ignoring cleanup, runoff, and front-yard appearance rules.
Bottom Line
A straw bale garden is one of the simplest ways to grow vegetables without building a traditional raised bed, but it is not just a bale dropped in the yard. Buy clean wheat straw, place it near water and away from moisture-sensitive surfaces, condition it for 10 to 15 days, plant modestly, and water it like a container garden.
Done well, it is practical, temporary, and productive. Done casually, it becomes a hot, dry, weedy bale with stressed plants and a messy footprint. The difference is mostly setup, water management, and restraint.
Frequently Asked Questions
How much does it cost to start a straw bale garden in 2026?
A typical one-bale DIY setup costs about $25 to $75 if you buy a local farm or feed-store bale and already own basic tools. If you buy a delivered retail bale, fertilizer, compost, transplants, and basic irrigation, expect about $60 to $140.
How long do you condition straw bales before planting?
Plan on 10 to 15 days. The bale needs nitrogen and daily water so decomposition starts. Plant only after the inside is warm and crumbly, not hot.
Is straw or hay better for a bale garden?
Use straw, preferably wheat straw. Hay often contains grass and weed seeds, which can create extra maintenance all season.
Can a straw bale garden sit on concrete or a driveway?
Yes, but protect the surface and plan drainage. Conditioning runoff can stain concrete or pavers, and water should not pond under the bale or run toward structures.
What vegetables grow best in straw bales?
Tomatoes, peppers, lettuce, herbs, cucumbers, squash, beans, and strawberries can do well. Compact varieties are best. Large sprawling crops like pumpkins, watermelons, and cantaloupe need extra room and support.
Do you need a permit for a straw bale garden?
Usually no, because it is temporary and non-structural. Still check HOA rules, front-yard garden rules, visibility setbacks, and nuisance vegetation standards before placing bales in a visible yard.
Quick Recap
Product prices and availability are accurate as of the date/time indicated and are subject to change. Any price and availability information displayed on Amazon at the time of purchase will apply.