You can make a short-lived incandescent demonstration with a clear jar, a 0.5 mm graphite pencil lead, two bolts, and eight D batteries. The graphite becomes the filament: current heats its electrical resistance until it glows. It is not a usable household lamp, and the graphite may smoke, burn, or remain dangerously hot after the batteries are disconnected.
What you are building
This project creates a temporary light source inside a jar. The pencil’s graphite core is the resistive filament; the wood casing is not part of the electrical path. Two bolts pass through the lid as separated terminals and also clamp the graphite. When the battery chain completes a circuit through the lead, graphite resistance converts electrical energy into heat and, briefly, visible light.
Unlike a commercial incandescent bulb, this jar contains ordinary residual air. Commercial bulbs protect a tungsten filament with a vacuum or inert gas, while graphite in oxygen can smoke and combust. Treat the result as a supervised classroom demonstration, not a lamp.
Materials and setup
| Item | Specification or purpose |
|---|---|
| Clear glass jar or mason jar | Enclosure; use one large enough that the filament does not touch the glass. |
| Jar lid | Drill two holes for the terminals. |
| Two bolts, nuts and washers | The bolt-and-nut terminals; the documented apparatus uses 1/4-inch holes and bolts clamped through a plastic lid. |
| Graphite mechanical-pencil lead | 0.5 mm lead, as specified by IEEE Reach; have spares because it breaks easily. |
| Wires with alligator clips | Use two long insulated leads, or join four short clip leads into two longer leads. |
| Eight D batteries | Connect all eight positive-to-negative in series for the documented 12 V classroom supply. |
| Electrical tape and cardboard or a paper-tube support | Secure the battery chain and keep conductors from contacting the work surface. |
| Safety glasses or goggles | Wear them while assembling, energizing and dismantling. |
| Stable, nonflammable tray or work surface | Contains hot fragments and keeps the jar from tipping. |
Safety rules before connecting power
- Use this only with adult or teacher supervision. The University of Northern Colorado procedure recommends that an adult make the final connections.
- Wear eye protection. Keep paper, solvents and other flammable materials away from the jar.
- Never let the two battery leads touch directly. That bypasses the graphite, creates a short circuit and can heat the batteries and wires.
- Make the energizing connection briefly, observe the glow, then disconnect the battery chain before touching the jar, bolts, clips or lead.
- Wait at least five minutes before removing the jar or unclipping the graphite. The Australian Science Teachers Association specifically gives this cooling interval.
- Stop immediately if a battery becomes hot, leaks, swells or smells unusual.
Build the jar and bolt terminals
- Place the lid on a stable work surface and mark two separated points. Drill two 1/4-inch holes in a plastic lid, following the bolt apparatus described in the science-project procedure. Do not drill a glass lid.
- Pass one bolt through each hole. Fit a washer and nut on the underside and tighten enough to hold each bolt firmly without cracking the lid.
- Leave an accessible nut or threaded section above the lid on each bolt. These two points are the positive and negative terminals; they must not touch each other.
- Lay a straight piece of 0.5 mm graphite between the upper nuts or clamping surfaces and tighten them gently. Do not crush the lead. Keep the filament suspended so it cannot touch the lid or jar.
- Set the lid on the tray and place the clear jar over it without sealing it permanently. A cardboard or paper-tube support can stabilize the battery chain and keep the jar from being knocked over.
Wire the batteries and test the filament
- Arrange eight D cells in series: connect the positive end of one cell to the negative end of the next. The free positive and free negative ends are the two battery-pack leads.
- Inspect every battery junction, then cover exposed accidental contact points with electrical tape where appropriate. Leave the two output leads identifiable.
- With the battery pack disconnected, clip one insulated lead to each bolt terminal. Ensure each clip grips metal, not paint, tape or the graphite itself.
- Check that the graphite is unbroken, both bolt clamps are secure, the jar is stable and the two clip leads cannot touch.
- Have the supervising adult make the final connection to the battery pack. Complete the circuit only long enough to observe the graphite glow.
- Disconnect the battery chain first. Do not lift the jar or touch the hardware until the five-minute cooling period has passed.
Why the graphite glows
Graphite conducts electricity, but it also resists the current. That resistance turns electrical energy into heat. As the thin lead reaches a high temperature, it emits visible light. In the jar’s oxygen, the hot carbon can also smoke and combust, which is why the glow may end quickly and why the lead must be treated as a hot, consumable filament.
Do these 3 things before closing this tab:
1Fix the driver behind crashes, sound loss and screen glitches2Repair Windows errors before they cause bigger problems3Scan for outdated or missing drivers - takes under a minute#1 Best Overall

- Fun and safe: when conducting these experiments, stimulate children's curiosity and Intelligence IQ.
- Note:that the positive and negative poles should not be directly connected, which may cause a short circuit.
- Application: used in electrical experiments in primary and middle schools/home DIY circuit test.
- Kind note: you need 2pcs AA batteries to do experiments this kit.
- Package includes:10pcs 2.5v bulbs,1pcs battery case,1pcs switch button,2pcs wires,2pcs Lamp holder.
What the bolts do
The bolts are not light-producing elements. They provide two electrically separated terminals and a mechanical way to clamp the fragile graphite so current enters at both ends.
Why a commercial bulb lasts longer
Household incandescent bulbs use a tungsten filament in an evacuated or inert-gas-filled envelope. Reducing oxygen slows oxidation. This open-air graphite demonstration has neither the controlled atmosphere nor the robust filament needed for useful service.
Rank #2
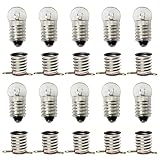
- E10 bulb: Rated voltage: 1.5V Rated current: 0.3A Thread diameter: 9mm.
- E10 Lampholder: Height: 13mm. Diameter: 10mm Overall length of two feet: 19mm.
- The E10 bulb is a tungsten filament bulb made of glass, metal, insulating materials, etc. It can be used as the light source of the flashlight and the indicator light of the distribution box.
- This product is mainly used for electrical experiments in primary and secondary schools. This product is of high quality, bright and durable. It is a necessary electrical equipment for elementary school science, middle school physics laboratory, and student home laboratory.
- Packing List: 10PCS E10 Bulbs, 10PCS E10 Lamp Holders.
If it does not glow
- No electrical path: Recheck every positive-to-negative battery connection and confirm that both clips make metal-to-metal contact with the bolt terminals.
- Broken lead: Replace the graphite. IEEE Reach notes that 0.5 mm leads break easily.
- Short circuit: Separate the battery leads and clips. Current must pass through the graphite, not around it.
- Poor clamp: Tighten the nuts enough to hold the lead, but do not snap it. A fresh piece of lead may be needed.
- Unexpected smoke or heat: Disconnect immediately, keep hands away, and allow the assembly to cool for at least five minutes before inspection.
What changes brightness and duration
There is no published brightness, operating lifetime, temperature or current measurement for this exact jar-pencil-two-bolt build. In practice, the visible result depends on graphite diameter and length, battery voltage and available current, contact quality, and the oxygen remaining inside the jar. A thinner or longer filament generally offers more resistance; changing geometry also changes heating, so make only one change at a time and energize briefly.
A separate bolt-and-nichrome apparatus compared 10, 16, 22 and 28 cm filament lengths after winding the wire over a pencil and stretching it. Those lengths are a model for controlled geometry comparisons, not measured performance values for this graphite build.
Quick Recap
Best Value

- 1. PLUG IN PENDANT LIGHT CORD: Farmhouse hanging light kit with E26/E27 socket, perfect for your DIY home decor lighting, simple and portable
- 2. UL SOCKET AND PLUG: The lamp kit Safe Rated with adjustable 15FT hemp rope hanging lights with plug in cord, compatible with all types of E26 E27 incandescent/LED bulb (Bulb NOT Included), Max 60W, 120V
- 3. EASY to INSTALL: Insided with necessary hooks to hang it, without any need for additonal wiring, just hang it up anywhere you need
- 4. WIDE APPLICATION: Could be a perfect plug in pendant light independantly, but also DIY with different pendant or sconcecs cages, also alternatives to chandeliers, table lamp. Ideal for bedroom, Study room, living room, laundry room, coffee shop
- 5. Attention: Here NOT Included Bulb/Lampshade/Cage, you could also buy our other light fixtures together to get new DIY style
Rank #4

- EASY TO USE - convert your Mason Ball Jars to Unique Conversation Pieces with our easy to use DIY Lamp Light Kit!
- USES HOUSEHOLD LIGHT BULBS - Standard Base E26 size black phenolic lamp socket is already wired with 6 foot black SPT-1 lamp cord and Ready To Use - No Drilling of Jar Required!
- WIDE MOUTH LID - The lid fits wide mouth mason ball jars with mouth measuring 3.0 Inch (76mm) ID / 3-1/4 Inch (83mm) OD.
- UL LISTED SAFE - Lamp components are UL Listed, factory assembled and safe. For use with 120 volt standard electric.
- GREAT ACCENT - E26 size lamp socket features a push thru on/off switch, factory assembled 2 prong plug and takes standard size household light bulb and your own clip on bulb lamp shade.
Rank #3

- Complete Wiring: Includes A 6 ft black cord, rotary on/off switch, E12 socket, 0.7W LED bulb, and mounting hardware.
- Correct Bulb: Energy Efficient 0.7W LED bulb fits the included E12 candelabra socket and provides steady illumination.
- Small Projects: Ideal For small ceramic Christmas trees, holiday decorations, pottery pieces, and decorative craft objects.
- Easy Control: Rotary On/off switch is built into the cord for convenient operation without unplugging the display.
- Indoor Use: UL Listed cord set plugs into standard household outlets for dependable indoor lighting projects.
Graphite, nichrome and tungsten: different purposes
| Feature | Graphite pencil lead | Nichrome wire | Tungsten bulb filament |
|---|---|---|---|
| Role here | Simple, disposable demonstration filament. | Common educational resistive-wire comparison; the cited apparatus varies its length. | Commercial incandescent filament material. |
| Enclosure | Ordinary jar air; oxygen can consume the hot carbon. | Not established for the cited jar-pencil build. | Evacuated or inert-gas-filled bulb envelope. |
| Durability | Fragile and potentially smoky; exact duration is not stated. | Performance depends on gauge, length and power; no value is established here. | Designed for controlled operation in a manufactured bulb. |
| Best use | Brief resistance-heating lesson. | Further supervised resistance experiments. | Practical incandescent lighting technology. |
Remember these five points
- The glowing element is graphite pencil lead, not ordinary wood or a finished bulb.
- The two bolts provide separated electrical terminals and clamp the filament.
- Eight D cells in series provide the documented 12 V classroom source, with enough available current to require careful supervision.
- Graphite can smoke, combust and stay hot; disconnect first and wait before handling.
- The result demonstrates resistance heating for a short time and is not a durable household light.
Product prices and availability are accurate as of the date/time indicated and are subject to change. Any price and availability information displayed on Amazon at the time of purchase will apply.