Recommended Free Tools
There is no single “best” oak finish. The right choice depends on whether you want a warm natural appearance, decorative shimmer, a dramatic dark grain, or a lower-odor indoor workflow. These four finish systems produce distinctly different results and require different preparation, drying, and safety practices.
Choose the finish by the result you want
For the simplest natural-looking oak, use boiled linseed oil followed by wipe-on polyurethane. For a subtle decorative shimmer, use Pearlessence. For a dramatic dark finish that still shows oak grain, layer ebony dye, dark oil stain, and water-based polyurethane. For an indoor workshop where odor and cleanup matter most, use a water-based stain and water-based topcoat.
These four systems are not interchangeable. They differ in color, sheen, drying time, application difficulty, odor, and protection. The procedures below were demonstrated on small red-oak tables, so treat them as starting points rather than guaranteed recipes for every oak project.
Before finishing: prepare oak for a predictable result
Oak has open pores that collect pigment. That is why stain often produces a stronger light-and-dark contrast on oak than on smoother-grained woods. Final sanding around 180 grit generally moderates that contrast; sanding much more coarsely can make the color look harsher, while over-sanding can reduce absorption.
What’s actually slowing this PC down?
Pick the symptom - the matching free tool is one click away.
- Sand all surfaces evenly and remove dust before applying color or finish.
- Inspect the wood under good light. Wipe bare wood with mineral spirits when the instructions for the selected product allow it; this temporarily reveals scratches, glue spots, and uneven sanding.
- Test the complete finishing schedule on an offcut or hidden area. Test the same species, sanding progression, veneer or solid wood, color products, wiping time, and topcoat.
- Consider a conditioner, sanding sealer, or wash coat on scrap if the oak absorbs color unevenly. Do not assume it will improve every product combination.
- Keep glue surfaces clean. Finish on areas that must later be bonded only when the product schedule specifically allows it; for the dark dye system below, tape glue areas before finishing.
A color name is not a reliable color specification. Red oak and white oak can produce different results, as can solid oak and oak veneer plywood. Sanding, stain chemistry, dwell time, wiping technique, and the color and sheen of the topcoat also change the appearance. The examples here are based on red oak.
#1 Best Overall
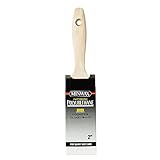
- Designed with natural bristle for a smooth, glass like finish
- Natural bristle for increased absorption and hold of clear coatings
- Use with Minwax Polyurethane
- Excellent for all sheens
- Stainless steel ferrule
1. Boiled linseed oil and wipe-on polyurethane
Best for: a forgiving, natural-looking finish with a warm appearance.
This is the least complicated-looking route, but it has the longest wait before the protective topcoat. The oil soaks into oak and emphasizes its grain. Wipe-on polyurethane then adds a protective film without the brush marks that can result from applying a heavy brushed coat.
Application steps
- Prepare and clean the oak. Make sure the surface is evenly sanded and free of dust.
- Flood the surface with boiled linseed oil. Replenish areas that absorb the oil so the surface remains evenly wet during the initial application.
- Watch for oil bleeding back out of the open pores. Wipe those deposits away. Continue checking and wiping roughly hourly until oil is no longer collecting on the surface.
- Lay oil-soaked rags flat on a nonflammable surface before disposal. Never leave them crumpled or piled together. For larger quantities of combustible oily waste, use the disposal and storage method required by local rules and the product label; covered metal containers designed for oily waste are an important fire-control measure.
- Allow approximately four to seven days for the oil to dry before applying the polyurethane. Actual drying depends on temperature, humidity, airflow, application thickness, and the product formulation.
- Mix two parts polyurethane with one part low-odor mineral spirits for the documented wipe-on mixture. Apply it with a clean cloth in a thin, even coat.
- Remove runs, puddles, and heavy deposits as you work. Let each coat dry according to its label before recoating.
- Apply at least three thin coats. Add more coats on tabletops, exposed legs, and other high-wear areas because wipe-on coats build protection gradually.
Thin coats reduce brush marks and dust nibs, but they also mean slower film build. This is a good choice when appearance and a forgiving application matter more than a fast turnaround. It is a poor choice when the project must be completed indoors quickly or when the oil-drying stage cannot be safely managed.
Safety: Boiled linseed oil and other oil-finish rags can heat up and ignite when left in a pile. Keep them spread flat on a nonflammable surface while they dry, or use an appropriate covered metal oily-waste container and follow the product and local disposal requirements. Provide ventilation and follow the label for gloves, respiratory protection, storage, and disposal.
Rank #2

- 100% Natural Lambskin for Superior Finish: Crafted from Genuine Lambskin, this professional staining brush absorbs more stain and releases it evenly for a smooth, streak-free finish on wood, floors, cabinets, furniture, and trim.
- Designed for Wood Stains, Polyurethane & Finishes: Works with oil-based and water-based stains, polyurethane, sealers, varnish, and latex paints—ideal for hardwood floors, decks, cabinets, furniture restoration, and faux finishing.
- Smooth, Even Coverage with No Brush Marks: Natural Lambskin fibers hold more finish and distribute it evenly, reducing lap marks and streaks compared with synthetic brushes or foam applicators.
- Ergonomic Hardwood Block for Precision Control: Durable hardwood backing provides a comfortable grip, allowing better control when applying stains and finishes on flat surfaces or detailed woodworking projects.
- Professional-Grade Tool Built to Last: The dense Lambswool is durable and reusable when cleaned properly, making it a reliable tool for contractors, floor refinishers, woodworkers, and DIY homeowners.
2. Pearlessence for a subtle golden sheen
Best for: accent furniture and small projects where a decorative metallic or pearlescent effect is more important than a plain natural finish.
Pearlessence is presented as a one-step decorative coating. It can be applied directly to prepared bare wood, or over a stain when you want to alter the underlying color. The base color matters: golden-oak stain emphasizes the metallic effect, while red-oak stain mutes it.
Application steps
- Sand the bare oak to 180 grit.
- Wipe the surface with mineral spirits to reveal scratches, glue marks, and other flaws before coating.
- Stir the Pearlessence thoroughly. Keeping the material uniformly mixed helps maintain a consistent sheen.
- Apply one coat by brush or spray. Use the application method and working conditions specified on the product label.
- If additional wear protection is needed, apply two optional coats of semi-gloss water-based finish after the decorative coat has dried and the products are confirmed compatible.
No stain is required beneath this finish. If you do use one, make a complete test panel first: the same Pearlessence over different oak stains can look like two different finishes. Because this is primarily a decorative system, it is particularly suitable for small accent tables, occasional furniture, and pieces that do not receive the abuse of a heavily used dining or work surface.
3. Ebony dye, dark oil stain, and water-based polyurethane
Best for: a deep charcoal-to-brown appearance with visible oak grain and strong pore contrast.
Rank #3
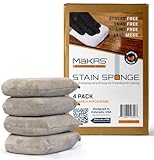
- Fast Coverage for Large Wood Finishing Projects: Ideal for exterior posts and railings, interior trim and doors, and other large DIY projects. The thick microfiber Stain Sponge applies finish quickly and evenly, helping you cover more surface with each pass.
- More Finish Goes to the Wood: The foam-core design holds finish and releases it onto the surface instead of trapping it inside the sponge. That means less waste, better coverage, smoother application, and fewer drips or streaks.
- Snag-Free on Rough Lumber: The loopless microfiber surface glides smoothly across rough boards, cedar posts, and trim without snagging or leaving lint or fuzz behind.
- Snag-Free on Rough Lumber: The loopless microfiber surface glides smoothly across rough boards, cedar posts, and trim without snagging or leaving lint or fuzz behind.
- Fits Standard 1-Quart Cans for Clean Dipping: Sized to fit neatly into standard 1-quart cans, with rounded corners that make dipping easy and help reduce splattering.
This is the most dramatic of the four systems and the least forgiving of missed areas. The dye creates the dark foundation; the dark oil stain adds pigment into oak’s open pores, producing the visual depth that dye alone cannot provide. A water-based polyurethane then seals the color and builds protection.
Prepare before assembly
Finish parts before assembly where possible. Missed spots are conspicuous on a near-black surface, and assembled corners can be difficult to reach cleanly. Tape glue areas so dye, stain, and sealer do not interfere with later bonding.
Application steps
- Sand the parts to 150 grit.
- Raise the grain with a damp towel, then allow the wood to dry.
- Lightly sand away the raised fibers without aggressively removing material or changing the shape.
- Mix the water-soluble ebony dye at the documented ratio: two tablespoons of black dye to six ounces of water.
- Apply the dye generously with a cloth or sponge brush. Work methodically so areas do not dry with obvious lap marks.
- Let the dye dry, then remove surface residue with a clean, dry cloth.
- Apply dark walnut oil stain. Work it into the pores using a circular motion, then wipe with the grain to even the surface.
- After the stain has dried as directed, apply a semi-gloss water-based polyurethane sealer.
- Apply two additional polyurethane topcoats, observing the product’s drying and recoating instructions.
The final color can be adjusted by changing the dye concentration and the darkness of the stain. A stronger dye and darker stain can approach black; a lighter combination can produce a chocolate-brown result. Make those adjustments on scrap rather than on the project itself.
The Tool Desk
Outbyte PC Repair FREERepair Windows errors before they cause bigger problemsFix Now →Outbyte Driver Updater FREEScan for outdated or missing drivers - takes under a minuteDriver Scan →Because the schedule combines water-soluble dye, oil stain, and a water-based topcoat, do not assume that any brands or formulations are automatically compatible. Confirm the label and technical data sheet, allow each layer to dry properly, and test the entire sequence before committing to the furniture.
Rank #4
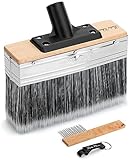
- Bates deck stain brush features a 7.5-inch width for expansive and even application, ideal for efficiently staining decks, fences, and other large wooden areas.
- Comprised of premium synthetic bristles, the brush ensures smooth stain application, retaining more stain for consistent distribution and achieving a professional finish with every pass.
- Each brush comes with a dedicated cleaning comb, making post-stain cleanup easier, and a can-opening keyring. The comb effectively removes excess stains trapped between bristles, prolonging the brush's life and maintaining its optimal performance.
- Bates deck stain brush is crafted with a universal threaded base, enabling easy attachment to most standard extension poles, allowing for enhanced reach and flexibility when working on larger projects. (Note: Handle and pole not included.)
- The high-quality materials and stain-resistant properties of this brush allow for multiple uses. After cleaning with the provided comb, the brush remains in prime condition, ensuring you get the most value out of your purchase.
4. Water-based stain and water-based topcoat
Best for: an indoor workshop that prioritizes lower odor, water cleanup, and a relatively direct stain-and-seal workflow.
The documented example uses General Finishes Early American water-based stain in a semi-gel form, followed by ZAR Ultra Max water-based satin finish. Comparable interior water-based polyurethane products are also available in different sheens. Choose by the project’s required appearance and protection, not by the word “water-based” alone.
Application steps
- Prepare a test piece, especially if the project combines solid oak with oak veneer plywood.
- Apply the water-based stain with a soft paper towel, working in a circular motion to push pigment into the pores.
- Remove surplus stain promptly with a clean towel. Water-based stain can dry quickly, so do not leave a thick deposit to level itself.
- Work in small areas and minimize overlaps. On long parts such as legs, use long strokes and maintain a wet, orderly working edge.
- Let the stain dry according to its label.
- Brush or spray on one coat of water-based topcoat to seal the surface.
- Apply two additional topcoats after the required dry time. Use a suitable synthetic brush or spray setup and avoid overworking material that has begun to tack.
If the grain rises, make a few light passes with 320-grit abrasive. Do not sand through the color. If dried excess stain leaves deposits, a moistened coarse cloth can remove them; allow the area to dry and restain it before proceeding.
Do these 3 things before closing this tab:
1Scan for outdated or missing drivers - takes under a minute2Repair Windows errors before they cause bigger problems3Fix the driver behind crashes, sound loss and screen glitchesSolid oak and oak veneer plywood may absorb the stain differently. In the documented example, the plywood could require additional applications to approach the solid wood’s color. That difference is one of the strongest reasons to test the complete schedule on both materials.
For the clear protective layer, look for a water-based polyurethane for oak in the sheen you want. Current manufacturer examples include Varathane Ultimate Water-Based Polyurethane, General Finishes High Performance Water Based Topcoat, and Minwax water-based polyurethane products. Product features, recoat times, packaging, and availability can change, so check the current label and technical data sheet before buying. Water-based does not mean hazard-free, food-safe, or universally compatible with every stain.
Independent reader supportYour contribution helps us test, update, and keep practical guides available for everyone.How to choose among the four
| Your priority | Best starting choice | Main compromise |
|---|---|---|
| Natural, warm appearance and forgiving application | Boiled linseed oil plus wipe-on polyurethane | Four to seven days of oil drying before the topcoat, plus slow film build |
| Subtle golden or pearlescent decoration | Pearlessence | Decorative appearance may not suit high-wear furniture without extra protection |
| Near-black or chocolate-brown oak with visible grain | Ebony dye, dark oil stain, and water-based polyurethane | Missed spots show easily; multiple materials and careful sequencing are required |
| Indoor work with lower odor and water cleanup | Water-based stain and water-based topcoat | Fast drying makes overlap control important, and mixed solid/veneer surfaces may color differently |
Topcoat selection should also account for oil versus water chemistry, desired sheen, application method, ambering, wood species, project size, odor, cleanup, and dry time. There is no universally best finish. The right system is the one whose appearance, schedule, protection, and working conditions fit the project.
Best Value

- READY-TO-USE 6 PACK APPLICATORS: Includes 6 stain sponge applicators sized 3" x 4" with rounded edges. No cutting or trimming needed. Designed for direct dipping into stain cans for controlled and efficient application.
- LINT-FREE MICROFIBER COVER: Microfiber outer layer is snag-resistant and lint-free, helping reduce fuzz or loose fibers when working on rough-sawn, reclaimed, or textured wood surfaces.
- THICK FOAM CORE FOR EVEN COVERAGE: 1-inch thick divided foam core holds stain evenly to support smooth, streak-minimized application across large flat areas such as tables, doors, and panels.
- COMPATIBLE WITH COMMON WOOD FINISHES: Suitable for use with gel stains, polyurethane, shellac, varnish, and both water-based and oil-based wood finishing products.
- CONTROLLED ABSORPTION FOR CLEANER USE: Dense sponge structure helps limit over-saturation and dripping, allowing better hand control during staining, sealing, or finishing tasks.
Supplies that actually affect the result
- Abrasives: 120, 150, 180, and 320 grit as required by the selected schedule.
- Wiping materials: clean lint-free cloths for oil and polyurethane; soft paper towels for the water-based stain procedure.
- Application tools: a brush or spray equipment suited to the coating. Use a suitable synthetic brush for water-based products when brushing.
- Mineral spirits: for the specified surface inspection and wipe-on polyurethane mixture, only where the product instructions permit.
- Safety equipment: ventilation, gloves, eye protection, and any respiratory protection required by the label or technical data sheet.
- Oily-waste control: a nonflammable drying surface or a covered metal container intended for oily rags when using oil-based products.
Common mistakes to avoid
- Skipping a sample: Oak species, veneer, sanding, and stain dwell time can all change the result.
- Expecting the color name to guarantee the appearance: “Early American,” “dark walnut,” and similar names are not universal color standards.
- Leaving oil on the surface: Oil that bleeds back from pores must be wiped away during the initial curing stage.
- Applying thick coats: Runs and puddles are harder to correct and generally dry more slowly than thin, controlled coats.
- Overlapping fast-drying water-based stain: Work in small areas, keep overlaps controlled, and wipe excess promptly.
- Sanding through stained color: Use only light passes with 320 grit when smoothing raised grain.
- Finishing glue surfaces: Mask bonding areas when the finishing schedule could interfere with adhesion.
- Treating water-based as harmless: Follow the current label for ventilation, PPE, drying, recoating, cleanup, storage, and disposal.
Safety and compatibility
Read the product label and technical data sheet for every finish, stain, dye, thinner, and topcoat. They control the required ventilation, personal protective equipment, drying conditions, recoating window, cleanup, storage, and disposal. Never make a food-contact or food-safe claim based only on a product being water-based; verify that use separately for the exact product and project.
Do not combine brands or finish types on the assumption that they will bond or dry correctly. The ebony schedule and any stained project should be tested as a complete system. Product formulations, packaging, retailer listings, and availability can change, so verify current instructions before starting.
Frequently Asked Questions
Which oak finish is best for an indoor workshop?
The water-based stain and water-based topcoat system is usually the most practical for an indoor workshop where lower odor and water cleanup are priorities. It dries quickly, however, so work in small sections and control overlaps. A water-based product is not automatically hazard-free or food-safe; follow the label and verify the intended use.
How can I avoid uneven stain color on oak?
Use a complete test panel made from the same oak species and material. Solid oak and oak veneer plywood can absorb stain differently. Match the sanding, stain, wiping time, and topcoat on the sample before finishing the furniture.
Why use both ebony dye and dark stain?
The ebony dye creates the dark base, while the dark oil stain puts additional pigment into oak’s open pores and creates visual depth. The dye alone does not fill the deep pores.
Windows Errors? Fix Them Before They Spread
Repair common Windows errors and clear accumulated junk for a smoother, more stable PC - no reinstall needed.Free scan · no reinstallCrashes, No Sound, or Screen Glitches?
Random freezes, missing sound and display glitches usually trace back to one bad driver. Find and replace yours safely.Free scan · under a minuteHow long should boiled linseed oil dry before polyurethane?
Allow approximately four to seven days for the boiled linseed oil to dry before beginning the wipe-on polyurethane stage. Temperature, humidity, airflow, application thickness, and the formulation can change the actual drying time, so follow the product label.
The Bottom Line
For most indoor oak projects, start with the water-based stain and water-based topcoat system if lower odor and easier cleanup matter. Choose boiled linseed oil and wipe-on polyurethane for a warmer, simpler-looking finish when you can wait several days. Use Pearlessence for decorative shimmer, or the ebony-dye sequence when a dark, grain-visible statement finish is the goal. In every case, test the complete schedule on matching scrap first.
Quick Recap
Product prices and availability are accurate as of the date/time indicated and are subject to change. Any price and availability information displayed on Amazon at the time of purchase will apply.