Free tools Windows power users keep installed
One-click scans. No signup required.
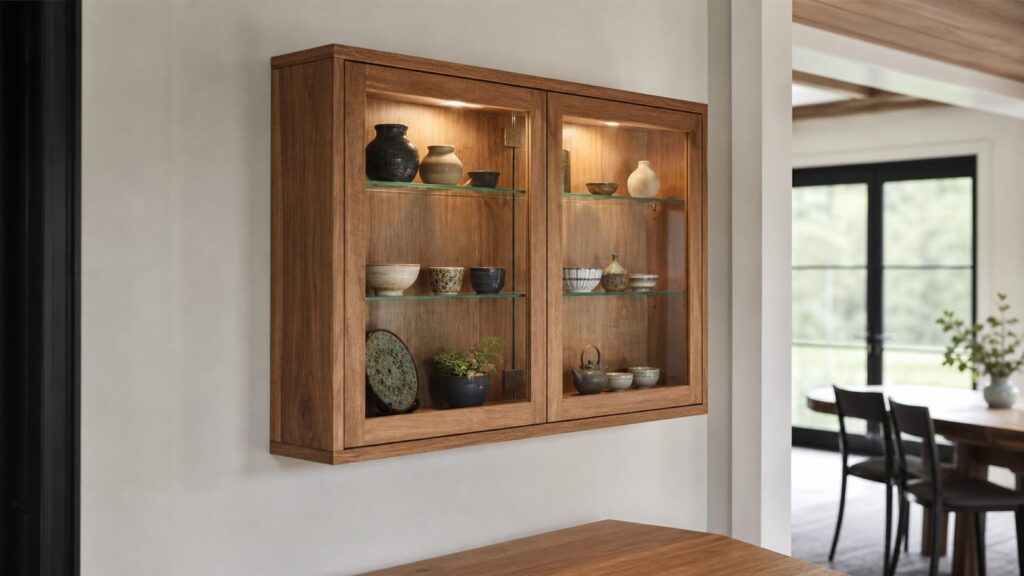
To keep a wall-hung display cabinet square, use an accurately square reference board during glue-up, keep the back flat as the case is clamped, and recheck the diagonals before the glue sets. To hang it level and securely, plan the cabinet-side hanging connection as part of the case, level the wall cleat or mounting rail, and fasten it to studs or suitable blocking. The right hardware and attachment depend on the cabinet, wall, and installation; there is no universal load rating for this custom combination.
Plan the Case and Its Hanging Connection
Before cutting parts, decide how the cabinet will hang and how that hardware will connect to substantial case components. A thin back panel alone may not be an appropriate place to attach hanging hardware. For example, the Woodcraft “Wall-Hung Display Cabinet” plan fits the back into rabbets and positions keyhole hangers so their screws penetrate into the cabinet sides. Treat that as a project-specific design example, not a universal specification.
Choose materials and joinery that suit your design, then make the back and hanging connection part of the structural plan. Confirm that the selected hardware is compatible with the cabinet and follow its maker’s instructions. Do not assume that a particular cleat, screw, or anchor arrangement has a specific safe capacity without a rating for the actual cabinet, wall, fasteners, and installation.
Keep the Cabinet Square During Glue-Up
A cabinet that is out of square can cause uneven door gaps and make installation more difficult. Woodcraft’s display-cabinet plan uses a dead-square plywood or MDF board fitted into the rear rabbets as a reference during dry-fit and glue-up. The important principle is to check the case against an accurate square reference before the glue sets, and to keep the back flat and square as the clamps are tightened.
PC Slower Than It Used to Be?
A free scan shows the junk files, broken settings and background clutter dragging Windows down - then fixes them in one click.Free scan · Windows 10 & 11Crashes, No Sound, or Screen Glitches?
Random freezes, missing sound and display glitches usually trace back to one bad driver. Find and replace yours safely.Free scan · under a minute#1 Best Overall

- Professional Mirror Mounting Hardware: Heavy duty french cleat system supports up to 50 lbs. Ideal for mirror brackets for wall mounting, wall mount headboard, and large mirror hanging kit applications. Includes mirror hangers for the wall
- Complete Picture Hanging Hardware Kit: 3 pairs of metal french cleats with mounting brackets. Art hanging kit includes twelve #8 plastic anchors, screws in two sizes, and clear bumpers. Everything needed for secure cabinet wall mounting hardware.
- Premium Aluminum Z Bar Hanger: Durable extruded aluminum construction measuring 1 1/8 inches wide. Professional grade z clips for hanging heavy mirrors, artwork, headboards, and acoustic panels. Wall cleats for hanging heavy duty items.
- Versatile Wall Mount System: Perfect french cleats for picture hanging, whiteboard mounting brackets, mirror mounting brackets and cabinet hanger applications. Works with wood frames, dresser mirror brackets, and frame mounting kit projects.
- Secure Heavy Duty Installation: Interlocking french cleat bracket design distributes weight evenly. Prevents wall damage while ensuring flush, invisible mounting. Trusted by professionals for hanging heavy mirrors on wall reliably.
- Dry-fit the case parts and check that the back and rabbets fit as intended.
- Prepare a square reference board sized for the particular cabinet, or use another reliable square reference.
- Assemble the case and fit the reference board into the rear rabbets during glue-up.
- Apply clamp pressure gradually, checking that the rabbets meet the reference board and that the back remains flat.
- Recheck the case for square before the glue sets; adjust the clamps if needed.
- Follow the plans for the specific cabinet when fitting the back and hanging hardware.
The board is an assembly aid, not a substitute for accurate parts or a guarantee of a square result. Recheck the case after clamping rather than relying on clamp pressure alone.
Choose a Mounting Method
A French cleat uses matching beveled members: one attached to the cabinet and one attached to the wall. A mounting rail or bracket system is another option when it is compatible with the cabinet and can be fastened into framing. Neither method has a universal capacity in the sources cited here; assess the whole installation and follow the hardware instructions.
| Method | Alignment and installation | Key considerations |
|---|---|---|
| French cleat | The wall member can be positioned and leveled before the cabinet is hung. Matching bevels engage when the cabinet is lowered into place. | Attach the cabinet-side member to substantial case structure; secure the wall-side member to studs or suitable blocking. |
| Mounting rail or brackets | Provides access to fasteners through compatible cabinet rails or brackets. | Check hardware compatibility and place fasteners into studs or suitable blocking as the installation requires. |
This Old House describes a French cleat made from beveled stock, with the wall member leveled and fastened to studs. Norm Abram explains the alignment principle: “When the cabinet is set in place and gravity locks the bevels together, the cabinet will be square and level.” This describes how the cleat’s bevels engage; it is not a guarantee that every cabinet or installation will be square and level. Fine Woodworking’s “3-D Shelves Enliven Any Room” describes using a temporary mating box to position and level a cleat before its final fastening.
Prepare the Wall and Hang the Cabinet
Use a stud finder and level to locate framing and mark the mounting line. If studs do not align with the intended attachment points, determine whether suitable blocking can be installed. Do not treat drywall alone as a structural attachment for a loaded cabinet. Wall construction and hardware differ, so confirm the fasteners and method for the actual project.
Rank #2
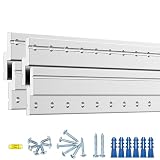
- Made of Preminium Aircraft Grade Aluminum.
- The Aluminum cleat is 0.12"(3mm) thickness and 1-1/4" width single cleat and 2" interlocked.
- Holes were punched every 1 inch, size 1/5" .Suitable for 24" stud space walls.
- Fasteners are included.
- Suitable for Mirror, frame, cabinet,shelf,headboard,canvas,painting,sign wall mounting.
- Locate and mark studs with a stud finder, then lay out the cabinet position and mounting line with a level.
- Dry-fit the cabinet-side cleat or compatible mounting hardware and confirm how it connects to the case.
- Position and level the wall cleat or rail. A temporary mating box can help locate a French cleat before final fastening, as described by Fine Woodworking.
- Predrill and fasten the wall member into studs or suitable blocking, following the hardware maker’s directions. The Home Depot’s wall-cabinet guide describes marking studs, predrilling through mounting rails, and using washer-head cabinet screws for its installation.
- Hang or support the cabinet as the chosen system requires, then check level and plumb. Shim where needed rather than forcing the cabinet out of alignment.
- Follow the mounting hardware instructions and any model-specific warnings. The Grizzly Router Display Cabinet instructions, for example, require its brackets to be attached to a stud or a cleat mounted to a stud.
These references describe different projects and hardware. They do not establish a universal screw length, stud penetration, anchor choice, or load limit for this cabinet. Select fasteners for the actual wall, case, and mounting system.
Check Alignment After Installation
After hanging the cabinet, check that it is level and plumb and that it sits as intended against the wall. If alignment is off, correct the mounting position or use appropriate shimming; do not force the case into a twist to make it meet an uneven wall. Recheck the cabinet after final fastening.
The Home Depot installation guide recommends checking alignment and shimming where needed. A manufacturer’s instructions may impose additional requirements for a particular display cabinet or bracket system, so consult them before installation.
Independent reader supportYour contribution helps us test, update, and keep practical guides available for everyone.Frequently Asked Questions
How do I keep a display cabinet square while assembling it?
Dry-fit the parts, use an accurate square reference, and recheck the case during glue-up before the glue sets. Woodcraft’s “Wall-Hung Display Cabinet” plan uses a dead-square plywood or MDF board fitted into the rear rabbets and keeps the back flat and square under clamp pressure.
Do these 3 things before closing this tab:
1Scan for outdated or missing drivers - takes under a minute2Repair Windows errors before they cause bigger problems3Fix the driver behind crashes, sound loss and screen glitchesRank #3

- Made of Preminium Aircraft Grade Aluminum.
- The Aluminum cleat is 0.12"(3mm) thickness and 1-1/4" width single cleat and 2" interlocked.
- Holes were punched every 1 inch, size 1/5" .Suitable for 24" stud space walls.
- Fasteners are included.
- Suitable for Mirror, frame, cabinet,shelf,headboard,canvas,painting,sign wall mounting.
How do I hang a cabinet with a French cleat so it is level?
Position and level the wall-side cleat before hanging the cabinet, then fasten it to studs or suitable blocking. A temporary mating box can help with positioning. After hanging, check the cabinet for level and plumb; a correctly engaged cleat does not guarantee that every installation is aligned.
Can I hang a display cabinet on drywall alone?
The dossier sources emphasize fastening mounting hardware to studs or to a cleat secured to a stud. Do not assume drywall alone is adequate for a loaded cabinet. Assess the wall and hardware, and install suitable blocking if the required attachment points are unavailable.
How much weight can a French cleat hold?
There is no tested load rating in the cited research for this cabinet-and-wall combination. Capacity depends on the cabinet, cleat attachment, fasteners, wall construction, and installation. Do not rely on a generic load claim in place of a rating for the actual setup.
Should I use a French cleat or mounting rails?
A French cleat lets you level the wall member before hanging and uses matching bevels to engage the cabinet-side member. Rails or brackets may suit a cabinet designed for them and can provide access for fastening. Choose based on the cabinet’s construction, hardware instructions, wall framing, and installation needs rather than an unsupported capacity comparison.
Quick Recap
Product prices and availability are accurate as of the date/time indicated and are subject to change. Any price and availability information displayed on Amazon at the time of purchase will apply.