Recommended Free Tools
A good backyard upgrade does not start with decor. It starts with making the space easier to use: a dry place to sit, a clear path, shade at the right time of day, safe lighting, and planting that does not become another weekend chore.
For most homeowners, the best budget backyard projects are simple: clean up what is already there, define one useful zone, add a durable ground surface, then layer in shade, lighting, privacy, and planting. Done in that order, even a small yard can feel finished without turning into a $50,000 renovation.
On our job sites, the projects that age best are rarely the most complicated. They are the ones with good drainage, compacted base material, sensible clearances, and materials matched to the climate. A $700 gravel seating area built correctly can outperform a poorly prepared $5,000 paver patio. The difference is usually planning, not glamour.
Start With the One Backyard Problem You Actually Need to Solve
Before buying furniture, pavers, string lights, or plants, walk the yard after rain. Look for standing water, soft soil, mud at the back door, uneven concrete, exposed roots, weeds, broken steps, and areas where people already cut across the lawn. Those marks show how the yard is being used.
Quick wins for a faster PC:
Repair Windows errors before they cause bigger problemsFix Now →Scan for outdated or missing drivers - takes under a minuteDriver Scan →#1 Best Overall

- 50-Gallon Capacity: Provides ample storage for harvested rainwater, ideal for watering gardens, lawns, and plants.
- Durable Construction: Made from UV-resistant polyethylene for long-lasting durability and protection from the elements. Made of 100% Recycled plastic.
- Overflow Valve: Built-in overflow valve for managing excess water and the option to connect multiple barrels for increased storage.
- Convenient Spigot: Easy-to-use plastic spigot for quick and efficient water retrieval.
- Low Maintenance: Easy to install and maintain, offering a simple, sustainable solution for homeowners.
A practical backyard plan should answer five questions:
- Where will people sit?
- How will they get there without walking through mud?
- Where does water go during a storm?
- What needs shade, privacy, or lighting?
- What can you maintain for the next 5 to 10 years?
Use temporary layouts before building. Mark a proposed patio with spray paint, stakes, rope, cardboard, or painter’s tape on existing concrete. Set chairs in place and check real clearances. A bistro table needs about 6 feet by 6 feet. A four-person dining table is more comfortable in a 10-foot by 10-foot area. A lounge setup with two chairs, a small table, and a fire pit often needs a 12-foot circle or a 10-foot by 12-foot rectangle.
Also check the boring but critical items: gate swing, hose bib access, trash path, grill clearance, downspout discharge, low windows, air-conditioning equipment, and where shadows fall at 4 p.m. A backyard that looks good but blocks service access or traps water near the foundation is not a successful project.
Budget Ranges: What Simple Backyard Upgrades Cost in 2026
Backyard pricing varies by region, access, slope, demolition, soil conditions, material weight, and labor availability. A wheelbarrow-friendly flat yard costs less than a narrow side-yard access project where every stone has to be carried by hand. Still, homeowners can plan around realistic 2026 ranges.
What’s actually slowing this PC down?
Pick the symptom - the matching free tool is one click away.
| Budget Level | Best Uses | Typical Projects | Realistic 2026 Cost Range |
|---|---|---|---|
| Under $250 | Cleanup and quick visual improvement | Mulch refresh, solar lights, container plants, paint, furniture repair, outdoor rug | $50-$250 DIY |
| $250-$1,500 | Small functional zones | Gravel seating pad, raised beds, shade sail, small paver landing, trellis screen, portable fire pit | $250-$1,500 DIY, depending on size and materials |
| $1,500-$7,500 | Durable hardscape or partial professional help | Concrete patio, larger gravel area, basic paver patio, drainage correction, fence section | $1,500-$7,500+ installed or hybrid DIY/pro |
| $7,500+ | Major construction | Large paver patio, retaining walls, full fencing, deck, pergola, outdoor kitchen, gas fire feature | $7,500-$50,000+ depending on scope |
For reference, installed patios commonly run about $5-$35 per square foot. A 20-foot by 20-foot patio can land around $2,000-$14,000 installed depending on whether it is gravel, concrete, pavers, flagstone, or a more complex assembly. A 320-square-foot patio might cost about $1,900-$3,800 for gravel or decomposed granite, $1,900-$4,200 for broom-finish concrete, $3,800-$8,300 for concrete pavers, $4,800-$10,200 for dry-laid flagstone, and $6,400-$14,400 for mortared flagstone.
Mulch is one of the cheapest legitimate upgrades. Professionally installed mulch often averages about $72-$94 per cubic yard. Material alone can run roughly $30-$135 per cubic yard, while bagged mulch often costs about $2-$13 per bag and covers around 10 square feet at 2 inches deep.
For broader context, full backyard renovations commonly reach $15,000-$50,000, and large landscaping or hardscaping projects can range from about $3,000 to $80,000 or more. That does not mean a useful backyard requires that budget. It means you should pick the part of the yard that will change daily life the most and finish that first.
Clean, Repair, and Simplify Before You Build
The cheapest backyard improvement is often removing friction. Pull dead shrubs, edge the lawn, pressure-wash existing concrete, repair loose steps, cut back overgrown branches, and reset wobbly stepping stones. This is not glamorous work, but it tells you what the yard really needs.
The Tool Desk
Outbyte PC Repair FREERepair Windows errors before they cause bigger problemsFix Now →Outbyte Driver Updater FREEFix the driver behind crashes, sound loss and screen glitchesFind Drivers →Plan one full weekend for cleanup on an average suburban yard. Basic supplies might include contractor bags, gloves, pruning tools, a shovel, a rake, a pressure washer rental, landscape staples, and a few cubic yards of mulch. Most homeowners can make a neglected backyard look 50 percent better for $100-$500 if the bones are sound.
Do not cover problems with new materials. If water pools at the patio door, adding an outdoor rug will only hide the issue until mildew, rot, or settlement shows up. If soil slopes toward the house, correct the grade before building a seating pad. If old concrete is cracked and heaving, decide whether it needs removal, grinding, mudjacking, resurfacing, or replacement before placing furniture over a trip hazard.
Define One Useful Outdoor Room
The best budget move is to create one complete backyard zone instead of scattering money across the whole yard. Choose a dining corner, fire-pit circle, lounge nook, play area, garden wall, or grill station. Finish that zone with a stable surface, seating, shade or lighting, and a clear path.
Good Sizes for Common Backyard Zones
- Two-chair coffee spot: 6 feet by 8 feet
- Bistro table for two: 6 feet by 6 feet minimum
- Four-person dining area: 10 feet by 10 feet
- Six-person dining area: 12 feet by 12 feet
- Fire-pit seating circle: 12-14 feet diameter
- Grill station: 4 feet by 6 feet minimum, with safe clearance from siding and railings
Leave circulation space. A chair needs about 3 feet behind it to pull out comfortably. Main paths should be 36 inches wide where possible, and 42-48 inches is better for two people passing, strollers, coolers, or aging-in-place access. Narrow stepping-stone paths can work in gardens, but the main route from the back door to the seating area should be predictable and stable.
Use Gravel for the Lowest-Cost Patio or Lounge Pad
Gravel is one of the most useful budget backyard materials when installed correctly. It drains well, suits small spaces, and can be done in phases. For a simple 10-foot by 12-foot seating pad, many homeowners can build a DIY gravel area for a few hundred dollars to around $1,200 depending on excavation, edging, fabric, gravel type, and delivery.
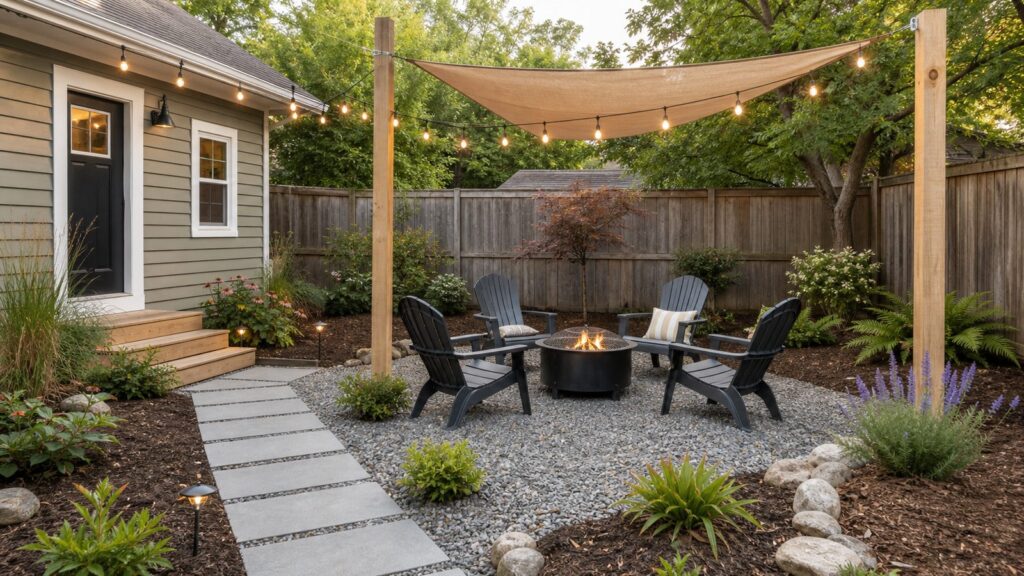
The basic assembly is straightforward: excavate organic material, slope the area away from the house, compact the soil, install landscape fabric where appropriate, add sturdy edging, place 3-4 inches of compactable base if needed, then finish with 2-3 inches of decorative gravel. In many climates, a compacted crushed-stone base under the decorative layer helps prevent sinking and rutting.
Do not skip edge restraint. Gravel without a defined edge migrates into lawn and beds. Steel edging, aluminum edging, pressure-treated lumber, stone, paver edging, or concrete curbing can all work. The right choice depends on the style of the yard and how permanent you want the installation to be.
For furniture areas, choose angular gravel that locks together better than smooth pea gravel. Pea gravel looks soft and casual, but chair legs sink and roll more easily. If you want pea gravel, use larger furniture feet, outdoor rugs, or a stabilized grid system.
Do these 3 things before closing this tab:
1Fix the driver behind crashes, sound loss and screen glitches2Repair Windows errors before they cause bigger problems3Scan for outdated or missing drivers - takes under a minuteBuild a Small Paver Landing Instead of a Full Patio
If a full patio is not in the budget, build a smaller paver landing where it matters most: outside the back door, under a grill, beside a garden bench, or at the end of a path. A 6-foot by 8-foot or 8-foot by 10-foot paver area can make a backyard feel intentional without the cost of a 300-square-foot patio.
Installed paver patios commonly cost more than gravel because the base preparation, cuts, compaction, edge restraints, bedding sand, and joint material require more precision. Recent contractor examples put basic 150-250 square foot concrete paver patios around $3,000-$6,000, while more finished 200-400 square foot paver patios can run roughly $7,500-$14,000 installed depending on region, access, base prep, and paver selection.
DIY pavers are realistic for small, square or rectangular areas. The critical details are excavation depth, compacted base, slope, bedding layer, edge restraints, and final compaction. For larger areas, rent a plate compactor. Hand tampers are fine for tiny repairs, but they do not produce the same result on a patio-size base.
A typical pedestrian paver patio needs several inches of compacted aggregate base over stable subgrade, plus bedding sand and the paver thickness. Requirements vary by soil and climate. Freeze-thaw regions, clay soil, and poor drainage demand more careful base work. If the site holds water after rain, solve that before installing pavers.
Add Mulch Beds and Low-Maintenance Planting
Mulch is not just cosmetic. A 2-3 inch layer helps suppress weeds, retain soil moisture, and visually clean up the yard. Keep mulch pulled back from siding, posts, tree trunks, and foundations. Do not pile it against wood or create mulch volcanoes around trees.
For budget planting, think in masses rather than one of everything. Three to five of the same shrub or perennial usually looks better than a random collection of individual plants. Native and climate-adapted species often need less water and maintenance once established.
Useful low-cost planting strategies include:
- Refreshing existing beds with compost and mulch before buying new plants
- Using 5-gallon shrubs where patience allows instead of oversized specimens
- Planting narrow beds along fences to soften hard edges
- Using containers only where watering will be convenient
- Adding drip irrigation to beds that regularly dry out
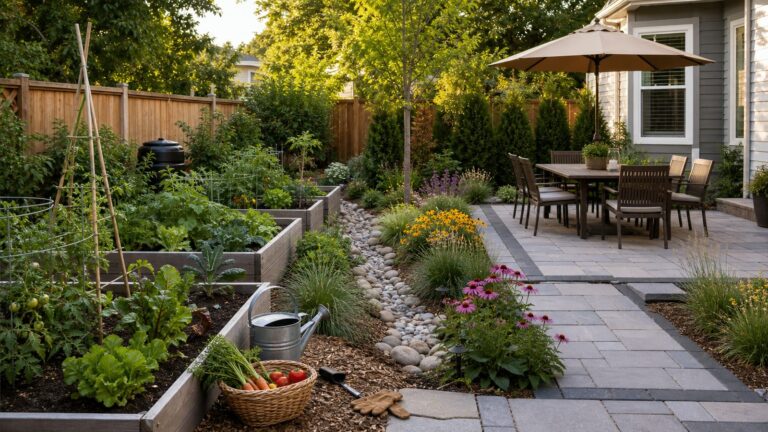
Raised beds are also a strong DIY project. A basic 4-foot by 8-foot vegetable bed is large enough to be productive but still manageable. Keep bed width around 4 feet so you can reach the middle from both sides. Use rot-resistant lumber, galvanized metal beds, masonry block, or composite kits. Avoid placing edible beds where roof runoff, treated wood contamination, or old industrial soil may be a concern.
Rank #2

- 50-Gallon Capacity: Provides ample storage for harvested rainwater, ideal for watering gardens, lawns, and plants.
- Durable Construction: Made from UV-resistant polyethylene to withstand outdoor elements and ensure long-lasting durability.
- Overflow Valve: Built-in overflow valve for managing excess water and the option to connect multiple barrels for increased storage.
- Premium Brass Spigot: Features a high-quality brass spigot for easy, secure, and leak-free water retrieval.
- Low Maintenance: Easy to install and maintain, offering a simple, sustainable solution for homeowners.
Make a Small Backyard Feel Bigger
Small yards need vertical design more than large features. Oversized decks, bulky sectionals, and wide built-ins can make a compact yard feel cramped. Use the walls, fence lines, corners, and overhead space instead.
Free tools Windows power users keep installed
One-click scans. No signup required.
Good small-yard upgrades include wall planters, trellises, narrow raised beds, folding bistro furniture, hanging string lights, a compact gravel pad, and one clean path. Keep the center of the yard open where possible. Place taller plants and screens at the edges to draw the eye outward.
Use furniture with legs rather than solid bases so more floor surface remains visible. Choose one or two larger planters instead of ten small pots. Small pots dry out fast, tip over, and create clutter. A pair of 18-24 inch planters with shrubs or ornamental grasses can do more for a small patio than a shelf full of undersized containers.
Add Shade Without Overbuilding
Shade changes how often a backyard gets used. The lowest-cost options are patio umbrellas, shade sails, fabric canopies, and strategically planted trees. More permanent options include pergolas, patio covers, and roof extensions.
A freestanding umbrella can be a same-day fix. Use a heavy base, especially in windy areas. Shade sails need strong anchor points, proper tension, and a pitch that sheds rain instead of forming a water pocket. Posts should be sized and embedded correctly for local wind loads and soil conditions. A sagging shade sail attached to weak fascia is a future repair bill.
Crashes, No Sound, or Screen Glitches?
Random freezes, missing sound and display glitches usually trace back to one bad driver. Find and replace yours safely.Free scan · under a minutePC Slower Than It Used to Be?
A free scan shows the junk files, broken settings and background clutter dragging Windows down - then fixes them in one click.Free scan · Windows 10 & 11Pergolas and patio covers can trigger permits, setback rules, snow-load requirements, wind-load requirements, and structural inspections. Some jurisdictions exempt small non-covered patios while regulating decks, patio covers, gazebos, and pergolas. Do not assume that “open roof” means “no permit.” Check your city or county before digging post holes or attaching anything to the house.
Use Outdoor Lighting in Layers
Lighting should make the yard safer and more usable, not blast the neighbors. A practical lighting plan has three layers: path lighting for movement, low warm lighting for seating, and task lighting at grills, steps, or work areas.
Solar path lights are the cheapest DIY option, but quality varies and shaded yards reduce performance. Plug-in string lights can work well where you already have a GFCI-protected exterior outlet. Low-voltage lighting is more durable and flexible, but transformer placement, wire runs, fixture spacing, and burial depth matter.
Permanent hardwired lighting, new exterior receptacles, underground conduit, and new circuits are electrical work. Exterior outlets should be weather-resistant, GFCI protected, and installed in proper in-use covers where required. If you need a new outlet across the yard, hire a licensed electrician. Trenching through unknown utilities or improvising outdoor wiring is not a budget shortcut.
Create Privacy by Screening the Sightline
Full perimeter fencing is expensive. In 2026, chain link commonly runs about $10-$40 per linear foot installed, wood around $20-$50 per linear foot, vinyl around $30-$60 per linear foot, and ornamental metal higher. If the real issue is one neighbor’s window or a view from the street, screen that specific sightline instead.
Budget privacy options include trellis panels, lattice sections, tall planters, fast-establishing shrubs, outdoor curtains, reed screening, and partial fence returns near seating areas. A 6-foot-wide trellis in the right place can do more than 80 feet of unnecessary fencing.
Check property lines, fence height rules, HOA requirements, easements, and utility locations before installing posts. This is especially important near side yards, alleys, drainage easements, and shared fences. A privacy screen built entirely inside your yard is usually simpler than a boundary fence, but local rules still apply.
Add a Fire Pit Carefully
A portable fire pit or simple block fire ring can make a backyard more inviting, but fire features require judgment. Many homeowners spend around $850 for an installed fire pit, with common ranges around $240-$2,400. Simple DIY block or steel-ring fire pits can land around $300-$1,500. Gas-line trenching, masonry fireplaces, and built-in fire features can move into several-thousand-dollar territory quickly.
Keep fire pits away from structures, fences, low branches, dry vegetation, and combustible surfaces. Follow the manufacturer’s clearances for portable units. Use a spark screen where appropriate. Keep a hose, extinguisher, or water source nearby. Do not place a wood-burning fire pit under a covered patio unless the system is specifically designed and approved for that use.
Fire rules vary heavily by city, county, HOA, drought condition, and air-quality district. Some areas restrict wood burning, require setbacks, or ban open flames during dry periods. Natural-gas and propane installations should be handled by qualified professionals.
Refresh Furniture, Paint, and Decor Last
Furniture and decor work best after the layout is settled. Refinish a wood bench, spray-paint metal chairs, replace cushions, add an outdoor rug, or build a simple side table once you know where the seating zone belongs.
For outdoor rugs, use them on surfaces that drain and dry. Rugs over damp concrete, shaded wood, or poorly drained gravel can trap moisture. For cushions, look for removable covers and store them when not in use. For painted furniture, prep matters: clean, sand, prime where needed, and use exterior-rated coatings.
Decor should support the function of the yard. A side table near every chair, a landing place for grill tools, a storage bench for cushions, and hooks for towels or garden tools are more useful than purely decorative pieces.
Permit, Drainage, and Safety Checks Before You Start
Small cosmetic upgrades usually do not require permits. Permanent construction might. Permit triggers vary by municipality, but homeowners should check before building decks, raised platforms, patio covers, pergolas, gazebos, retaining walls, fences, electrical work, gas fire features, major grading, or drainage changes.
Patios are often simpler than decks, but not always. A ground-level patio may be exempt in one city and regulated in another if it changes drainage, exceeds size limits, affects setbacks, or includes a cover. Decks are more likely to require permits because they involve structure, guardrails, stairs, footings, and ledger connections.
Drainage is the first professional concern. Patios and paths should slope away from the house, commonly at about 1/8 inch to 1/4 inch per foot depending on surface and conditions. Do not block weep holes, cover siding clearances, bury wood trim, trap water against the foundation, or redirect runoff onto a neighbor’s property.
Recommended Free Tools
Call 811 before digging. Even shallow projects can encounter irrigation lines, low-voltage lighting, cable, gas, electrical, or drainage pipes. Marking utilities is free in most areas and should happen before posts, edging stakes, tree planting, trenching, or excavation.
Independent reader supportYour contribution helps us test, update, and keep practical guides available for everyone.When to DIY vs When to Hire a Pro
DIY is a good fit when the project is small, non-structural, accessible, and reversible. Hire a professional when the work affects structure, utilities, drainage, property lines, or long-term safety.
Rank #3

- 50-Gallon Capacity: Provides ample storage for harvested rainwater, ideal for watering gardens, lawns, and plants.
- Durable Construction: Made from UV-resistant polyethylene for long-lasting durability and protection from the elements. Made of 100% Recycled plastic.
- Overflow Valve: Built-in overflow valve for managing excess water and the option to connect multiple barrels for increased storage.
- Convenient Spigot: Easy-to-use plastic spigot for quick and efficient water retrieval.
- Sturdy Stand Included: Raised design ensures easy access to the spigot on the rain barrel for efficient water retrieval.
| Project | Good DIY Candidate? | Hire a Pro When… |
|---|---|---|
| Mulch and planting beds | Yes | Drainage, grading, large tree work, or irrigation redesign is involved |
| Gravel path or seating pad | Yes for small areas | The site slopes, holds water, needs excavation, or connects to hardscape |
| Small paver landing | Yes for simple rectangles | The area is large, has steps, borders a pool, or needs drainage correction |
| Lighting | Yes for solar or plug-in systems | New outlets, hardwiring, conduit, or trenching is required |
| Privacy screen | Often | Posts are tall, near property lines, or subject to wind exposure |
| Fire pit | Portable units can be | Gas lines, masonry, covered areas, or local fire restrictions apply |
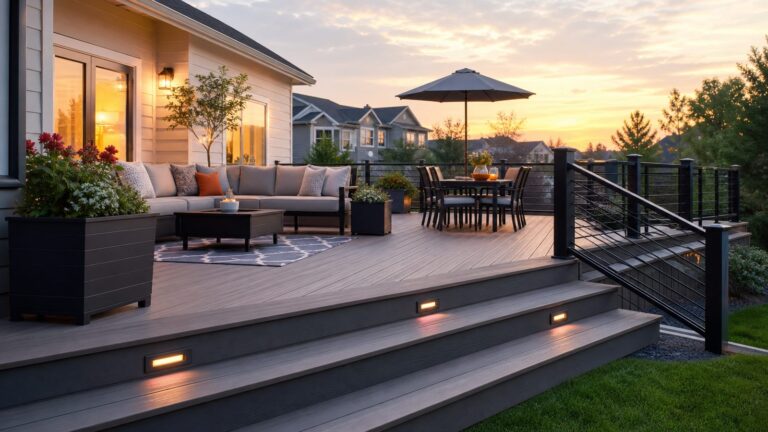
| Deck or pergola | Limited | Footings, ledgers, roofs, guards, stairs, or permits are involved |
A hybrid approach can be the best value. Homeowners can handle cleanup, planting, furniture, and finish details while hiring out grading, base prep, concrete, electrical, gas, or structural work. That keeps the budget focused on the parts where mistakes are expensive.
A Practical Weekend-by-Weekend Backyard Plan
Weekend 1: Clean and Measure
Remove clutter, trim overgrowth, pressure-wash hard surfaces, map wet areas after rain, and measure the yard. Take photos from the back door, patio, kitchen window, and street approach. Decide which view matters most.
Free tools Windows power users keep installed
One-click scans. No signup required.
Weekend 2: Mark the Layout
Mock up one zone with stakes, string, chairs, and temporary lighting. Confirm table clearance, grill safety, gate swing, hose access, and walking routes. Adjust before buying heavy materials.
Weekend 3: Build the Surface
Install a gravel pad, small paver landing, stepping-stone path, or mulch-defined seating area. Prioritize compaction, edging, and slope. This is the point where the backyard starts becoming usable.
Weekend 4: Add Shade, Lighting, and Planting
Install the umbrella, shade sail, solar lights, plug-in string lights, containers, mulch, and low-maintenance plants. Keep lighting warm and low. Keep plants sized for their mature spread, not their nursery-pot size.
Weekend 5: Finish and Edit
Add furniture, storage, an outdoor rug if the surface drains well, and a small focal feature. Remove anything that makes the space harder to maintain. A clean, usable backyard beats a crowded one.
The Tool Desk
Outbyte PC Repair FREEClear out junk files and repair common Windows errorsFree Scan →Outbyte Driver Updater FREEFix the driver behind crashes, sound loss and screen glitchesFind Drivers →Best Budget Backyard Ideas by Goal
If You Want a Place to Eat Outside
Build a 10-foot by 10-foot gravel or paver zone, add a four-person table, provide shade, and run warm string lights overhead if you already have a safe outlet. Keep the grill nearby but not tight against siding, rails, or overhangs.
If You Want a Fire-Pit Area
Use a 12-14 foot diameter gravel circle, Adirondack-style chairs, and a portable fire pit with proper clearances. Check local burn rules first. Avoid placing the fire feature under trees, patio covers, or near fencing.
If You Want More Privacy
Stand in the seating area and identify the exact sightline. Install a trellis, tall planter, or shrub grouping there. Do not pay for a full fence unless the whole boundary actually needs screening.
If You Want Less Yard Work
Convert awkward lawn edges into mulch beds, use native shrubs and perennials, add drip irrigation where needed, and replace muddy cut-throughs with gravel or stepping stones. Avoid large annual beds unless you enjoy replanting.
If You Want Better Resale Appeal
Keep the design neutral and durable. Buyers respond well to good drainage, safe steps, clean hardscape, usable seating or dining space, low-maintenance planting, and lighting that makes the yard feel cared for. Highly personalized features are riskier.
Common Backyard Upgrade Mistakes
The most common mistake is starting with the fun purchases before fixing the site. Decor cannot overcome drainage, unstable soil, weeds, broken concrete, or unsafe stairs.
The second mistake is building patios and paths on thin, uncompacted base material. That leads to settlement, wobbling pavers, puddles, and trip hazards. If you are building anything larger than a tiny landing, rent the compactor and use proper edge restraint.
The third mistake is overspending on scattered features. A fire pit in one corner, a half-finished garden bed in another, and string lights over a muddy lawn do not add up to an outdoor room. Put the money into one finished zone first.
What’s actually slowing this PC down?
Pick the symptom - the matching free tool is one click away.
The fourth mistake is ignoring maintenance. Wood needs sealing or staining. Gravel needs occasional raking and weed control. Plants need water until established. Fabric shade can tear or sag. Outdoor cushions need storage. Every backyard material has a future chore attached to it.
The Bottom Line
The cheapest way to upgrade a backyard is not to buy more things. It is to make one part of the yard work properly. Start with drainage and cleanup, define a seating or dining zone, build a stable surface, then add shade, lighting, privacy, and low-maintenance planting.
A useful backyard can start under $250 with cleanup, mulch, lighting, and paint. A more complete DIY zone often lands between $250 and $1,500. Larger patios, fencing, drainage corrections, structural shade, and professional hardscape can move into the $1,500-$7,500+ range quickly.
Spend where failure is expensive: grading, drainage, compaction, structure, electrical, and gas. Save where DIY shines: cleanup, planting, mulch, simple gravel areas, furniture refinishing, containers, and non-permanent decor. That balance is how a budget backyard becomes a space you actually use.
PC Slower Than It Used to Be?
A free scan shows the junk files, broken settings and background clutter dragging Windows down - then fixes them in one click.Free scan · Windows 10 & 11Crashes, No Sound, or Screen Glitches?
Random freezes, missing sound and display glitches usually trace back to one bad driver. Find and replace yours safely.Free scan · under a minuteFrequently Asked Questions
What is the cheapest way to upgrade a backyard?
Clean up the yard, refresh mulch, define one seating area, and add low-cost lighting. Many homeowners can make a noticeable improvement for $100-$500 before taking on larger hardscape work.
How much does a small backyard makeover cost in 2026?
A simple DIY refresh can cost under $250. A more complete backyard zone with gravel, planting, shade, and lighting often runs $250-$1,500. Larger patios, fencing, drainage work, or contractor-built features commonly move into the $1,500-$7,500+ range.
What is the cheapest patio material?
Gravel or decomposed granite is usually the lowest-cost patio surface. For a 320-square-foot patio, 2026 estimates commonly place gravel around $1,900-$3,800 installed, compared with higher ranges for pavers, flagstone, or more complex finishes.
Do I need a permit for a DIY patio, pergola, deck, or fire pit?
Permit rules vary by city and county. Ground-level patios may be exempt in some areas, while decks, patio covers, pergolas, gazebos, electrical work, gas fire features, fences, and grading changes often require review. Check local rules before building.
Can I build a patio myself?
Small gravel pads and simple paver landings are reasonable DIY projects if you can excavate, compact the base, set edge restraints, and slope the surface away from the house. Hire a pro for large patios, drainage problems, steep slopes, steps, or structural work.
What backyard projects should not be DIY?
Avoid DIY work on structural decks, retaining walls, major grading, foundation drainage, natural-gas fire features, new exterior circuits, and projects near property lines or utilities unless you have the right training, permits, and inspections.
Quick Recap
Product prices and availability are accurate as of the date/time indicated and are subject to change. Any price and availability information displayed on Amazon at the time of purchase will apply.