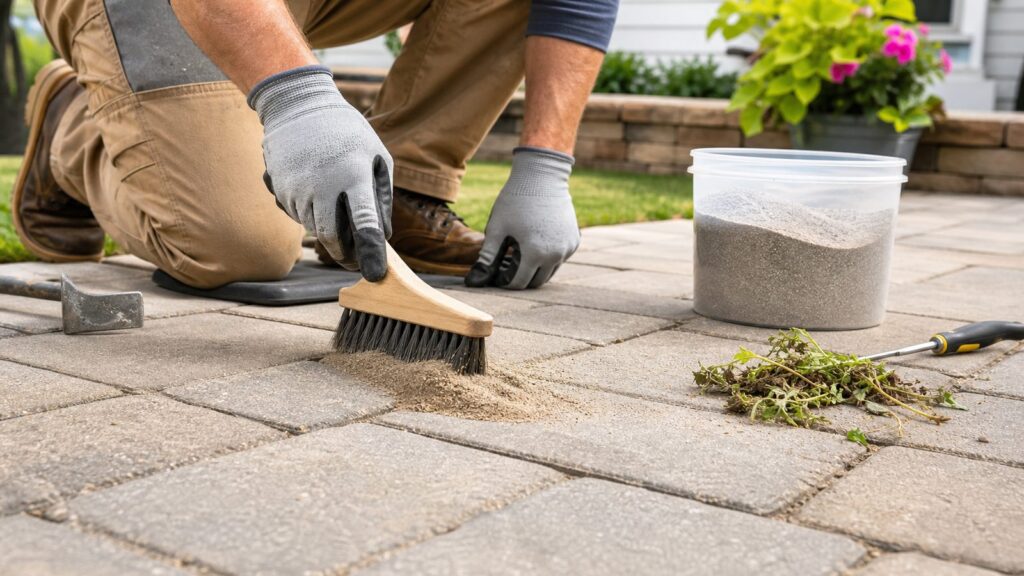
Weeds between patio pavers are rarely solved by spraying once and walking away. In most cases, the patio has collected windblown seed, grass clippings, leaves, and soil in the joints. Once that organic material sits in damp gaps, weeds germinate right where your joint sand should be.
The best way to get rid of weeds between patio pavers is to remove the living plants, clean the joints deeply enough to remove soil and roots, let the surface dry, refill the joints with the right material, and then keep debris from building back up. On our job sites, we treat paver weeds as a joint failure and maintenance issue first, and a weed issue second.
As an Amazon Associate I earn from qualifying purchases.
For a small patio with scattered annual weeds, hand removal or boiling water may be enough. For a 200 to 400 square foot patio with dense weeds, moss, missing joint sand, or low spots that trap sediment, expect a more involved cleanout and re-sanding. DIY tools may cost $10 to $45, while professional weed control or joint cleanout can range from about $40 to $200 per treatment or $35 to $140 per labor hour depending on the work.
Free tools Windows power users keep installed
One-click scans. No signup required.
Start With a Quick Patio Diagnosis
Before choosing a weed removal method, look at why the weeds are there. A paver patio in good condition has firm pavers, stable edges, clean joints, and joint material that sits below the chamfered edge but is not washed out. If the joints are mostly empty or filled with dark soil instead of sand, killing the weeds will only buy time.
#1 Best Overall
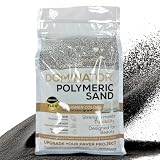
- FLEXIBILITY, STRENGTH and BEAUTY: Ease your mind with revolutionary CERAMIC FLEX technology in the most advanced polymeric sand available, allowing flexibility and durability in joints 1/8” up to 4”, with beautiful colors to make your paver or stone surfaces pop!
- EASY TO USE PACKAGING: Our bag’s NEW Easy Pour Handle makes carrying a breeze and offers more control and precision installation a breeze.
- EASY INSTALLATION: Made with fine sand and a cement-free formula, DOMINATOR Polymeric Sand easily sweeps into joints and rinses easily, dramatically cutting your installation time and labor efforts. (Note: This product is not a replacement for grout, mortar, and paver edging.)
- COVERAGE RATE: Using Google, search "DOMINATOR Polymeric Sand Calculator" to help you calculate the amount of sand needed for your project, or download our Product Documentation in the Product Guides section of this listing for a Calculator Worksheet.
- NOTE: Use the Installation Manual in the Product Guides section of this listing, and reference our How To Video.
Use a screwdriver, painter’s tool, or crevice weeder to check joint depth in several areas. If you can push down 1 inch or more into loose dirt, old sand, roots, or ant tunnels, the joints need cleaning and refilling. If pavers rock underfoot, hold standing water, or have lifted edges, the problem may extend into the base or edge restraint.
Also identify the weed type. Annual weeds usually have shallow roots and often respond well to pulling, boiling water, brushing, or a shallow cleanout. Perennial weeds, including dandelion, nutsedge, bermudagrass, and many creeping grasses, can regrow from roots or rhizomes left below the joint. Those usually require deeper removal, repeat spot treatment, or partial paver lifting if roots have spread under the field.
A simple inspection saves money. There is no value in paying for sealer over failed joints, and there is no point adding polymeric sand over roots and soil. The patio has to be clean and structurally sound first.
Quick wins for a faster PC:
Repair Windows errors before they cause bigger problemsFix Now →Fix the driver behind crashes, sound loss and screen glitchesFind Drivers →Method 1: Hand Pulling and Mechanical Joint Cleaning
Hand removal is still the most controlled way to remove weeds between patio pavers, especially near edible gardens, storm drains, pets, pool decks, and planting beds. It is slow, but it removes more root mass than surface burn-down methods.
For DIY work, plan on a crevice weeder, stiff wire brush, scraper, gloves, and kneeling pad. If you already own basic hand tools, the added cost is usually about $10 to $45. The real cost is time. A 200 to 400 square foot patio with dense weeds can take several hours, especially if roots have grown into compacted old sand.
Work after light rain or irrigation, when the joints are damp but not muddy. Grip weeds at the base and pull straight up. Then scrape the joint to remove root fragments, moss, and accumulated soil. For tight joints, a hooked crevice tool works better than a flat screwdriver because it can pull debris out instead of compacting it deeper.
After pulling, sweep or blow the patio clean. If the joints are still mostly full of clean sand, you may only need light touch-up sand. If the joints are open, dirty, or uneven, move to a deeper joint restoration step before the next rain carries more soil into the gaps.
Recommended Free Tools
Best Use
Use hand removal for small patios, isolated weeds, patios next to sensitive plantings, and areas where chemical drift or runoff is a concern. It is also the right first step before polymeric sand because no jointing product should be installed over living roots.
Method 2: Boiling Water for Small Areas
Boiling water is a low-cost spot treatment for young weeds in paver joints. It damages plant tissue quickly and can knock back seedlings within a day. Material cost is close to zero, but it is only practical for small patios, steps, narrow walkways, or scattered weeds near the house.
Carry the kettle carefully and pour directly into the joint, not across the full paver surface. Keep children and pets away until the area cools. Avoid repeated thermal shock on delicate natural stone, older concrete pavers, or surfaces with existing cracks. Also stay clear of desirable plants because hot water can damage nearby roots and foliage.
Boiling water works best on annual weeds and shallow growth. Perennial weeds often regrow because the heat may not reach the full root system. Expect repeat treatments every few days or weeks if roots remain alive below the joint.
The Tool Desk
Outbyte Driver Updater FREEScan for outdated or missing drivers - takes under a minuteDriver Scan →Outbyte PC Repair FREEClear out junk files and repair common Windows errorsFree Scan →Best Use
Use boiling water when you want a quick, non-herbicide option for small areas and you can apply it safely. It is not efficient for a large patio or a commercial-style cleanup.
Rank #2

- Professional Polymeric Sand for Pavers Ideal jointing sand for patios, walkways, driveways, pool decks, and stone installations
- Rain Safe Technology Sets quickly and resists washout after activation
- Strong Joint Stabilization Locks pavers together to prevent shifting and movement
- Fast & Easy Installation Simple sweep-in application for contractors and homeowners
- For Concrete & Natural Stone Pavers Compatible with most hardscape surfaces
Method 3: Vinegar or Labeled Herbicide Spot Treatment
Vinegar and non-selective herbicides can help when weeds are too dense to pull first, but they need to be used with restraint. The goal is targeted spot treatment, not blanket spraying across the patio.
Household vinegar is inexpensive and can brown tender top growth, but it is not a guaranteed root killer. Stronger horticultural vinegar is more aggressive and more hazardous to skin and eyes. Salt-and-vinegar mixes are a poor choice near planting beds, metal edging, drainage paths, and soils you want to keep healthy because salt can persist and cause collateral damage.
Labeled non-selective herbicides are another option for active growth. Glyphosate, for example, is a foliar non-selective herbicide with little soil activity, so it can kill existing foliage but does not create a lasting barrier in paver joints. That matters: even after a successful application, new seeds can germinate later if the joints stay dirty.
In the United States, pesticide labels are legally enforceable. Only apply a herbicide to sites listed on the label, at the labeled rate, and under the labeled weather conditions. Do not spray before rain, during wind, near open water, or where runoff can reach a storm drain. Professional weed-control pricing commonly runs about $40 to $200 per application, with typical weed-control visits averaging roughly $49 to $210 depending on the minimum trip charge, product, patio size, and weed density.
Best Use
Use spot treatment for actively growing perennial weeds, dense foliage that needs to be weakened before removal, or patios where roots are difficult to extract by hand. Follow with physical cleanout once the weeds die back.
Method 4: Pressure Washing, Used Carefully
Pressure washing can remove weeds, moss, algae, and dirty joint material quickly. It can also damage a paver patio if used too aggressively. A narrow tip or excessive pressure can blast out joint sand, disturb bedding sand, scar softer concrete pavers, and leave deeper voids that collect even more seed and debris.
For paver patios, use controlled pressure, a fan tip, or a surface cleaner. Keep the wand moving. Avoid cutting directly into the joints at close range. If the patio has old, loose, or soil-filled joints, assume you will need to replenish joint material afterward.
Pressure washing is most useful when paired with re-sanding. Clean the patio, remove failed joint material to an appropriate depth, allow the surface and joints to dry, then install joint sand according to the product directions. If you pressure wash and stop there, the patio may look better for a week but will often become more weed-friendly because the joints are open.
Professional paver cleaning, re-sanding, and sealing prices vary widely by region and scope. For 2026, regional contractor pricing commonly lands around $0.75 to $4.00 per square foot for cleaning and resealing. Full restoration with joint cleanout, polymeric sand, stain treatment, repairs, and sealer can run higher because the labor is in the prep.
Best Use
Use pressure washing for patios with widespread moss, dirt, and failed joints, but plan the job as a restoration rather than a quick rinse. It is a good candidate for professional help when pavers are uneven, stained, or already losing joint material.
Rank #3

- FLEXIBILITY, STRENGTH and BEAUTY: Ease your mind with revolutionary CERAMIC FLEX technology in the most advanced polymeric sand available, allowing flexibility and durability in joints 1/8” up to 4”, with beautiful colors to make your paver or stone surfaces pop!
- EASY TO USE PACKAGING: Our bag’s NEW Easy Pour Handle makes carrying a breeze and offers more control and precision installation a breeze.
- EASY INSTALLATION: Made with fine sand and a cement-free formula, DOMINATOR Polymeric Sand easily sweeps into joints and rinses easily, dramatically cutting your installation time and labor efforts. (Note: This product is not a replacement for grout, mortar, and paver edging.)
- COVERAGE RATE: Using Google, search "DOMINATOR Polymeric Sand Calculator" to help you calculate the amount of sand needed for your project, or download our Product Documentation in the Product Guides section of this listing for a Calculator Worksheet.
- NOTE: Use the Installation Manual in the Product Guides section of this listing, and reference our How To Video.
Method 5: Flame Weeding Where It Is Legal and Safe
flame weeders do not need to burn weeds to ash. They work by heat shock. A brief pass over the foliage damages plant cells, and the weed wilts afterward. Used correctly, this can be fast on small seedlings in open paver joints.
Crashes, No Sound, or Screen Glitches?
Random freezes, missing sound and display glitches usually trace back to one bad driver. Find and replace yours safely.Free scan · under a minuteWindows Errors? Fix Them Before They Spread
Repair common Windows errors and clear accumulated junk for a smoother, more stable PC - no reinstall needed.Free scan · no reinstallThe safety limits are serious. Do not use a flame weeder during drought, burn bans, high wind, or dry leaf buildup. Avoid mulch, wood fences, vinyl siding, deck skirting, propane storage, irrigation boxes, landscape fabric edges, and dry ornamental grasses. Keep a hose or extinguisher nearby and check the area again after finishing.
Flame weeding is not the first choice for patios with deep-rooted perennial weeds. Like boiling water and vinegar, it mainly affects top growth. Repeated passes may weaken some plants, but roots can survive below the joint. It is also a poor fit for pavers surrounded by dry landscaping or tight urban side yards.
Best Use
Use flame weeding only where local rules allow it and the surrounding materials are noncombustible and clear. It is best for fast treatment of small annual weeds in open hardscape areas.
Method 6: Restore the Joints With Polymeric Sand or Permeable Aggregate
Joint restoration is the closest thing to a long-term fix. Once the weeds and debris are removed, the joints need to be filled with a material that resists washout and reduces the space where seeds can root.
For many standard patios and walkways, polymeric sand is the common choice. It is a sand blended with binders that harden after proper watering. It can reduce weed growth and joint washout, but it is not a magic top-dressing. For an existing patio, the old sand should be removed down to the bottom of the paver before new polymeric sand is installed. If you only sweep a thin layer over old dirt and roots, the surface may crust while the joint below remains weak.
Material costs vary. In 2026, big-box pricing shows budget polymeric sand around $30 for a 35-pound bag, while premium 40-pound products are often around $89 to $93. Coverage depends on paver size, joint width, and joint depth. One 40-pound bucket may cover up to about 55 square feet in some listed conditions, while contractor estimating often uses roughly 75 to 100 square feet per 50-pound bag for standard pavers. Wide joints can cut coverage sharply.
Install polymeric sand only during a dry weather window and within the manufacturer’s temperature range. The pavers and joints must be clean and dry before sweeping. After compaction and cleanup, activate the sand with controlled watering. Too little water can leave dry, uncured sand in the joint. Too much water can wash binders out or stain the surface. Most products also require a dry curing period before heavy rain, furniture, or foot traffic.
Not every patio should receive standard polymeric sand. Wide joints, natural stone, permeable pavers, driveways, and freeze-thaw climates may require specialty jointing products. For permeable pavers, the joints are part of the drainage system and are typically filled with clean angular aggregate, not polymeric sand that blocks water movement.
Best Use
Use joint restoration when the patio has missing sand, recurring weeds, ant activity, washout, or soil-filled gaps. This is the method that addresses the conditions weeds need to return.
Comparison: Which Weed Removal Method Should You Use?
The right method depends on weed type, joint condition, patio size, and safety concerns. For most patios, the best result comes from combining two or three methods: remove or kill the growth, clean the joint, then refill it properly.
Rank #4

- FLEXIBILITY, STRENGTH and BEAUTY: Ease your mind with revolutionary CERAMIC FLEX technology in the most advanced polymeric sand available, allowing flexibility and durability in joints 1/8” up to 4”, with beautiful colors to make your paver or stone surfaces pop!
- EASY TO USE PACKAGING: Our bag’s NEW Easy Pour Handle makes carrying a breeze and offers more control and precision installation a breeze.
- EASY INSTALLATION: Made with fine sand and a cement-free formula, DOMINATOR Polymeric Sand easily sweeps into joints and rinses easily, dramatically cutting your installation time and labor efforts. (Note: This product is not a replacement for grout, mortar, and paver edging.)
- COVERAGE RATE: Using Google, search "DOMINATOR Polymeric Sand Calculator" to help you calculate the amount of sand needed for your project, or download our Product Documentation in the Product Guides section of this listing for a Calculator Worksheet.
- NOTE: Use the Installation Manual in the Product Guides section of this listing, and reference our How To Video.
| Method | Typical 2026 Cost | Speed | How Long It Lasts | Best Use Case | Main Caution |
|---|---|---|---|---|---|
| Hand pulling and scraping | $10-$45 DIY tools; $35-$140 per labor hour pro | Slow to moderate | Good if roots and debris are removed | Small patios, sensitive areas, prep before re-sanding | Labor-intensive on dense or rooted joints |
| Boiling water | Near-zero material cost | Fast for small areas | Short-term; repeat often | Scattered annual weeds | Burn risk and possible surface stress |
| Vinegar spot treatment | Low for household vinegar; higher for horticultural vinegar | Fast top-growth burn | Short to moderate | Young weeds away from desirable plants | Can injure skin, eyes, plants, soil, and metal |
| Labeled herbicide spot treatment | About $40-$200 per application | Moderate; results take days | Moderate for existing weeds only | Perennial weeds and dense growth | Must follow the legally enforceable label |
| Pressure washing | Often part of $0.75-$4.00 per sq ft cleaning/resealing work | Fast | Good only if joints are refilled | Dirty patios, moss, failed joint material | Can remove too much sand or damage pavers |
| Flame weeding | Tool and propane cost vary; often DIY | Fast | Short to moderate | Open hardscape with tiny weeds | Fire risk; avoid burn bans, wind, mulch, and structures |
| Polymeric sand or joint aggregate restoration | About $30 per 35-lb budget bag to $89-$93 per 40-lb premium product, plus labor | Moderate | Best long-term prevention when installed correctly | Recurring weeds, empty joints, washout | Requires clean, dry, full-depth prep |
When Weeds Mean Your Patio Needs Repair
Recurring weeds can be a symptom of a larger hardscape problem. If the patio keeps filling with soil after every storm, the source may be drainage, edge movement, or settlement rather than weed pressure.
Look for pavers that have sunk more than about 1/4 inch below adjacent units, edges that have spread, joints wider than the original layout, standing water after rain, muddy residue, ants tunneling through the joints, moss in shaded wet areas, or trip hazards. Also check whether mulch or bare soil uphill from the patio washes across the surface. If stormwater is carrying sediment into the joints, the weeds will keep coming back until runoff is redirected.
What’s actually slowing this PC down?
Pick the symptom - the matching free tool is one click away.
Common repairs include adjusting downspout discharge, adding or correcting slope, replacing failed edge restraint, lifting and resetting sunken pavers, removing root mats below the field, and rebuilding sections of the bedding layer. Sealer can help reduce water intrusion and organic buildup, but it does not fix failed joints, poor base compaction, sinking pavers, or drainage problems.
If pavers are uneven, broken, or undermined by roots, partial reset work may be needed. New paver patio installation benchmarks in 2026 commonly run about $20 to $35 per square foot nationally, with some regional examples around $21 to $36 per square foot and mid-range full patio projects averaging about $17,750. A targeted repair is usually less than full replacement, but the labor depends on access, base condition, and how much of the patio must be lifted.
Independent reader supportYour contribution helps us test, update, and keep practical guides available for everyone.How to Prevent Weeds From Returning
Prevention is mostly housekeeping and water control. Weed seeds need a place to lodge, moisture, and organic material. If you remove those conditions, the patio stays cleaner and the joints last longer.
Sweep or blow the patio after mowing, leaf drop, and storms. Grass clippings are one of the cheapest problems to prevent and one of the easiest ways to feed new weeds. Keep mulch below the paver surface and pull it back from patio edges. Redirect downspouts so roof water does not carry soil across the pavers. Trim shrubs and trees where constant shade keeps joints wet and mossy.
Do these 3 things before closing this tab:
1Scan for outdated or missing drivers - takes under a minute2Repair Windows errors before they cause bigger problems3Fix the driver behind crashes, sound loss and screen glitchesInspect the joints twice a year, usually in spring and fall. If joint material is low, loose, or missing, address it before weeds establish. For polymeric sand, do not casually top off a dirty joint. Clean out failed material first, follow the product depth requirements, and water it exactly as directed.
Sealing can be useful after the patio is cleaned, repaired, and re-sanded. It can reduce staining, make cleanup easier, and slow organic buildup. But sealer should be the final step, not the repair. If the patio has low spots, missing sand, or drainage stains, fix those first.
When to DIY vs. When to Hire a Pro
DIY makes sense when the patio is generally flat, the weeds are shallow, the joints still have usable sand, and the area is small enough to finish in one day. A homeowner with a crevice tool, gloves, broom, and patience can clean up a walkway or modest patio for under $50 in tools, plus the cost of any joint sand needed afterward.
Hire a pro when weeds cover a large area, the joints are packed with soil, pavers are sinking or rocking, moss is widespread, drainage is questionable, or you are considering pressure washing, polymeric sand, and sealer as one project. Professional hand weeding or joint cleanout commonly falls in the $35 to $140 per labor hour range, and weed-control visits often land around $49 to $210. Paver restoration is usually priced by condition and scope, with cleaning and resealing often around $0.75 to $4.00 per square foot before more involved repairs.
Quick wins for a faster PC:
Scan for outdated or missing drivers - takes under a minuteDriver Scan →Repair Windows errors before they cause bigger problemsFix Now →Fix the driver behind crashes, sound loss and screen glitchesFind Drivers →Best Value

- FLEXIBILITY, STRENGTH and BEAUTY: Ease your mind with revolutionary CERAMIC FLEX technology in the most advanced polymeric sand available, allowing flexibility and durability in joints 1/8” up to 4”, with beautiful colors to make your paver or stone surfaces pop!
- EASY TO USE PACKAGING: Our bag’s NEW Easy Pour Handle makes carrying a breeze and offers more control and precision installation a breeze.
- EASY INSTALLATION: Made with fine sand and a cement-free formula, DOMINATOR Polymeric Sand easily sweeps into joints and rinses easily, dramatically cutting your installation time and labor efforts. (Note: This product is not a replacement for grout, mortar, and paver edging.)
- COVERAGE RATE: Using Google, search "DOMINATOR Polymeric Sand Calculator" to help you calculate the amount of sand needed for your project, or download our Product Documentation in the Product Guides section of this listing for a Calculator Worksheet.
- NOTE: Use the Installation Manual in the Product Guides section of this listing, and reference our How To Video.
Permits are not usually required for routine patio maintenance such as weeding, cleaning, re-sanding, or sealing. They may come into play if you expand the patio, change drainage, add impervious area, alter grading, or connect work to stormwater systems. Local rules vary. Some cities have residential stormwater requirements for new or modified hardscape, especially where runoff affects neighboring properties, sidewalks, streets, or storm drains.
From a contractor’s point of view, the dividing line is simple: if the patio is structurally sound, maintenance is fair DIY work. If the patio is moving, holding water, shedding sand, or creating trip hazards, treat it as a repair project.
A Practical Step-by-Step Plan
For most homeowners, the best sequence is straightforward. First, pull or spot-treat the existing weeds. Give herbicide or vinegar treatments time to work if you use them. Second, scrape or wash the joints clean. Third, let the patio dry thoroughly. Fourth, refill the joints with the correct sand or aggregate for that paver system. Fifth, compact, sweep, water, and cure according to the joint product directions. Sixth, maintain the patio by removing leaves, clippings, and sediment before they become soil in the joints.
If you skip the joint work, weeds usually return. If you skip drainage correction, sediment returns. If you install polymeric sand over dirty, damp joints, it may haze, crust, fail to cure, or break apart. The durable fix is not one product. It is a clean joint, the right material, proper installation, and a patio that drains the way it should.
Do these 3 things before closing this tab:
1Repair Windows errors before they cause bigger problems2Scan for outdated or missing drivers - takes under a minute3Clear out junk files and repair common Windows errorsFrequently Asked Questions
What is the best way to get rid of weeds between patio pavers?
The best long-term method is to remove the weeds and roots, clean soil and debris out of the joints, let the patio dry, then refill the joints with polymeric sand or the correct permeable aggregate. Simple pulling or spraying only treats the visible weeds.
Can weeds between pavers be killed permanently?
Not permanently in the absolute sense, because new seeds can blow into the joints. You can greatly reduce regrowth by keeping joints full, sweeping away organic debris, correcting drainage, and restoring failed joint sand.
Does polymeric sand stop weeds from growing between pavers?
Polymeric sand can reduce weed growth and joint washout when installed correctly, but it is not a magic top coat. Existing sand, soil, and roots should be removed to proper depth before new polymeric sand is swept in and activated.
Is it safe to pressure wash weeds out of paver joints?
Yes, if pressure is controlled and the right tip or surface cleaner is used. Aggressive pressure or a narrow stream can blast out joint and bedding sand, scar softer pavers, and leave voids that invite new weeds.
Should I use vinegar, boiling water, or herbicide on paver weeds?
Boiling water and vinegar are useful for small spot treatments and young weeds, but they often only burn down top growth. Labeled non-selective herbicide can work better on perennial weeds, but it must be used exactly according to the product label.
Do I need to seal pavers after removing weeds?
Sealing can help reduce staining, water intrusion, and organic buildup, but it does not fix missing joint sand, sinking pavers, poor drainage, or base failure. Clean, repair, and re-sand first; seal last if appropriate.
Quick Recap
Product prices and availability are accurate as of the date/time indicated and are subject to change. Any price and availability information displayed on Amazon at the time of purchase will apply.

