What’s actually slowing this PC down?
Pick the symptom - the matching free tool is one click away.
Some links on this page are affiliate links: if you buy through them we may earn a commission, at no extra cost to you.
For most plywood edging work, the best router bit is a carbide flush-trim bit with a guide bearing. It trims veneer tape, solid hardwood edging, laminate, and template-routed plywood edges flush with the face of the panel. From there, roundover bits soften exposed edges, chamfer bits create clean bevels, rabbeting bits cut shoulders for applied edging, and specialty V-groove or tongue-and-groove bits help lock solid wood edging to plywood for stronger furniture-grade work.
That is the short answer. The better answer depends on what edge you are building, how visible it will be, how much abuse it will take, and whether the work is paint-grade shelving, stain-grade cabinetry, commercial casework, or a one-off repair. On our job sites, the router bit is rarely the expensive part of the job. The expensive part is a bad cut on a $75 sheet of cabinet plywood, sanding through a thin veneer, or installing an edge detail that cannot survive daily use.
As an Amazon Associate I earn from qualifying purchases.
In 2026, a practical carbide flush-trim bit from a mass-market brand commonly runs about $25 to $50. A Diablo 1/2 in. x 1 in. carbide flush-trim bit was listed at $38.97, while premium flush-trim and specialty bits commonly run $60 to $200 or more depending on size, bearing setup, spiral geometry, carbide quality, and brand. Plywood itself gives the bit no mercy: glue lines are abrasive, veneers can chip, and nominal thickness is often not exact. A 3/4 in. cabinet panel may be closer to 23/32 in. or 18 mm, which matters when you are cutting grooves, rabbets, and edging details that must close tightly.
What Plywood Edging Bits Actually Do
Plywood edging bits are router bits used to hide, trim, shape, or reinforce exposed plywood edges. Plywood is strong and stable, but the edge tells the truth: alternating plies, glue lines, core voids, and thin face veneer. Left unfinished, that edge can look rough, absorb finish unevenly, and chip faster than solid wood.
There are four common goals when routing plywood edges:
#1 Best Overall

- SPECIFICATION. Compression cut router bits 1-1/4" cutting length; 1/4" cutting diameter; 1/4" shank; 3" overall length, can be used on routers with 1/4" collect.
- COATING. The new coating provide up to 2.5 times life than the uncoated, make the bit sturdy durable, sharp efficient, smooth stable
- COMPRESSION CUT. The compression cutters are designed with both up and down-cut flutes, combatting delamination on the top and bottom of a workpiece.
- COMPATIBILITY. This Router Bits is perfect for soft woods, hard woods, Plywood, laminate, OAK, MDF and any hardwood working. It can be used with cnc router and handheld router with 1/4" collet.
- DURABLE AND PRECISE. This up&down router bits are high-quality construction ensures durability and precision, allowing for consistent and accurate cuts.
- Make applied edging flush. This is where a flush-trim bit earns its keep. It follows the plywood face or a template and cuts veneer tape, hardwood edging, laminate, or oversize banding flush.
- Ease a sharp exposed edge. A roundover or chamfer bit removes the fragile corner so the edge feels better and resists small chips.
- Create a mechanical seat for edging. Rabbeting, slotting, tongue-and-groove, and V-groove bits create a shoulder or profile so solid edging has more glue surface and better alignment.
- Cut plywood-sized grooves and dados. Undersized plywood bits are made for real panel thickness, such as 23/32 in. material instead of a true 3/4 in.
The bit choice changes with the panel. A garage shelf made from paint-grade plywood may only need a light roundover and sealed edge. A stain-grade built-in with exposed cabinet fronts usually needs hardwood edging that is glued slightly proud, then trimmed flush and sanded carefully. Commercial casework may call for PVC or ABS banding, specified thickness, shop-applied edges, and clear requirements for visible surfaces.
The Main Router Bits for Plywood Edging
Most crews can handle 90 percent of plywood edging work with a small group of bits: flush-trim, roundover, chamfer, rabbeting, spiral, and one or two specialty edging profiles. The key is matching the bit to the edge detail instead of trying to make one bit do every job.
Flush-Trim Bits
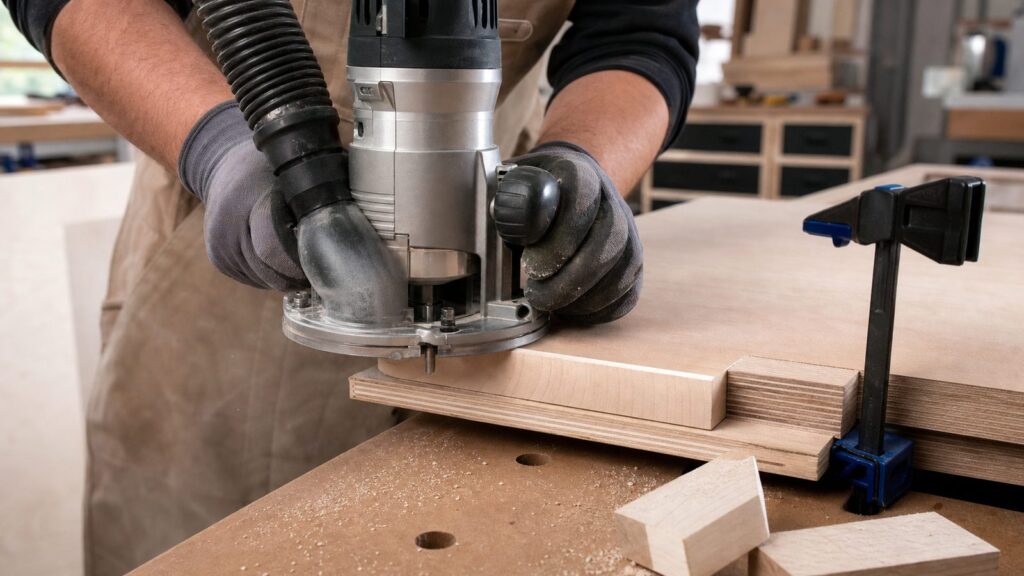
A flush-trim bit has cutting flutes and a guide bearing. The bearing rides against a reference surface while the cutter removes the material that sticks proud. For plywood edging, that reference surface is usually the plywood face, a template, or the edge already established by a straight fence.
Use a flush-trim bit for iron-on veneer banding, solid hardwood edging, laminate edges, and template cleanup. For basic shop and field work, a 1/2 in. diameter or larger bit with carbide cutters is a dependable baseline. The common 1/2 in. x 1 in. flush-trim format is useful because the 1 in. cutting length covers many plywood edge details without being excessively long.
Bearing position matters. A top-bearing bit follows a template or surface above the cutter. A bottom-bearing bit follows the workpiece or template below the cutter. A dual-bearing bit gives more flexibility because you can flip the work or change feed direction to reduce tearout. On stain-grade plywood, that flexibility can save a visible face veneer.
Roundover Bits
A roundover bit softens a sharp plywood corner. Common radii for plywood work are 1/16 in., 1/8 in., and 1/4 in. A 1/8 in. roundover is a good general-purpose edge for shelves, shop cabinets, utility panels, and painted built-ins. A 1/4 in. roundover looks more deliberate but can expose more ply lines and core imperfections.
You can round over plywood directly, but the result depends on the grade of plywood. Baltic birch, ApplePly-style panels, and high-quality multi-ply cabinet panels can look clean when finished clear. Construction sheathing and lower-grade cabinet panels often reveal voids, football patches, glue discoloration, and uneven plies. For stain-grade residential interiors, we usually prefer solid wood edging before routing the final profile.
Chamfer Bits
A chamfer bit cuts a bevel, often 45 degrees. It is useful when a round edge would look too soft or when you want a crisp modern line. A light chamfer, about 1/16 in. to 1/8 in. wide, is enough to prevent a fragile plywood corner from splintering. Larger chamfers can look good on shop furniture, utility cabinetry, and contemporary millwork, but they also expose more of the plywood core.
Rabbeting Bits
A rabbeting bit cuts a shoulder along the edge of the panel. In plywood edging, that shoulder can receive a thicker solid wood strip, a back panel, a cabinet side, or a lip detail. Rabbeting bits often use interchangeable bearings to change the cut width. Typical rabbets might be 1/4 in., 3/8 in., or 1/2 in. wide, depending on the edging design.
Free tools Windows power users keep installed
One-click scans. No signup required.
For solid wood edging, a rabbet can help with alignment and glue surface. It is more work than simply gluing on a rectangular strip, but it can be worthwhile on high-use shelves, desk edges, cabinet fronts, and stair-related trim components where impact resistance matters.
Spiral, Downcut, Upcut, and Compression Bits
Spiral bits are often cleaner than straight-flute bits, especially on veneer plywood. A downcut spiral pushes fibers downward and helps protect the top face. An upcut spiral clears chips better but can lift or chip the top veneer. A compression bit combines upcut and downcut geometry so both faces are supported when the bit is fully engaged.
These bits cost more, and they require the right router speed, feed rate, and horsepower. A compact trim router can handle light cleanup and shallow passes, but a large-diameter spiral or heavy production cut belongs in a full-size router or CNC-style setup. If veneer tearout is the main risk, spiral geometry is often worth the money.
Specialty Plywood Edge-Banding Bits
Specialty plywood edging bits cut mating profiles, such as V-grooves, tongue-and-groove shapes, or interlocking solid wood edging joints. These bits are useful when the edging is not just cosmetic. A shaped joint increases glue surface and helps the hardwood edging register consistently along the panel.
Quick wins for a faster PC:
Fix the driver behind crashes, sound loss and screen glitchesFind Drivers →Clear out junk files and repair common Windows errorsFree Scan →Rank #2
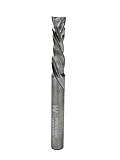
- TOOL SPECS: Solid carbide, 2+2 compression spiral with 1/4" cutting diameter, 1/4" shank, 1" cutting length, and 2-1/2" overall length for use in routers with a 1/4" collet.
- COMPRESSION SPIRAL: Features upcut and downcut edges for chip-free finishes on both sides of the material. The two-flute design ensures smooth, precise results and is widely used.
- UP AND DOWN CUT: Designed with up cut and down cut edges, this tool performs like two separate bits, providing the many benefits of both styles in one tool.
- MULTI-PURPOSE TOOLING: Plunge-capable bit for woodworking. Perfect for creating grooves, dados, slots, pockets, and more.
- MATERIAL: Perfect for plywood and laminate cuts where chipout is common. Also performs excellent in hardwoods and softwoods, providing clean, smooth cuts in various materials.
These setups take more time. You need test pieces, careful fence settings, and consistent stock thickness. For a single closet shelf, that is usually overkill. For a run of stain-grade cabinet parts, conference room millwork, or custom shelving, the extra setup can produce a cleaner and stronger edge.
Quick Comparison: Which Bit Should You Use?
The table below reflects how we typically match router bits to plywood edging tasks in residential and light commercial work. Prices are realistic 2026 U.S. ranges, not promises for every store or market.
| Bit type | Best use | Common size or detail | Typical 2026 cost | Jobsite note |
|---|---|---|---|---|
| Flush-trim bit | Trimming veneer, laminate, or solid edging flush | 1/2 in. diameter, 1 in. cutting length | $25-$70 | Use carbide; check bearing screw before every session. |
| Roundover bit | Softening exposed plywood or hardwood-edged corners | 1/16 in., 1/8 in., 1/4 in. radius | $20-$60 | Small radius is safer on thin veneer plywood. |
| Chamfer bit | Clean bevels and modern edge breaks | 45-degree bevel, light pass | $20-$60 | Large chamfers expose core defects. |
| Rabbeting bit | Shoulders for edging, backs, panels, or lips | 1/4 in. to 1/2 in. rabbet | $30-$90 | Bearing sets make one bit more flexible. |
| Spiral or compression bit | Cleaner veneer cuts, production trimming, CNC-style work | 1/4 in. or 1/2 in. shank | $60-$200+ | Match feed rate and router power to the bit. |
| Specialty edging bit | Interlocking hardwood edging or decorative edge joints | V-groove, tongue-and-groove, matched profiles | $60-$200+ | Worth it when repeating the same edge across many parts. |
| Undersized plywood bit | Dados and grooves for real plywood thickness | 23/32 in., 18 mm, or panel-specific | $25-$100 | Do not assume 3/4 in. plywood measures 0.750 in. |
Shank Size: 1/4 Inch vs 1/2 Inch
Router bit shank size affects rigidity, vibration, cut quality, and safety. A 1/4 in. shank bit is common in compact trim routers and works well for light edge banding, small roundovers, and short cleanup cuts. A 1/2 in. shank bit is stiffer, runs with less chatter, and is the better choice for longer cuts, larger profiles, thicker edging, and router-table work.
For plywood edging, we reach for 1/2 in. shank bits whenever the router accepts them and the cut is more than light cleanup. The larger shank helps reduce deflection, especially when trimming hardwood edging proud of the plywood face. Less deflection means a flatter edge, less sanding, and a lower chance of cutting into the face veneer.
Recommended Free Tools
That does not make 1/4 in. shank bits useless. A trim router with a sharp 1/4 in. flush-trim bit is excellent for field work, scribe cleanup, and small panels. The limits show up when the cut gets long, the bit gets tall, or the material gets hard. If the router starts to chatter, burn, or leave a washboard edge, slow down and reassess the bit, pass depth, and setup.
Carbide, Solid Carbide, and Why Plywood Dulls Bits
Plywood is harder on router bits than many homeowners expect. The glue lines are abrasive, the grain direction changes from ply to ply, and sheet goods often carry resins, fillers, mineral content, or hard face veneers. High-speed steel bits have their place in some shops, but carbide is the practical baseline for plywood.
Carbide-tipped bits are affordable and durable enough for most construction and finish carpentry work. Solid-carbide spiral bits cost more, but they cut cleaner and can last longer in production settings if they are used correctly. For a homeowner doing a few shelves, a $30 to $50 carbide bit may be the right buy. For a cabinet shop trimming dozens of panels, a $100-plus compression bit can pay for itself by reducing sanding, rework, and veneer blowout.
We also separate rough sheet-good bits from fine hardwood bits. Plywood glue lines wear cutters faster, so using the same bit for abrasive melamine, MDF, construction plywood, and stain-grade walnut edging is asking for poor results. A bit can still feel sharp to the finger and leave a fuzzy, burned, or chipped edge in real material.
How to Get Clean Plywood Edges Without Tearout
Tearout control starts before the router touches the panel. The best habit is to make a sample edge from the same plywood, same edging, same adhesive, and same finish schedule. Plywood core quality and veneer thickness vary enough that a setup that looks perfect on one panel can chip badly on the next.
Use Light Passes
Do not remove too much material at once. If solid hardwood edging is glued 1/16 in. proud of the plywood face, trim it in controlled passes instead of forcing the full cut in one move. Heavy cuts increase heat, deflection, and tearout. They also put more load on the bearing, which can mark or damage the plywood face if the setup is sloppy.
Support the Router
Large panels are hard to route freehand because the router base can tip at the edge. In the shop, a router table with a fence gives the cleanest repeatable result when the panel size allows. In the field, use a wide auxiliary base on the router so the tool stays flat. Clamp the work securely, support the offcut, and keep the cord and dust hose from pulling the router off line.
Protect Exit Corners
Veneer often blows out where the bit exits the cut, especially across grain. Tape, a sacrificial backer, or routing the end grain first can reduce that damage. On high-visibility parts, we often leave pieces slightly long, route the edge, and trim the part to final length afterward. That gives the tearout somewhere harmless to happen.
The Tool Desk
Outbyte Driver Updater FREEScan for outdated or missing drivers - takes under a minuteDriver Scan →Outbyte PC Repair FREERepair Windows errors before they cause bigger problemsFix Now →Use Climb Cutting Carefully
Climb cutting can reduce tearout because the bit approaches the fibers differently, but it also makes the router want to pull itself forward. For most users, the main pass should be a conventional feed direction. If a climb cut is needed, it should be a tiny, controlled cleanup pass with a stable setup and both hands on the router. This is not the place to learn router control on an expensive cabinet side.
Rank #3

- UP & DOWN cut spiral router bit with 1/4 inch shank and 1/4 inch cutting diameter, 1 inch cutting length, 2-1/2 inch for total length
- SOLID CARBIDE AND NANO BLUE COATED: The up and down cut spiral router bit is made of solid carbide. And Nano Blue Coating with high hardness and heat resistance enables the tool's cutting edge to retain crucial sharpness and lubricity. This provides longevity and produces cutting results of the highest quality. Clean surface, neat, no glitches.
- Spiral bits used for side milling, end milling, finish machining, etc. End Mill Bits can smoothly upcut and downcut groove and slots, mortises, cycles and dados with clean edge and bottom, better than straight bits.
- The CNC End Mill Router Bits apply to various wood: such as Plywood, OAK, MDF, and any hardwood working and Long service life for sharp. And also for carbon steel, soft alloy steel, tool steel, cast iron, aluminum alloy.
- The router bit suit for CNC router and any plunge routers with 1/4" collet.
Set Speed and Feed by the Cut
Burning usually means heat is building faster than chips are being cleared. Common causes are a dull bit, moving too slowly, taking too heavy a pass, running the bit at the wrong speed, or letting resin build up on the cutters. Clean the bit, reduce the depth of cut, and keep the router moving at a steady pace. If the plywood edge smells scorched or the bit leaves brown streaks, stop and correct the setup before routing visible work.
Edge Banding Options and the Bits That Fit Them
The edge material drives the bit choice. A thin iron-on veneer strip does not need the same tool setup as 3/4 in. solid maple edging or commercial PVC banding. The right answer also changes with expected abuse. A linen closet shelf and a school reception desk do not live the same life.
Iron-On Veneer Edge Banding
Iron-on veneer is the lowest-cost way to make plywood look like solid wood from the front. It is common on shelves, cabinet parts, closet built-ins, and small furniture projects. The banding is applied with heat, pressed down, and then trimmed flush.
Windows Errors? Fix Them Before They Spread
Repair common Windows errors and clear accumulated junk for a smoother, more stable PC - no reinstall needed.Free scan · no reinstallCrashes, No Sound, or Screen Glitches?
Random freezes, missing sound and display glitches usually trace back to one bad driver. Find and replace yours safely.Free scan · under a minuteA sharp flush-trim bit works, but many thin veneer tapes can also be trimmed with a hand trimmer or sharp blade. If using a router, take a light pass and make sure the bearing is clean. Thin veneer is easy to overcut. After trimming, sand lightly with 180 or 220 grit. Do not chase perfection so hard that you sand through the plywood face veneer.
Solid Hardwood Edging
Solid wood edging is stronger, more impact-resistant, and more repairable than veneer tape. For stain-grade shelves, cabinet fronts, desks, and built-ins, it is usually the better professional detail. A common method is to glue a 3/4 in. wide by 1/4 in. to 3/4 in. thick hardwood strip slightly proud of the plywood, then flush-trim or plane it down before sanding.
Use a flush-trim bit for cleanup, then a roundover, chamfer, or profile bit for the final edge. If the edge will take abuse, a 1/8 in. roundover on solid hardwood is much more durable than a sharp square corner. For wider hardwood nosing, a rabbet or tongue-and-groove profile can help alignment and strength.
PVC and ABS Banding
PVC and ABS banding are common in commercial casework, medical offices, schools, multifamily amenity spaces, and high-use storage areas. They resist impact and moisture better than thin veneer, and they come in colors and thicknesses that can match melamine or laminate panels.
These materials are often applied with shop equipment, then trimmed with dedicated tooling. Field repairs can be done, but the finish quality depends on adhesive, pressure, trimming tools, and edge polishing. For a commercial project, the specification should identify edge thickness, exposed-edge locations, edge material, color, and finish grade instead of using a vague note like “edge band plywood.”
Cost: Bits, Plywood, Edging, and Labor
The router bit is usually a small line item compared with the total cost of plywood edging. In 2026, mass-market router-bit categories show a broad spread of roughly $10 to $400 depending on brand, profile, shank, set size, and carbide quality. A single usable carbide flush-trim bit may be under $50, while specialty edging or compression bits can be several times that.
Plywood cost matters because mistakes are expensive. A typical plywood or sheathing category price may sit around $30, but cabinet-grade 3/4 in. 4 ft. x 8 ft. maple or birch plywood examples can be around $74.98 per sheet, with other panels ranging roughly from the high $40s to $80-plus depending on grade and construction. Prices vary by region, supplier, veneer species, certification, thickness, and availability.
For homeowners, material cost often breaks down like this: a basic flush-trim bit at $25 to $50, a roundover bit at $20 to $60, iron-on banding as the least expensive edge option, and hardwood edging costing more in both material and labor. For contractor-grade work, labor is usually driven by setup time, number of exposed edges, shop versus field routing, curved versus straight work, dust containment, and finish matching.
Do these 3 things before closing this tab:
1Fix the driver behind crashes, sound loss and screen glitches2Repair Windows errors before they cause bigger problems3Scan for outdated or missing drivers - takes under a minuteA simple DIY shelf edge may take 20 to 45 minutes after the banding is applied. A room full of stain-grade built-ins can take hours of layout, milling, glue-up, trimming, sanding, and finishing. Production work is faster per piece only after the jigs, router table, fence settings, and sample approvals are dialed in.
Safety, Dust, and Indoor Air Quality
Routing plywood creates fine dust and small glue-line debris. Treat it as a real exposure, not just a housekeeping issue. OSHA identifies wood dust and woodworking machinery as safety and health concerns, and practical control starts with dust collection, local exhaust, guards, stable workholding, and eye and hearing protection. PPE helps, but it should not be the only control when dust collection is available.
Rank #4

- 2 Pack - Specs: Compression Bit 1/4" Shank, 1/4" Cutting Diameter, 1" Cutting Length, 2-1/2" Overall Length, 2 Flutes, nACo Coated.
- nACo NANO COATING: Nano-blue coating increases surface hardness and heat resistance. Maintains cutting edge sharpness during high-speed operations and extends overall tool life.
- COMPRESSION SPIRAL DESIGN: Combines upcut and downcut geometries to pull wood fibers toward the center of the board. Eliminates chipping and fuzzing on both the top and bottom surfaces of the workpiece simultaneously.
- MATERIAL COMPATIBILITY: Engineered for CNC routers and handheld machines. Efficiently cuts through hardwood, softwood, plywood, MDF, laminates, and various plastics.
- PROFESSIONAL SUPPORT: Used by professional workshops and hobbyists across the country, our team is here to assist with any questions or concerns to ensure your satisfaction.
On our job sites and in occupied homes, dust containment changes the work plan. That may mean cutting outside, using a router with dust extraction, isolating the room with plastic, running a HEPA air scrubber, and cleaning with a HEPA vacuum instead of blowing dust around. Small routing jobs still produce fine dust that can travel through a house.
Indoor air quality also connects to the plywood itself. Hardwood plywood, MDF, particleboard, and finished goods containing those materials sold in the United States are covered by federal formaldehyde emission standards under TSCA Title VI. For cabinets, built-ins, and interior finish work, specify compliant products and keep documentation where the project requires it. This is especially relevant for commercial interiors, multifamily work, schools, medical offices, and clients who ask for low-emitting materials.
Permits and Specifications
Plywood edging by itself is usually not a standalone permit issue. Trimming shelf edges, adding veneer banding, or routing a cabinet panel normally falls under finish carpentry or millwork. Permits enter the conversation when the work is part of a larger project, such as structural alterations, built-ins tied to electrical changes, commercial tenant improvements, fire-rated assemblies, accessibility requirements, or work governed by local building department review.
For professional projects, the better control point is the specification. We want the drawings or scope to say which edges are exposed, which edges receive banding, what thickness and material the edging should be, what finish grade applies, and whether the panel products must be TSCA Title VI compliant. Architectural woodwork standards distinguish visible and exposed surfaces for a reason: a cabinet side next to a wall does not need the same edge treatment as a drawer front, transaction counter, or open shelving face.
For homeowners, the practical permit advice is simple: if the work is limited to freestanding furniture, shelf edges, or replacement cabinet parts, a permit is usually not involved. If the plywood edging is part of built-in cabinetry in a permitted remodel, ask the contractor or local building department how that scope is being handled. Local rules vary, and the permit question depends on the whole project, not the router bit.
When to DIY and When to Hire a Pro
DIY plywood edging makes sense when the project is small, the edge is straight, the finish is paint-grade or low-risk, and a small mistake will not ruin an expensive room. Closet shelves, garage cabinets, shop fixtures, laundry room storage, and basic veneer banding are reasonable DIY candidates if you have a router, sharp bit, clamps, dust control, and scrap material for test cuts.
Plan on buying at least one decent carbide flush-trim bit, using scrap for setup, and taking your time. If you are edging one or two shelves, the tool cost may exceed the labor savings. If you expect to build more projects, the router and bits become more reasonable.
Hire a pro when the work is stain-grade, highly visible, curved, repeated across many panels, or part of a larger remodel. Also hire out the work when the panels are expensive, the edging must match existing cabinetry, or the job needs shop-applied PVC/ABS banding. A professional finish carpenter or cabinet shop brings jigs, router tables, dust collection, sharper bits, material-matching experience, and a lower risk of visible mistakes.
The decision often comes down to tolerance. Paint-grade trim can forgive filler and primer. Clear-finished maple plywood with a hardwood edge does not. If a routed mistake will force you to replace a $75 to $150 panel or delay installation, the cheaper option may be hiring the person who does this every week.
Common Mistakes We See With Plywood Edging Bits
The first mistake is using a dull or bargain bit on abrasive plywood and expecting cabinet-shop results. Dull bits burn, chatter, and chip veneer. They also make users push harder, which makes the router less controlled.
Recommended Free Tools
The second mistake is trusting nominal plywood thickness. A panel sold as 3/4 in. may measure about 23/32 in. or 18 mm. That small difference matters when routing grooves, dados, rabbets, and edge details. Measure the actual sheet with calipers before choosing a bit or setting a fence.
The third mistake is routing unsupported large panels freehand. A router base only needs to tip slightly to gouge an edge or cut into the face. Use a router table when practical. For large panels, use an auxiliary base, stable supports, and clamps that do not interfere with the router path.
The fourth mistake is skipping the bearing check. Flush-trim bits depend on the bearing. If the bearing screw loosens, the bearing freezes, or debris builds up, the bit can destroy the edge before you react. Spin the bearing by hand before use, confirm the screw is tight, and replace rough bearings.
Best Value

- UP and DOWN SPIRAL ROUTER BIT: 1/8" shank, 1/8" cutting diameter, 7/8"=22mm cutting length, 1-31/32"=50mm total length.
- DURABLE & LONG-LASTING TOOL LIFE: high-quality solid carbide router bits with nano blue coat feature with high hardness, heat resistance, and long-lasting cutting-edge performance ensure high work efficiency.
- CLEAN CUT & EXCELLENT EDGE-GRINDING: Compression bit is the combination of both upcut and downcut spirals. The bottom of the material will be pulled upwards while the top of the material is pushed downwards thus eliminating the risk of damaging the laminated surfaces, leaving a sharp, clean edge on both sides of your workpiece. Non-stick crumbs, smokeless, and silent during processing, smooth cutting, and fast chip removal.
- WIDELY USE: Compression CNC router bit specially designed for mortising grooving and dado in plastic, plywood, oak, MDF, and any hardwood working with machines CNC machines. Work for table-mounted and Small or handheld CNC routers.
- Package Includes: 5pcs Up & Down Cut Bit
The fifth mistake is sanding through the face veneer while trying to fix a routing error. Many plywood face veneers are thin. Once you sand through, there is no invisible repair. Prevent the mistake with samples, light passes, backers, and sharp cutters.
Do these 3 things before closing this tab:
1Fix the driver behind crashes, sound loss and screen glitches2Clear out junk files and repair common Windows errors3Scan for outdated or missing drivers - takes under a minuteOur Practical Setup for Clean Plywood Edges
For a clean hardwood-edged plywood shelf, our usual sequence is straightforward. First, rip and square the plywood accurately. Second, mill the hardwood edging slightly thicker or wider than final size. Third, glue and clamp the edging so it sits a little proud of the plywood face. Fourth, flush-trim the hardwood to the panel with a sharp carbide or spiral bit. Fifth, ease the edge with a small roundover or chamfer. Sixth, sand just enough to prepare for finish without thinning the veneer.
For paint-grade plywood, we may skip hardwood edging if the edge will not see abuse. In that case, we fill voids, sand flat, seal the edge, and prime carefully. Sealing matters because raw plywood edges absorb finish unevenly and the plies can telegraph through paint. A routed roundover on a filled and primed edge often looks better than a sharp square painted edge.
For commercial casework, we prefer the edge treatment to be decided before fabrication starts. That includes banding thickness, material, exposed-edge map, color match, finish sheen, compliance documentation, and whether the work is shop-applied or field-trimmed. The cleaner the specification, the fewer field compromises.
Bottom Line
If you are buying one bit for plywood edging, start with a sharp carbide flush-trim bit. Choose a 1/2 in. shank if your router accepts it and the work involves long cuts, hardwood edging, or repeated production. Add a small roundover bit for durable exposed edges, a chamfer bit for crisp bevels, and a rabbeting or undersized plywood bit when the joint needs a shoulder or a true plywood-sized groove.
What’s actually slowing this PC down?
Pick the symptom - the matching free tool is one click away.
The best results come from setup more than luck: measure the real plywood thickness, test on offcuts, support the router, control dust, check the bearing, and take light passes. Plywood edging can be simple, but the visible edge is where people notice the difference between a quick cover-up and professional finish carpentry.
Frequently Asked Questions
What router bit is best for plywood edge banding?
A carbide flush-trim bit with a guide bearing is the best general-purpose bit for plywood edge banding. Use it to trim veneer, laminate, or solid hardwood edging flush with the plywood face.
Can you use a roundover bit directly on plywood edges?
Yes, but the result depends on plywood quality. High-quality multi-ply panels can look clean, while lower-grade plywood may expose voids and uneven plies. For stain-grade work, solid hardwood edging usually gives a better result.
Is a 1/4 in. or 1/2 in. shank router bit better for plywood edging?
A 1/2 in. shank is better for heavier cuts, longer bits, hardwood edging, and router-table work because it is stiffer and chatters less. A 1/4 in. shank is fine for light trimming with a compact router.
The Tool Desk
Outbyte Driver Updater FREEScan for outdated or missing drivers - takes under a minuteDriver Scan →Outbyte PC Repair FREEClear out junk files and repair common Windows errorsFree Scan →How do you prevent tearout when routing plywood edges?
Use a sharp carbide or spiral bit, take light passes, support the router with a table or wide base, tape or back up exit corners, and test the setup on scrap from the same plywood before routing the finished panel.
Do plywood edging projects require a permit?
Plywood edging alone usually does not require a permit. Permits may apply when the edging is part of larger built-in work, commercial tenant improvements, structural changes, electrical work, or other regulated construction.
Does plywood used for cabinets need TSCA Title VI compliance?
Hardwood plywood, MDF, particleboard, and finished goods containing those products sold in the U.S. are covered by TSCA Title VI formaldehyde emission standards. For cabinets and interior millwork, specify compliant materials.
Quick Recap
Product prices and availability are accurate as of the date/time indicated and are subject to change. Any price and availability information displayed on Amazon at the time of purchase will apply.

