A reliable table saw tuneup follows a fixed order: disconnect power, check blade alignment against the miter slot, calibrate the fence, then verify bevel settings and inspect the saw. Adjustment points and tolerances vary by model, so use your saw’s manual for the exact procedure; do not assume one adjustment or measurement applies to every saw.
Before you adjust anything
Read the manual for your exact saw, including its instructions for calibration and maintenance. Cabinet, contractor, hybrid, and portable saws can use different adjustment mechanisms. Do not rely on generic bolt locations, tightening torques, or service intervals.
- Disconnect the saw from its power source before calibration or adjustment. Harvey’s HW110LC/TC procedure states: “Disconnect the table saw from its power source before performing any maintenance, calibration, or adjustments.” Harvey Industries International’s support procedure uses this precaution; Grizzly and SawStop also direct users to disconnect power in their guidance (Grizzly; SawStop).
- Remove loose debris and make sure the work area is clear before measuring. Consult the manual for approved cleaning methods and products.
- Use a combination square or another measurement tool specified by your saw’s procedure. A dial indicator or dedicated alignment gauge may be useful for some setups, but the cited guidance does not make either necessary for every tuneup.
Align the blade to the miter slot
Use the miter slot as the reference for checking whether the blade runs parallel to it. Check blade-to-slot alignment before adjusting the rip fence; a fence cannot be calibrated accurately against a blade that is out of alignment.
- Follow the manual’s instructions for setting the blade and making it accessible for measurement. Keep the saw disconnected from power throughout the adjustment.
- Place a combination square in the miter slot and bring its rule close to the blade, following the measuring method in the saw’s manual. Take care not to damage the blade or use the teeth as an inconsistent reference.
- Compare the distance to the same reference point on the blade at two positions 180 degrees apart. Using the same point helps distinguish alignment from variation in the blade itself. Harvey documents this method for its HW110LC/HW110TC saws.
- If the measurements differ, use the model-specific procedure to adjust the blade or trunnion assembly, then measure again. Adjustment locations and steps differ by saw.
Harvey specifies a difference of less than 0.2 mm for its HW110LC/HW110TC procedure. That is a model-specific criterion, not a universal table-saw tolerance; use the value and method given by your own manufacturer. See Harvey’s HW110LC/TC support procedure.
Free tools Windows power users keep installed
One-click scans. No signup required.
#1 Best Overall

- 【Professional Table Saw Gauge】Neoteck table saw gauge is designed according to the standard miter grooves(3/8 inch x 3/4 inch). It can check table saw miter slot to blade squareness, blade and fence alignment, arbor and blade run-out, or any other alignment and measurement you want, in order to make the table saw in its best condition, which is suitable for most table saws and can be widely used for aligning and calibrating work,shop machinery,band saws,drill presses.
- 【Accurate Digital Dial Indicator】The measuring range of the digital indicator is from 0 - 1 inch (0 ~ 25.4 mm) with high resolution up to 0.0005 inch (0.01 mm),also it is switchable between mm and inch with zero setting function. Compared with the dial gauge, Neoteck digital indicator can provide more convenient use experience and quickly help you finish the alignment work.
- 【CNC Anodized Aluminum Bars】2PCS 3/4 inch adjustable, CNC-machined anodized aluminum bars with 3 chute partitions for enhanced stability and usability. The rod features 6 holes for a digital dial indicator, facilitating precise adjustments across various workshop machines, regardless of differences in chamfer groove and blade distances.(Note: Suitable for table saws with a groove width of 3/4" (19mm) or more; adjustable via screws for optimal fit if the groove width exceeds 3/4" (19mm))
- 【Easy to Install】You can quickly set-up, tune up and check the accuracy of your shop's tools. This system is the self-adjusting “Smart Bar” that will stay tight in a miter slot that isn’t the same size along it’s slot length. You only need to adjust the spring plungers once, and after that, its a perfect fit in the miter slot, which is more efficient and convenient.
- 【Practical Package】Package includes: 2 x anodized aluminum Bar, 1 x digital dial indicator, 1 x back cover, 2 x plum blossom nut, 2 x spring plunger, 2 x hexagon socket nut, 2 x hexagon socket wrench, 2 x metal shop. What's more,the practical storage case can well protect your table saw gauge set and it is more convenient for you to store the gauge and can be carried with you to everywhere.
Set the rip fence after blade alignment
Once the blade is aligned to the miter slot, adjust or verify the fence against the slot using the steps for your saw. Delta’s manual guidance says to check blade-to-slot alignment before adjusting the fence to the slots, and a fence-positioner manual likewise makes blade alignment a prerequisite for accurate fence calibration (Delta manuals; INCRA TS-LS manual).
- Set the fence parallel to the miter slot using the manufacturer’s specified measuring points and method.
- Lock and unlock the fence as directed, then check whether it remains in position. Make any corrections using the fence’s own adjustment procedure.
- Recheck the blade-to-slot alignment if the adjustment process could have shifted the blade assembly.
Check bevel settings and tilt behavior
A blade that aligns at 90 degrees may not remain parallel to the miter slots when tilted. Some saw designs require checks at more than one blade angle because alignment to the tilt axis affects how the blade moves during bevel adjustment. Follow the manual for your model rather than assuming a single square-blade measurement is sufficient.
Rank #2

- High Precision Digital Measurement: BOBOVAV digital table saw alignment gauge features a digital dial indicator with 0.0005" (0.01mm) resolution; supports inch/mm switch and zero-setting for intuitive clear readings that save you time interpreting data; eliminates errors from mechanical dials; easily checks blade parallelism arbor run-out and fence alignment to keep your table saw in optimal condition and ensure precise cuts every time
- CNC Machined Stable Aluminum Structure: Crafted with CNC-machined anodized aluminum alloy bars (processing accuracy up to 0.02mm); anodized surface resists oxidation for long-lasting use; ensures no wobble during operation; minimizes measurement deviations so you get consistent reliable results that take the guesswork out of woodworking calibration
- Wide Compatibility: Designed to fit standard 3/4" (19mm) slots and compatible with wider non-standard slots; use the plunger screw and plum blossom nut to adjust width and fill gaps; achieves a snug secure fit regardless of your slot size so you don’t have to worry about ill-fitting tools disrupting measurement accuracy
- Extended 18cm Rod: Boasts an 18cm dial gauge rod that offers a wider operating range compared to standard 13cm rods; covers diverse measurement needs for small DIY projects large-scale woodworking tasks and various equipment sizes so you can tackle most of your alignment jobs with one tool
- Durable & Ready-to-Use Design: The digital dial indicator is designed for durability, allowing for immediate out-of-the-box use. It includes 2 hex keys, so you can start calibrating your tools right away without the need for extra preparation
- Verify the 0-degree and 45-degree positions if the manual calls for them. Grizzly’s alignment guidance includes checks at both angles.
- Check the bevel stops and confirm that the blade returns to the expected positions. Use the manufacturer’s adjustment sequence if a stop needs correction.
- If the blade’s relationship to the miter slots changes as it tilts, consult the manual’s model-specific instructions for alignment to the tilt axis. SawStop explains this consideration in its blade-to-miter-slot guidance.
Finish with inspection and maintenance
After alignment, inspect the saw for issues that can affect operation or make adjustment unreliable. Rockler’s tuneup overview includes cleaning, inspection, alignment, and fine tuning; for products and service intervals, follow the manual for your saw.
- Remove dust and buildup using only the cleaning methods approved for the machine.
- Look for worn or damaged components, loose parts, and signs of rust. Do not continue operating with a component that appears unsafe; consult the manual or a qualified service provider.
- Use only the rust-prevention products and maintenance schedule recommended by the manufacturer.
- After completing adjustments, verify that guards and other safety equipment are correctly installed and functioning according to the manual before returning the saw to service.
For a broader overview of these tuneup tasks, see Rockler’s table-saw tuneup guide.
PC Slower Than It Used to Be?
A free scan shows the junk files, broken settings and background clutter dragging Windows down - then fixes them in one click.Free scan · Windows 10 & 11Outdated Drivers Are Slowing You Down
One free scan finds every outdated or missing driver and matches the right update for your exact hardware.Free scan · exact hardware matchQuick Recap
Best Value

- 【Professional Table Saw Gauge】Neoteck table saw gauge is designed according to the standard miter grooves(3/8 inch x 3/4 inch).It can check table saw miter slot to blade squareness, blade and fence alignment, arbor and blade run-out or any other alignment and measurement you want, in order to make the table saw in its best condition, which is suitable for most table saws and can be widely used for aligning and calibrating work,shop machinery,band saws,drill presses
- 【Accurate Digital Dial Indicator】The measuring range of the digital indicator is from 0 - 1 inch (0 - 25.4 mm) with high resolution up to 0.0005 inch(0.01 mm),also it is switchable between inch and mm with zero setting function. Compared with the dial gauge, Neoteck digital indicator can provide more convenient usage experience and quickly help you finish the alignment work
- 【CNC Anodized Aluminum Bars】2PCS 3/4 inch adjustable, CNC-machined anodized aluminum bars with 3 chute partitions for enhanced stability and usability. The rod features 6 holes for a digital dial indicator, facilitating precise adjustments across various workshop machines, regardless of differences in chamfer groove and blade distances.(Note: Suitable for table saws with a groove width of 3/4" (19mm) or more; adjustable via screws for optimal fit if the groove width exceeds 3/4" (19mm))
- 【Easy to Install】You can quickly set-up, tune up and check the accuracy of your shop's tools. This system is the self-adjusting “Smart Bar” that will stay tight in a miter slot that isn’t the same size along it’s slot length. You only need to adjust the spring plungers once, and after that, its a perfect fit in the miter slot, which is more efficient and convenient
- 【Practical Package】Package includes: 1 x digital dial indicator, 1 x back cover, 2 x plum blossom nut, 2 x spring plunger, 2 x hexagon socket nut, 2 x hexagon socket wrench, 2 x metal shop. What's more the practical storage case can well protect your table saw gauge set and it is more convenient for you to store the gauge and can be carried with you to everywhere
Rank #4

- Simplify Your Work: Each setup blocks (with varying thicknesses) can be set for router bit height, milling thickness, testing the depth of the workpiece, setting the cutting angle of the table saw blade, or stacked into hundreds of combinations to meet your different needs and make work easier
- What You Get: Includes 14 router table setting bars with precision up to 0.001 inch, covering sizes: 1/16", 3/32", 1/8", 5/32", 3/16", 7/32", 1/4", 5/16", 3/8", 7/16", 15/32", 1/2", 23/32", and 3/4". The setup blocks come with a dedicated storage case for easy organization and portability
- 4-in-1 Versatile Design: Each set up blocks for woodworking combines 4 essential tools (angle, step, depth and fence) in one, realizing the versatility of your project, you can set the height of router bit, milling thickness, test the depth of workpiece, and set the cutting angle of table saw blade
- Premium Quality Material: These woodworking setup blocks are crafted from lightweight, high-strength aluminum alloy with CNC machining, anodized finish, and laser-engraved markings for clarity and durability
- Versatile Applications: Compatible with a wide range of machines, these set up blocks are ideal for table saws, routers, band saws, and planers. They excel at height, depth, and angle measurements and assist with drilling tasks, catering to the diverse needs of woodworkers, machinists, handymen, and DIY enthusiasts
Rank #3
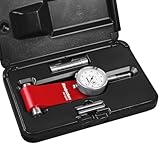
- SPECS - SG-WP | Includes Gauge, Pin Set, Dial Indicator, Storage Case | Great for Rip Fence & Saw Blade Alignment
- AUTO ADJUST - Automatically adjusts to the width of the miter slot using a pin system. Simply set the cradle pin onto the two small pins in the slot.
- STORAGE CASE INCLUDED - Keep your tool safe and secure with the included fitted storage case.
- DIAL INDICATOR - Dial indicator has 1 inch of travel as well as a rotation counter, one thousandth of an inch graduations, and adjustable scale and bezel.
- AMERICAN MADE QUALITY - The Woodpeckers Saw Gauge (except dial indicator) is made in the USA.
Product prices and availability are accurate as of the date/time indicated and are subject to change. Any price and availability information displayed on Amazon at the time of purchase will apply.