The Tool Desk
Outbyte Driver Updater FREEScan for outdated or missing drivers - takes under a minuteDriver Scan →Outbyte PC Repair FREERepair Windows errors before they cause bigger problemsFix Now →Yes, you can power Starlink from an RV battery without using an inverter—but the correct equipment depends on your Starlink model. For Starlink Standard 4 and Standard 4 X, Starlink now offers an official DC-DC Power Supply in select markets. It accepts 12–48VDC and outputs 56V at 3.57A. Older rectangular Standard/Roam systems generally require a model-matched DC-DC converter, compatible passive PoE arrangement, and often a separate 12V router.
Do not connect a Starlink dish directly to a nominal “12V” battery unless the manufacturer’s power architecture explicitly supports it. Identify the terminal first, then size the converter, wiring, fuse, connectors, and router as one complete system.
As an Amazon Associate I earn from qualifying purchases.
Why use direct DC power?
An RV battery supplies DC power. The conventional Starlink setup may convert that battery power to AC through an inverter, then convert AC back to DC inside the Starlink power supply. A direct-DC installation removes that extra conversion stage and can reduce inverter idle consumption and conversion losses.
The actual saving is installation-dependent. Dish model, router consumption, converter efficiency, cable length, battery voltage, weather, and operating mode all affect battery-side power. Do not assume a fixed percentage reduction. If Starlink is used only occasionally, or the inverter already powers several AC appliances, keeping the factory system may be the simpler choice.
#1 Best Overall

- Powering Starlink On the Go: This Starlink Gen 3 12V adapter is specifically designed for the Starlink Standard 4X/V3/REV 4 Gen 3 Router powering on truck, RV, camping and other outdoor use.
- Compatibility: This Starlink Standard 12V DC Boost Power Adapter is perfect conversion kit for Starlink Gen 3, which is capable of boosting power from 10V-36V to 57V, meeting the voltage demands of the Starlink Gen 3 router and Starlink antenna. No worry about voltage drop or rise in vehicles, provide a stable network connection for your travel.
- High Quality Material: This Starlink dc 12V Adapter is encased in an aluminum shell and sealed with silica gel, in addition, the wires at input side is also 14AWG thick to ensure safe use while powering starlink v3 devices under large current.
- Premium Made: Different from others, our power cable for Starlink Gen 3 is made as a whole, no connector needed between plug and adapter, safer and more reliable for use.
- Multi Intelligent Protection: This Starlink Standard 12V converter for Starlink Standard Gen 3 Router has built-in protections against over-loads, over-current, over-heating, and short-circuits.
Direct DC is most useful for permanent RV, van, boat, overlanding, and off-grid installations where battery runtime, heat, and wiring simplicity matter.
Safety note: A 12V battery can deliver extremely high fault current. Disconnect every power source before wiring, protect the positive conductor with a fuse close to the battery or distribution point, and stop immediately if a cable, connector, fuse holder, or converter becomes excessively hot.
First identify your Starlink model
“Starlink” is not one universal electrical system. Before buying a converter or injector, record:
Do these 3 things before closing this tab:
1Fix the driver behind crashes, sound loss and screen glitches2Repair Windows errors before they cause bigger problems3Scan for outdated or missing drivers - takes under a minute- The exact kit or product name.
- Whether the antenna is a rectangular Standard/Roam terminal, Standard 4/4X, Mini, High Performance, or Enterprise unit.
- Whether the system has a Starlink router, separate power supply, Ethernet Adapter, proprietary dish cable, or factory DC supply.
- The voltage, current, and wattage printed on the original power supply or in the applicable documentation.
- Whether you need the factory router’s Wi-Fi and routing features.
- Whether the installation is permanent or temporary.
Standard 4 and Standard 4 X
For supported Standard 4 and Standard 4 X kits, check Starlink’s official Standard DC-DC Power Supply information first. The supply accepts 12–48VDC and produces 56V at 3.57A. Starlink’s specification sheet lists XT60 connectors, 12 AWG wiring, an IP66 Type 4 environmental rating, and an operating temperature range of −40°C to 60°C.
Availability is market-dependent. If the accessory does not appear in your local Starlink shop, Starlink says it may not currently be offered in that region. Compatibility with Standard 4/4X does not automatically establish compatibility with Mini, older Standard/Roam, High Performance, or Enterprise hardware.
Earlier rectangular Standard/Roam systems
Many older installations use a 12V-to-48V or 12V-to-56V conversion architecture, depending on the exact terminal and power arrangement. These builds commonly bypass the original Starlink power supply and router. A typical system uses a cable adapter, DC-DC boost converter, passive PoE injector, and 12V-compatible aftermarket router.
Some adapters allow the original cable to remain uncut. Other builds modify an Ethernet Adapter or dish cable. Cutting or reterminating the cable introduces polarity, shielding, connector, water-ingress, and possible warranty risks.
Rank #2

- HELPS STOP ROAD REBOOTS — Unlike basic cables that pass vehicle voltage straight through, this 105W boost adapter helps keep Starlink Mini powered from a 12V-24V cigarette lighter socket, reducing power drops during RV, truck, boat and car travel.
- SEE POWER IN REAL TIME — The built-in digital voltage display lets you check vehicle power at a glance before powering your dish. A 105W DC output supports Starlink Mini, while the 30W USB port keeps a phone or small device charged on long drives.
- BUILT FOR OFF-GRID TRIPS — Whether you’re working from an RV, camping outside the city, driving a truck route or anchoring near shore, the 6.5FT DC cable gives your Starlink Mini a cleaner vehicle-power setup for travel internet.
- FOR MINI OWNERS ON THE GO — Great for road trippers, overlanders, campers, boaters and mobile workers who rely on Starlink Mini away from home. Keep it in the RV drawer, truck console or emergency kit for quick plug-and-play setup.
- COOLER, SAFER POWER DESIGN — Built with heat dissipation and a built-in fuse to help protect against overheating, short circuits and overloads. Reinforced connectors and a durable cable support frequent travel use; contact us if you need help.
High Performance and Enterprise
Do not reuse a low-power Standard-kit diagram. One purpose-built high-wattage conversion system specifies 9–36VDC input, 52VDC/6A output, and possible maximum power draw of 350W. Its installation guide requires much more substantial attention to fuse selection, cable gauge, voltage stability, ventilation, and chassis grounding.
That vendor also warns against using its conversion system with the Starlink router or other PoE switches because Starlink uses a proprietary passive PoE arrangement. Follow the instructions for the exact power system rather than combining parts from unrelated diagrams.
Starlink Mini
Treat Mini as a separate project. Do not apply the Standard dish’s 48V/56V assumptions, connectors, or pinout to Mini. Starlink provides a Mini USB-power support reference, but the available documentation here does not establish a complete, model-specific 12V wiring procedure. Verify the current Mini requirements from Starlink before connecting it to an RV system.
Choose the power architecture
| Option | Best for | Main trade-off |
|---|---|---|
| Official Starlink DC-DC supply | Supported Standard 4/4X installations | Select-market availability |
| Adapter-based third-party conversion | Older Standard/Roam systems | Requires compatible PoE and usually a replacement router |
| DIY cable modification | Experienced electrical builders | Highest risk and least reversibility |
| Pure-sine inverter | Temporary use or systems also powering AC equipment | Extra conversion losses and inverter overhead |
Option 1: Install the official Standard DC-DC supply
This is the preferred route for a compatible Standard 4 or Standard 4 X because it avoids designing a separate converter-and-injector system.
Windows Errors? Fix Them Before They Spread
Repair common Windows errors and clear accumulated junk for a smoother, more stable PC - no reinstall needed.Free scan · no reinstallCrashes, No Sound, or Screen Glitches?
Random freezes, missing sound and display glitches usually trace back to one bad driver. Find and replace yours safely.Free scan · under a minuteWhat you need
- Compatible Starlink Standard 4 or Standard 4 X terminal.
- Official Standard DC-DC Power Supply, if available in your market.
- Fused 12V distribution circuit.
- Positive and negative conductors sized for the run and manufacturer requirements.
- Appropriate terminals, strain relief, mounting hardware, and weather protection.
- Multimeter and, ideally, a DC watt meter or battery monitor.
Installation sequence
- Confirm the exact terminal and accessory compatibility.
- Disconnect shore power, inverter output, solar charging where necessary, and the battery circuit being modified.
- Mount the supply securely in a dry, ventilated location protected from abrasion, vibration, and water.
- Run correctly sized positive and negative conductors from the RV’s fused DC distribution point.
- Install the fuse as close as practical to the battery or distribution source.
- Check polarity and voltage with a multimeter before connecting the Starlink supply. Starlink’s cable diagram identifies red as positive and black as negative for the DC power cable, but always follow the supplied documentation.
- Connect the supply and dish cable without forcing or stressing the connectors.
- Energize the circuit and allow the terminal to initialize.
- Open the Starlink app, check status and obstructions, and test connectivity.
- Monitor voltage, current, temperature, and stability during an extended run.
Use the official specification sheet for the current connection diagram and environmental limits.
Option 2: Build an adapter-based system for an older rectangular terminal
A commonly documented arrangement is:
12V RV battery or fused DC distribution
        ↓
Fused positive and negative input
        ↓
12V-to-48V DC-DC boost converter
        ↓
Compatible passive PoE injector
        ├── PoE port → Starlink dish cable and adapter
        └── Data port → aftermarket router WAN port

12V fused circuit → aftermarket router power input
Typical parts
- Model-matched 12V-to-48V or 12V-to-56V DC-DC converter.
- Starlink-compatible cable adapter or Ethernet Adapter.
- Passive PoE injector with the correct voltage, current capacity, pinout, and connector arrangement.
- 12V-compatible router.
- Fuses, fuse holder or distribution-block position, terminals, cable, enclosure, and strain relief.
- Ethernet patch cable and a multimeter.
The documented adapter-based tutorial connects the converter to the injector, routes the dish through the injector’s PoE port, and connects the injector’s data port to a separate router. It warns that the original Starlink router is not used in that arrangement and that the aftermarket router must be powered separately from the 12V system.
Wiring procedure
- Confirm that every part matches the dish model and required output voltage.
- Mount the converter and injector securely away from water and excessive heat.
- With power disconnected, connect battery or fuse-block positive to converter positive and battery negative to converter negative.
- Fuse the positive feed close to the source.
- Connect converter output to the passive PoE injector input.
- Connect the dish cable to the injector’s PoE port through the compatible adapter.
- Connect the injector’s data port to the aftermarket router’s WAN or Internet port.
- Power the router from its own correctly fused 12V circuit. Verify its voltage and polarity from the router documentation.
- Check every connector, port, polarity, fuse, and crimp before applying power.
- Power the system, connect to the router’s Wi-Fi, and open the Starlink app.
Never connect two power sources to the same equipment. Do not combine the original Starlink router, a third-party passive injector, and an aftermarket power supply unless the manufacturer’s architecture explicitly permits it.
Rank #3

- ✅Precision Power for Starlink Mini: 9-28V Input to Rock-Solid 30V/3.5A Output. This Starlink Mini 12V Adapter delivers military-grade voltage stability, converting noisy 12V/24V truck/RV/battery inputs into optimized 30V power that outperforms satellite signal dropouts.
- ✅IP68 Armored: Submerge-Proof & Extreme Environment Ready. Forged in aircraft aluminum with silicone armor, your Starlink DC power supply laughs off salt spray, blizzards, and 6ft drops. Waterproof, dustproof, shockproof – because off-grid adventures aren’t climate-controlled.
- ✅No Volt Drop Fear: Smart Protection for 24/7 Reliability. Sleep soundly with built-in shields against overcurrent, overheating, and short circuits. This Starlink Mini power adapter actively corrects voltage spikes/drops – making ‘signal lost’ screens as rare as unicorns.
- ✅1ft Plug & Play: Hook Up Power in 10 Seconds Flat. The heavy-duty Starlink Mini power cable snaps into any 12V car/RV/boat socket. Zero setup, zero tools – just plug → power → stream from mountain tops to ocean swells.
- ✅Ultimate RV/Boat Essential: Power Where Cell Towers Die. Your Starlink Mini power supply for van life, transatlantic sails & storm-blackouts. Fits gloveboxes yet outlasts mud pits – guaranteed connectivity when you’re 100 miles from a Starbucks.
Option 3: Modify the cable
A DIY cable-modification build can reduce parts cost, but it is appropriate only for someone comfortable with shielded Ethernet termination, passive PoE pinouts, DC protection, and troubleshooting.
What’s actually slowing this PC down?
Pick the symptom - the matching free tool is one click away.
Documented versions modify the Starlink Ethernet Adapter or cable, add a shielded RJ45 connector, connect the dish through a passive PoE injector, and replace the factory router with a 12V-compatible router. The risks include reversed polarity, incorrect PoE pinout, poor shielding, damaged equipment, water ingress, loss of reversibility, and possible warranty implications. A third-party tutorial specifically cautions that modifying Starlink hardware may affect warranty coverage; verify current terms with Starlink rather than treating that statement as a universal policy.
If you cannot positively identify the conductors, shield, connector orientation, and PoE arrangement, use an approved or adapter-based solution instead.
Fuse, wire, and battery sizing
There is no universal “10A Starlink fuse.” Select the fuse and conductor from the converter manufacturer’s instructions and the actual circuit length, expected current, insulation temperature rating, installation environment, and allowable voltage drop. The fuse must protect the wire and equipment; increasing its rating is not a remedy for overheating.
Use these basic calculations:
Current (A) = Power (W) ÷ Voltage (V)

Battery energy (Wh) = Battery voltage × Capacity (Ah)

Runtime (hours) = Usable battery energy (Wh) ÷ Average system power (W)
For example, a 60W load on a nominal 12V system is approximately 5A before converter losses and wiring losses. That is a calculation example, not a fuse recommendation.
Recommended Free Tools
Include the router in the load. Also allow for converter losses, cable losses, cold-weather derating, battery-management cutoffs, solar variation, reserve capacity, and Starlink’s changing demand.
Starlink’s cited Standard specifications list antenna consumption at approximately 75–100W average, while a third-party test reported approximately 40W for one particular DC-converted Standard setup including its router. Those figures are not interchangeable or universal. Measure the completed installation with a DC watt meter or battery monitor.
Rank #4

- [ Instant 24V Boost Power for Starlink Mini ] Convert any 12V/24V cigarette lighter adapter to stable 24V/2.5A output with intelligent DC-DC technology. Enjoy true plug and play charging with auto-voltage stabilization, ensuring safe operation of your Starlink Mini even extreme conditions (-20°C to 60°C). Universal cigarette lighter plug for cars, trucks, RVs and boats
- [ Built-in Step Up Converter ] Unlike standard cigarette lighter cables that lack a built-in boost converter, STARGEAR Starlink Mini adapter features integrated voltage booster, this ensures stable power delivery by preventing restarts due to voltage fluctuations. Designed for ACC mode, it eliminates voltage dropouts to maintain consistent performance for your Starlink Mini
- [ Triple-Protection Cigarette Lighter Adapter ] Engineered for Starlink Mini with intelligent safety safeguards, the cigarette lighter to DC power adapter actively defends against short circuit protection, overheat protection, and overcurrent protection. Features efficient 12V→24V step-up conversion for all car cigarette lighter plugs, delivering uninterrupted power across deserts or alpine trails
- [ Heat Dissipation & Gold-Plated Durability ] Brass-plated pure copper cores deliver oxidation-free conductivity in 12V car charger or cigarette lighter adapter. The ribbed anti-loose design with secure locking prevents disconnection even in high-vibration environments. Dual heat dissipation sustains full 24V/60W output—perfect Starlink Mini car adapter and 12V to 24V booster for RV power converters or DC to DC chargers. 𝐍𝐨𝐭𝐞: 𝐅𝐮𝐥𝐥𝐲 𝐢𝐧𝐬𝐞𝐫𝐭 𝐭𝐡𝐞 𝐚𝐝𝐚𝐩𝐭𝐞𝐫 𝐢𝐧𝐭𝐨 𝐭𝐡𝐞 𝐬𝐨𝐜𝐤𝐞𝐭 𝐭𝐨 𝐞𝐧𝐬𝐮𝐫𝐞 𝐟𝐢𝐫𝐦 𝐜𝐨𝐧𝐭𝐚𝐜𝐭; 𝐥𝐨𝐨𝐬𝐞 𝐜𝐨𝐧𝐧𝐞𝐜𝐭𝐢𝐨𝐧 𝐦𝐚𝐲 𝐜𝐚𝐮𝐬𝐞 𝐨𝐯𝐞𝐫𝐡𝐞𝐚𝐭𝐢𝐧𝐠 𝐚𝐧𝐝 𝐚𝐟𝐟𝐞𝐜𝐭 𝐩𝐞𝐫𝐟𝐨𝐫𝐦𝐚𝐧𝐜𝐞.
- [ Max 30M/98.4FT 16 AWG Official Cable Support ] Works with official 30M/98.4FT Starlink Mini cables using a 16 AWG power cord — Low voltage drop. 𝐍𝐨𝐭𝐞: 𝐂𝐚𝐛𝐥𝐞 𝐧𝐨𝐭 𝐢𝐧𝐜𝐥𝐮𝐝𝐞𝐝. This premium Starlink Mini power supply requires no tools; just ensure your cigarette lighter socket supports at least 144W output (12V/12A) before plugging into standard 12V cigarette lighter sockets to deliver 24V power, supporting uninterrupted off-grid adventures
Initial startup and testing
- Check the fuse or circuit breaker.
- Measure battery voltage at the converter input.
- If permitted by the converter manufacturer, verify output voltage with the dish disconnected.
- Confirm the aftermarket router is powered and broadcasting Wi-Fi.
- Confirm the dish cable is fully seated.
- Confirm the cable is in the injector’s PoE port, not the data-only port.
- Apply power.
- Wait for initialization and satellite acquisition. One documented installation took approximately 10–15 minutes, but timing varies.
- Connect to Wi-Fi and open the Starlink app.
- Check boot status, obstructions, and online status.
- Run a speed test only after the system reports online.
- Measure voltage under load and inspect the converter, fuse holder, connectors, and cable for abnormal heat.
A successful system powers the router, initializes the dish, reaches online status, provides internet access, and remains stable without repeated reboots or excessive heating.
Troubleshooting
Nothing powers on
- Check the battery disconnect, fuse, breaker, and converter enable switch.
- Measure converter input voltage under load.
- Check polarity, grounds, crimps, terminals, and damaged conductors.
- Inspect for an undersized cable or a voltage drop caused by a long run.
The router works, but Starlink is disconnected
- Check dish cable seating and adapter compatibility.
- Confirm the injector port assignment.
- Verify converter output voltage under load.
- Check passive PoE wiring and the router’s WAN configuration.
The dish repeatedly reboots
Measure voltage at the converter input and at the load while Starlink is operating. Likely causes include battery sag, long or undersized conductors, loose or corroded connections, converter current limiting, inadequate wattage, incompatible voltage, or excessive High Performance demand.
Internet works but the app cannot see the dish
Internet access and local dish diagnostics are separate issues. Router isolation, WAN/LAN arrangement, double-NAT, custom routing, or an unsupported router configuration may block local access. Some aftermarket-router installations need a static route; that is router-specific, not a universal Starlink step.
The converter or wiring gets hot
Stop using the system. Inspect wire gauge, fuse-holder condition, crimp quality, terminal tightness, connector contact resistance, converter overload, ventilation, cable length, and possible shorts. Do not install a larger fuse until the cause is identified.
Direct DC versus an inverter
Direct DC normally offers higher efficiency potential, less inverter idle consumption, and a cleaner permanent installation. Its disadvantages are model-specific compatibility, custom wiring, passive PoE risk, and the possibility that the factory router must be replaced.
An inverter remains sensible when Starlink is temporary, the factory equipment must remain untouched, an appropriately sized pure-sine inverter is already installed, or the RV needs AC power for other equipment. It is also the safer choice for a user who cannot verify a custom DC architecture.
Quick wins for a faster PC:
Repair Windows errors before they cause bigger problemsFix Now →Fix the driver behind crashes, sound loss and screen glitchesFind Drivers →Clear out junk files and repair common Windows errorsFree Scan →For a supported Standard 4/4X, check the official DC-DC supply first. For older Standard/Roam equipment, favor a reversible adapter-based build. For High Performance or Enterprise, use a purpose-built high-wattage system and follow its grounding, fuse, and cable requirements.
Best Value
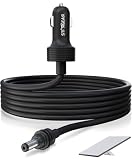
- Wide and Portable Application: Stargear 12v starlink mini car adapter for Starlink mini is equipped with high-quality 16AWG wiring for consistent performance. Designed for 12V-48V cigarette lighter sockets, versatile for rv, car, suv, truck etc.
- Ultra Low Internal Resisstant: Tested with a 13.145V power supply and 5A load, the voltage drop is only 0.2V. After 30 minutes of using, the temperature rise is minimal at just 0.6°C, ensuring safe and efficient.
- Premium Waterproof Performance: Stargear Starlink mini power cable with SL proprietary waterproof gasket, aims to protect against the elements of indoors and outdoors. IP67 Type 4 of Starlink MINI with Starlink DC plug installed for this starlink mini cable.
- Oustanding Starlink Mini Accessories: Plug this starlink mini 12v adapter to both the cigarette lighter socket and starlink mini dish, enjoy seamless internet access, enhancing convenience and efficiency from this starlink mini cable.
- Long Lifespan Assurance: Stargear starlink cable for Starlink Mini combines robust construction with dependable performance, thicker metal connector brings more sturdy and long lifespan.
Frequently Asked Questions
Can I connect Starlink directly to a 12V battery?
Usually not. The battery may be the 12V source, but the dish generally requires a model-specific higher-voltage supply or approved DC architecture. Verify the exact terminal before connecting it.
Do I need 48V or 56V?
It depends on the model and power system. Starlink’s official Standard DC-DC supply specifies 56V output; do not substitute a generic 48V converter without confirming compatibility.
Can I use a cigarette-lighter socket?
Only if the complete system’s current demand, connector rating, fuse protection, voltage drop, and manufacturer instructions support it. A dedicated fused circuit is generally more suitable for permanent installations.
Free tools Windows power users keep installed
One-click scans. No signup required.
Does this work with Starlink Mini?
Do not use the Standard wiring diagram for Mini. Verify Mini’s current power requirements and approved connection method from Starlink documentation first.
Why does Starlink reboot when the battery is low?
Battery voltage can sag under load, especially with long or undersized conductors. Measure voltage at the converter input and load while the dish is operating.
Is the official DC-DC supply available everywhere?
No. Starlink identifies the Standard DC-DC Power Supply as available in select markets. Check the local Starlink shop and the official compatibility page.
Will modifying a Starlink cable affect the warranty?
It may create warranty concerns, according to a third-party tutorial. Check Starlink’s current warranty terms and prefer a reversible adapter-based installation if warranty protection matters.
Quick Recap
Product prices and availability are accurate as of the date/time indicated and are subject to change. Any price and availability information displayed on Amazon at the time of purchase will apply.




