Some links on this page are affiliate links: if you buy through them we may earn a commission, at no extra cost to you.
Start by lowering the recipe temperature by 25°F. For example, convert 350°F to 325°F. Keep the original cooking time as an initial reference for most baked goods, but begin checking at the recipe’s earliest doneness point. Roasts often finish sooner, while casseroles and dense foods may need nearly the original time at the lower temperature.
There is no universal “cook 25% faster” rule. Convection ovens circulate hot air, which usually increases heat transfer, browns surfaces more quickly, and can shorten cooking time—but the result also depends on the food, pan, quantity, rack position, and oven model.
As an Amazon Associate I earn from qualifying purchases.
The Tool Desk
Outbyte PC Repair FREEClear out junk files and repair common Windows errorsFree Scan →Outbyte Driver Updater FREEFix the driver behind crashes, sound loss and screen glitchesFind Drivers →The basic convection conversion rule
- Identify the conventional oven temperature and time in the recipe.
- Lower the temperature by 25°F for your first attempt.
- Use the original time as a reference, but check earlier when roasting or when the food is browning quickly.
- Judge doneness using the recipe’s visual and textural cues. For meat, poultry, seafood, egg dishes, and casseroles, verify the center with a food thermometer rather than relying on color.
- Record the result—including temperature, time, pan, rack position, and quantity—so you can fine-tune the conversion for your particular oven.
A convection oven’s fan moves heated air around the food. That moving air generally improves heat transfer and surface browning compared with a conventional oven, where the air remains mostly still. The fan does not make every food cook at the same rate, however. A thin cookie and a deep casserole respond very differently to the same airflow and temperature.
Quick temperature-conversion chart
| Recipe temperature | Starting convection temperature |
|---|---|
| 300°F | 275°F |
| 325°F | 300°F |
| 350°F | 325°F |
| 375°F | 350°F |
| 400°F | 375°F |
| 425°F | 400°F |
This 25°F reduction is a starting point, not a guarantee. Some convection-microwave guidance recommends reducing the temperature by 25°F to 50°F, particularly for delicate baked goods. A full-size convection range or wall oven may use different instructions, so check the manual for the specific appliance.
Popular on Amazon
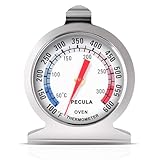
- Clear Dial Display: PECULA's analog oven thermometer delivers precise, instant readings from 50–300°C / 100–600°F. Its dial features clear dual-zone blue and red indicators for at-a-glance temperature monitoring—perfect for ovens, grills, smokers, and deep fryers, ensuring you master every bake, roast, or fry.
- Versatile Hanger and Base Plate: Our oven thermometer features a hook and stand base, allowing it to hang on oven racks or stand stably on flat surfaces for flexible placement without tools or assembly. Compatible with electric ovens, toasters, grills, smokers, and skillets, it is designed for a variety of everyday cooking uses.
- Battery-Free Design: This battery-free mechanical thermometer provides instant, accurate readings upon placement. Maintenance-free and highly reliable, it performs consistently even in high-heat environments, ensuring dependable use for all your baking, grilling, and cooking needs.
- Safety & Durability: This oven thermometer is crafted from food-grade stainless steel, offering shatter-resistant and high-temperature properties for long-lasting durability. Its protective tempered glass lens provides robust resistance against grease buildup, steam condensation, and liquid splashes, while its smooth surface facilitates quick and hygienic cleaning with a damp cloth. Additionally, the heat-resistant dial resists fading, ensuring clear and reliable readings during daily cooking.
- Essential Kitchen Tools: This kitchen cooking thermometer is designed specifically for home cooks, baking enthusiasts, and barbecue masters. By helping you maintain the ideal temperature, it ensures food is cooked to perfection—making meat more tender and juicy, baked goods fluffier and softer, and delivering consistently delicious results every time.
Should you lower the temperature or shorten the time?
For most recipes, lowering the temperature is the easier first adjustment because it reduces the risk of a dark exterior and undercooked center. Shortening the time can work well for foods that are already cooked through quickly, but a fixed percentage does not fit every recipe.
- Baking: Lower the temperature by about 25°F and initially keep the recipe’s stated time as a monitoring reference.
- Roasting: Expect the food to possibly finish earlier. Begin checking well before the recipe’s stated finish time; a 25% time reduction is a broad starting guideline, not a promised result.
- Casseroles and dense center-set foods: Lower the temperature, but do not automatically shorten the time. The center may need nearly the original cooking period.
- Vegetables: Reduce temperature or time by roughly 25%, depending on whether your priority is even tenderness, crisp edges, or faster browning.
- Frozen foods: Follow package and appliance directions first. Some instructions are already written for convection equipment.
Worked example: converting a 350°F, 40-minute recipe
A recipe calling for 350°F for 40 minutes becomes a starting point of 325°F. Do not automatically change the time to 30 minutes. For a cake or quick bread, begin checking around the recipe’s normal earliest doneness point and use a skewer, spring-back test, or other recipe cue. For a roast, start checking earlier because convection may reduce the cooking time. Continue until the food reaches the appropriate visual, textural, or internal-temperature endpoint.
Converting cakes, cookies, quick breads, and yeast breads
Begin most baked goods at about 25°F below the conventional recipe temperature. Convection can accelerate browning, so check regularly rather than assuming the original time or a 25% time reduction is correct.
Cakes and quick breads
Do not cut the baking time by 25% automatically. The top and edges may brown while the center is still setting, especially in a dark pan or in an oven with a strong fan. If the crust is darkening too soon, keep the lower temperature, allow more time, and consider loosely shielding the top when appropriate. Shielding slows browning but can change the finished surface, so it is not always desirable.
Use the recipe’s normal tests: a skewer should come out according to the recipe’s instructions, the center may spring back lightly, and the cake should show the expected signs of being set. If repeated batches brown too quickly, reduce the temperature another 10°F to 25°F on the next attempt or try a lighter-colored pan.
Cookies
Convection may brown cookies more efficiently and can be useful when baking on multiple racks. Leave space between pans and between the pans and oven walls. Stagger the pans so they do not block one another’s airflow. Some ovens need little or no rotation; others still have hot spots, so adjust rack positions only after observing your oven’s results.
Yeast breads
Start about 25°F below the conventional temperature and monitor the crust closely. The loaf may brown before the interior is fully baked. Use the recipe’s doneness test or an internal-temperature guideline appropriate to that bread rather than relying only on crust color.
Also popular on Amazon

- WIDE TEMPERATURE RANGE: Reads accurately from 100 F to 600 F and 50 C to 300 C, covering every cooking method from slow roasting to high-heat baking; know your oven's true temperature before every meal
- EASY-TO-READ 3 INCH DIAL: Large, colorful dial with clearly marked optimal cooking zones helps you identify the right temperature at a glance; no guesswork, no overcooked meals, just consistent results
- DURABLE STAINLESS STEEL CONSTRUCTION: Built with sturdy stainless steel that withstands the high heat and humidity of daily oven use; designed to maintain accuracy through years of consistent kitchen performance
- FLEXIBLE PLACEMENT - HANGS OR STANDS: Versatile design lets you hang the thermometer from an oven rack or stand it upright on any rack surface; fits most standard home ovens for reliable placement every time
- NSF LISTED FOR FOOD SAFETY: Meets National Sanitation Foundation standards, making this thermometer a trusted choice for home cooks and food-conscious kitchens; precision measurement backed by Taylor's heritage since 1886
Roasts, poultry, and other meats
Roasting is the category in which convection most often shortens the cooking time. A general manufacturer guideline uses a reduction of about 25% in normal roasting time, but that figure is only a reason to begin checking early. Roast size and shape, starting temperature, pan design, oven calibration, and the amount of food in the cavity all matter.
You can either lower the temperature by about 25°F or keep the recipe temperature and monitor the roast for an earlier finish, depending on the recipe and the oven’s instructions. Avoid applying a large temperature reduction and a large time reduction at the same time unless the appliance manual specifically directs it.
For safety, use an instant-read food thermometer to verify the thickest part of the food. It verifies the result; it does not provide a universal convection cooking time. Insert the probe away from bone, fat, or gristle. For thin foods, insert it from the side so the sensing area reaches the center.
| Food | USDA minimum internal temperature |
|---|---|
| Beef, pork, veal, and lamb steaks, chops, and roasts | 145°F, followed by a three-minute rest |
| Ground meats and egg dishes | 160°F |
| All poultry and casseroles | 165°F |
| Fish and shellfish | 145°F |
These are food-safety temperatures, not recipe-specific quality targets. A roast may be safe at its minimum temperature but still need additional resting or cooking to reach the texture the recipe describes.
Fish and seafood
Fish cooks quickly and can dry out when convection browns the surface faster than expected. A cautious approach is to lower the recipe temperature by about 25°F and begin checking when roughly 75% of the expected cooking time has elapsed. That is a monitoring point, not a universal formula for every fillet, thickness, or pan.
Use a thermometer where appropriate and verify that the thickest part reaches 145°F. Thin fillets can be difficult to measure accurately; insert the probe from the side into the center.
Casseroles, egg dishes, and cheese-based bakes
Casseroles are a common source of misleading visual cues: the top can be deeply browned while the center remains cool or unset. Lower the temperature by about 25°F, but do not assume the cooking time should also be shortened. Check the middle of the dish, not just the edges.
Recommended Free Tools
Also popular on Amazon
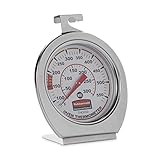
- FOOD SAFETY: Thermometer displays true oven temperature instantly to ensure safe food preparation
- EXTREME TEMPERATURE RANGE: Thermometer reads between 60° and 580° degrees Fahrenheit / 20° and 300° degrees Celsius
- PERFECT FOR ANY KITCHEN: Designed for professional kitchens with the highest quality in mind. Works perfectly in any home or commercial space
- MANY USES: This product is perfect for traditional ovens, toaster ovens, grills, smokers, or any heat based food appliance
- DURABLE: Stainless steel construction and shatter proof lens makes this thermometer highly dependable
Egg dishes should reach 160°F, while casseroles should reach 165°F according to USDA food-safety guidance. Covering a dish can slow surface browning, but it also changes moisture and texture. Use covering as a deliberate adjustment rather than as an automatic convection step.
Vegetables
Convection is often helpful for roasted vegetables because moving air encourages surface drying and browning. If the conventional recipe uses a high temperature, begin by reducing it 25°F. Alternatively, keep the temperature and start checking about 25% earlier if you want the same browning with less time.
Spread vegetables in a single layer where possible. Crowding traps steam and can defeat the crisping advantage of convection. Pieces of different sizes will still finish unevenly even in a well-circulated oven.
Frozen convenience foods
Read the package directions before applying a generic conversion. Some frozen-food instructions are specifically developed for convection ovens, and some ovens have food categories or automatic settings that already compensate for the fan.
Quick wins for a faster PC:
Repair Windows errors before they cause bigger problemsFix Now →Scan for outdated or missing drivers - takes under a minuteDriver Scan →If the package does not specify convection, follow the appliance manual and check the food 5 to 10 minutes before the stated time. Confirm that the center is hot and fully cooked rather than judging only by a browned exterior.
Automatic convection conversion: avoid double-converting
Many ovens offer a feature called Convection Conversion, Easy Convect Conversion, or Auto Convection Conversion. You enter the conventional recipe temperature—and sometimes the time—and the oven calculates a lower temperature, a shorter time, or both. One example converts a conventional 350°F setting to 325°F.
The exact behavior varies by model and food category. Some systems group foods broadly and may prompt you to check the result rather than guaranteeing a finish time. The owner’s manual is the authority for your appliance.
Also popular on Amazon
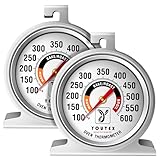
- 1. Easy to Read: The 2.5-inch dial with bright, large numbers provides clear temperature readings, even through smoky oven doors. The vibrant, heat-resistant ink stays vivid over time, and color-coded sections for warm, bake/roast, and broil allow for quick reference.
- 2. Easy to Use: The dual-direction top hook and stable bottom stand allow for easy hanging or standing upright, always facing the cook. Compact yet featuring large fonts, it shows Temp from 100 to 600°F, meeting a wide range of requirements such as cooking, grilling, smoking and baking.
- 3. Easy to Clean: The sealed no-holes stainless steel and tempered glass design is easy to clean, preventing contamination during cooking for healthier meals! After hours of cooking, a quick wipe is all you need to bring it back to life again. Perfect gift for moms and baking enthusiasts.
- 4. Maintenance-free design: The high-precision temperature-sensitive alloy allows accurate, battery-free mechanical temperature measurement. Simply place it in the oven or on the grill for real-time readings. Ideal for oven calibration and monitoring temps in harsh environments.
- 5. What You Get: You will receive YT-30 x2 and 24/7 customer service. Ensuring your oven or grill is at the correct temp is essential for chefs. For simple and delicious cooking, Youtex is a staple tool for gas ovens, electric ovens, toaster ovens, grills, smokers, traditional ovens and convection ovens.
Do not manually subtract another 25°F when the oven has already applied automatic conversion. Double-converting can make the oven unnecessarily cool and produce pale, slow-cooking, or poorly textured food. Apply the manual’s instructions once, then use the recipe’s doneness tests.
Preheating, pans, and rack placement
Preheating
Preheat according to both the recipe and the appliance manual. Some range guidance says preheating may not be necessary for foods with bake times longer than 15 minutes, but that is appliance-specific. Do not override a recipe or manufacturer instruction that calls for a fully preheated oven.
Pan material and color
Use the recipe’s specified pan size. Metal pans generally heat more quickly than glass or ceramic, while dark or matte pans can brown food faster than shiny pans. Glass and ceramic may cook more slowly, so changing pan material can alter the conversion even when the oven setting is unchanged.
If excessive browning is a repeated problem, an optional light-colored baking sheet can reduce the aggressive surface browning associated with a dark pan. A new pan is not required for convection conversion; it is simply one troubleshooting option.
Airflow and multiple racks
Leave space between pans, between pans and the oven walls, and around the food. Stagger pans on multiple racks rather than placing them directly above one another. Convection is particularly useful for multi-rack cooking, but a crowded cavity can restrict airflow and cause uneven browning.
Windows Errors? Fix Them Before They Spread
Repair common Windows errors and clear accumulated junk for a smoother, more stable PC - no reinstall needed.Free scan · no reinstallCrashes, No Sound, or Screen Glitches?
Random freezes, missing sound and display glitches usually trace back to one bad driver. Find and replace yours safely.Free scan · under a minuteDo not block the fan or cover vents unless the appliance manual specifically permits it. Rack positions that work in one oven may not work in another because fan direction, cavity geometry, and hot spots differ.
Independent reader supportYour contribution helps us test, update, and keep practical guides available for everyone.Troubleshooting a poor conversion
The top or edges brown too quickly
- Lower the temperature another 10°F to 25°F on the next attempt.
- Move the pan away from the strongest airflow if your manual permits this.
- Use a lighter-colored pan.
- Loosely shield the top when appropriate, accepting that the surface texture may change.
Do not shield a food when its intended result depends on a crisp or deeply browned surface unless you accept that trade-off.
The center is underdone
- Keep the lower temperature but allow more time.
- Confirm that the oven was preheated if preheating is required.
- Check that you used the recipe’s pan size; a smaller, deeper pan changes the cooking profile.
- Avoid opening the door repeatedly.
- For casseroles and egg dishes, measure the center temperature rather than relying on the browned top.
The food is dry
- Begin checking earlier.
- Do not combine a large temperature reduction with a large time reduction.
- Check whether the oven is running hotter than its display indicates.
- Use an oven thermometer to compare the displayed temperature with the actual cavity temperature if results are consistently too dry, too dark, or too fast. An appliance thermometer is an optional diagnostic tool, not a substitute for the recipe’s conversion method.
Browning is uneven
- Leave more space between pans.
- Stagger pans on different racks.
- Reduce the load in the oven.
- Test another rack position.
- Check whether your pan material or color is contributing to the difference.
Convection improves circulation, but it cannot eliminate every difference caused by the fan, cavity design, pan, or amount of food.
Also popular on Amazon

- Oven and grill safe for leave-in use while cooking
- Measures temperatures from 150 to 600 degrees Fahrenheit
- Durable, stainless steel construction with protective glass lens
- Integrated hanger for easy mounting or stands upright on base
A repeatable conversion checklist
- Identify the appliance: full-size convection oven, convection microwave, convection bake, or convection roast. These modes may not use the same conversion behavior.
- Check for automatic conversion: if it is enabled, follow the manual and do not apply a second manual reduction.
- Write down the original recipe: temperature, time, food quantity, pan, and rack position.
- Start 25°F lower: unless the package or appliance instructions specify another adjustment.
- Preserve the time as a reference: shorten it only when the food’s behavior or the appliance guidance supports doing so.
- Begin checking early: especially for roasts, fish, vegetables, cookies, and foods already showing rapid browning.
- Measure when safety matters: use the appropriate internal-temperature target for meat, poultry, seafood, egg dishes, and casseroles.
- Log the result: note what was too dark, too dry, underdone, or uneven so the next batch can be adjusted precisely.
Food safety comes before the clock
A converted cooking time is never a food-safety guarantee. A food thermometer is the reliable way to determine whether meat, poultry, seafood, and egg products have reached safe minimum internal temperatures. Probe the thickest part, avoid bone and fat, and measure thin foods from the side.
Free tools Windows power users keep installed
One-click scans. No signup required.
Use an instant-read thermometer after removing the food from the oven. If you need to monitor a roast while it cooks, use an oven-safe leave-in probe or wireless thermometer rated for that purpose and follow its manufacturer instructions. Do not leave an instant-read thermometer in the oven unless it is specifically designed for oven use.
Frequently Asked Questions
Do I always reduce the temperature by 25°F in a convection oven?
No. A 25°F reduction is the most useful general starting point for recipes written for conventional ovens, but the appliance manual, recipe, food type, and automatic conversion setting may call for something different. Convection-microwave guidance may recommend a 25°F-to-50°F reduction.
Should I reduce cooking time by 25% too?
Not automatically. Roasts may finish about 25% sooner as a broad early-checking guideline, but cakes, casseroles, and dense foods may need close to the original time. Judge the food by its doneness cues and, when appropriate, its internal temperature.
What happens if my oven has Convection Conversion?
Enter the conventional recipe information as directed by the oven manual and let the appliance calculate the adjustment. Do not subtract another 25°F manually unless the manual explicitly instructs you to do so.
What’s actually slowing this PC down?
Pick the symptom - the matching free tool is one click away.
Can I use the same conversion for a convection microwave and a full-size convection oven?
Not necessarily. Convection microwaves and full-size convection ranges or wall ovens can have different fan, heating, and automatic-conversion behavior. Use the instructions for the specific model.
How do I know whether meat or a casserole is done?
Use a food thermometer in the thickest part or center. USDA minimums are 145°F with a three-minute rest for whole cuts of beef, pork, veal, and lamb; 160°F for ground meats and egg dishes; 165°F for poultry and casseroles; and 145°F for fish and shellfish.
The Bottom Line
For a first conversion, lower a conventional recipe by 25°F, keep the original time as a reference, and start checking early. Adjust the time or temperature based on the specific food, pan, oven mode, and result—never by a universal percentage alone. When safety matters, the thermometer decides when the food is done.
Quick Recap
Product prices and availability are accurate as of the date/time indicated and are subject to change. Any price and availability information displayed on Amazon at the time of purchase will apply.
Do these 3 things before closing this tab:
1Clear out junk files and repair common Windows errors2Scan for outdated or missing drivers - takes under a minute3Repair Windows errors before they cause bigger problems
