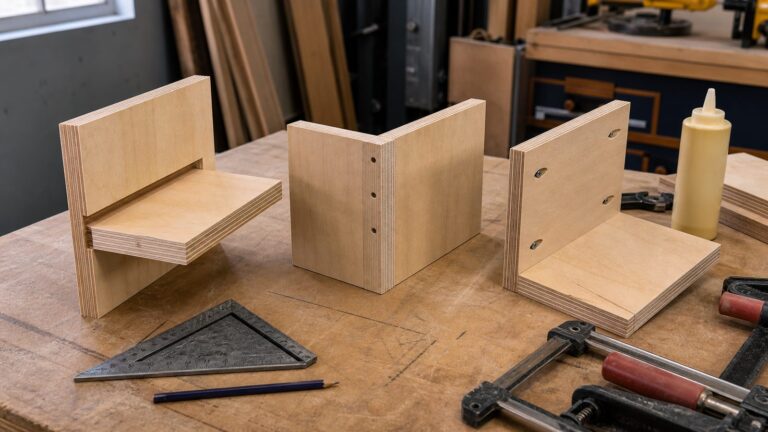
To add a spline to a mitered corner, guide the joint through a stable, properly supported jig to cut a slot across the miter, fit a wood strip snugly into the slot, glue it in place, then trim it flush. First decide whether you want an exposed spline as a contrasting detail or a hidden spline that preserves the outside grain. The slot depth and cutting setup depend on the joint and workpiece; test the setup on scrap before cutting the finished piece.
Choose a visible or hidden spline
Visible splines
A visible spline is installed in a slot cut across the assembled miter. It reinforces the corner and can also serve as a design accent if you choose contrasting wood. The slot and spline remain visible on the outside faces.
Hidden splines
A hidden spline goes into a slot routed into the miter before assembly. This can strengthen the joint while keeping the exterior grain uninterrupted, which is useful for a grain-matched box. The sequence differs: prepare the slots before glue-up, and rough-trim any inside overhang before assembling the joint.
Choose a cutting setup and jig
The jig supports and positions the work; it is the key to keeping the cut controlled. For a table saw or router table, use a fixture that registers the project at the miter angle and supports it steadily throughout the pass. WOOD magazine demonstrates a simple fence-and-support fixture for this purpose: WOOD magazine’s spline-cutting demonstration.
#1 Best Overall

- 【Aluminum Alloy Right Angle Spline Fixture】The right-angle spline jig is made of aluminum alloy, NC processing, anodized, with a solid structure, reliable, durable and wear-resistant, not easy to deform or break, and long service life.
- 【Spline Jig Suitable for】Clamping range: frame thickness 5-42mm/0.2-1.65inch, safety recommendation: frame depth 15-500mm/0.59-19.7inch. Adaptive clamping range, can be applied to more projects.
- 【Practical Design】The spline clamp can fix the frame left and right, which is more stable, providing a safer way of operation, away from danger. Ultra-low ground clearance, the workpiece is almost close to the table, high accuracy.
- 【Adjustable Corner Dovetail Jig for Table Saw Router Table】The spline clamp is more convenient to add design to your frame, can be used with table saws and planers to cut various spline grooves or dovetail keyways. Great for making picture frames, small boxes and other joinery.
- 【Package Content】You will receive 1pair aluminum alloy right angle spline jig, 1pcs hex wrench and 1pcs hex bit. Each spline jig is about 180x50x100mm/7.09x1.97x3.94inch(LxWxH), practical set for woodworking.
| Setup | Best suited to | Trade-off |
|---|---|---|
| Shop-made table-saw or router-table jig | Small or medium work that can be held and guided securely at the machine | Low-cost and adaptable, but it must be built and aligned for stable support |
| Commercial table-saw or router-table jig | Repeat setups where adjustable stops or scales are useful | Can simplify setup; confirm current machine compatibility and capacity before buying. Woodpeckers lists the SPLINE-23 as an example: Woodcraft’s product listing. |
| Handheld router with the work secured | Large frames or panels that are awkward to move through a stationary machine | Keep the project clamped and bring the router to it; the setup still needs to guide and control the cut. See WoodWorkers Guild of America’s frame-jig example. |
A shop-made router-table fixture described by Doug Stowe uses 3/4-inch plywood or MDF, with a blank about 8–9 inches wide by 12 inches long; those are dimensions for that particular jig, not requirements for every setup. See Fine Woodworking’s shop-made jig guide.
Set slot position and depth
Choose the slot location for the joint and the appearance you want. Keep enough material around the slot that it does not break through an edge that should remain intact. Cut a test in scrap of the same stock to check the position, support, and depth before working on the finished piece.
Rank #2

- This spline jig strengthen your miter joints and add a design element in the form of splines across the miters.
- Works with both table saw and router table, cut a variety of spline slots or dovetail Keyways, suitable for making picture frames small boxes and other joinery.
- Perfect for projects as narrow as 0.6 inch and up to 20 inch wide; Can clamping 5-42mm(0.2-1.7 Inch) thick frame.
- Benefit from the unique structure, there are no metal obstacles above the saw blade and router bit, can effectively avoid accidental damage; Besides, the workpiece almost close to the table top, ground clearance only 1MM.
- TOOLCOOL spline Jig is made of aluminum alloy, CNC-machined, anodized finished, robust construction, reliable and has a long service life; Come with a allen wrench and hex bit, you can operate it manually or use a hand drill.
There is no single depth that fits every miter. In Bob Hunter’s WOOD magazine candle-holder example, the slots go about halfway through the joint. The Woodpeckers instructions suggest about two-thirds of the joint thickness as a starting point. These are examples, not a universal dimension. Check the Woodpeckers spline jig instructions against your joint and intended appearance.
Cut the slots safely and consistently
- Set up the jig. Register it against the machine fence or other guide, and confirm that the project is supported without rocking. Test the arrangement on scrap.
- Secure and guide the work. Keep hands clear of the cutting path and maintain control of the project and fixture through the pass. For a large piece, clamp it securely and use a handheld router if that makes the work easier to control.
- Make the cut without backing over the blade. WOOD magazine warns that bringing the jig back over the blade after a pass can shift it and widen the slot. Clear the cut in a controlled way instead of reversing the jig across the blade.
- Check the result. Inspect the slot and test-fit a scrap spline. Adjust the setup before cutting the remaining corners if the slot is misplaced, loose, or too deep.
Fit and install the spline
Size the spline for a snug fit
Cut the strip so it fits snugly in the slot without play, but do not force an oversized spline into the joint. A spline that is too wide can split the stock or damage the miter; the joint must still close completely. If the strip binds, reduce its thickness or correct the slot rather than driving it in.
Quick wins for a faster PC:
Scan for outdated or missing drivers - takes under a minuteDriver Scan →Repair Windows errors before they cause bigger problemsFix Now →Fix the driver behind crashes, sound loss and screen glitchesFind Drivers →Rank #3

- Versatile Joinery Jig: Create decorative and joint-reinforcing splines for boxes, frames, cabinets, picture frames, and woodworking projects; works as a spline jig for table saw and router table applications with precise alignment control.
- Adjustable 45 Degree Sled: Durable jig base securely holds workpieces at a 45 degree angle while guiding smoothly past router bits or saw blades; ideal for spline joinery, box joint jig setups, finger joint cuts, and decorative corner details.
- Multiple Cutting Styles: Supports straight, angled, dovetail, V-groove, and custom spline patterns using router bits or table saw blades; expands woodworking versatility for furniture making, boxes, cabinetry, and trim projects.
- Precision & Stability: Aluminum miter bar with adjustable tension blocks delivers smooth no-slop movement in standard miter slots; zero-clearance inserts help reduce tear-out while adjustable fences improve positioning accuracy and repeatability.
- What’s Included: Rockler Deluxe Spline Jig For Table Saw; (1) Miter Bar with Adjustable Tension Blocks; (1) Miter Jig Base; (2) Adjustable Fences; (5) MDF Zero-Clearance Inserts; (1) Miter Stop with Easy-to-Grip Five-Star Knob; Hardware Pack.
Orient the grain and choose the material
For a strength-oriented spline, Woodcraft’s guide recommends running the spline’s face grain perpendicular to the face of the miter. Ripped strips are quick to make, but Woodcraft notes they can split along the grain if handled roughly. A contrasting species is optional and only matters when the spline will be visible. See Woodcraft’s splined-miter guide.
Quick Recap
Best Value

- DURABLE ALLOY CONSTRUCTION: Built from sturdy alloy material, this drawer jig locator provides reliable support for repeat woodworking setup, helping maintain steady positioning during cabinet, drawer, and furniture projects.
- PRECISE FLIP LIMITERS: The integrated flip limiters make alignment easier for repeat cuts and joinery positioning, allowing this drawer clamp locator to help improve consistency when working with drawer panels and cabinet parts.
- WIDE ADJUSTABLE RANGE: Designed for flexible height adjustment, this spline clamp for table saw supports material thicknesses from 1/2 inch to 16 inches, making it suitable for a variety of woodworking applications.
- SMOOTH SLIDE OPERATION: The sliding components help reduce resistance during adjustment while protecting work surfaces from unnecessary scratches, supporting smoother setup and longer-lasting workshop use.
- MULTI-PURPOSE WORKSHOP TOOL: This table saw drawer clamp locator is suitable for furniture making, cabinet assembly, milling machine work, and general woodworking tasks, offering practical support for DIY users and professionals.
Rank #4

- PRECISION BUILT - The Woodpeckers Spline Jig has 2 sections of aluminum Super Track, secured by UHMW glide strip lined, powder-coated steel legs. Also inlcuded are 4 molded flip stops to keep your splines aligned.
- STENGTHEN YOUR MITER JOINTS - You can make a joint rock solid and add a design element at the same time by adding spline across the miters with the Spline Jig.
- VERSATILE PROJECT CAPACITY - The Woodpeckers Spline Jig can handle narrow projects from 1/2" to 16" wide on the wider setting. When projects exceed 16", just move the tracks inward to tackle long projects up to 3 feet wide.
- TABLE SAW & ROUTER TABLE JIG - For narrow splines, this jig works great on the table saw. For wider splines or dovetail work, the jig works great with the router table too.
- MADE IN USA - Like all Woodpeckers products, the Spline Jig is precisely machined and carefully inspected in our Strongsville, Ohio, facility just south of Cleveland.
Glue, trim, and finish
- Apply glue in the slot and on the spline, then seat the spline without forcing it. Confirm that the miter closes fully.
- Allow the glue to set according to the adhesive instructions.
- Trim the protruding spline close to the surface, then pare or sand it flush.
- For a hidden spline, rough-trim the inside overhang before glue-up and finish trimming flush after assembly, following the sequence in Woodcraft’s splined-miter procedure.
Common problems to avoid
- The slot shifts or widens: Improve jig registration and work support; do not pull the fixture backward over the blade after the pass.
- The spline will not seat: Check its thickness and the slot for a tight spot. Do not hammer in a spline that prevents the miter from closing.
- The spline breaks through an edge: Reassess slot position and depth on a test piece, leaving the intended outer edges intact.
- A large assembly is difficult to maneuver: Secure the work and consider using a handheld router rather than moving the project through a stationary machine.
Product prices and availability are accurate as of the date/time indicated and are subject to change. Any price and availability information displayed on Amazon at the time of purchase will apply.