The Tool Desk
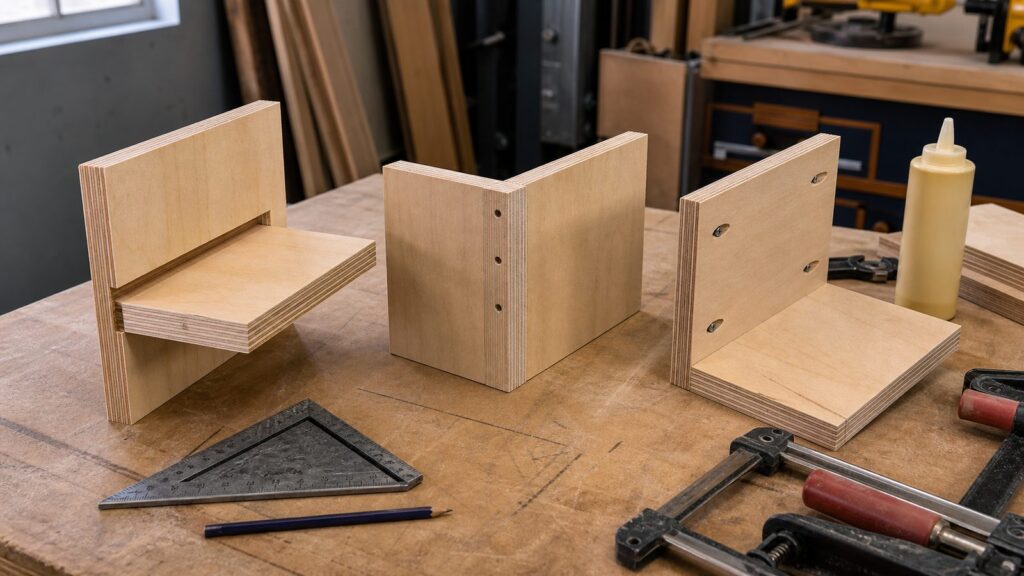
Outbyte PC Repair FREEClear out junk files and repair common Windows errorsFree Scan →Outbyte Driver Updater FREEFix the driver behind crashes, sound loss and screen glitchesFind Drivers →A strong plywood joint does one of three things: it captures the panel, increases clean glue surface, or adds mechanical fasteners. The best joints do two or three of those at once. For most built-ins, shop cabinets, utility shelves, closet systems, and site-built storage, the three plywood joints worth knowing are the housed dado or groove, the reinforced rabbet, and the pocket-screw-and-glue butt joint.
On our job sites, we choose the joint by use, not by woodworking tradition. A shelf that carries paint cans needs a captured end and a stiff front edge. A cabinet corner needs alignment and racking resistance. A fast shop-built box may need hidden screws more than furniture-grade joinery. These are plenty-strong carpentry joints, but they are not substitutes for engineered plywood sheathing, subfloor, shear-wall, or roof-deck fastening schedules. Structural panels follow the approved plan, the panel stamp, span rating, edge support, fastener schedule, and local inspection requirements.
As an Amazon Associate I earn from qualifying purchases.
The Short Answer: Which Plywood Joint Should You Use?
If you are building with 3/4-inch plywood, start with a dado for shelves and dividers, a rabbet plus screws or a face frame for case corners, and pocket screws plus glue for fast hidden assemblies. A plain plywood butt joint with edge glue alone is the weak option because the edge exposes alternating end grain and long grain. The glue line is small, inconsistent, and easy to break under racking or pull-apart loads.
Do these 3 things before closing this tab:
1Clear out junk files and repair common Windows errors2Fix the driver behind crashes, sound loss and screen glitches3Repair Windows errors before they cause bigger problems| Joint | Best use | Typical 3/4 plywood setup | Strength profile | Speed |
|---|---|---|---|---|
| Dado or groove | Shelves, vertical dividers, partitions | 1/4 to 3/8 inch deep groove cut to actual panel thickness | Strongest and cleanest for captured shelves | Moderate |
| Reinforced rabbet | Cabinet corners, backs, case alignment | Rabbet cut in one panel, glue plus screws, brads, confirmat screws, cleat, or face frame | Good alignment, needs reinforcement | Moderate to fast |
| Pocket screw and glue | Fast shop cabinets, utility cases, hidden joints | 1-1/4 inch coarse-thread washer-head pocket screws for most 3/4 plywood | Good when hidden and clamped, not ideal for exposed premium work | Fastest |
| Code-fastened structural panel joint | Subfloor, wall sheathing, roof deck, shear wall | Per approved plans, panel stamp, blocking, edge spacing, field spacing, and inspection | Structural only when designed and fastened as specified | Depends on scope |
The rest of this guide explains where each joint belongs, how we size it, what it costs in 2026 materials, and where homeowners should stop and bring in a carpenter, cabinetmaker, or builder.
#1 Best Overall

- Complete Set - Set includes 2 outside blades, 2 wing chippers, and shims that are designed to fit 5/8" laser cut arbors, allowing for accurate and efficient blade rotation.
- Efficient - With its specially engineered design, Diablo's Dado Saw Blade Set requires less power to feed, making it perfect for underpowered saws without sacrificing performance or quality.
- Versatile - The set provides a range of groove widths from 1/4" to 13/16" and includes shims for micro adjustments down to .004". Resharpenable blades ensure long-term use and precision.
- Clean Cuts - Ensures precise, clean cuts and smooth flat bottom grooves with negative hook angles that minimize splintering, even on delicate woodwork.
- Durable - Featuring a Perma-SHIELD non-stick coating, the blades are protected from heat, gumming, and corrosion, ensuring longevity and consistent performance even through heavy use.
Before You Cut: Plywood Thickness, Grade, Glue, and Fasteners Matter
The most common plywood joinery mistake is assuming that a 3/4-inch sheet is actually 0.750 inch thick. Many panels sold as 3/4 inch are 23/32 inch. Imported or metric panels may be 18 mm. Cabinet panels can land around 0.688 to 0.709 inch depending on species, core, sanding, and manufacturer. That difference is enough to make a dado sloppy, a rabbet misaligned, or a pocket screw blow through the face.
Measure the actual panel with calipers before setting a dado stack, router bit, jig, or screw stop. Then make a test joint from offcuts from the same sheet. We want a dado or groove that slides together with moderate hand pressure. If you have to pound it together, you can starve the glue joint, bow the side panel, or split a veneer. If it rattles, the glue line is doing too much work.
Choose the right plywood for the joint
Void-free cabinet plywood, multi-ply birch-style panels, and high-quality hardwood veneer panels hold joinery better than low-cost sheathing with core voids. That does not mean every shop shelf needs expensive birch. It does mean a joint cut through a football-sized void in cheap plywood is not the same joint you saw in a controlled shop test. For paint-grade built-ins, a good cabinet-grade 23/32-inch panel around $45 per 4 by 8 sheet can be a better value than bargain sheathing if it cuts cleaner and holds screws better. Hardwood-veneer birch, oak, or maple panels commonly run about $75 to $80 per sheet at national home centers in mid-2026.
For utility work, 23/32-inch sheathing around $40 per sheet may be fine if appearance is secondary and the joint is mechanically reinforced. For sanded sande plywood, expect roughly $50 for 1/2 inch and around $70 for 18 mm or 3/4 inch. Thin sheathing is cheaper, with 11/32 inch around $23 per sheet, 15/32 inch around $26, and 19/32 inch around $32, but those panels are not good candidates for refined case joinery.
Use glue where it can actually bond
For cabinet-grade plywood joinery, ordinary wood glue works well on clean wood-to-wood surfaces. Prefinished plywood is different. If the joint lands on a factory finish, glue may not bond reliably unless the adhesive is rated for that surface and the finish is properly scuffed or machined away. A dado or rabbet can expose raw wood where the glue belongs. If you cannot expose raw wood, treat screws, staples, brads, or mechanical supports as the primary holding method.
Construction adhesive has its place in framing, subfloor, and field assemblies. A 10-ounce tube of Polyurethane construction adhesive was about $7.50 in 2026 retail pricing. It can help reduce squeaks and add bond in the right construction detail, but it is messy and thick for precise cabinet joinery. In a tight dado, a good wood glue line on clean plywood is usually the better choice.
Joint 1: Full-Width Dado or Groove for Shelves and Dividers
A dado is a channel cut across the grain direction of a panel. A groove runs with the grain direction. In plywood casework, people often use the word dado for both because the panel itself is cross-laminated. The practical point is the same: one plywood part is housed in a slot in another plywood part.
Recommended Free Tools
This is the first joint we reach for when a shelf, vertical divider, or partition must stay straight, resist racking, and look clean from the front. The receiving panel captures the shelf end, so the joint is not relying only on glue stuck to a plywood edge. The shoulder of the dado helps with alignment, and the side walls of the groove add glue surface.
Good dimensions for 3/4-inch plywood
For 3/4-inch plywood, a 1/4-inch to 3/8-inch deep dado is a practical range. A common woodworking guideline is to cut the dado roughly half the panel thickness, but in construction-grade casework we also consider what the receiving panel has left after the cut. A 3/8-inch dado in a 23/32-inch side leaves about 11/32 inch of material behind. That can be fine for a cabinet side, but it is too aggressive in some narrow parts, low-grade plywood, or highly loaded assemblies.
For most built-in shelves, we use a 1/4-inch dado when the panel quality is average or the side panel is doing important work, and a 3/8-inch dado when the plywood is good and the shelf needs more bearing. The dado width should match the actual thickness of the shelf panel, not the nominal label on the rack. Router bits marketed for undersized plywood can help, but the offcut test is still the final answer.
Why dados are strong
In published plywood joint testing, a glued dado in 3/4-inch plywood failed at 559 pounds in pull-apart testing. Adding screws raised failure load to 1,018 pounds, and the failure was through the plywood or screw-head pull-through rather than a clean glue failure. That does not mean every dado in every home will hold 559 pounds. Test fixtures are controlled; real shelves also deal with span, sag, moisture, fastener placement, plywood grade, and installation quality. But the direction is useful: a housed joint is much stronger than edge glue alone, and screws can add real holding power when appearance allows.
For shelves, stiffness often matters before the joint breaks. A long shelf may sag even if the dado is intact. Span, shelf depth, load, plywood grade, and front edging all matter. A solid-wood nosing on the front edge improves stiffness and hides the plywood plies. On a 3/4-inch plywood shelf, even a 3/4 by 1-1/2 inch hardwood or poplar front edge can make a noticeable difference on closet shelves, pantry shelves, and office built-ins.
How we cut and assemble dados
Cut every matching dado from the same reference face and reference edge. If the left side is laid out from the front and the right side is laid out from the back, a 1/16-inch layout error becomes a twisted box. We mark the good face, cut all shelf locations with a guide, then dry-fit the full case before opening glue.
A dry fit should confirm four things: the shelf seats fully, the front edges align, the case measures square diagonally, and clamps can reach without forcing the case out of shape. After that, apply glue to the dado walls and bottom, slide the shelf in, clamp the case square, and add screws only if the design allows them. If screws will show on an exposed cabinet side, skip them or hide them under an end panel, wall return, or finished skin.
Joint 2: Rabbeted Corners Reinforced With Screws, Cleats, or a Face Frame
A rabbet is an L-shaped notch along the edge of a panel. In plywood casework, rabbets are useful for cabinet corners, backs, drawer boxes, and situations where you want one panel to register against another without the bulk of a full dado. A rabbeted corner is easier to align than a plain butt joint because the shoulder gives the mating panel a ledge.
What’s actually slowing this PC down?
Pick the symptom - the matching free tool is one click away.
The weakness is glue area. Compared with a full housed dado, a rabbet gives up one glue surface. That is why we do not treat a glued plywood rabbet as magic. We reinforce it with screws, brads, confirmat screws, a face frame, a back panel, a cleat, or a combination of those.
Where rabbets shine
Rabbets are excellent for cabinet backs. A 1/4-inch plywood back let into a 1/4-inch-deep rabbet helps square the box and keeps the back flush or recessed. For cabinet sides meeting a top or bottom panel, a rabbet can make assembly faster because the parts self-locate. In built-ins, a rabbet at the front edge can also receive a face frame that stiffens the cabinet and covers plywood edges.
For a 3/4-inch plywood case corner, a typical rabbet might be 3/8 inch deep by the actual thickness of the mating panel, or shallower if the remaining material is limited. If the rabbet is only for a 1/4-inch back panel, size it to the back and leave enough meat for staples, brads, or screws without splitting the veneer.
Rank #2
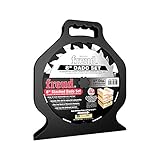
- Versatile Set Configuration - Includes 2 blades, 3 chippers, spacers, and a precision shim set, allowing micro-adjustments for custom groove widths and cleaner cuts.
- Wide Range of Groove Sizes - Designed to cut flat-bottom grooves from 1/4" to 7/8" in materials like laminated plywood, melamine, and solid hardwood, offering flexibility for cabinetry, joinery, and shelving applications.
- Optimized for Safety Brake Saws - Engineered for smooth, efficient performance on safety-equipped and lower-powered saws to other compatible models.
- Advanced Carbide Technology - Features Premium TiCo HI-Density Carbide with a crosscutting blend formulation, delivering maximum durability, longer cutting life, and consistent precision.
- Silver I.C.E. Coating Protection - High-performance coating resists pitch build-up, reduces heat during operation, and keeps blades cleaner for smoother, longer-lasting performance.
How to reinforce a plywood rabbet
Glue alone may be adequate for a light drawer box or decorative panel, but a cabinet corner deserves mechanical backup. For paint-grade work, trim-head screws, brads, or narrow-crown staples can hold the joint while the glue cures and add resistance to pull-apart movement. For utility cabinets, confirmat screws or standard cabinet screws work well if pilot holes are sized correctly. Avoid drywall screws. Their brittle shanks and bugle heads are wrong for plywood joinery and can crush the face veneer or split the edge.
Crashes, No Sound, or Screen Glitches?
Random freezes, missing sound and display glitches usually trace back to one bad driver. Find and replace yours safely.Free scan · under a minutePC Slower Than It Used to Be?
A free scan shows the junk files, broken settings and background clutter dragging Windows down - then fixes them in one click.Free scan · Windows 10 & 11A face frame is another form of reinforcement. Once glued and pinned to the front of the case, it ties the sides, top, and bottom together while covering exposed plies. A back panel let into rabbets does the same at the rear. For garage cabinets, laundry storage, or mudroom cubbies, a rear cleat screwed through the sides and into studs can carry wall loads better than expecting the rabbet alone to do the work.
Common rabbet mistakes
The first mistake is cutting the rabbet from the wrong face. A mirrored cabinet side can become two left sides quickly. Label parts before milling. The second mistake is overcutting depth. Removing too much from a side panel makes the remaining leg fragile. The third mistake is assuming glue will bond to a prefinished face. If the rabbet exposes raw wood, glue that surface. If it does not, plan fasteners accordingly.
We also see fasteners placed too close to the plywood edge. A screw driven into the edge of plywood needs a pilot hole, a straight path, and enough distance from the face veneer to avoid splitting or bulging. If the joint will be painted, a slightly larger pilot and a controlled countersink are usually better than forcing a screw and repairing a blown-out corner later.
Joint 3: Pocket-Screw-and-Glue Butt Joints for Fast Hidden Assemblies
Pocket screws are not the most elegant plywood joint, but they are extremely useful. For shop-built cabinet boxes, closet organizers, workbench bases, site jigs, and utility built-ins, pocket holes let one person assemble square boxes quickly with hidden fasteners. When paired with glue on clean wood and good clamping, they are plenty strong for many non-structural assemblies.
Quick wins for a faster PC:
Scan for outdated or missing drivers - takes under a minuteDriver Scan →Clear out junk files and repair common Windows errorsFree Scan →The key phrase is hidden fasteners. Pocket holes belong on the inside of a cabinet, underside of a shelf, back face of a panel, or an area that will be covered by trim. They are not our first choice for exposed premium cabinetry unless plugs, layout, and finishing are part of the design.
Screw choice for 3/4-inch plywood
For most 3/4-inch plywood pocket-hole work, start with #8 by 1-1/4 inch coarse-thread washer-head pocket screws. In 2026, a 100-pack of these screws was about $10 at national home centers. Coarse threads are the right starting point for plywood, MDF, particleboard, and softwoods because they bite better in less dense material. Fine-thread pocket screws are for hardwoods.
Set the pocket-hole jig by actual material thickness, not the label on the sheet. Test on offcuts before drilling the finished panel. The test should confirm that the screw seats without lifting the joint, stripping the plywood, or breaking through the outside face. If the plywood is thin, soft, or imported metric material, the standard setting may need adjustment.
Use exterior-rated coatings or stainless steel only when the assembly is in a damp, exterior, coastal, or corrosive environment. Interior zinc-coated screws are fine inside a conditioned pantry or office built-in, but they are not the right call for exterior storage, wet garages, or pressure-treated lumber interfaces.
How to make pocket-hole plywood joints stronger
Clamping matters. A pocket screw pulls at an angle, so it can slide the mating panel out of alignment as it tightens. Clamp the faces flush or use a right-angle assembly clamp before driving screws. Apply glue where clean raw wood meets clean raw wood. Do not overdrive the screws. The washer head should seat firmly in the pocket without crushing the plywood layers.
Spacing depends on the part, but for typical cabinet sides and shelves we prefer a screw near each end, set back enough to avoid splitting, with additional screws every 6 to 8 inches on long runs when the joint is hidden. On narrow parts, fewer well-placed screws are better than a row of fasteners that weakens the edge.
Pocket screws are fast, but they do not create a captured joint. A shelf installed between two sides with pocket screws can be strong, but a shelf captured in dados has better registration and more resistance to sagging or peel loads. Use pocket screws where speed and hidden assembly matter. Use dados where shelf support matters most.
Independent reader supportYour contribution helps us test, update, and keep practical guides available for everyone.Costs in 2026: What Strong Plywood Joinery Really Adds
The joint itself is usually not the expensive part. The cost comes from plywood quality, layout time, tooling, clamps, finish level, and labor. Material prices also keep moving. The softwood veneer and plywood producer price index was 323.926 in June 2026, up from 321.977 in May and 295.407 in February. NAHB reported on July 24, 2026 that framing lumber prices were up 1.4 percent week over week and 3.1 percent month over month, while still 0.3 percent lower year over year. Retail plywood shelves can look stable while the upstream cost background is shifting.
| Item | Typical 2026 US reference price | What it means for a small project |
|---|---|---|
| 23/32 sheathing plywood, 4 by 8 | About $40 per sheet | Useful for utility work, not ideal for fine exposed joinery |
| 23/32 cabinet-grade plywood, 4 by 8 | About $45 per sheet | Good value for paint-grade built-ins and cabinets |
| 18 mm or 3/4 sande plywood, 4 by 8 | About $70 per sheet | Smoother faces, better for finished work |
| 3/4 hardwood veneer plywood, 4 by 8 | About $75 to $80 per sheet | Best when the face will be stained or clear finished |
| Polyurethane construction adhesive | About $7.50 per 10-ounce tube | Better for construction assemblies than tight cabinet dados |
| #8 by 1-1/4 inch pocket screws | About $10 per 100 | Enough for several cabinet boxes or a closet organizer |
| Wood glue | About $5 to $15 per bottle | Cheap compared with plywood, but only works on bondable surfaces |
Labor changes the math quickly. BLS May 2025 data released in 2026 lists carpenters at a $29.12 median hourly wage and a $31.55 mean hourly wage nationally. Homeowner-facing billing rates are higher after insurance, payroll burden, travel, overhead, markup, and warranty. For 2026 planning, consumer carpentry billing commonly runs about $40 to $100 per hour, with finish carpentry, built-ins, cabinet installation, and high-cost metro areas at the upper end.
A simple garage shelf unit might be a half-day project for a capable DIYer with a circular saw guide, drill, clamps, and pocket-hole jig. A finished built-in with scribed walls, face frames, concealed fastening, paint-grade prep, and clean reveals can take a pro crew one to three days depending on size and site conditions. The joint is just one part of the finished result.
Rank #3

- stacked dado blades set cuts smooth and precise grooves with clean edges, square shoulders and flat bottoms
- Set includes two 8 inch outer blades, five two-wing chippers and seven metal shims for fine adjustments with storage case.
- Create 20 different widths of dados anywhere from slot widths range from 1/4" to 13/16", in 1/16" increments
- Features a 5/8-inch arbor for compatibility with the majority of 10-inch table saws on the market
- Carbide tooth blades and chippers feature negative hook angles to make flat bottom grooves that are smooth and virtually splinter-free
When to DIY and When to Hire a Pro
DIY makes sense when the project is freestanding or lightly built-in, the load is modest, the finish standard is utility or paint-grade, and you can safely cut full sheets. Good DIY candidates include garage cabinets, pantry shelves, closet dividers, shop storage, workbench bases, and laundry room cubbies. Use dados for shelves, pocket screws for hidden assembly, and rabbets for backs or corners. Buy extra material for test cuts. One mistake in a $70 sheet is more expensive than practicing on offcuts.
Hire a pro when the work is highly visible, tied into walls or floors, heavily loaded, moisture-exposed, or part of a larger remodel. Built-ins around fireplaces, mudroom lockers supporting daily use, wall-hung cabinets, stair-adjacent storage, and custom office cabinetry all reward professional layout and fastening. A pro also brings the boring equipment that makes the work better: track saws, table saws with good outfeed, sharp dado tooling, assembly tables, long clamps, dust control, scribes, lasers, and finish systems.
For wall-mounted cabinets and built-ins, the joint inside the plywood box is only part of the load path. The box must transfer load to cleats, rails, studs, blocking, masonry anchors, or other approved supports. A beautiful pocket-screwed box can still fail if it is hung with the wrong fasteners or misses the framing.
Safety, Moisture, and Permit Boundaries
Plywood work looks simple until a full 4 by 8 sheet starts moving. Support panels on a flat surface, use sharp blades, keep hands out of the cut path, and control dust. Plywood dust and glue-line dust are not something to breathe casually. Use eye protection, hearing protection, and a respirator or dust extractor when cutting, routing, or sanding. Clamp guides instead of freehanding narrow cuts.
Moisture changes joint reliability. Interior plywood, interior glue, and zinc screws belong inside dry conditioned spaces. For damp garages, exterior storage, covered porches, utility rooms, and coastal conditions, choose panels with the right exposure rating, adhesives rated for the environment, and corrosion-resistant fasteners. Do not mix incompatible metals or bury interior screws where moisture can reach them.
Permits are usually not required for a freestanding bookshelf, shop cabinet, or closet organizer, but local rules vary. Permits and inspections become more likely when the work changes structure, fire separation, egress, plumbing, electrical, HVAC, stairs, guardrails, or exterior weather barriers. Structural plywood panel joints are a separate category. Subfloor repairs, wall sheathing, roof decking, and shear walls are governed by building code, approved plans, panel stamps, span ratings, edge blocking or tongue-and-groove requirements, nail or screw schedules, and local amendments. Do not replace those requirements with shop joinery advice.
Free tools Windows power users keep installed
One-click scans. No signup required.
Our Practical Recommendation
For most homeowners and remodel projects, the best plywood joint is the one that matches the load and finish. Use a 1/4-inch to 3/8-inch dado in 3/4-inch plywood for shelves and vertical dividers, then add a solid-wood front edge when stiffness and appearance matter. Use a rabbet for case corners and backs, but reinforce it with glue and screws, brads, confirmat screws, cleats, a back panel, or a face frame. Use pocket screws and glue when you need fast hidden assembly and can clamp the joint accurately.
The work starts before the blade touches the sheet. Measure actual plywood thickness, make test cuts from offcuts, cut matching joinery from the same reference face and edge, dry-fit the entire box, and choose screws for the material and environment. That simple discipline prevents most plywood joint failures we see in the field.
A strong joint is not just a joint that survives a shop test. It is a joint that fits the plywood grade, carries the real load, tolerates the room it lives in, accepts the right finish, and connects into the rest of the building correctly. Get those pieces right and these three plywood joints are more than strong enough for serious cabinet, built-in, and site carpentry work.
Frequently Asked Questions
What is the strongest joint for 3/4-inch plywood?
For shelves, dividers, and case partitions, a full-width dado or groove is usually the strongest practical joint because it captures the mating panel and adds glue surface. A 1/4- to 3/8-inch-deep dado in 3/4-inch plywood is a common working range.
Are pocket holes strong enough for plywood cabinets?
Yes, pocket holes are strong enough for many plywood cabinets when the screws are hidden, the joint is clamped, and glue is used on clean wood-to-wood surfaces. For most 3/4-inch plywood, start with 1-1/4 inch coarse-thread washer-head pocket screws and test on offcuts.
Should plywood dados be half the thickness of the panel?
Roughly half the panel thickness is a common guideline, but it is not automatic. In 3/4-inch plywood, 1/4 to 3/8 inch is often practical. Avoid cutting so deep that the receiving panel loses too much strength.
Do plywood joints need glue, screws, or both?
Use both when appearance and access allow. Glue works well on clean raw wood surfaces, while screws add clamp force and mechanical holding. For prefinished plywood, expose raw wood at the joint or rely more heavily on mechanical fasteners unless the adhesive is rated for the finish.
Can these plywood joints be used for structural sheathing or subfloor repairs?
No. These are woodworking and carpentry joints for cabinets, shelves, built-ins, and shop assemblies. Structural plywood panels must follow the approved plan, panel stamp, span rating, blocking or tongue-and-groove requirements, fastener schedule, and local inspection rules.
Do I need a permit for built-in plywood shelves or cabinets?
Usually not for freestanding shelves or ordinary closet and cabinet work, but local rules vary. Permits are more likely if the work affects structure, fire separation, egress, stairs, plumbing, electrical, HVAC, or exterior weather protection.
Quick Recap
Product prices and availability are accurate as of the date/time indicated and are subject to change. Any price and availability information displayed on Amazon at the time of purchase will apply.

