The Tool Desk
Outbyte Driver Updater FREEScan for outdated or missing drivers - takes under a minuteDriver Scan →Outbyte PC Repair FREEClear out junk files and repair common Windows errorsFree Scan →The right door depends on which route you want: from the garage into a mudroom, or from outdoors into the garage or mudroom. A garage-to-home doorway must preserve the required separation between the garage and dwelling; a new exterior doorway must be framed safely and tied into the wall’s water-control system. Before cutting anything, ask your local building department which permits, inspections and code rules apply.
Choose the route before choosing the door
“A grocery entry door” can mean two different projects. You might want to carry bags directly from the attached garage into a mudroom, or you might want a new exterior entrance into the garage or mudroom from a driveway, side yard or other outdoor area. The distinction matters: a door between an attached garage and the dwelling is subject to garage-separation rules, while a new opening through an exterior wall has weatherproofing requirements and may affect the structure.
As an Amazon Associate I earn from qualifying purchases.
| Route | Main benefit | Key questions | Principal construction concern |
|---|---|---|---|
| Garage to mudroom | A direct path from the parked car to the home’s entry or storage area. | Does the doorway open into the dwelling? Is the wall part of the garage separation? Is there room for the door swing and a safe landing? | The opening and door assembly must meet the locally adopted garage-separation requirements. |
| Exterior to garage or mudroom | A separate route from outdoors, which can avoid carrying bags through another part of the house. | Which side of the building is accessible? Where will the door swing and land? Will the proposed wall opening affect framing, utilities or drainage? | The opening may require structural framing and must be integrated with the exterior wall’s drainage plane. |
Neither route is best for every house. The practical choice depends on the path you use, the wall’s framing and services, available room for a door and landing, and the approvals required locally. A drawing that marks the car, existing doors, proposed doorway, door swing and grocery-carrying path can help you and the building official discuss the same project.
Recommended Free Tools
Check code, permits and inspections first
Contact your local building department before demolition or cutting. Ask which residential code edition and local amendments apply, whether a permit is needed for the new opening and framing, and what inspections or plan details will be required. Rules vary by jurisdiction and project; a model-code example is not a substitute for the adopted local code or an official interpretation.
#1 Best Overall
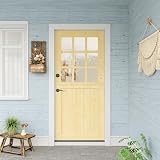
- Trend Design: Dutch door is a versatile, stylish home pick, complete with 4 hinges, 1 latch, 1 set lock and 1 jamb. Its midpoint split lets the upper half open alone; the latch connects both halves when needed. The keyhole-equipped lock provides secure locking to deter unauthorized entry. Hinges are not pre-installed — you can mount them as left or right, inward or outward swing to match your space — ensuring smooth operation, letting in light and air while keeping kids and pets safe.
- Multi-Scene Adaptability: Beyond functioning as an entry door, kitchen door, or balcony door, this wooden Dutch door also works as an indoor partition (e.g., between living room and entrance, study and corridor). It separates spaces without blocking visual communication. With its natural wood texture, it blends smoothly with various home decor styles such as American, Nordic, and pastoral, combining functionality with decorative appeal.
- Durable Wood Material + Exquisite Craftsmanship: Extend Service Life:The solid wood surface has a waterproof, scratch-resistant, wear-resistant coating—daily cleaning only needs a damp cloth, resisting kitchen oil and balcony rain. Rounded polished edges reduce bump injury risk. Rust-proof alloy hardware ensures relatively smooth, noiseless opening/closing; it’s less likely to loosen or stick long-term, cutting maintenance costs.
- Flexible Partition Design:This wooden Dutch door features a split-top design that allows you to open the upper half independently. It helps maintain good indoor air circulation, lets natural sunlight flow in, and helps prevent pets from wandering outside, as well as keeps outdoor fallen leaves at bay. Particularly suitable for spring and autumn use, it meets the dual needs of "ventilation without disorder and protection without stuffiness".
- PRODUCT SIZE: Engineered with 1.75-inch thick natural pine wood – 40% thicker than standard 1.38-inch interior doors – this Dutch door slab measures 36"W x 80"H (split into dual 40" upper/lower sections),Fits door openings measuring(Without Jamb) 38"W x 81.5"H,Fits door openings measuring(With Jamb) 36.25"W x 80.5"H. with 4 hinges and 1 Latch, whether replacing existing front entry doors or creating interior/exterior partitions in house renovations."
For a garage-to-dwelling opening, ask specifically what door construction, closing and latching provisions are required at that location. Do not assume that a standard interior door or an ordinary exterior prehung unit is acceptable just because it fits the opening. Confirm the required assembly and hardware before ordering.
The 2021 International Residential Code (IRC), Chapter 3, Section R302.5.1, provides a model-code starting point. It states, “Openings from a private garage directly into a room used for sleeping purposes shall not be permitted.” For other openings between a private garage and a residence, its listed door options include a solid wood door at least 1 3/8 inches thick, a solid or honeycomb-core steel door at least 1 3/8 inches thick, or a 20-minute fire-rated door. The model text also calls for self-latching and self-closing or automatic-closing provisions. These are the 2021 IRC model provisions, not a universal ruling; the code adopted where the home is located and any amendments govern. See the 2021 IRC, Chapter 3.
Requirements can differ substantially across jurisdictions. For example, British Columbia’s 2024 Building Code calls for a tight-fitting, weather-stripped door between a garage and dwelling that provides an effective barrier against gas and exhaust fumes, and requires a self-closing device. It also bars a doorway into a room intended for sleeping. This is a British Columbia example, not a rule for other locations; consult the British Columbia Building Code 2024 only if that jurisdiction applies to your project.
Assess the wall, load path and concealed services
A door needs a rough opening, and making one can interrupt wall framing. Before choosing a location, determine whether the wall carries loads from above and whether plumbing, wiring, ducts or other services run through the proposed opening. Do not treat a wall as non-load-bearing merely because it is an interior wall, or assume that a clear-looking patch of drywall means the cavity is free of services.
In a load-bearing exterior wall, a structural header carries loads above the new opening and transfers them to supporting posts at the sides. Header dimensions and support details depend on the opening span, loads, construction and site conditions. There is no safe universal header size for an unknown house. If the load path, existing framing or required design is uncertain, have a qualified structural professional or appropriately qualified contractor review it before framing. The U.S. Department of Energy’s Building America guidance describes the header’s load-transfer role in Advanced Framing: Insulated Headers.
Rank #2

- PRECISE SIZING & 40% THICKER SOLID PINE:1.75-inch thick solid pine Dutch door (40% thicker than standard 1.38"doors), 32"W x 80"H split slab. Fits 34"W x 81.5"H (no jamb) / 32.25"W x 80.5"H (with jamb) openings, prepped with 4 hinges & 1 latch. Ideal for front entry replacement or interior/exterior renovations.
- DUTCH DOOR SPLIT DESIGN FOR PET & YOUTH SAFETY:Classic split Dutch door with independent top/bottom panels, perfect for fresh air and pet/youth safety. Timeless farmhouse style complements modern/rustic decor, maximizes natural light, blending vintage charm with everyday practicality.
- PREMIUM KILN-DRIED SOLID PINE & SGCC-CERTIFIED TEMPERED GLASS:Built from natural solid pine wood with professional kiln-dried processing, this door resists warping and cracking caused by humidity fluctuations for long-lasting durability. Paired with 4mm SGCC-certified tempered clear glass, it delivers reliable impact resistance while maintaining crystal-clear transparency. The unfinished surface accepts any stain or paint, offering endless customization to match your home decor.
- UNIVERSAL FIT FOR INDOOR & OUTDOOR USE:Versatile Dutch door for pantries, bedrooms, porches, and exterior entries. Universal left/right swing without extra drilling. Thick solid pine construction works as entry door, interior partition, or porch door.
- 24/7 AFTER-SALES SUPPORT:24-hour dedicated support for installation, parts, or quality issues. Our team resolves concerns promptly to ensure a satisfying purchase experience.
Tell the building department whether the proposed opening is in an exterior wall, a garage separation, or both. Ask what plans or structural information it needs before work begins. If the project involves a garage-to-dwelling wall and an exterior opening, both structural design and garage-separation details may be relevant; resolving only one does not settle the other.
Plan the doorway around daily use
Grocery convenience depends on more than the shortest route. Consider where a person carrying bags will stand, whether the door will block a parked car or another passage, and whether there is a usable landing on both sides. Check the proposed swing against shelves, cabinetry, appliances, stairs and existing doors. If a door cannot open far enough to move through comfortably or would be obstructed by stored items, the location may not work as intended.
PC Slower Than It Used to Be?
A free scan shows the junk files, broken settings and background clutter dragging Windows down - then fixes them in one click.Free scan · Windows 10 & 11Crashes, No Sound, or Screen Glitches?
Random freezes, missing sound and display glitches usually trace back to one bad driver. Find and replace yours safely.Free scan · under a minute- Map the path: Trace the route from the usual parking spot to the place where groceries are unloaded. Note steps, turns and other doors along it.
- Mark the swing: Show the door leaf’s full arc and the space needed to stand and carry items through. Confirm the planned swing and landing with the permit authority and door instructions.
- Check both faces of the wall: Look for shelves, cabinets, vehicles, equipment and circulation routes that could conflict with the new opening.
- Locate services: Identify likely utilities before opening the wall, and arrange qualified help if their location or rerouting is uncertain.
- Compare disruption: An exterior opening introduces weatherproofing work and may affect a load-bearing wall. A garage-to-mudroom opening has garage-separation requirements. The specific wall and route determine which issues apply.
Select the door assembly to match its location
For an exterior entrance, a prehung door assembly can simplify alignment because the door is supplied in its frame, but the correct size and installation details come from that unit’s manufacturer. For an opening between an attached garage and dwelling, verify that the door’s construction or listing and its self-closing and latching hardware meet the locally adopted requirements. The label “exterior door” alone does not establish compliance for a garage-to-home location.
Before ordering, use the selected manufacturer’s specifications to determine the required rough-opening dimensions and installation clearances. Confirm handing and swing, threshold or sill details, and compatibility with the wall assembly. For an exterior door, also plan the sill pan and flashing materials that fit the door and exterior cladding. A level and framing square are useful installation tools, but accurate layout does not replace an approved structural design or inspection.
For doors adjacent to unconditioned spaces, including garages, the Department of Energy’s Building America guidance treats air sealing similarly to exterior doors: use continuous frame weatherstripping, a tight-fitting bottom sweep, and seal the gap between the frame and rough opening. See Air Sealing Doors Adjacent to Unconditioned Space. Follow the door manufacturer’s installation instructions and any locally required assembly details.
Rank #3

- Door Size: 30" x 80" - Door Size Including Frame: 31.5" x 81.75" - Suggested Rough Opening: 32" x 82.25"
- Primed door: Clear glass is double paned, tempered and insulated. 15 lite external grilles.
- 2-1/8 inch entry and deadbolt bore prep. Left-Hand/Inswing: When viewed from the exterior of the home, a left-hand/inswing has the hinges on the left, the knob on the right and swings into the home
- Durable fiberglass door will not rot, warp, dent or split. Prehung on 4-9/16 inch wide primed Finger-Jointed frame.
- Door is for residential use only.
Install the opening in a controlled sequence
- Get approvals and confirm the design. Obtain required permits and settle the opening location, door assembly, structural framing and inspection sequence with the relevant professionals and building department before demolition.
- Verify dimensions and conditions. Measure against the selected door manufacturer’s rough-opening specifications. Confirm the proposed opening against the approved framing plan; check the intended swing and clearances again before making cuts.
- Open the wall carefully. Remove finishes in a controlled way and inspect the framing, sheathing and surrounding materials. If you find water damage, rot, unexpected framing or utilities, stop and resolve the issue before proceeding. Do not cover damaged or unapproved work.
- Frame to the approved design. Install the specified header, supports and other framing details if the opening is in a load-bearing wall. Do not substitute a guessed header size or omit required support. Arrange required inspections at the stages specified by the building department.
- Set the prehung unit. Install it according to the manufacturer’s directions. Use a level and framing square to check that the unit is level, plumb and square, and verify that the door operates without binding before finishing the opening.
- Flash an exterior opening as a system. Provide sill or pan flashing, jamb flashing and head flashing, integrated with the wall’s drainage plane and installed in the correct drainage order. The specific details depend on the cladding, wall assembly, door and manufacturer instructions.
- Air-seal and weatherstrip. Seal the frame-to-rough-opening gap with an appropriate non-expanding foam, backer rod or caulk. Install continuous perimeter weatherstripping and a tight-fitting sweep. Fibrous batt insulation alone does not stop airflow.
- Restore finishes and preserve required separation. Complete interior and exterior finishes without defeating the approved garage separation or covering work that still needs inspection. Confirm that required closing and latching hardware is installed and functions as intended.
- Complete inspections and closeout. Obtain required inspection signoff before treating the project as complete. Keep the permit or approval records and the door’s installation information with the house documents.
Keep exterior water out with layered flashing
For a new exterior doorway, flashing is part of the wall’s water-control strategy, not a cosmetic bead around the frame. The Department of Energy’s fully flashed-opening guidance describes a sequence in which sill or pan flashing is installed first, jamb flashing laps over the sill flashing, and head flashing laps over the jambs. The flashing must connect to the wall’s drainage plane so water can drain outward. Consult Windows and Doors are Fully Flashed and the door manufacturer’s details for the assembly in question.
Exact materials and overlaps vary with the exterior cladding and wall construction. A sill pan and compatible flashing tape may be relevant, but one product does not by itself make an opening watertight. Exterior caulk alone is not a substitute for properly layered flashing tied into the drainage plane. If the existing wall’s water-control layers are unclear, have the installation detail reviewed before closing the wall.
Air-seal the frame and preserve the garage barrier
Once the door is aligned and secured, close the gap between its frame and rough opening with a suitable non-expanding foam, backer rod or caulk, as appropriate for the gap and product instructions. Expanding foam that distorts a frame can interfere with door operation, so use a product and application method appropriate to the door installation. Batt insulation may fill a cavity but does not provide the air seal by itself.
Fit continuous weatherstripping around the frame and a tight-fitting bottom sweep. At a garage-to-dwelling doorway, these measures support a tight barrier, but they do not replace the required door construction, closer or latch. Confirm operation after the seal and hardware are installed: the door should open and close freely, and required self-closing and latching features should work reliably.
Quick Recap
Common mistakes and how to avoid them
- Cutting first and asking about permits later: A new opening may require approval, inspections or structural documentation. Contact the building department before demolition.
- Assuming every door is acceptable between a garage and home: Verify the locally required door construction and closing and latching provisions before purchase.
- Using an unverified header size: Header and support design depend on the actual house and opening. Have the load path reviewed rather than relying on a generic dimension.
- Ignoring concealed utilities: Investigate services before cutting and stop if unexpected wiring, piping or other obstructions appear.
- Relying on exterior caulk instead of flashing: Use a flashing sequence integrated with the drainage plane; caulk alone does not provide that system.
- Filling the frame gap with batt insulation only: Use an appropriate air-sealing material and install frame weatherstripping and a bottom sweep.
- Finishing before required inspections: Keep work accessible until the building department’s required inspection stages are complete.
Project closeout checklist
- Required permits and inspections are complete, with signoff documented.
- The garage-to-dwelling door and any closer or latch meet the locally adopted requirements, if applicable.
- The garage separation remains intact after framing and finish work.
- Exterior sill, jamb and head flashing are integrated with the drainage plane, where applicable.
- The frame gap is air-sealed, perimeter weatherstripping is continuous, and the bottom sweep fits tightly.
- The door opens and closes without obstruction, and the planned grocery route has usable clearance.
Product prices and availability are accurate as of the date/time indicated and are subject to change. Any price and availability information displayed on Amazon at the time of purchase will apply.
Quick wins for a faster PC:
Scan for outdated or missing drivers - takes under a minuteDriver Scan →Repair Windows errors before they cause bigger problemsFix Now →Fix the driver behind crashes, sound loss and screen glitchesFind Drivers →