Recommended Free Tools
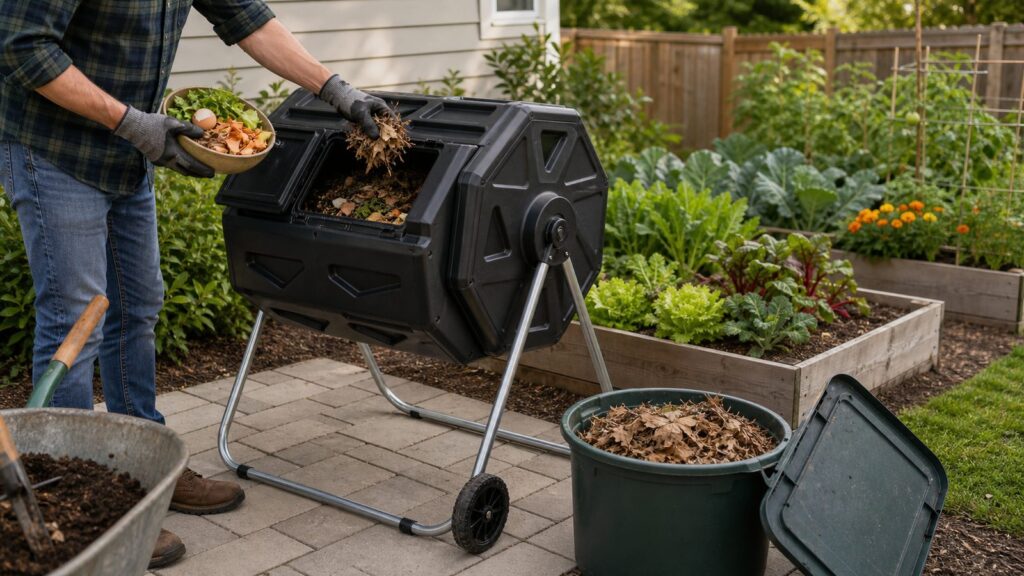
A compost tumbler is one of the cleanest ways to compost in a small yard, but it only works well when you manage it as a batch. Load it with a balanced mix of dry carbon materials and fresh nitrogen materials, keep it about as damp as a wrung-out sponge, rotate it several times per week, then stop adding new scraps and let that batch finish.
The biggest mistake homeowners make is treating a tumbler like a sealed garbage can. Kitchen scraps go in every day, dry leaves never get added, the chamber gets overloaded, and a few weeks later the unit smells sour and rolls like a wet sandbag. Used correctly, a residential tumbler can produce usable compost in roughly 4 to 8 weeks of active decomposition under good conditions, followed by another 4 to 6 weeks or longer of curing for garden-safe maturity. Cold weather, small batches, low nitrogen, and poor moisture can stretch that timeline to several months.
On our job sites, we think about compost tumblers the same way we think about any small exterior installation: it needs stable footing, drainage, working clearance, and convenient access. A well-placed tumbler gets used. A wobbly one tucked behind a shed usually gets ignored by November.
What a Compost Tumbler Does Well
A compost tumbler is a sealed or mostly enclosed composting drum mounted on a frame so the homeowner can rotate the contents instead of turning a pile with a fork. Most residential models hold about 37 to 45 gallons, with larger units around 65 gallons. Dual-chamber tumblers are the most practical for steady household use because one side can be filling while the other side is decomposing.
Free tools Windows power users keep installed
One-click scans. No signup required.
#1 Best Overall

- Twin chambers: Two separate chambers allow one side to finish composting while leaving the other side available to add fresh wastes; Constant alternation of the two sides will create an uninterrupted stream of nutritious compost
- 360⁰ Tumbling Design: The rotating design prevents you from digging or mixing the pile by hand; And the deep fins on eight panels make it easier to turn the compost bin
- Excellent Aeration: Air vents can make the air fully circulate and will not cause an explosion due to excessive internal pressure; Deep fins can better break the clumps, which is conducive to the full fermentation of oxygen
- Sturdy & Durable Construction: Constructed of premium metal frame and high-quality pp plastic body, this tumbling composter is corrosion-resistant, weathering-resistant, sturdy, and durable for long-lasting service life
- Garden Gloves Included: The gloves that not only protect your hands from injury, but are also waterproof, making them easy to clean; With 4 durable ABS plastic claws for easy digging, planting and other gardening work
Tumblers are useful for small yards, suburban lots, and homes where an open compost pile would be too visible or too easy for animals to disturb. The elevated drum keeps material contained, makes mixing easier, and can reduce rodent access compared with an open pile. It does not remove the need for correct ingredients. If you add wet food scraps without enough dry browns, the tumbler can still smell, attract flies, and produce sludge.
The practical advantages are simple: less mess, faster mixing, fewer tools, and better control. The limitations are also real: limited capacity, winter slowdown, and the need to finish each batch before using the compost. A small half-empty tumbler in January should not be expected to perform like a large hot compost pile in June.
Choosing the Right Tumbler Size and Type
For most households, a dual-chamber tumbler in the 37 to 45 gallon range is the best starting point. That size is large enough to handle routine fruit and vegetable scraps, coffee grounds, garden trimmings, and fall leaves, but still small enough to rotate when partially full. A 65 gallon unit gives more capacity, but once wet organic material accumulates, weight matters. Compost can become heavy fast.
If you cook often, garden regularly, or have a family of four producing daily food scraps, choose a dual-chamber model rather than a single barrel. With a single chamber, you have to stop adding fresh material while the batch finishes. With two chambers, you can fill one side while the other side breaks down and cures.
Quick wins for a faster PC:
Fix the driver behind crashes, sound loss and screen glitchesFind Drivers →Repair Windows errors before they cause bigger problemsFix Now →Scan for outdated or missing drivers - takes under a minuteDriver Scan →| Option | Typical 2026 Cost | Best For | Watch For |
|---|---|---|---|
| Budget 37-43 gallon dual-chamber tumbler | $53-$85 | Small yards, first-time composting, light household use | Thinner plastic, smaller doors, lighter frames, more assembly frustration |
| Midrange 37-45 gallon tumbler | $90-$180 | Most homeowners who want regular use | Check door quality, frame stiffness, UV-resistant resin, and replacement parts |
| Large or premium 65 gallon tumbler | $200-$300+ | Bigger gardens, heavier seasonal yard waste, larger households | Loaded weight, footprint, turning effort, and pad stability |
| DIY food-grade barrel tumbler | $40-$120 with salvaged barrel; $100-$200+ with new drum and upgraded stand | Handy homeowners with tools and time | Ventilation, drainage, safe barrel history, frame strength, and latch security |
Site preparation is usually modest. If the yard is level and drains well, you may only need a few pavers. If the area is muddy, sloped, or soft, budget $20 to $150 for compacted gravel, leveling sand, pavers, or a small pad. That is money well spent. A full tumbler on uneven soil can twist, bind, tip, or become difficult to rotate.
Where to Place a Compost Tumbler
Put the tumbler where it is convenient in bad weather, not just where it looks good in summer. You should be able to reach it with a kitchen pail, garden cart, or wheelbarrow without walking through mud. Leave clearance on all sides so the drum can rotate fully and the doors can open without hitting a fence, wall, shrub, or HVAC unit.
A good setup is a level pad at least 3 feet by 4 feet for a typical small dual-chamber unit, with more room if you want to unload into a wheelbarrow. Use concrete pavers, compacted gravel, or a small hardscape pad. Slope the surrounding grade so any leachate or rainwater drains away from foundations, patios, wells, crawlspace vents, and neighboring outdoor living areas.
Keep the unit out of drainage swales and low spots. A tumbler sitting in a wet depression will be unpleasant to use and may stay too damp. A little sun can help warm the batch, but full exposure in a hot climate can dry the contents quickly. Partial sun is often a good compromise.
Setbacks, HOAs, and nuisance rules
Backyard composting rules vary by city, county, and HOA. Many communities allow enclosed residential composting but prohibit nuisance odors, pest attraction, runoff, or placement too close to property lines. Before installing a tumbler, check local ordinances and HOA rules for setbacks, permitted container types, and nuisance language. A typical small residential tumbler rarely needs a building permit, but local rules control.
As a contractor, our practical advice is to place it like a considerate utility item: not against a shared fence, not below a neighbor’s window, not beside an outdoor dining area, and not where drainage carries residue across a sidewalk or property line.
What to Put in a Compost Tumbler
Compost needs carbon, nitrogen, oxygen, and moisture. In homeowner terms, that means browns, greens, air, and water. The technical carbon-to-nitrogen target is about 25:1 to 30:1, but nobody is weighing molecules in the backyard. A practical rule is to start with roughly 2 parts browns to 1 part greens by volume for odor control, then adjust based on smell and moisture. Some simple guides use 1:1 by volume; that can work if the greens are not too wet and the browns are absorbent.
Browns
Browns are carbon-rich dry materials. Use dry leaves, shredded non-glossy paper, plain cardboard, straw, small wood chips, dry garden debris, and small amounts of untreated sawdust. Shred or chop bulky material so it mixes instead of matting. Keep a covered bin or bag of browns next to the tumbler. That one habit prevents most odor problems because every food-scrap addition can be capped with dry carbon.
The Tool Desk
Outbyte Driver Updater FREEScan for outdated or missing drivers - takes under a minuteDriver Scan →Outbyte PC Repair FREEClear out junk files and repair common Windows errorsFree Scan →Rank #2

- ✅Speed Up Composing Process: More advanced models use rotating to bring oxygen to the center of the bin and paddles inside the chamber to help mix and aerate the composting materials when turned. These improvements or modifications are designed for one reason: to speed the composting process.
- ✅How do Compost Tumblers work? Simple. You load them with green and brown waste from your yard and kitchen. When full, you give them time to work, in other words, heat up. Turning a compost pile mixing the organic materials and the organisms it contains with heat-producing oxygen is the traditional method of keeping the process going full steam. By turning the tumbler, the organic materials are mixed and infused with fresh oxygen.
- ✅Easy to Access Finished Compost: Just Slide the door open and take the organic fertilizer out when the compost is ready. When a check reveals the compost is complete —and this can happen in a matter of weeks —the same access that allowed you to fill the tumbler lets you empty it. Now is the time to spread the results.
- ✅Dual-Bin Design: The dual bin design takes a different approach to the continuous-use composted concept, Two bins are set side-by-side into a single rotating chamber. Thickly insulated compartments conserve the heat generating by the decaying matter, and this greatly speeds the process. This design also allows you to add food waste to one chamber while the other is composting.
- ✅Totally Organic and Money-Saving: If you're looking for a fast, convenient way to compost your kitchen throw-outs, grass clippings, and organic yard waste, our outdoor kitchen compost bin is just right for you! The Compact Compost Tumbler quickly recycles it into nutrient-rich compost.
Greens
Greens are nitrogen-rich fresh materials. Use fruit and vegetable scraps, coffee grounds, tea leaves, fresh grass clippings in thin layers, spent annuals, and fresh plant trimmings. Chop larger scraps into 1 to 2 inch pieces. Smaller particles break down faster and tumble more evenly.
What to keep out
Do not add meat, bones, dairy, fats, oils, pet waste, diseased plants, pesticide-treated plant material, or mature weed seeds to a standard backyard tumbler. These materials can create odor, attract pests, spread problems into the garden, or fail to break down safely in a small residential system.
How to Start the First Batch
Start with a layer of browns in the bottom of the chamber. A few inches of dry leaves, shredded cardboard, or straw helps absorb moisture from food scraps and keeps the first load from turning into paste. Then add greens and browns in alternating small loads.
Do not pack the chamber solid. A tumbler needs air space and rolling action. Stop filling when the chamber is about two-thirds to three-quarters full. If it is packed to the door, the contents will move as one heavy mass instead of lifting and falling. That means poor mixing, less oxygen, and slower composting.
After loading, add water only if the mix feels dry. The target is moisture like a wrung-out sponge: damp enough to hold together slightly, not wet enough to drip. If water runs out when you squeeze a handful, it is too wet. If the material is dusty and loose, it is too dry.
Close the door, open the vents if the model has adjustable vents, and rotate the drum several turns. That first mixing matters because it distributes moisture and helps the browns absorb liquid from the greens.
How Often to Turn a Compost Tumbler
Rotate the tumbler daily if you can. Several times per week should be considered the minimum for an active batch. The goal is to add oxygen and mix wet and dry pockets before they become anaerobic. You do not need to spin it endlessly. Five to ten full rotations is usually enough for a small residential drum.
If the batch is very wet and heavy, turning may be difficult. Do not force a binding frame or lean your full body weight into a lightweight unit. Open the chamber, add coarse dry browns, break up clumps with a hand cultivator or trowel, and remove some material if the tumbler is overloaded.
Windows Errors? Fix Them Before They Spread
Repair common Windows errors and clear accumulated junk for a smoother, more stable PC - no reinstall needed.Free scan · no reinstallOutdated Drivers Are Slowing You Down
One free scan finds every outdated or missing driver and matches the right update for your exact hardware.Free scan · exact hardware matchDuring active composting, check the batch once or twice per week. Look for heat, moisture, smell, and texture. A healthy batch smells earthy or mildly sweet. A sour, rotten, or ammonia smell means the mix needs correction.
How Long Compost Takes in a Tumbler
Under good conditions, a tumbler can move through the active decomposition phase in about 4 to 8 weeks. Good conditions mean enough volume to hold heat, chopped materials, balanced browns and greens, steady moisture, and frequent turning. In cooler weather, with a small batch, or with too many dry leaves and not enough nitrogen, the same process can take several months.
Do not judge readiness only by color. Compost can look dark before it is mature. For use around vegetables, seedlings, or tender plants, curing matters. After the active phase, move the material to a curing bin, lidded tote with ventilation, or quiet pile for another 4 to 6 weeks or longer. This frees the tumbler for the next batch and gives the compost time to stabilize.
Finished compost should be dark, crumbly, earthy smelling, and no longer heating after turning. Screen it over a wheelbarrow with a half-inch hardware cloth screen if you want a finer product. Return large pieces to the next batch as bulking material and microbial starter.
Rank #3
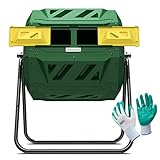
- ✅Speed Up Composing Process: More advanced models use rotating to bring oxygen to the center of the bin and paddles inside the chamber to help mix and aerate the composting materials when turned. These improvements or modifications are designed for one reason: to speed the composting process.
- ✅How do Compost Tumblers work? Simple. You load them with green and brown waste from your yard and kitchen. When full, you give them time to work, in other words, heat up. Turning a compost pile mixing the organic materials and the organisms it contains with heat-producing oxygen is the traditional method of keeping the process going full steam. By turning the tumbler, the organic materials are mixed and infused with fresh oxygen.
- ✅Easy to Access Finished Compost: Just Slide the door open and take the organic fertilizer out when the compost is ready. When a check reveals the compost is complete —and this can happen in a matter of weeks —the same access that allowed you to fill the tumbler lets you empty it. Now is the time to spread the results.
- ✅Dual-Bin Design: The dual bin design takes a different approach to the continuous-use composted concept, Two bins are set side-by-side into a single rotating chamber. Thickly insulated compartments conserve the heat generating by the decaying matter, and this greatly speeds the process. This design also allows you to add food waste to one chamber while the other is composting.
- ✅Totally Organic and Money-Saving: If you're looking for a fast, convenient way to compost your kitchen throw-outs, grass clippings, and organic yard waste, our outdoor kitchen compost bin is just right for you! The Compact Compost Tumbler quickly recycles it into nutrient-rich compost.
Troubleshooting Common Compost Tumbler Problems
It smells rotten
The batch is probably too wet, too dense, or too heavy on greens. Add dry browns such as shredded cardboard, dry leaves, or straw. Open the vents, rotate the tumbler, and stop adding food scraps until the smell improves.
It smells like ammonia
There is too much nitrogen. Add carbon. A few handfuls of shredded cardboard may not be enough if the chamber is loaded with grass clippings or kitchen scraps. Add browns until the texture loosens and the smell fades.
It is not heating
The batch may be too dry, too small, too cold, or short on nitrogen. Add greens such as coffee grounds or fresh grass clippings in thin layers, check moisture, and make sure the chamber is at least half full. Do not expect strong heat from a small batch in winter.
It forms a wet heavy ball
This happens when the mix is overloaded, too wet, or too fine. Break the mass apart, add coarse dry browns, check vent and drain openings, and remove some material if needed. The contents should tumble and cascade, not roll as one lump.
There are flies or larvae
Some insect activity is normal in compost. Soldier fly larvae can help process organic material, but a cloud of flies usually means exposed food scraps or excess moisture. Bury food scraps in the center of the batch, cap each addition with browns, and keep doors latched.
Using Finished Compost Around the Yard
Finished compost is a soil amendment, not a replacement for soil. In garden beds, spread 1 to 2 inches over the surface and mix it into the top few inches of soil, or use it as a light topdressing around established plants. For lawns, screened compost can be applied as a thin topdressing, typically about one-quarter inch, then raked in so grass blades are not buried.
Do not plant directly into pure compost. It can hold too much moisture, contain soluble salts, or be too biologically active for young roots. For containers, blend mature screened compost with potting mix rather than using it alone.
If the compost still has recognizable food scraps, sour odor, slimy clumps, or heat after turning, it is not finished. Put it back into the curing stage. Using immature compost too soon is one of the easiest ways to stress seedlings and vegetable beds.
Do these 3 things before closing this tab:
1Fix the driver behind crashes, sound loss and screen glitches2Repair Windows errors before they cause bigger problems3Scan for outdated or missing drivers - takes under a minuteWhen to DIY and When to Hire a Pro
Most homeowners can buy and assemble a compost tumbler without hiring anyone. A typical unit arrives flat-packed and can be assembled with basic hand tools in 45 minutes to 2 hours. DIY also makes sense if the location is level, close to the garden, and already drains well.
Consider hiring a landscaper, handyman, or small concrete crew when the site needs grading, a compacted gravel pad, pavers, or integration with a larger garden layout. If the tumbler will sit near a retaining wall, fence line, drainage path, or finished patio, getting the base right matters. A simple compacted gravel or paver pad is usually a small job, but it prevents years of wobble and mud.
DIY tumbler construction is reasonable for a capable homeowner using a clean food-grade barrel, strong hinges, secure latches, vent hardware, and a stout stand. The frame must handle dynamic load, not just static weight. Wet compost shifting inside a barrel puts twisting force on the axle and supports. If you are unsure about the barrel’s prior contents or the frame strength, buy a manufactured unit instead.
Safety and Maintenance Notes
Wear gloves when handling compost, especially if you have cuts or sensitive skin. Wash hands after loading or screening material. Keep the tumbler latched so children and pets cannot access decomposing food scraps. Do not let kids climb or hang on the frame.
What’s actually slowing this PC down?
Pick the symptom - the matching free tool is one click away.
Rank #4

- Dual Chamber, High Capacity: Our compost bin features a dual chamber with a generous capacity of 43 gallons. Perfect for large families and avid gardeners, you can simultaneously compost in one chamber while adding new organic material to the other, reducing overall composting time.
- Convenient Access: The dual-chamber composter tumbler features a detachable sliding door with a large opening, making it effortless to add waste or remove compost. The compost bin features a secure seal that effectively keeps out mice, insects, and other pests, ensuring a safe and efficient composting process.
- Built to Last: Crafted from high-quality PP materials and supported by sturdy metal components, our compost bin outdoor boasts a robust load-bearing capacity of 110 lbs. They are BPA-free, UV-resistant, and weatherproof, enduring direct sunlight, typhoons, rain, snow, and more.
- Effortless Tumbling: Say goodbye to the hassle of manual stirring. Our tumbling composter's innovative 360° tumble design ensures thorough mixing, faster decomposition, and higher-quality compost output. Simply roll it every few days, and you'll have compost ready in just 4-6 weeks.
- Optimized Airflow: The garden compost tumbler features strategically placed vents that promote proper air circulation and prevent potential issues. Internal grooves effectively break up clumps, ensuring uniform mixing of materials and accelerating the decomposition of organic matter.
Inspect the unit monthly during active use. Tighten bolts, check the stand for rust or movement, clear blocked vents, and make sure doors still slide or latch correctly. UV exposure, freeze-thaw cycles, and loaded rotation all wear on plastic and hardware over time.
In winter, expect slowdown. Keep adding browns with kitchen scraps if you are still filling a chamber, but understand that major breakdown may resume when temperatures rise. If the tumbler freezes, do not force it. Wait for thawing, then rebalance moisture and continue.
A Simple Weekly Routine That Works
Keep a lidded kitchen pail indoors and a covered browns container beside the tumbler. Every time you empty food scraps, add at least an equal volume of dry browns, and closer to twice the volume if the scraps are wet. Rotate the chamber five to ten times. Once per week, open it and check moisture by feel.
When the chamber reaches about two-thirds to three-quarters full, stop adding new material. Mark the date with tape or a garden tag. Keep turning several times per week during the active phase. When the material looks mostly broken down and smells earthy, move it to a curing bin for 4 to 6 weeks or longer, then start using it where mature compost belongs.
That is the difference between a tumbler that disappoints and one that becomes part of the household routine. The equipment is simple. The discipline is the batch process: load it correctly, turn it consistently, cure it patiently, and use the finished compost where it will improve the soil instead of creating new problems.
Frequently Asked Questions
How often should you turn a compost tumbler?
Daily turning is ideal during active composting, but several times per week is a practical minimum. Five to ten full rotations usually mixes a small residential tumbler well.
What is the right brown-to-green ratio for a compost tumbler?
A practical starting point is about 2 parts browns to 1 part greens by volume for odor control. The technical composting target is roughly a 25:1 to 30:1 carbon-to-nitrogen ratio.
How long does compost take in a tumbler?
Under good conditions, active decomposition often takes about 4 to 8 weeks. Curing can add another 4 to 6 weeks or longer, especially before using compost around seedlings or vegetables.
Can you keep adding scraps to a compost tumbler?
Not indefinitely if you want finished compost. Fill one chamber to about two-thirds or three-quarters full, then stop adding fresh scraps and let that batch process. A dual-chamber tumbler makes this easier.
Why does my compost tumbler smell bad?
Bad odor usually means too much wet green material, not enough dry browns, poor airflow, or overfilling. Add shredded cardboard, dry leaves, or straw, open vents, rotate, and pause new food scraps until it recovers.
Where should I place a compost tumbler?
Place it on a level, well-drained pad with enough clearance to rotate and unload it. Keep it away from foundations, drainage paths, HVAC equipment, shared fences, and neighbor outdoor living areas.
Quick Recap
Product prices and availability are accurate as of the date/time indicated and are subject to change. Any price and availability information displayed on Amazon at the time of purchase will apply.
Recommended Free Tools