Yes—you can run the same flooring through much of your home, but you should not choose a single product on appearance alone. Repeating one suitable floor works especially well where rooms share an open sightline, such as a hall, living room, dining area and kitchen. A coordinated mix is often better when moisture, noise, underfloor heating, subfloor construction, level changes or comfort differ. The reliable approach is to preserve visual flow where conditions match and change materials deliberately where the building requires it.
What “the same flooring throughout” actually means
Homeowners use this phrase to mean two different things. You might want one exact product in every room, including bathrooms and bedrooms, or you might want a consistent visual direction with only a few technically necessary changes. Those are not the same decision.
As an Amazon Associate I earn from qualifying purchases.
A continuous floor is most effective across connected sightlines. When an open-plan living, dining and kitchen area shares one suitable surface, the uninterrupted pattern can make the interior feel calmer and less visually busy. It does not physically enlarge the rooms; it simply reduces the number of visual breaks. The effect is strongest when the rooms are visible from one another and the floor can meet all of their performance requirements.
Recommended Free Tools
Separate rooms do not have to use identical material to feel related. Similar undertones, plank or tile proportions, edge details and trim can create a planned transition. Color similarity alone, however, does not make two products technically interchangeable.
#1 Best Overall

- Stylish - Authentic wood looking and grain texture, adding timeless feature for your home!
- Easy DIY - Just peel and stick down on the floor for installation, no power tools, no experience.
- Superior Property - Rigid surface and hard core, 100% waterproof, fire proof, wear resistant, scratch and abrasion resistant, high strength, no expansion, stable.
- Wide Application - Besides as flooring, it can be applied to wall, ceiling, cabinet by adding extra glue (liquid nail).
- Packaging Detail - Plank dimension: 6" width x 36" length, pack of 36 pcs, covers 54 sq.ft
When one flooring product is a good choice
Open rooms with one shared sightline
Continuing one product through a hall, living room, dining room and kitchen can make the circulation path read as one composition. It also avoids an awkward seam in the middle of a visible opening. Measure the entire connected area before ordering so that batch, color and installation direction are planned together.
Rooms with similar environmental demands
A single product is easier to justify when the rooms have comparable moisture exposure, temperature, sound expectations, substrate construction and heating conditions. “Similar” does not mean identical, but there should be no room whose conditions fall outside the product’s installation instructions.
Projects where future repairs should be simple
Using one product can simplify spare-stock storage and make a future repair less conspicuous. Keep unopened boards, planks or tiles from the same production run when possible; color and surface variation can make later replacements visible even when the product name is unchanged.
The Tool Desk
Outbyte Driver Updater FREEScan for outdated or missing drivers - takes under a minuteDriver Scan →Outbyte PC Repair FREERepair Windows errors before they cause bigger problemsFix Now →When mixing flooring is the more practical answer
Moisture-exposed rooms
Bathrooms, laundry rooms, mudrooms, entrances and below-grade areas deserve a moisture assessment before any product is extended into them. Water exposure can come from routine use, wet footwear, appliance leaks, condensation or a slab that is not adequately dry. A product marketed for general living spaces is not automatically suitable for a bathroom or basement. Confirm the exact product’s water limitations, subfloor requirements, perimeter detailing and maintenance instructions.
Bedrooms and quiet zones
Bedrooms may justify a different surface when warmth underfoot, footfall noise or acoustic absorption matters more than visual continuity. A door opening provides a natural place for a planned transition. The change can still look intentional if the materials share a compatible color family or grain direction.
Different subfloors, levels or heating systems
Concrete, wood framing, existing tile and other substrates can have different flatness, moisture and movement characteristics. A floor that is approved over one substrate may require preparation or a different installation method over another. Level changes also affect the transition detail: a profile designed for same-height surfaces is not a solution for a step or an abrupt height difference.
Rank #2

- 【NAACOO UNIVERSAL FLOOR KIT】 4 IN 1 Portable KIT--Tapping Block has unique combination edge design for use with most types of flooring, push tongue and groove wood floor together creating a tight seam, Match Spacers create a uniform gap between the wall. Pull Bar Flooring Tool suitable for work close to a wall, corner, closets or in tight spaces, closing the gaps and seams in laminate floors without causing damage. Rubber mallet can be used with pull bar hook and tapping block, which makes it easier to complete the floor installation work.
- 【Usage Scenarios 1 - MORE TYPES of FLOOR】UNIVERSAL BLOCK Suitable for TONGUE & GROOVE or CLICK-LOCK FLOOR.Just put portable tapping block on the floor tongue, then tapping it, make the tongue and groove or edges of resilient vinyl planks, laminate or hardwood, joins flooring planks creating tight seam.
- 【Usage Scenarios 2 - MORE THICKNESS of FLOOR】UNIVERSAL BLOCK With 3 DIFFERENT THICKNESS EDGES--to meet multiple size of flooring. The 1.5mm edge can install with a floor thickness of 3.5 mm ~ 5.5 mm. The 2.5mm edge can install with a floor thickness of 6mm~3/8in. The 3.5mm edge on the other side can install with a floor thickness of 10 mm ~ 12 mm. The 1.5mm edge (Thinnest one) of tapping block with an inclined angle, can hook the floor and prevent the floor from moving during knocking.
- 【STEEL PULL BAR】 Suitable for work close to a wall, corner, loser or in tight spaces. Adopt quenching process to treat. Made from premium 45# steel with frosting and matt coating. Better than A3 steel. Soft pads on the back can protect the floor from scratch.
- 【40pc WEDGE FLOORING SPACERS】The kit comes with 40 pieces of flooring spacers which are "slope design" and "non-slip design". The spacers have “serrated” edges that lock them into the correct position once a board is placed against them. The spacers are easy to insert and remove from the floor, making them a breeze to work.
Rooms with different comfort priorities
Kitchens and hallways often prioritize cleanability and traffic resistance, while a family room may prioritize resilience and acoustic comfort. If one material forces a compromise in a room that has a distinct need, a coordinated mixed-floor plan is usually more successful than treating the entire home as one technical zone.
A decision framework before you order samples
- Map the sightlines. Stand at the main entries and note which rooms are visible together. Mark continuous areas, door-separated rooms and changes in level.
- List each room’s conditions. Record moisture exposure, expected traffic, noise sensitivity, underfloor heating, sunlight, substrate type and comfort requirements.
- Shortlist products by instruction, not by image. Download the installation and care documents for the exact product and verify approved rooms, substrates, acclimation, movement space and transition rules.
- Choose the visual anchor. In a connected zone, decide whether the floor’s color, grain or tile pattern should be the dominant element. Keep walls, cabinetry and thresholds in mind so the floor is not competing with every surface.
- Plan every boundary. Draw where flooring changes occur and specify whether each opening needs a T-molding, reducer, end profile, edge protection or another detail.
- Order samples large enough to judge. View them in daylight and artificial light, beside cabinets and trim, and across the actual rooms. Small samples can hide repeating patterns and undertone differences.
- Reserve spare material. Store labeled pieces in a dry, stable location after installation. Record the product name, color, lot and installation date.
Room-by-room guidance
| Area | Use one floor when… | Consider a change when… |
|---|---|---|
| Entry and hall | The product tolerates tracked moisture and the hall is part of the main sightline. | Wet footwear, grit or frequent cleaning exceeds the product’s stated limits. |
| Living and dining rooms | They connect directly and the substrate and comfort requirements match. | Acoustic control, softness or a separate construction zone is more important. |
| Kitchen | The product is approved for the room and its cleaning and spill limits are acceptable. | Water exposure, appliances or a different subfloor create requirements the product cannot meet. |
| Bathroom | Only when the exact product instructions address the room’s moisture conditions and installation details. | The documentation excludes wet areas or leaves water management unclear. |
| Laundry or mudroom | The product and underlayment are specifically suitable for the expected exposure. | Leaks, floor drains, wet equipment or heavy grit make a more specialized surface prudent. |
| Bedroom | Continuity is desired and warmth and sound performance are acceptable. | A quieter, softer or warmer surface better serves the room. |
| Basement | The slab moisture, vapor conditions and product approval all align. | Moisture testing, heating or substrate conditions do not meet the instructions. |
This table is planning guidance, not a substitute for the installation document for the product you buy. Local building conditions can change the answer.
Luxury vinyl plank: a category to investigate, not a universal solution
Luxury vinyl plank (LVP) is often considered for continuous flooring because many products are available in plank formats that can visually connect rooms. That makes it a category worth investigating, not a blanket recommendation for every room. Individual products differ in water claims, approved installation areas, subfloor tolerances, underlayment requirements, wear layers, locking systems and warranty conditions.
Before extending an LVP product into a bathroom, basement or laundry area, read the product’s technical sheet and installation guide. Check whether “water resistant” refers only to the plank surface, how long spills may remain before damage, whether perimeter sealing is allowed or required, and whether the warranty excludes certain rooms. Do not infer suitability from a retailer’s room photograph or from the category name.
How to design a mixed-material floor so it looks intentional
Use a clear boundary
Place a change at a doorway, the edge of cabinetry, the start of a stair or another architectural line. Avoid ending one material in the middle of an open room unless the boundary is part of the design.
Free tools Windows power users keep installed
One-click scans. No signup required.
Coordinate character, not just color
Compare undertone, plank width, tile scale, gloss level, grain movement and visual weight. Two brown floors can clash if one is gray-washed and the other is orange, or if one has a quiet surface and the other has a high-contrast pattern.
Rank #3
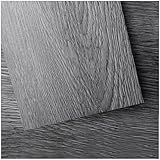
- Stylish - Authentic wood looking and grain texture, adding timeless feature for your home
- Easy DIY - Just peel and stick down on a flat floor for installation, no power tools, no experience, no glue, no accessoies
- Superior Property - Rigid surface and hard core, 100% waterproof, fire proof, wear resistant, scratch and abrasion resistant, high strength, no expansion, stable
- Wide Application - Besides as flooring, it can be applied to wall, ceiling, cabinet by adding extra glue (liquid nail)
- Exceptional Customer Service - We offer full service 24/7 for our customers for any product related issues, 2-year warranty
Keep installation direction purposeful
Running planks along a hallway and continuing that direction into a connected room often reads as deliberate. If direction must change, use the threshold or a border to signal the change rather than allowing the pattern to collide randomly.
Test the transition in the real light
Metal and color-matched profiles can look different in morning, evening and artificial light. Put the samples and proposed profile at the actual opening before installation.
Transition profiles and height differences
Transitions are not an afterthought; they are part of the floor specification. The required profile depends on the materials meeting, their relative heights and whether the work is new construction or a retrofit.
Crashes, No Sound, or Screen Glitches?
Random freezes, missing sound and display glitches usually trace back to one bad driver. Find and replace yours safely.Free scan · under a minutePC Slower Than It Used to Be?
A free scan shows the junk files, broken settings and background clutter dragging Windows down - then fixes them in one click.Free scan · Windows 10 & 11- DECO: described as a decorative line and edge-protection profile for tile meeting other same-height coverings, including wood or carpet.
- RENO-T: described for transitions between existing same-height hard-surface coverings, primarily in retrofit situations.
- SCHIENE: described as tile edge protection, including edges bordered by carpet and transitions between floor coverings.
These descriptions do not make the profiles interchangeable. Confirm the finished heights, edge condition, tile thickness, adhesive or mortar build-up and movement requirements before selecting one. A reducer is generally needed where one surface finishes lower than another; a same-height profile is not designed to disguise a step.
Independent reader supportYour contribution helps us test, update, and keep practical guides available for everyone.Installation rules that can change the plan
General design advice cannot replace the instructions for the exact flooring. One retrieved document, Installation Instructions Laminate R6.2025, revision R 06.2025 and hosted by HF Design LLC, states: “Flooring is not a moisture barrier.” It also states: “When installing next to other types of flooring use a transitions strip/molding.” The available document metadata does not establish the manufacturer’s identity, so these statements should be attributed to that document rather than generalized to all laminate.
The same instructions require a T-molding for rooms wider or longer than 55 feet under the conditions specified in that document. Treat 55 feet as a product-instruction threshold, not a universal rule for every floating floor. Other products may specify different maximum runs, expansion gaps, room-break requirements or transition details.
Rank #4

- 🏆【NAACOO UNIVERSAL FLOOR KIT】 5 IN 1 Portable KIT--Tapping Block has unique combination edge design for use with most types of flooring, push tongue and groove wood floor together creating a tight seam, Match Spacers create a uniform gap between the wall. Pull Bar Flooring Tool suitable for work close to a wall, corner, closets or in tight spaces, closing the gaps and seams in laminate floors without causing damage. Contour gauge with lock solves the installation difficulty of the odd-shaped floor. Rubber mallet can be used with pull bar hook and tapping block, which makes it easier to complete the floor installation work.
- 🏆【Usage Scenarios 1 - MORE TYPES of FLOOR】UNIVERSAL BLOCK Suitable for TONGUE & GROOVE or CLICK-LOCK FLOOR.Just put portable tapping block on the floor tongue, then tapping it, make the tongue and groove or edges of resilient vinyl planks, laminate or hardwood, joins flooring planks creating tight seam.
- 🏆【Usage Scenarios 2 - MORE THICKNESS of FLOOR】UNIVERSAL BLOCK With 3 DIFFERENT THICKNESS EDGES--to meet multiple size of flooring. The 1.5mm edge can install with a floor thickness of 3.5 mm ~ 5.5 mm. The 2.5mm edge can install with a floor thickness of 6mm~3/8in. The 3.5mm edge on the other side can install with a floor thickness of 10 mm ~ 12 mm. The 1.5mm edge (Thinnest one) of tapping block with an inclined angle, can hook the floor and prevent the floor from moving during knocking.
- 🏆【STEEL PULL BAR】 Suitable for work close to a wall, corner, loser or in tight spaces. Adopt quenching process to treat. Made from premium 45# steel with frosting and matt coating. Better than A3 steel. Soft pads on the back can protect the floor from scratch.
- 🏆【10 Inch Precise Contour Gauge with Lock】 Keep the shape with no move out of form, Easily duplicate, and convenient transfer the shape anywhere. creates an instant template for curved and odd-shaped profiles simply and easily. good help for installing flooring. Perfect solution to the problem of irregular shapes on wood flooring installation.
What to verify in every installation guide
- Approved rooms and moisture limitations.
- Subfloor flatness, cleanliness, dryness and structural requirements.
- Underlayment type and whether a separate moisture-control layer is required.
- Perimeter expansion space and how it is covered at walls, cabinets and thresholds.
- Maximum uninterrupted run lengths and when a T-molding or other break is mandatory.
- Rules for radiant or underfloor heating, direct sunlight and temperature acclimation.
- Which transitions are supplied, optional or excluded from the warranty.
Common mistakes and how to avoid them
Choosing one floor before checking wet areas
Problem: A visually attractive product is ordered for the whole house, then its instructions exclude a bathroom or below-grade slab. Fix: classify rooms by exposure first and eliminate products that cannot serve the required zone.
Assuming “waterproof” solves installation risk
Problem: The surface resists a spill, but the subfloor, seams, perimeter or underlayment is not protected from moisture. Fix: read the complete water-management language and follow the required substrate preparation and edge detailing.
Ignoring height at the threshold
Problem: A transition strip becomes a trip point or leaves an exposed edge. Fix: calculate finished heights, including underlayment, adhesive and tile, before ordering profiles.
Continuing a floor across a structural break
Problem: Movement between additions, different framing systems or separate slabs causes stress or joint failure. Fix: ask the installer to identify movement joints and substrate changes before deciding on a continuous surface.
Matching color but not scale
Problem: Similar colors still look disconnected because plank widths, grout lines or surface sheen fight each other. Fix: compare full-size samples and coordinate pattern scale as well as hue.
Failing to plan replacement stock
Problem: A damaged plank or tile cannot be matched after the product is discontinued. Fix: retain labeled spare material and installation records.
A practical specification checklist
- Draw the floor plan and mark every visible sightline, doorway and level change.
- Assign each room a moisture, noise, comfort and substrate profile.
- Obtain the current installation guide for every shortlisted product.
- Confirm product approval for each proposed room, including the basement and wet areas.
- Specify movement gaps, maximum runs and transition locations on the installation plan.
- Measure finished heights before buying profiles or trim.
- Approve samples under the home’s actual lighting and beside permanent finishes.
- Keep spare material, lot information and the final product documentation.
The strongest whole-home designs are not necessarily the ones with one material everywhere. They are the ones where continuity appears in the rooms that can support it and every necessary change has a clear technical and visual reason.
Quick Recap
Product prices and availability are accurate as of the date/time indicated and are subject to change. Any price and availability information displayed on Amazon at the time of purchase will apply.

