Some links on this page are affiliate links: if you buy through them we may earn a commission, at no extra cost to you.
The best indoor compost bin is not always the prettiest stainless pail on the counter. For most U.S. homeowners, the best setup is a two-stage system: a small, easy-to-clean kitchen caddy where scraps are created, plus a clear destination for those scraps, such as a curbside green cart, outdoor compost bin, freezer container, bokashi bucket, worm bin, or electric food recycler.
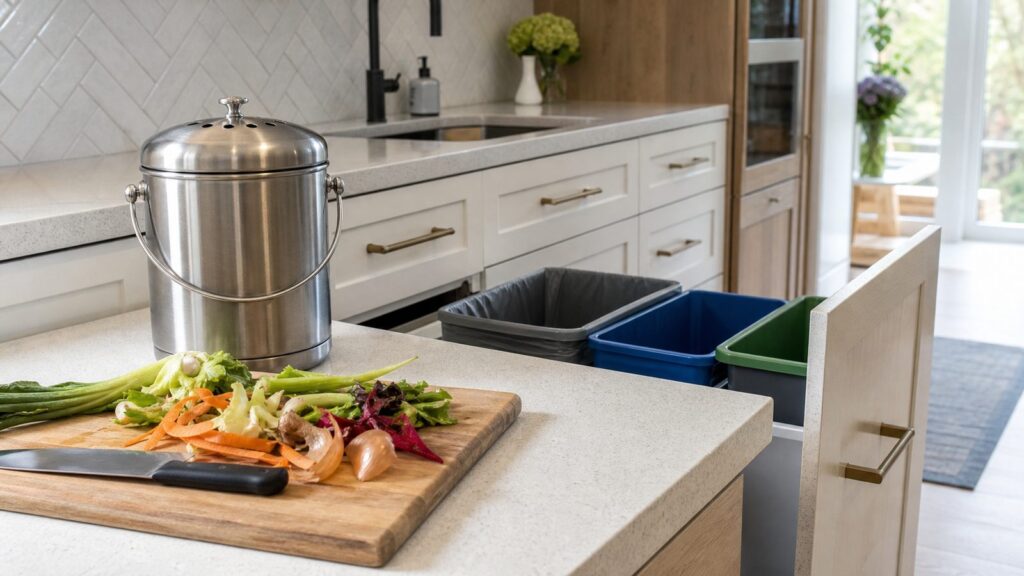
If you cook several nights a week, plan around workflow first. Food scraps happen at the cutting board, coffee station, sink, and plate-scraping area. A compost bin that is across the kitchen, hard to open with messy hands, or too small for a family dinner will not get used for long.
As an Amazon Associate I earn from qualifying purchases.
The Tool Desk
Outbyte Driver Updater FREEFix the driver behind crashes, sound loss and screen glitchesFind Drivers →Outbyte PC Repair FREERepair Windows errors before they cause bigger problemsFix Now →From a builder’s point of view, the right indoor compost solution comes down to five things: capacity, odor control, cleanability, cabinet protection, and whether the system fits the way your kitchen is built. During remodels, we like to solve composting at the same time we solve trash and recycling. A pullout waste center, washable liner tray, and properly placed outlet can make the difference between a habit that lasts and a good intention that sits under the sink.
There is a real environmental reason to care. EPA data identifies food as the most common material landfilled and incinerated in the U.S., and EPA says wasted food is responsible for 58% of methane emissions from municipal solid waste landfills. USDA and EPA commonly cite U.S. food waste at roughly 30% to 40% of the food supply. Composting is not the first step on EPA’s Wasted Food Scale, because prevention, donation, and feeding people come first, but keeping unavoidable scraps out of the landfill is still a practical household move.
Popular on Amazon

- FEATURED IN BON APPETIT & FORBES: Recognized by renowned magazines, EPICA’s compost bin is a perfectly sized marvel for your kitchen, compact yet spacious enough to hold days' worth of compostable organic waste. Measures 7.16" in diameter x 11" high.
- CONTROL KITCHEN ODORS NATURALLY: This indoor compost bin with a charcoal filter features an airtight lid and a replaceable activated-charcoal filter to help reduce odors. Enjoy a fresher kitchen with an odor-free compost bucket designed for daily use.
- EASY TO CLEAN & RESISTANT TO LEAKS: This countertop bin features a one-piece molded design that resists rust and leaks. The container's construction is easy to hand-wash with warm water and is built for everyday convenience. Empty & clean weekly for best results. Rinse the filters and air dry them to extend their life, or replace them (they last 3-6 mo. with regular use). Don't saturate the charcoal filters- gentle rinsing is enough.
- BUILT TO LAST A LIFETIME: Crafted from premium stainless steel, this stainless steel compost container resists scratches and rust for lasting durability. An ideal compost bin for kitchen counter use that combines style with everyday performance.
- REPLACEABLE CHARCOAL FILTER FOR ODORLESS COMPOSTING: Activated-charcoal filters help keep this countertop compost bin fresh by reducing odors. With proper care, each filter lasts 3–6 months, making this compost bucket easy to maintain.
Quick Answer: Best Indoor Compost Bin by Home Type
For a small apartment or condo, choose a 0.75- to 1.3-gallon countertop pail if you have pickup or a drop-off option, or use a freezer compost bin if odor is your main concern. A freezer bin is simple, cheap, and almost foolproof because cold storage stops smells and fruit flies until collection day.
For a busy family kitchen, choose a 1.5- to 3-gallon under-sink or pullout compost bin paired with trash and recycling. The extra capacity matters more than a designer lid. Families that cook daily can fill a small 0.75-gallon countertop pail in one dinner prep, especially with melon rinds, corn cobs, coffee grounds, and vegetable trimmings.
For a kitchen remodel, build compost into the cabinet plan. A dedicated pullout waste center near the main prep zone is usually better than putting every waste function under the sink. Under-sink space is often crowded with plumbing, disposals, water filters, instant hot systems, leak sensors, and cleaning supplies.
For odor-sensitive homeowners, use a freezer container or a sealed bokashi bucket. Charcoal-filter countertop pails help, but filters do not cancel poor emptying habits, wet scraps, or fruit residue left for a week.
For convenience-focused homeowners with the budget, an electric food recycler can reduce scrap volume and odor, but it is not the same thing as a passive compost pail. Many units dry and grind scraps into a pre-compost material that may still need curing, mixing into outdoor compost, or use according to the manufacturer’s soil guidance.
Indoor Compost Bin Types Compared
The phrase “indoor compost bin” gets used for several different products. That causes confusion. A countertop pail does not make finished compost. It collects scraps. Bokashi ferments scraps. Worm bins biologically process scraps. Electric units usually dehydrate and grind scraps, sometimes with microbial processing depending on the model. Those are different tools with different maintenance needs.
Quick wins for a faster PC:
Fix the driver behind crashes, sound loss and screen glitchesFind Drivers →Repair Windows errors before they cause bigger problemsFix Now →| Type | Best For | Typical Capacity | 2026 Cost Range | Main Tradeoff |
|---|---|---|---|---|
| Countertop pail | Daily scraps headed to curbside pickup or outdoor compost | 0.75-1.3 gallons | $20-$80+ | Needs frequent emptying |
| Under-sink or pullout bin | Remodeled kitchens and larger households | 1.5-3+ gallons | $60-$300 for hardware; $300-$800+ installed | Requires cabinet space and careful clearances |
| Freezer compost bin | Odor-sensitive homes and weekly pickup | Often 0.5-1.5 gallons | Usually similar to small food-storage containers or specialty bins | Uses freezer space |
| Bokashi bucket | Small spaces and homeowners willing to manage fermentation | Commonly 3-5 gallons | $40-$120 plus $10-$30 bran refills | Requires bran, draining liquid, and a second-stage destination |
| Worm bin | Hands-on composters with stable indoor temperature | Varies by system | $80-$200+ plus worms and bedding | Needs moisture, feeding, and temperature control |
| Electric food recycler | Convenience, volume reduction, and low odor | Compact units around 2.5-5 liters | $180-$1,000+ | Uses electricity, filters, counter or utility space |
Countertop Compost Pails
A countertop compost pail is the simplest indoor option. It sits near the prep area, collects coffee grounds, fruit peels, vegetable trimmings, eggshells if accepted by your compost destination, and plate scrapings if your local program allows them. Most household pails fall between 0.75 and 1.3 gallons. That is enough for one to three days of scraps for many couples, but not always enough for a family that cooks heavily.
Basic plastic, bamboo-fiber, or simple stainless countertop pails usually cost about $20 to $50 in 2026. Better-sealing lids, replaceable charcoal filters, dishwasher-safe liners, and brand-name caddies often push the price to $50 to $80 or more. Premium countertop or magnetic caddies can land between $50 and $150, especially if they dock to a trash can, cabinet door, or proprietary liner system.
What We Look For
On our kitchen jobs, we care less about the marketing language and more about the parts that touch food waste every day. The bin should have a smooth interior with few seams, a lid that opens easily with one hand, and a shape that can be washed in a sink without fighting the faucet. A removable inner bucket is helpful. A square or rectangular footprint usually stores better against a backsplash or inside a cabinet than a wide round pail.
Charcoal filters are useful, but they are not magic. Odor control depends more on emptying frequency, moisture management, lid fit, and airflow. Wet scraps, fruit residue, onion skins, and delayed emptying drive smell and fruit flies. If your household empties the caddy every day or two, a simple lidded bin may be enough. If scraps sit four to seven days, look at freezer storage, bokashi, or pickup-compatible liners.
What’s actually slowing this PC down?
Pick the symptom - the matching free tool is one click away.
Also popular on Amazon
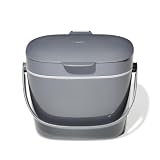
- Unique design keeps bags tucked inside for a neat look
- 1.75-gallon/6.62-liter capacity perfect for busy kitchens
- Smooth interior makes Bin easy to clean
- Odor-containing and pest-reducing since oxygen can flow through the soft-close lid
- Stay-open lid makes it easy to toss scraps in while you’re working
Under-Sink and Pullout Compost Bins
An under-sink bin keeps the counter clear, but it is not automatically the best location. The sink base cabinet is usually one of the most congested cabinets in the kitchen. There may be a disposal, P-trap, dishwasher drain loop, water filter, shutoff valves, soap dispenser bottle, and sometimes an instant hot water tank. A bin that rubs plumbing or blocks shutoff access is a bad trade.
For remodels, a pullout waste center is usually cleaner. We often specify a base cabinet near the prep zone with separate containers for trash, recycling, and compost. The best location is close to the cutting board and primary work surface, not tucked at the far end of the room. For many kitchens, an 18-inch or 21-inch base cabinet can handle a two-bin pullout. A wider 24-inch or 30-inch cabinet may allow trash, recycling, and compost together, depending on the hardware and bin sizes.
Hardware-only pullout systems commonly cost about $60 to $300. Installed as part of a cabinet modification or kitchen remodel, expect roughly $300 to $800 or more, depending on cabinet construction, drawer slide quality, face-frame versus frameless cabinets, finish carpentry, and whether plumbing or electrical clearances are tight. Full-extension, soft-close slides are worth the upgrade because compost bins are handled often and loaded unevenly.
Cabinet Protection Details
Compost storage can introduce moisture, condensation, and occasional leaks. We like a washable liner tray, waterproof mat, or metal/plastic cabinet-floor liner below any indoor compost container. This is especially important in particleboard cabinet boxes, where a slow leak can swell the cabinet floor and leave a permanent ridge.
Recommended Free Tools
Leave enough clearance above the bin for the lid to open or for the bucket to lift out without scraping the countertop overhang, sink bowl, or drawer hardware. A common mistake is choosing a tall bin that technically fits the cabinet opening but cannot be removed without tilting and spilling. Measure the cabinet opening, interior depth, plumbing obstructions, hinge swing, and pullout travel before buying.
Freezer Compost Bins
A freezer compost bin is one of the most underrated indoor options. It is not fancy, but it solves odor better than almost any countertop pail. You put scraps in a sealed container or silicone bin in the freezer, then empty it into your green cart, outdoor compost, or drop-off bucket when convenient. Frozen scraps do not attract fruit flies and do not smell while frozen.
This works especially well for apartments, townhomes, and households with weekly municipal pickup. It also works for homeowners who cook fish, onions, citrus, or other strong-smelling food and do not want a warm scrap pail on the counter. The tradeoff is freezer space. A 0.5- to 1.5-gallon container is practical for many kitchens, but a small apartment freezer may not have room.
From a remodeling standpoint, this does not require construction, but it does affect appliance planning. If a client is already choosing a counter-depth refrigerator, we talk through freezer volume. Counter-depth models look cleaner, but they can give up useful storage. If compost freezing is part of the routine, that lost freezer space matters.
Free tools Windows power users keep installed
One-click scans. No signup required.
Bokashi Buckets
Bokashi is a sealed fermentation system. You add food scraps to a bucket, sprinkle bokashi bran, press the material down, and keep the lid sealed. Many buckets include a spigot so you can drain liquid. The fermented material then needs a second step, such as burial, outdoor composting, or another approved method. It is compact and can handle some foods that backyard composters often avoid, but it is more process-heavy than a countertop caddy.
Starter bokashi kits generally run about $40 to $120 for one or two sealed buckets with a spigot. Bran refills often add about $10 to $30 per bag, depending on size and brand. If you fill one bucket while the other ferments, a two-bucket setup is more practical than one bucket.
Also popular on Amazon

- Countertop Fit - The countertop compost bin measures 7.2 inches wide and 11.2 inches high, offering a slightly larger capacity while maintaining a compact cylindrical design that fits neatly on your countertop without taking up excessive prep space.
- Durable Build - Made with stainless steel, the composter resists scratching, cracking, and chipping, so it can handle onion skins, coffee grounds, and daily scraps without showing the wear.
- Stylish Design - With a sturdy, sleek design that complements most kitchen decor, the compost bucket with lid looks like it belongs on your counter, not tucked away out of sight. Its clean lines fit right in, whether your style is modern or classic.
- Odor Control - This kitchen compost bin with lid comes with charcoal filters that trap odors naturally, so food scraps can build up for a full week without any bad smell taking over your kitchen, no matter how close you get to trash day.
- Easy Care - Line the bottom of this small compost bin with newspaper or cardboard to absorb liquid, and drain excess moisture from food scraps before adding them. A quick weekly rinse with water, mild soap, or vinegar keeps things smelling fresh.
Bokashi can fit under a sink, in a pantry, garage, mudroom, or utility closet. Because it is sealed, it can be a good fit for small spaces. The owner still needs to manage liquid draining, bran supply, and final handling. If that sounds like too many steps, choose a simpler caddy plus municipal pickup.
Worm Composting Indoors
Vermicomposting uses worms to process food scraps into castings. A residential starter system typically costs about $80 to $200 or more, plus worms, bedding, and periodic maintenance supplies. It can work well for the right household, but it is not a set-it-and-forget-it kitchen accessory.
Windows Errors? Fix Them Before They Spread
Repair common Windows errors and clear accumulated junk for a smoother, more stable PC - no reinstall needed.Free scan · no reinstallOutdated Drivers Are Slowing You Down
One free scan finds every outdated or missing driver and matches the right update for your exact hardware.Free scan · exact hardware matchWorm bins need a stable environment. Too wet and the bin can smell. Too dry and the worms struggle. Too much food at once can overwhelm the system. Temperature matters too. Many worm systems perform best in a comfortable indoor range, not in a hot garage or freezing porch. Homeowners who travel often or dislike hands-on maintenance are usually happier with pickup, freezer storage, bokashi, or an electric unit.
If you want a worm bin inside the conditioned envelope of the home, plan for a location that is accessible but not in the way. A laundry room, pantry, basement utility area, or mudroom can be better than a kitchen cabinet. The system needs airflow, service access, and a floor surface that can tolerate an accidental drip.
Electric Food Recyclers and Indoor Composters
Electric food recyclers are popular because they reduce volume, control odor, and make scraps easier to store. Budget units can start around $180 to $300. Mainstream units commonly fall around $300 to $650. Larger or premium continuous systems can reach about $800 to $1,000 or more. Current market examples include compact units around $300 to $400, higher-feature countertop machines around $500 to $650, and larger subscription-style or continuous systems near $999.
Before buying one, understand the output. Many electric units dry and grind food scraps into a smaller, soil-like material. That does not always mean finished compost. Depending on the machine and manufacturer guidance, the output may need curing, mixing into outdoor compost, or limited application to soil. If you want true finished compost for a garden, read the product instructions carefully before assuming the countertop machine completes the whole biological process.
What to Check Before Buying
Look at bucket capacity, cycle time, noise level, filter cost, warranty, cleaning requirements, and countertop footprint. Compact units often measure capacity in liters, commonly around 2.5 to 5 liters per cycle. A smaller unit may be fine for two people but frustrating for a household that cooks daily.
Also check power needs. Many electric units plug into a standard 120-volt receptacle, but placement matters. During a remodel, we avoid creating a cord that crosses a wet prep area or blocks an appliance garage door. If the unit will live under a counter, in a pantry, or in a utility cabinet, outlet placement should be planned with an electrician. Kitchen receptacles and many related areas are subject to GFCI protection requirements under modern electrical rules, and local code adoption can vary.
Noise is another practical issue. A machine running during dinner cleanup may be acceptable in a closed pantry but irritating on an open kitchen island. Ask where the unit will run, where it will be emptied, and where filters or media will be stored.
Compost Bin Costs in 2026
Indoor composting can cost $20 or more than $1,000 depending on how much convenience and integration you want. Most homeowners do not need the most expensive option. The sweet spot is usually a durable caddy or integrated pullout that matches the household’s actual food routine.
Also popular on Amazon

- Reuse your kitchen scraps and coffee grinds into our kitchen compost bin with the plastic inner pail and handle: Just put this small trash can on your kitchen countertop, throw away the food scraps (such as fruits, vegetables, coffee grounds, tea bags, egg shells, etc.) in it during cooking; 1.3 gallons offers enough space for temporarily collecting your organic kitchen and food waste for several days, without taking up too much space.
- The plastic inner pail comes out easily, and the little handle on the inner pail is thoughtful to make it a breeze to throw kitchen scraps into your compost tumbler outdoors!
- The countertop compost bucket with lid comes with 2 active carbon filters to prevent odor leaking: The charcoal filter blocks odor naturally and effectively, leaving your kitchen smelling fresh. Put the lid on, and it becomes the perfect farmhouse kitchen decor without any unpleasant smells. Tips: The period of use of the carbon filter is about 4 months to 6 months. Please remember to replace it in time.
- Long-lasting kitchen decor will never rust: The plastic inner pail isolates the scraps from contact with the outer metal bucket, so it will be more durable and will not crack, rust, or corrode. The cream beige color and classic farmhouse pattern make it a unique fit for any kitchen, whether rustic, minimal, boho, or country.
- Our kitchen compost bin considers aesthetics and practicality, and this trash can is a high-quality product that will accompany you in your actions of everyday life. This would also make a wonderful conscious gift.
| Project | Typical 2026 Cost | Good Fit |
|---|---|---|
| Basic countertop pail | $20-$50 | Simple scrap collection for pickup or backyard compost |
| Upgraded countertop caddy | $50-$80+ | Better lid, washable liner, charcoal filter, improved finish |
| Premium integrated caddy | $50-$150 | Magnetic, docked, stainless, or proprietary kitchen systems |
| Pullout waste center hardware | $60-$300 | Cabinet-based trash, recycling, and compost sorting |
| Installed pullout or cabinet modification | $300-$800+ | Kitchen remodels or finish carpentry upgrades |
| Bokashi kit | $40-$120 plus bran | Sealed fermentation in small spaces |
| Worm bin | $80-$200+ plus supplies | Hands-on composting and garden use |
| Electric food recycler | $180-$1,000+ | Convenience, odor reduction, and volume reduction |
Compare that with a garbage disposal project. Current U.S. installation and replacement ranges vary widely. HomeAdvisor’s 2026 update gives about $150 to $950, with many homeowners around $550. Angi’s 2026 replacement range is about $200 to $625, also averaging around $550. Thumbtack reports a national installation average range around $138 to $272, with a typical figure around $194. Variance comes from motor size, stainless versus aluminum grind chambers, existing wiring, switch location, drain alignment, dishwasher connection, local labor, and permits.
A disposal and a compost bin are not the same solution. Many municipal compost programs prefer scraps in a green cart, not down the drain. Some homes should still have a disposal for limited sink cleanup, but composting is usually better for separating recoverable organic material from the wastewater system.
Where to Put a Compost Bin in a Kitchen Remodel
The best place is usually near the prep zone. In real kitchens, scraps come from trimming vegetables, peeling fruit, cleaning herbs, cracking eggs, emptying coffee grounds, and scraping plates. If the compost bin is one step from the cutting board, people use it. If it is hidden behind a tight cabinet door under a sink, they often default to trash.
For a new kitchen layout, consider three zones. First, a small counter caddy or flush-access pullout near the main prep surface. Second, a larger holding destination, such as a green cart path, garage bin, freezer bin, or utility-area recycler. Third, a cleaning path so the compost container can be rinsed without dripping across finished floors.
In cabinet design, we look for full-extension slides, removable bins, washable liners, and labels. Labels are not just for guests. They help children and visitors avoid contaminating compost with plastic wrap, produce stickers, foil, twist ties, and non-compostable packaging. Contamination is one of the fastest ways to make composting fail at home.
If you are planning an island, do not assume the compost pullout belongs in the island. It may be perfect there if the island is the main prep surface. But if the sink, knives, and cutting boards are on the perimeter, an island compost drawer becomes a walk-around nuisance. Match the bin to the way the kitchen is actually used.
Odor, Fruit Flies, and Cleaning
Odor control is mostly management, not branding. Empty small pails every one to three days. Keep wet scraps from pooling. Rinse sticky fruit residue. Replace charcoal filters when they stop working. Keep the lid and rim clean. If your bin uses compostable liners, confirm they are accepted by your local program; not every facility accepts every liner.
Fruit flies usually come from exposed fruit residue and delayed emptying. A tight lid helps, but a dirty lid gasket or sticky countertop around the pail can still attract pests. Freezing scraps is the most reliable indoor odor and fruit-fly control method. Bokashi can also control odor when sealed and managed correctly, though it has its own fermented smell when opened.
Do these 3 things before closing this tab:
1Scan for outdated or missing drivers - takes under a minute2Repair Windows errors before they cause bigger problems3Fix the driver behind crashes, sound loss and screen glitchesFor cleaning, stainless steel looks good and resists staining, but fingerprints and water spots show. Plastic is lighter and often easier to bang around in a sink, but it can retain odors if scratched. Dishwasher-safe inner buckets are useful, but check size. Some bins technically fit in a dishwasher only by occupying the entire lower rack.
Independent reader supportYour contribution helps us test, update, and keep practical guides available for everyone.What Can Go in an Indoor Compost Bin?
The answer depends on where the scraps go next. A municipal program may accept meat, bones, dairy, and certified compostable bags because it uses commercial processing. A backyard compost pile may do better with fruit and vegetable scraps, coffee grounds, tea leaves, eggshells, and yard material, while avoiding meat, grease, and dairy because of pests and odor. A bokashi bucket may accept a broader range of food scraps, but the fermented material still needs proper final handling.
For kitchen use, keep a simple accepted/not accepted list near the waste pullout or inside the cabinet door. The list should match your local hauler, drop-off site, or backyard system. Do not rely on generic composting rules if your city has specific instructions.
Also pair composting with food-waste prevention. EPA’s Wasted Food Scale places prevention and higher-value uses above composting. Better meal planning, clearer fridge storage, visible leftovers, and using produce before it spoils reduce waste before you need a bin. A compost bin is a good backstop for peels, cores, coffee grounds, and unavoidable scraps, not a license to overbuy food.
Also popular on Amazon

- Effortless Recycling: Revolutionize your kitchen with KIBAGAs’ countertop compost bin, designed for recycling food & other organic waste. Seamlessly support eco-consciousness and contribute to nutrient-rich soil for plants, while fostering a clean kitchen space
- Odorless Composting: The compost bin for the kitchen comes with a built-in charcoal filter compartment ensuring odor-free composting and lid air holes providing necessary aeration. With two filter included, you are well equipped. Embrace the fresh vibes!
- Practical Premium Design: Built to last with rust-free, powder-coated carbon steel, the kitchen compost bin for your countertop elevates your recycling game. Easy to carry with its wooden handle and a breeze to clean, it's a durable, handy ally in daily life
- Spacious Efficiency: Compact yet roomy, the 10.2x7” composting bin boasts a 1.1-gallon volume, providing ample space without hogging your kitchen countertop. Simply add your food scraps throughout the week, keeping your kitchen tidy, eco-friendly & odorless
- Upgrade Your Kitchen Aesthetic: Spruce up your kitchen with the compost bin's timeless sage design, jazzed up by a dash of modern flair in its wooden handle and knob. Uniting style and functionality, it's a must-have for your eco-chic kitchen
When to DIY vs. When to Hire a Pro
DIY is appropriate for most countertop pails, freezer bins, bokashi buckets, and many standalone worm bins. You can also install some simple cabinet-door caddies or freestanding pullout baskets if the cabinet is clear, square, and not crowded by plumbing. Expect a basic DIY pullout installation to take one to three hours if you are comfortable measuring, drilling pilot holes, leveling slides, and adjusting cabinet doors.
Hire a pro when the compost solution affects cabinetry, plumbing, electrical work, or finished surfaces. A pullout waste center may require cabinet modification, door mounting, filler adjustments, or rerouting around sink plumbing. Electric food recyclers may need a convenient receptacle, and kitchen electrical work should follow local code and GFCI requirements. If a new outlet, switch, or circuit is needed, use a licensed electrician.
Permit requirements vary by city and state. Some jurisdictions require permits for plumbing alterations, garbage disposal installation or replacement, and electrical changes. Examples from U.S. local and state permitting guidance show that plumbing and electrical permits can be triggered by work that goes beyond simple plug-in appliance use. Before adding a disposal, moving a drain, changing a dishwasher connection, or installing a new receptacle for a powered unit, check your local building department.
From a construction standpoint, the most efficient time to add compost infrastructure is during a kitchen remodel. The cabinet layout, drawer hardware, outlet locations, appliance garage, pantry storage, and waste path can all be coordinated before finishes are installed. Retrofitting is still possible, but it may cost more if the original layout left no practical cabinet bay.
Our Practical Recommendation
For most households, start with a 1-gallon countertop caddy or freezer bin and confirm your disposal path. If you have curbside organics pickup, a simple caddy near the prep area is hard to beat. If you have backyard compost, use the caddy as a transfer bin and empty it often. If odor is the sticking point, freeze scraps. If you are remodeling, build a pullout waste center into the cabinetry and protect the cabinet floor with a washable tray or liner.
Choose bokashi if you want a compact sealed system and are willing to manage bran, liquid, and second-stage handling. Choose a worm bin if you want real biological composting and are comfortable maintaining a living system. Choose an electric food recycler if convenience, volume reduction, and odor control are worth the upfront cost, counter space, electricity, and ongoing filter or media costs.
The best indoor compost bin is the one your household will use every day without making the kitchen harder to clean. Capacity, location, and maintenance matter more than the label on the lid. In a well-planned kitchen, composting should feel like part of normal prep and cleanup, not an extra chore bolted onto the room after the fact.
Frequently Asked Questions
What is the best indoor compost bin for a small kitchen?
For most small kitchens, a 0.75- to 1.3-gallon countertop caddy or freezer compost bin is the best fit. Choose the countertop bin if you empty scraps every one to three days. Choose the freezer bin if odor or fruit flies are a concern.
Quick wins for a faster PC:
Repair Windows errors before they cause bigger problemsFix Now →Fix the driver behind crashes, sound loss and screen glitchesFind Drivers →Do electric kitchen composters make real compost?
Many electric units dry and grind scraps into a smaller pre-compost material rather than finished compost. Some systems add microbial processing, but homeowners should follow the manufacturer’s guidance before using the output directly in soil.
How much does an indoor compost bin cost in 2026?
Basic countertop bins usually cost about $20-$50, upgraded caddies run $50-$80+, pullout systems cost about $60-$300 before installation, bokashi kits run $40-$120, worm bins run $80-$200+, and electric food recyclers range from about $180-$1,000+.
Where should a compost bin go in a kitchen remodel?
Place it near the main prep zone, not automatically under the sink. A pullout waste center near the cutting board with separate trash, recycling, and compost bins usually works best for daily use.
How do I keep an indoor compost bin from smelling?
Empty it frequently, control moisture, keep the lid and rim clean, replace charcoal filters when needed, and avoid leaving wet fruit scraps for several days. For maximum odor control, store scraps in the freezer until pickup or outdoor transfer.
Do I need a permit for an indoor compost bin?
A countertop, freezer, bokashi, or worm bin usually does not need a permit. Permits may apply if you add electrical outlets, alter plumbing, install or replace a garbage disposal, or modify systems during a kitchen remodel. Check your local building department.
Quick Recap
Product prices and availability are accurate as of the date/time indicated and are subject to change. Any price and availability information displayed on Amazon at the time of purchase will apply.

