An auxiliary rip fence is a removable face attached to a table saw’s factory rip fence. It can provide a sacrificial surface for certain cuts, more support for sheet stock, or a task-specific guide for thin laminate—but it does not replace the saw’s guards or safe workholding. A practical general-purpose version uses two flat pieces of 3/4-inch MDF, hardwood spacers, glue, countersunk screws kept out of the blade-contact area, and clamps sized for your saw.
Fit and dimensions depend on the saw and operation. WOOD Magazine’s example design is as tall as and about 6 inches longer than the factory fence; treat that as a starting example, not a universal specification. Check stability, clamp clearance, and squareness before use.
What an Auxiliary Rip Fence Does
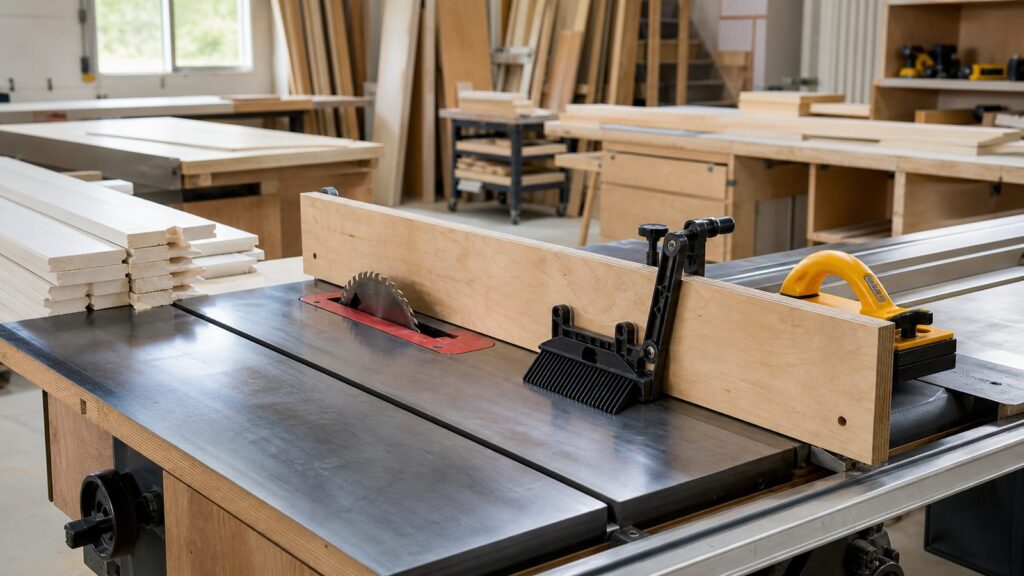
A rip fence guides stock parallel to the blade. An auxiliary fence attaches to the factory fence to provide a different working face. Depending on its design, it can offer more bearing support, a sacrificial face for a particular operation, or a specialized surface for thin material.
Common designs serve different purposes:
| Design | Typical purpose | Important fit or safety check |
|---|---|---|
| Box-style MDF fence | General support and a replaceable face | Clamp it securely; keep screws out of any possible blade-contact area. |
| Sacrificial fence | A specific cut that requires blade clearance in the face | Plan the clearance for the actual operation and ensure no metal is in the blade path. |
| Fence saddle | A removable attachment that fits over the factory fence | Verify a stable fit and a face square to the saw table. |
| Channel-bottom laminate fence | Helping prevent thin laminate from slipping beneath the fence | Use a smooth, deburred channel that will not scratch the sheet. |
Materials and Design Choices
For the general-purpose design, WOOD Magazine specifies two lengths of 3/4-inch MDF with solid-wood spacer blocks between them. MDF is a useful stable choice for this design; WOOD Magazine notes that it does not expand and contract like solid wood with seasonal humidity changes. This is not a guarantee that every MDF panel will be flat, so check the actual pieces before assembly.
Free tools Windows power users keep installed
One-click scans. No signup required.
#1 Best Overall

- SPECS - ARF-BSCS | 36 Inch Table Saw Fence | 3-1/2" Tall | Built In T-Track Slots | 7" Material Support | 2 Sliding Clamping Blocks | Fence & Clamping Block Thickness Measure Exactly 2" | Made in USA
- SIZED FOR COMPACT MACHINES - 36" fence length, ideal for job site table saws, band saws, vintage contractor’s saws, router tables, and more.
- QUICK SETUP & REMOVAL - Installs in seconds without modifying your existing fence. Just use standard track clamps (not included).
- ENHANCED SUPPORT - Includes two 7" material supports to stabilize workpieces on the infeed and outfeed side of the blade.
- AMERICAN MADE QUALITY - Like all Woodpeckers products, the Compact Auxiliary Rip Fence is precisely built and carefully inspected in our Strongsville, Ohio facility.
Other designs serve other needs. A sacrificial face can be dedicated to a cut that needs blade clearance. For thin laminate, WOOD Magazine describes a separate 3/4-inch plywood fence with a rabbet along its bottom edge holding aluminum U-channel. The channel sits against the saw table and helps prevent the sheet from slipping underneath the fence. These are task-specific alternatives, not interchangeable upgrades.
Recommended Design: MDF Fence With Spacers
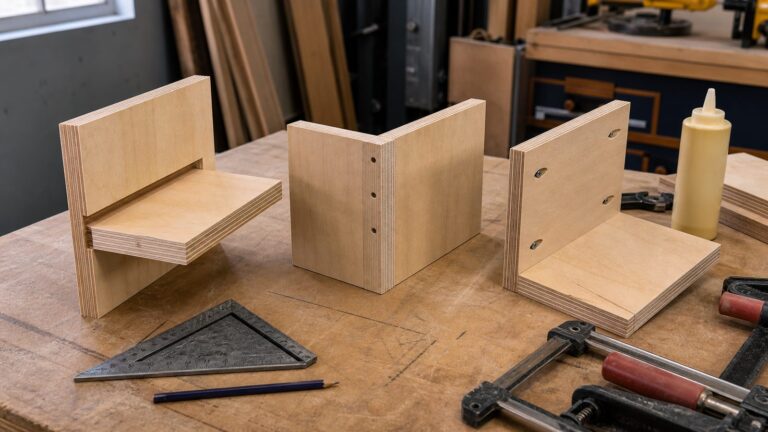
The general-purpose build is a box-like assembly: two MDF faces separated by solid-wood spacers. The spacers create room for clamping the fence to the factory fence. Size the assembly for your saw and intended work. WOOD Magazine’s example is as tall as and about 6 inches longer than the existing fence, but a longer auxiliary fence can become unstable if it is not clamped well.
Good Starting Dimensions
- Faces: Two lengths of 3/4-inch MDF, cut to fit the saw and intended use.
- Spacers: WOOD Magazine’s example uses 1 1/2-inch-long solid-wood blocks spaced approximately 8 inches apart.
- Length and height: The cited example is as tall as and about 6 inches longer than the factory fence. Measure your own saw; these are example dimensions, not universal requirements.
- Fasteners: Use countersunk screws as reinforcement after the glue joints set, omitting the central region where the blade may contact the fence.
- Clamps: Choose clamps that hold the attachment securely and low enough to avoid making it tippy.
A separate saddle-style plan calls for the auxiliary face to be 90 degrees to the saw table. Whatever design you choose, confirm that the attachment sits stably and does not interfere with the saw, fence, or workpiece.
Material Choice
Use flat MDF for the cited general-purpose design and check it with a straightedge. The glue-up must stay flat while the adhesive sets. For the laminate-specific design, WOOD Magazine describes 3/4-inch plywood with a bottom rabbet holding 1/4-inch aluminum U-channel; its cited channel has outside dimensions of 3/8 by 1/2 inch. Smooth or deburr the channel so it cannot scratch the laminate.
PC Slower Than It Used to Be?
A free scan shows the junk files, broken settings and background clutter dragging Windows down - then fixes them in one click.Free scan · Windows 10 & 11Outdated Drivers Are Slowing You Down
One free scan finds every outdated or missing driver and matches the right update for your exact hardware.Free scan · exact hardware matchDo not put screws, bolts, or other metal in a possible blade-contact area. Mark that area before assembly and keep reinforcement and clamps clear of it.
Tools and Supplies
For the MDF box-style fence, gather the two MDF faces, solid-wood spacers, glue, countersunk screws, suitable clamps, a square, and a straightedge. A drill and countersink bit help with the reinforcing screws. For the laminate-specific version, the cited design also uses plywood, aluminum U-channel, and epoxy.
Use push sticks and appropriate work support for the cut. A featherboard may help keep stock against the table in suitable setups, but it is not a replacement for required safeguards or sound workholding.
Rank #2

- SPECS - ARF-48 | 48 Inch Table Saw Fence | 3-1/2" Tall | Built In T-Track Slots | 12" Material Support | 3 Sliding Clamping Blocks | Fence & Clamping Block Thickness Measure Exactly 2" | Made in USA
- STRAIGHTER, SMOOTHER CUTS - Clamp the Auxiliary Rip Fence to any table saw fence for a longer, straighter, and more precise reference surface - no twisting or warping like plywood fence faces.
- MORE CONTROL FOR BIG PROJECTS - The 48" length and 12" material support keep panels balanced and stable on the infeed or outfeed side of the blade for safer, cleaner cuts.
- VERSATILE SETUP OPTIONS - Configure high, low, or L-fence positions to match the task - from thin rips to box lids to edge jointing straight stock.
- MADE IN THE USA - Built and inspected to our strict standards in Strongsville, Ohio, ensuring top-tier accuracy and durability.
Step-by-Step Build
1. Check the Saw and Plan the Fit
Read the saw manufacturer’s instructions and check the factory fence before adding an attachment. Decide what operation the auxiliary fence will serve, then measure the actual fence and check where clamps can fit. The attachment must not prevent normal adjustment or interfere with the blade, guard, or other saw components.
2. Cut the Faces and Spacers
Cut two 3/4-inch MDF faces to the length and height suited to your saw and intended work. WOOD Magazine’s example spacers are 1 1/2 inches long and approximately 8 inches apart. These measurements describe that design, not a required fit for every saw.
3. Glue the Spacers to One Face
Glue the spacer blocks to one MDF face. Let the bond begin to set so the blocks are less likely to shift when you add the second face. Keep the assembly aligned and plan the central blade-contact area before deciding where any screws will go.
4. Add the Second Face and Clamp Flat
Glue the second MDF face onto the spacer blocks. Clamp the assembly against a known flat surface, such as a workbench or saw top, while the glue cures. A flat glue-up matters: check that the faces have not shifted or bowed as you tighten the clamps.
5. Reinforce and Fit the Attachment
After the glue cures, reinforce the joints with countersunk screws, leaving out the central region where the blade could contact the fence. Fit the attachment to the factory fence with clamps. Check that the clamps hold securely and low enough to keep the assembly stable, and verify that they will not interfere with the work or saw operation.
Quick wins for a faster PC:
Scan for outdated or missing drivers - takes under a minuteDriver Scan →Repair Windows errors before they cause bigger problemsFix Now →6. Check Square and Test the Setup
Check that the auxiliary face is square to the saw table and that the attachment does not rock or shift. Confirm that the factory fence and auxiliary fence remain properly aligned for the intended operation. Before cutting useful stock, test the setup with suitable scrap and stop if the workpiece binds, shifts, or behaves unpredictably.
Using It Safely
An auxiliary fence is a workpiece support or sacrificial attachment, not a safety device. OSHA’s table-saw guidance calls for appropriate guarding, keeping hands out of the cut line, using a push stick for small pieces and to push stock past the blade, guiding stock parallel to the rip fence, and supporting the work and offcuts. Follow the saw manufacturer’s instructions and applicable workplace rules.
Rank #3

- PRECISION TABLE SAW RIP FENCE UPGRADE : Built from high-strength extruded aluminum, this table saw rip fence extension provides a stable, straight reference surface for cleaner and more consistent cuts. The rigid profile helps reduce flex and supports accurate alignment during repeated table saw operations
- 46" EXTENDED SUPPORT WITH SPACE-SAVING DESIGN : This 46" table saw fence extension kit with featherboards measures 47-1/4" overall and adds support when working with long boards or sheet goods. It functions as a table saw extension and outfeed support without requiring a bulky outfeed table
- VERSATILE 3-IN-1 MULTI-FUNCTION FENCE SYSTEM : Configure the fence for different cutting tasks: High Fence Mode supports tall panels and box work, Low Fence Mode 3/4" helps with controlled thin ripping, and L-Fence Mode supports edge jointing or template-guided cuts. It also works as a thin rip jig and table saw jig for added workshop flexibility
- 8 BUILT-IN T-SLOTS FOR CUSTOM JIG SETUPS: The fence body features eight integrated T-slots for mounting featherboards, stop blocks, hold-downs, and custom woodworking jigs. The included drop-in T-bolts can be inserted directly through the slot opening, allowing faster setup and adjustment without sliding hardware in from the ends of the track
- FITS MOST TABLE SAW FENCES WITH 1-1/4" OFFSET ALIGNMENT :Designed to clamp securely to most table saw rip fences without drilling or permanent modification. The 1-1/4" total thickness provides a clear offset reference
Use a featherboard only when it is appropriate for the specific operation. It can help hold stock against the table during ripping, but it does not replace guarding, proper workholding, or careful planning. Make sure clamps and the attachment are secure and cannot enter the blade path.
When Not to Use a Homemade Auxiliary Fence
Do not use an attachment that is loose, unstable, damaged, or poorly fitted. Do not use it if it interferes with required safeguards, the saw’s operation, or control of the workpiece. If clamps cannot hold it securely or the setup would place hands in the cut line, stop and choose a different approach.
Do these 3 things before closing this tab:
1Repair Windows errors before they cause bigger problems2Scan for outdated or missing drivers - takes under a minute3Clear out junk files and repair common Windows errorsPlan how both the workpiece and offcut will be supported and controlled. For any cut, use the guards and workholding appropriate to the saw and operation, and do not assume a homemade fence makes an otherwise unsuitable setup safe.
Special Setups Worth Building
Sacrificial Rabbet Fence
A sacrificial face can be prepared with clearance for a particular rabbet or dado operation. WOOD Magazine describes creating blade clearance in the MDF face with a dado set before resetting the blade and fence for a 1/4-by-1/4-inch rabbet. That is a source-specific example, not a universal setup recipe. The appropriate blade, guard arrangement, fence position, workholding, and procedure depend on the saw and operation.
Before any blade-contact setup, confirm that the blade cannot hit screws, clamps, or other metal. Follow the manufacturer’s instructions and use appropriate safeguards and workholding. Do not proceed if the setup or offcut path is unclear.
Longer Support for Sheet Stock
A longer auxiliary fence can provide more bearing length before the leading edge of a sheet reaches the blade. WOOD Magazine’s video describes using a longer version for this purpose. Choose the length for the saw and stock, and check that the added length does not make the attachment unstable or tippy.
Fence for Thin Laminate
For thin laminate, WOOD Magazine describes a separate 3/4-inch plywood fence with a rabbet along the bottom edge holding 1/4-inch aluminum U-channel, with outside dimensions of 3/8 by 1/2 inch, epoxied in place. When the fence is clamped to the rip fence, the channel sits against the saw table and helps keep the thin sheet from slipping underneath. Smooth or deburr the channel to protect the laminate from scratches.
Rank #4
- Accurate Cutting: Upgrade your rip guide precision with the Wixey digital rip saw fence system that offers ±0.002" accuracy per ft and a digital readout for reliable, repeatable cuts across all woodworking projects
- Heavy-Duty Build: Crafted from durable steel and aluminum, this professional-grade table fence delivers long-lasting stability and is perfect for woodworking benches, rip cuts, and shop work tables
- Digital Readout: Features a backlit digital display showing readings in inches, fractions, or millimeters; constant memory preserves calibration even when powered off or removed from the bench rail
- Smooth Adjustment: Micro-adjust wheels and roller glide ensure fine-tuned, smooth fence movement - ideal for setting precise bevels, rip cuts, and repeat measurements on contractor or cabinet saws
- What’s Included: You get (1) Wixey Table Saw Fence System (WR750) - (1) Digital Readout Display – (1) 72” Fence Rail (ships in two parts) - (1) Drilling Jig & Bit - Mounting Hardware Included - Batteries (2×AAA, not included) with this digital fence tool
DIY vs. Getting Help
A woodworker comfortable measuring, gluing, clamping, and checking a flat assembly may be able to build this attachment. The key is fitting it to the saw and operation rather than copying example dimensions blindly.
Get help from an experienced woodworker or saw technician if the factory fence is unreliable, you cannot achieve a stable fit, or you are unsure how to set up the intended cut. For workplace use, follow applicable safety rules and employer procedures as well as the saw manufacturer’s instructions.
Common Mistakes to Avoid
Do not assume example dimensions fit every saw. Measure the actual factory fence and check clamp clearance and stability before use.
Recommended Free Tools
Do not let the glue-up bow or shift. Clamp the faces against a known flat surface while the glue sets, then check the finished assembly.
Do not put screws or other metal in the possible blade-contact area. Plan that area before assembly and keep clamps clear of the blade path.
Do not make the attachment so tall or long that it becomes tippy. Secure, low clamp placement matters.
Do not treat the auxiliary fence or a featherboard as a substitute for the saw’s safeguards, appropriate workholding, and manufacturer instructions.
Best Value

- EXPERIENCE ENHANCED FEED CONTROL AND SAFETY: The XT XTENDER T Track Fence adds a 5” tall face to improve workpiece guidance on table saws and bandsaws. The increased surface helps stabilize material, supporting straighter cuts and controlled feeding.
- UNIVERSAL FIT FOR MULTIPLE SAWS: Designed to clamp onto existing fences using Bow T-Track clamps, this 46” XTENDER works with portable saws, cabinet saws, UniSaw, Harvey, and bandsaws. Upgrades fence capability without full replacement.
- MULTIPLE T-SLOTS FOR ACCESSORIES: Features three T-slots on the face, top, and back for 1/4” and 5/16” T-bolts. Our table saw fence system supports featherboards, stops, and feed accessories for customizable setups and improved control.
- HEAVY-DUTY ALUMINUM CONSTRUCTION: Built from aluminum extrusion with sandblasted anodized finish. The 4” flat face supports smooth material glide, while rigid 1” width maintains stability and alignment during woodworking operations.
- ADJUSTABLE POSITIONING AND EXTENSION SUPPORT: With milled rear slots, our table saw fence allows quick repositioning for infeed, center, or outfeed use. Standoffs help smooth movement, while accessory compatibility extends support for longer boards.
Final Setup Checklist
- The attachment fits the actual factory fence and is stable.
- The faces are flat, and the auxiliary face is square to the saw table.
- Clamps hold securely and do not interfere with the work or saw.
- No screws, clamps, or other metal are in a possible blade-contact area.
- Required and compatible guards and other safeguards are in place.
- The workpiece and offcut have appropriate support and control.
- The test setup behaves predictably before you proceed with the intended cut.
A good auxiliary fence is a fitted, stable attachment for a specific task—not a substitute for safe saw operation. Build the MDF version flat, keep reinforcement out of the blade-contact area, and check clamp stability and squareness. For thin laminate, use a purpose-built channel-bottom design rather than assuming a general-purpose fence will solve the problem.
FAQ
How do I make an auxiliary rip fence for my table saw?
One cited general-purpose design uses two 3/4-inch MDF faces separated by solid-wood spacers. Glue the assembly flat, reinforce it with countersunk screws outside the possible blade-contact area, and clamp it securely to the factory fence.
How long should an auxiliary fence be?
It depends on the saw and the work. WOOD Magazine’s example is about 6 inches longer than the factory fence, while another described design uses a longer fence to support sheet stock before it reaches the blade. Treat these as design examples and make sure the finished attachment remains stable.
What is a sacrificial fence used for?
A sacrificial face can be prepared for a particular operation that needs blade clearance in the fence face. Plan the clearance for the actual saw and cut, and keep all metal out of the possible blade path.
What’s actually slowing this PC down?
Pick the symptom - the matching free tool is one click away.
How can I keep thin laminate from slipping under a table-saw fence?
WOOD Magazine describes a separate plywood fence with a bottom rabbet holding aluminum U-channel. When fitted to the factory fence, the channel sits against the saw table and helps prevent the laminate from slipping underneath. Smooth or deburr the channel so it will not scratch the sheet.
Does an auxiliary fence replace the blade guard or other safety equipment?
No. OSHA’s table-saw guidance addresses guarding, keeping hands out of the cut line, using push sticks for small pieces, guiding stock parallel to the rip fence, and supporting stock. Follow the saw manufacturer’s instructions and applicable workplace rules.
Quick Recap
Product prices and availability are accurate as of the date/time indicated and are subject to change. Any price and availability information displayed on Amazon at the time of purchase will apply.