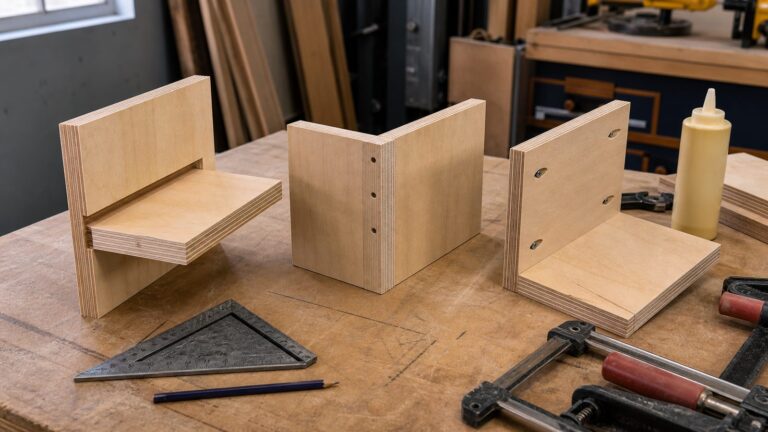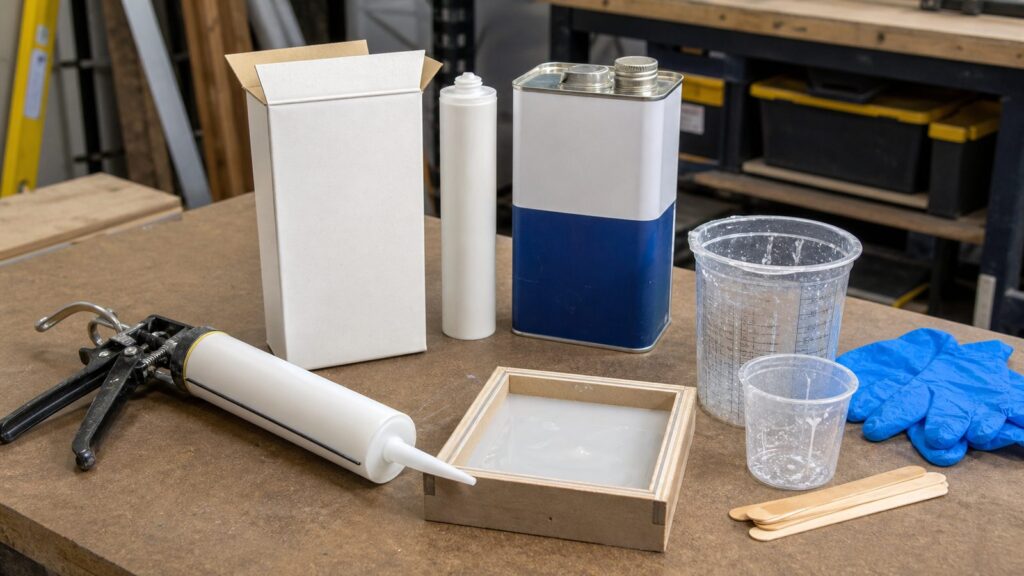
Yes, you can make a pourable silicone mold material from 100% silicone caulk, cornstarch, and mineral spirits. The common starting point is about 2 parts silicone caulk, 2 parts cornstarch, and 1 part mineral spirits by volume. That mix can work for small decorative molds, texture stamps, concrete accent samples, plaster, wax, resin crafts, and one-off prototypes.
It is not a replacement for construction sealant. Do not use homemade caulk silicone for window joints, showers, exterior expansion joints, glazing, waterproofing, firestopping, food-contact molds, structural work, or any code-required assembly. On our job sites, silicone caulk is used only within the manufacturer’s tested purpose. Once you thin it with solvent and bulk it with starch, it becomes a shop experiment, not a rated building material.
This guide explains how to make the pourable version, how much it costs in 2026, how to test it before risking your master object, and where the line is between a useful DIY workaround and a material that belongs in the trash.
What Pourable Caulk Silicone Is, and What It Is Not
Pourable caulk silicone is a homemade mold compound made by thinning 100% silicone caulk with a solvent such as mineral spirits or naphtha, then adding cornstarch to speed and support the cure. The goal is to turn a thick caulk bead into a liquid or heavy syrup that can flow around a small object in a mold box.
Recommended Free Tools
#1 Best Overall

- 100% Waterproof and Weatherproof: This 100% silicone formula offers protection from water damage, providing a reliable seal in areas exposed to harsh weather
- Excellent Flexibility and Strong Adhesion: Provides a flexible, durable seal for both exterior and interior projects
- Same-Day Rain-Ready: Ready for rain exposure in as little as 12 hours
- Compatible with Most Materials: Adheres to most metals and woods; glass, drywall, plaster, granite, cultured marble, ceramic and porcelain tile; natural stone, cement board, composites, and more
- Color : Clear
The chemistry matters. Standard silicone caulk cures by reacting with moisture in the air. Acetoxy-cure silicone usually smells like vinegar while curing. Neutral-cure silicone behaves differently and may cure more slowly in a homemade mix. Cornstarch helps because it carries moisture through the batch and thickens the material, but it does not make the product equal to commercial two-part RTV silicone.
Commercial mold silicones are engineered as two-part systems. A product such as Smooth-On Mold Star is mixed 1A:1B by volume and comes with published values for pot life, cure time, Shore hardness, tear strength, elongation, and shrinkage. Some versions are designed so small users can pour them without vacuum degassing for many applications. That predictability is what you are paying for.
Caulk-based silicone has no such guaranteed moldmaking specification after you modify it. Cure depth, bubbles, softness, shrinkage, odor, and final strength depend on the caulk formula, solvent ratio, room humidity, mold thickness, mixing method, and whether the master or release agent interferes with cure.
The Right Materials for a Small Pourable Batch
Use fresh 100% silicone caulk. Do not use acrylic-latex caulk, siliconized acrylic, paintable caulk, adhesive sealant blends, firestop sealants, roof cement, or construction adhesive. Those products are made for different jobs and can turn sticky, crumbly, weak, or unpredictable when mixed this way.
For one small mold, a practical starter list is:
- 1 tube of 100% silicone caulk, 10 to 10.1 oz
- Cornstarch, usually less than 1 cup for a small mold
- Mineral spirits, measured carefully
- Disposable mixing cups with volume marks
- Stir sticks or plastic putty knives
- Nitrile gloves rated for solvent handling
- Caulk gun
- Drop cloth or disposable work surface
- Mold box material, such as melamine scrap, plastic container, foam board, or sealed plywood
- Mold release, release wax, petroleum jelly, or a tested dish soap solution
Fresh caulk is worth mentioning because old tubes can partially cure inside the nozzle or cartridge. If the first inch comes out lumpy, rubbery, or separated, do not build a mold around it. A $9 tube is cheaper than losing an irreplaceable master.
2026 Cost Breakdown
For a small pourable batch, most homeowners in the United States should expect about $12 to $35 in material cost if they already own cups, gloves, a caulk gun, and basic shop supplies. If buying everything from scratch, the realistic range is closer to $25 to $70.
| Item | Typical 2026 US Cost | Notes |
|---|---|---|
| 100% silicone caulk, 10 to 10.1 oz tube | $6 to $14 | GE All Purpose Silicone 1 was listed around $9.48; advanced kitchen and bath versions often run $10 to $14. |
| Mineral spirits, quart | $8 to $15 | One quart is more than enough for several small molds. |
| Mineral spirits, gallon | $18 to $25 | A 1-gallon Klean-Strip odorless mineral spirits listing was around $18.48; VOC-regulated formulas may cost more. |
| Cornstarch, 16 oz box | $2 to $4 | Cost per mold is usually under $1 to $2. |
| Cups, stir sticks, gloves, drop cloth | $8 to $25 | Depends on pack size and glove quality. |
| Mold release aerosol | $10 to $20 | Useful for repeat work; test first. |
| Commercial RTV silicone trial kit | $35 to $60+ | Higher cost, but predictable mix ratio, cure, hardness, and repeatability. |
The homemade method looks cheaper when the mold is small and the object is not critical. Once the mold gets larger than a few cups of material, failed batches start to erase the savings. If accuracy matters, or if you need to make more than one dependable mold, commercial RTV usually becomes the better value.
The Starting Ratio: 2:2:1, Then Adjust
Do not treat any homemade caulk silicone ratio as universal. A good starting point for pourable silicone is 2 parts silicone caulk, 2 parts cornstarch, and 1 part mineral spirits by volume. For example, for a small test batch, use 2 tablespoons silicone, 2 tablespoons cornstarch, and 1 tablespoon mineral spirits.
Windows Errors? Fix Them Before They Spread
Repair common Windows errors and clear accumulated junk for a smoother, more stable PC - no reinstall needed.Free scan · no reinstallCrashes, No Sound, or Screen Glitches?
Random freezes, missing sound and display glitches usually trace back to one bad driver. Find and replace yours safely.Free scan · under a minuteLess solvent gives you a stronger, less shrunken final mold, but the mixture is thicker and harder to pour. More solvent improves flow, but increases odor, flammability, bubbles, oily surfaces, shrinkage, cure uncertainty, and distortion. If you add solvent until it pours like water, you have probably gone too far.
For a small mold around a knob, medallion, trim detail, or coin-sized texture sample, start with the 2:2:1 ratio. If it is too thick to settle, add mineral spirits in very small increments, such as 1 teaspoon at a time. If it runs like thin paint, add more cornstarch and silicone in equal amounts.
Step-by-Step: Making the Pourable Version
1. Build a Small, Leak-Tight Mold Box
Use a shallow mold box when possible. Caulk-based silicone cures more reliably in thinner sections, so avoid deep, bulky pours. For a small object, leave about 1/2 inch of silicone around the sides and 3/8 to 3/4 inch above the highest point. A mold that is 4 inches by 4 inches by 3/4 inch deep is far more predictable than a 4-inch cube.
Seal all seams. Solvent-thinned silicone can seep through small gaps that thick putty recipes would never find. Hot glue, packing tape, modeling clay, or a sealed plastic container can work. If the box leaks, the batch may drain out before it cures.
Free tools Windows power users keep installed
One-click scans. No signup required.
Rank #2

- 100% Silicone Caulk Protection: This silicone caulk clear provides ultimate waterproof protection, ensuring a reliable seal against water damage. Ideal for areas with consistent exposure, keeping your surfaces safeguarded and pristine under any weather condition.
- Strong and Flexible: Delivers a silicone sealant waterproof clear that remains permanently flexible, adapting to surface movements for a lasting, durable hold. Perfect for dynamic environments like bathrooms and kitchens where adaptability and resilience are paramount.
- Quick 30 Minute Water Ready Performance: Experience the convenience of a silicone caulk that becomes water resistant in just 30 minutes, making it perfect for time sensitive projects. No more waiting hours, dependable, quick sealing efficiency with clear silicone caulk.
- Shrink and Crack Proof: Experience superior durability with clear silicone caulk that withstands temperature fluctuations. Its flexibility guarantees your surfaces stay intact without shrinking or cracking, ensuring consistent protection and a flawless finish over time.
- Low Odor and Safe Indoors: Enjoy stress free application with this silicone sealant featuring a low odor, neutral cure formula. Great for indoor use without overwhelming fumes, enhancing comfort and safety while ensuring effective waterproof clear protection for your spaces.
2. Prepare and Seal the Master
Porous masters can trap air, absorb solvent, or bond too aggressively to the silicone. Wood, plaster, unsealed concrete, 3D prints with rough layer lines, and porous stone should be sealed first. Shellac, acrylic clear coat, polyurethane, or a compatible sealer can work, but test the exact combination before the final pour.
Apply release agent sparingly. Too much petroleum jelly or wax can soften detail. Dish soap solutions can leave surface defects. Aerosol mold release is cleaner, but it still needs a test. The question is not whether a release product usually works; the question is whether it works with this caulk, this solvent, this master, and this casting material.
3. Make a Test Puck First
Before covering the real master, mix a test puck about 2 inches wide and 1/4 to 1/2 inch thick. Photograph it next to a ruler, note the ratio, room temperature, humidity if available, and time. After cure, measure it again. This gives you real shrinkage information instead of a guess.
A simple test puck can tell you whether the surface stays oily, whether the center cures, whether the mix tears easily, and whether your solvent ratio is too aggressive. On larger work, this 15-minute preparation step can save a full day.
4. Mix the Silicone and Cornstarch
Squeeze the silicone into a disposable cup. Add cornstarch and fold it in slowly. Scrape the sides and bottom. The mix will be sticky, stringy, and uneven at first. Keep working until the starch is distributed. Once cornstarch is in the batch, working time can be short, often about 5 to 20 minutes depending on humidity, caulk formula, and ratio.
5. Add Mineral Spirits Carefully
Add mineral spirits gradually and mix until the material becomes a heavy pourable consistency. Aim for pancake batter or thick latex paint, not water. Scrape the cup thoroughly because unmixed caulk will cure as rubbery lumps.
Work in small batches. A 10 oz tube of caulk can become awkward fast once thinned and mixed. For most first attempts, use one-third to one-half of a tube, prove the process, then scale up.
6. Brush the Detail Coat
For better surface detail, brush or dab a thin coat of the mix over the master before pouring the bulk material. This wets the surface and pushes silicone into small lines, corners, lettering, and texture. It also reduces trapped air directly against the object.
Use a disposable acid brush, cheap artist brush, or gloved finger. Do not scrub so hard that you move the release agent or disturb the master. Once the surface is coated, pour the rest from one corner and let the material rise around the object.
7. Pour Shallow and Let It Cure
Pour slowly. Tap the mold box on the bench to bring bubbles up. Do not assume a thick mass will cure correctly just because the top skins over. Moisture-cure silicone can look done on the surface while the center remains soft.
Thin sections may firm up in a few hours, but a practical demold window is often overnight to 24 hours. Thicker areas may need 48 hours or longer, and some may never cure properly if the mix has too much solvent or too little moisture path.
Rank #3
- Kitchen & Bath Ready – Premium white silicone caulk formulated for kitchens and bathrooms, delivering a durable, long-lasting seal in wet, humid environments
- 100% Waterproof Seal – Perfect for showers, tubs, sinks, tile, and backsplashes, keeping water out where it matters most
- 30-Minute Water-Ready – Can be exposed to water in as little as 30 minutes; full cure in 24 hours for reliable results
- Flexible and Durable – High-flex silicone caulk prevents shrinking, cracking, or breaking down; perfect for indoor and outdoor projects
- Long-Lasting Mold-Resistant – Formulated to resist mold and mildew after curing; easy to clean with soap and water
Why Homemade Silicone Stays Sticky, Soft, or Smelly
Most failures come from one of five causes: wrong caulk, too much solvent, thick mold geometry, incompatible release or master material, or poor mixing.
The Tool Desk
Outbyte PC Repair FREEClear out junk files and repair common Windows errorsFree Scan →Outbyte Driver Updater FREEFix the driver behind crashes, sound loss and screen glitchesFind Drivers →If the mold is sticky throughout, check the tube. Siliconized acrylic and paintable caulk are common mistakes. They are not the same as 100% silicone. If the outside cured but the center stayed soft, the mold was probably too thick, too solvent-heavy, or short on moisture distribution. If the surface is oily, the solvent ratio may be too high or the caulk formula may not tolerate the thinning method well.
Bubbles are also common. Unlike commercial RTV systems that are designed around known viscosity and cure behavior, caulk silicone is improvised. Mixing folds in air, solvent can create voids, and a thick pour can trap bubbles against details. A brushed first coat helps, but it will not make the material equivalent to vacuum-degassed RTV.
Safety Rules That Matter
Mineral spirits and naphtha are flammable solvents. “Odorless” does not mean harmless. Treat the work as a solvent-handling task, not a kitchen craft. Work outdoors or in a well-ventilated shop. Keep the batch away from water heaters, furnaces, pilot lights, cigarettes, space heaters, grinders, saws, switches that arc, and any spark-producing tool.
Wear gloves and eye protection. Avoid breathing vapors. Keep containers closed when not actively measuring. Do not mix in food containers you plan to reuse. Keep children and pets away from the work area until the mold is cured and the solvent smell is gone.
Quick wins for a faster PC:
Scan for outdated or missing drivers - takes under a minuteDriver Scan →Repair Windows errors before they cause bigger problemsFix Now →Disposal also matters. Solvent-contaminated cups, rags, and leftover liquid may be household hazardous waste depending on your local rules. The EPA treats many leftover household chemicals as household hazardous waste because they can ignite, react, or create health and environmental hazards. Your city or county waste authority can tell you where to take solvent waste. Do not pour mineral spirits, uncured silicone, or solvent-heavy leftovers down a drain, into soil, or into a storm sewer.
Where DIY Caulk Silicone Works Well Enough
This method is best for small, noncritical molds where some shrinkage and surface variation are acceptable. Good candidates include decorative plaster pieces, wax shapes, resin craft parts, small concrete accent samples, texture pads, costume pieces, simple replacement knobs, and one-off prototypes.
It can also be useful for texture work in construction-adjacent projects. For example, a small silicone pad can capture a wood grain, stone face, or stamped concrete texture for a mockup. Keep the mold shallow, test the release, and assume the finished piece may not match exact dimensions.
For concrete, use caution. Homemade silicone may work for small cement paste or mortar samples, but concrete is abrasive and alkaline. Repeated casting can tear weak edges. Fine undercuts, sharp corners, and heavy aggregate increase the chance of damage. If you need ten matching concrete pieces, buy proper RTV or have a mold made.
Do these 3 things before closing this tab:
1Scan for outdated or missing drivers - takes under a minute2Clear out junk files and repair common Windows errors3Fix the driver behind crashes, sound loss and screen glitchesWhere It Does Not Belong in Construction
Homemade silicone from caulk does not belong in building envelope work. It is not an ASTM C920-rated joint sealant after modification. ASTM C920-rated sealants are tested for movement capability, adhesion, hardness, effects of heat aging, tack-free time, staining, and other performance requirements. A homemade solvent-thinned batch has none of that backing.
Do not use it around windows, doors, siding joints, exterior penetrations, control joints, concrete expansion joints, showers, tubs, backsplashes, balconies, decks, flashing, roofs, fire-rated walls, or glazing systems. Do not use it as a waterproofing membrane. Do not use it where a manufacturer’s system, code official, architect, engineer, warranty, or inspection requires a specific material.
Rank #4

- 100% Silicone Caulk Protection: This silicone caulk white provides ultimate waterproof protection, ensuring a reliable seal against water damage. Ideal for areas with consistent exposure, keeping your surfaces safeguarded and pristine under any weather condition.
- Strong and Flexible: Delivers a silicone sealant waterproof white that remains permanently flexible, adapting to surface movements for a lasting, durable hold. Perfect for dynamic environments like bathrooms and kitchens where adaptability and resilience are paramount.
- Quick 30 Minute Water Ready Performance: Experience the convenience of a silicone caulk that becomes water resistant in just 30 minutes, making it perfect for time sensitive projects. No more waiting hours, dependable, quick sealing efficiency with white silicone caulk.
- Shrink and Crack Proof: Experience superior durability with white silicone caulk that withstands temperature fluctuations. Its flexibility guarantees your surfaces stay intact without shrinking or cracking, ensuring consistent protection and a flawless finish over time.
- Low Odor and Safe Indoors: Enjoy stress free application with this silicone sealant featuring a low odor, neutral cure formula. Great for indoor use without overwhelming fumes, enhancing comfort and safety while ensuring effective waterproof clear protection for your spaces.
On our job sites, this distinction is nonnegotiable. A craft mold can fail and cost an afternoon. A failed sealant joint can put water into framing, insulation, sheathing, drywall, flooring, electrical cavities, or occupied space. Those are different risk categories.
Independent reader supportYour contribution helps us test, update, and keep practical guides available for everyone.DIY Caulk Silicone vs Commercial RTV Silicone
| Category | DIY Caulk Silicone | Commercial RTV Silicone |
|---|---|---|
| Typical starting cost | $12 to $35 if basic supplies are already on hand | $35 to $60+ for small trial kits |
| Mix ratio | Approximate; often starts near 2:2:1 silicone, cornstarch, mineral spirits | Specified by manufacturer, often 1A:1B by volume for common mold silicones |
| Working time | Often 5 to 20 minutes after starch is added | Published pot life by product |
| Cure time | Variable; overnight to 48+ hours depending on thickness and ratio | Published cure time by product |
| Shrinkage | Variable and often noticeable with excess solvent | Controlled and published more reliably |
| Best use | Small, noncritical, one-off molds | Accurate molds, repeated casting, better detail, dependable performance |
| Construction-rated use | No | Only if the specific product is rated for that construction use, which mold RTV usually is not |
The practical rule is simple: use homemade caulk silicone when failure is cheap and learning is part of the project. Use commercial RTV when dimensions, durability, detail, repeatability, or schedule matter.
What’s actually slowing this PC down?
Pick the symptom - the matching free tool is one click away.
Three Recipes People Confuse
Kneadable Silicone Putty
This is the thicker silicone-and-cornstarch method often used by hand. It behaves more like putty than liquid. It is useful for pressing around simple objects, making quick impressions, or building texture pads. It is less useful when you need silicone to flow into a detailed mold box.
Brush-On Caulk Silicone
This method uses thinned silicone in thin coats over a master. It can work for larger surfaces because each layer is thin enough to cure. Reinforcement, registration, and a rigid support shell may be needed. Brush-on work is slower but often more reliable than one thick pour.
Pourable Solvent-Thinned Silicone
This is the version covered here. It flows better than putty, but it brings more solvent risk and more shrinkage risk. It is best kept shallow and small.
When to DIY vs When to Hire a Pro
DIY makes sense when the mold is small, the master is replaceable, the casting material is low-risk, and you can tolerate imperfect dimensions. A homeowner making one plaster ornament, a resin craft insert, a drawer pull prototype, or a concrete texture sample can justify the experiment.
Hire a pro or buy commercial RTV when the mold needs to be accurate, repeated, durable, or part of paid work. That includes architectural restoration pieces, repeated concrete castings, custom trim reproduction, detailed resin parts, large molds, molds with deep undercuts, or any item where a failed mold damages the original.
For actual construction sealing, hire a qualified contractor or use the exact manufacturer-specified system. Windows, showers, exterior joints, expansion joints, firestopping, and glazing are not places to experiment with modified caulk. The correct product may cost more per tube, but the real expense is surface prep, joint design, backing material, tooling, compatibility, and warranty compliance.
Practical Troubleshooting
If the mold shrinks too much, reduce the mineral spirits and keep the next pour thinner. If it tears, use less solvent, increase wall thickness slightly, avoid sharp undercuts, or move to commercial RTV. If detail is poor, brush the first coat onto the master and pour more slowly. If the mold bonds to the master, improve sealing and release testing before trying again.
If the mold smells strongly after 24 hours, move it to a ventilated area and give it more time. Do not cast resin into a solvent-heavy mold until the odor has dropped and the surface feels stable. Solvent trapped in silicone can interfere with casting materials and cause bubbles, soft spots, or surface defects.
Recommended Free Tools
Best Value
- 100% Waterproof and Weatherproof: This 100% silicone formula offers protection from water damage, providing a reliable seal in areas exposed to harsh weather
- Excellent Flexibility and Strong Adhesion: Provides a flexible, durable seal for both exterior and interior projects
- Same-Day Rain-Ready: Ready for rain exposure in as little as 12 hours
- Compatible with Most Materials: Adheres to most metals and woods; glass, drywall, plaster, granite, cultured marble, ceramic and porcelain tile; natural stone, cement board, composites, and more
If the mold is uncured inside after 48 hours, do not assume it will become reliable later. Some batches recover with more time, but many remain weak or gummy. Cut the failed batch apart, note the thickness and ratio, and make the next test smaller with less solvent.
Bottom Line
Pourable silicone from caulk is a useful low-cost trick for small, noncritical molds. Start with 2 parts 100% silicone caulk, 2 parts cornstarch, and 1 part mineral spirits by volume, then test before committing the real object. Keep the mold shallow, brush on a detail coat, use fresh caulk, measure shrinkage, and handle solvents with respect.
For construction, the answer changes. Homemade silicone is not a sealant system, not a waterproofing product, not a firestop, not a glazing material, and not an ASTM C920-rated joint sealant. Use it at the workbench, not in the building envelope.
Frequently Asked Questions
Can you make pourable silicone from 100% silicone caulk?
Yes. A common DIY method mixes 100% silicone caulk with cornstarch and mineral spirits until it becomes pourable. It can work for small noncritical molds, but it is not equivalent to commercial RTV silicone or construction-rated sealant.
What’s actually slowing this PC down?
Pick the symptom - the matching free tool is one click away.
What is the best ratio for silicone caulk, cornstarch, and mineral spirits?
Start with about 2 parts silicone caulk, 2 parts cornstarch, and 1 part mineral spirits by volume. Adjust only after a small test puck. Less solvent usually means better strength and less shrinkage; more solvent improves flow but adds risk.
How long does homemade caulk silicone take to cure?
Working time is often about 5 to 20 minutes after cornstarch is mixed in. Thin molds may firm up in a few hours, but overnight to 24 hours is a more realistic demold window. Thick sections can take 48 hours or may stay soft inside.
Is DIY caulk silicone safe to use indoors?
It should only be mixed with strong ventilation and away from flames, pilot lights, heaters, cigarettes, sparks, and ignition sources. Mineral spirits are flammable, and odorless mineral spirits are still hazardous. Gloves and eye protection are recommended.
Can homemade silicone from caulk be used for concrete molds?
It can work for small concrete accent samples or texture molds, but it is not ideal for repeated production, sharp undercuts, heavy abrasion, or dimensionally accurate parts. Commercial RTV is the better choice for reliable concrete mold work.
The Tool Desk
Outbyte Driver Updater FREEFix the driver behind crashes, sound loss and screen glitchesFind Drivers →Outbyte PC Repair FREERepair Windows errors before they cause bigger problemsFix Now →Can I use homemade silicone instead of construction sealant around windows or showers?
No. Once caulk is mixed with cornstarch and solvent, it is no longer a manufacturer-tested construction sealant. Do not use it for windows, showers, exterior joints, waterproofing, firestopping, glazing, or code-required work.
Quick Recap
Product prices and availability are accurate as of the date/time indicated and are subject to change. Any price and availability information displayed on Amazon at the time of purchase will apply.