Outdated Drivers Are Slowing You Down
One free scan finds every outdated or missing driver and matches the right update for your exact hardware.Free scan · exact hardware matchWindows Errors? Fix Them Before They Spread
Repair common Windows errors and clear accumulated junk for a smoother, more stable PC - no reinstall needed.Free scan · no reinstallTo install a chain-link fence, first confirm the boundary and local requirements, arrange utility locating, and lay out the fence and gate openings. Set the end, corner, and gate posts; add line posts and rails; then attach, stretch, and tie the fabric. Hole dimensions, post spacing, fence height, and permits depend on your site and jurisdiction, so use local requirements and the instructions for your chosen fence system rather than treating general guidance as code.
Plan the fence line before digging
Confirm the property boundary before choosing a route. Mark the line with stakes and taut string or a chalk line, including corners, ends, and gate openings. Check local rules for permits, allowable fence height, setbacks, and other requirements. Contact the local utility-locate service before digging; buried cables and pipelines may cross the proposed route. A manufacturer resource also recommends checking permits and locating underground services: chain-link fence installation resources.


Measure each run and gate opening. These measurements determine how much fabric and rail you need and where posts and fittings must go. Match gate-post spacing to the gate you select and its installation instructions; do not assume a standard opening.
Choose compatible parts and gather tools
A typical system includes chain-link fabric, terminal posts, line posts, top rail and sleeves, post tops and caps, rail ends, tension bars, tension and brace bands, and tie wires. A gate and bottom tension wire are optional depending on the layout and system. Buy fittings that match the posts, rails, fabric, and gate rather than relying on broad product names alone. Compare fence height, mesh and wire specifications, coating or material, site slope and soil, local rules, and total materials or labor cost when selecting a system.
Recommended Free Tools
#1 Best Overall
Common tools include a tape measure, stakes and string or chalk line, level, shovel or post-hole digger, wrench, fence pliers, and a fence stretcher or come-along. A power auger can speed hole digging; use it according to its instructions. Check the Lowe’s chain-link fence installation guide and the selected system’s instructions for a parts and tool checklist.
Set terminal posts and line posts
Set the terminal posts first
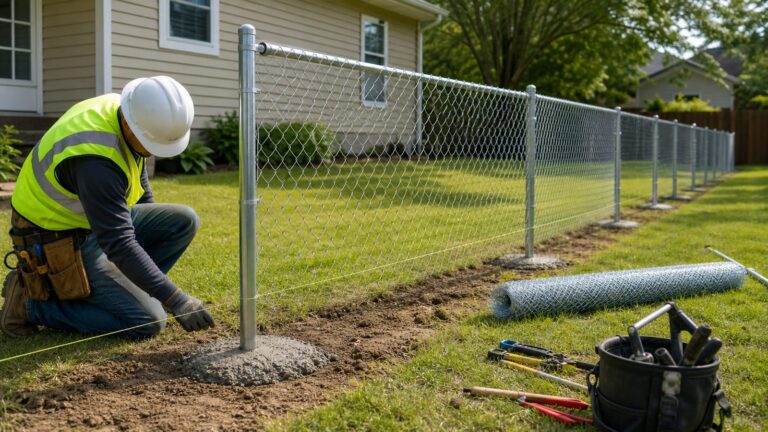
Terminal posts are the end, corner, and gate posts. They anchor the tensioned fabric and are distinct from the lighter intermediate line posts. Dig holes to dimensions suited to local requirements and site conditions. Terminal-post holes are typically wider or deeper than line-post holes, but exact dimensions should come from local rules and the fence-system instructions. Frost depth matters in cold regions because freeze-thaw movement can heave posts; the frost line varies by location.
Set terminal posts plumb and aligned with the planned fence line. Use concrete or another footing detail where required by local rules and the system instructions.
Space line posts along each run
After the terminals are established, lay out and set the line posts between them. Lowe’s gives up to about 10 feet on center as a typical spacing recommendation; it is not a universal standard. Check the instructions for your fence system and local requirements before settling on spacing.
Install bands, caps, and top rail
Fit the tension and brace bands, terminal caps, line-post tops, and rail ends in the positions required by your system. Run the top rail through the line-post tops and connect it at terminal posts. Keep the fittings oriented so the fabric can be attached and tensioned, and tighten them in the sequence specified by the manufacturer.
Attach and stretch the chain-link fabric
-
Weave a tension bar through the first edge of the fabric and secure the bar to a terminal post with tension bands.
-
Unroll the fabric along the run. Use a fence stretcher or come-along with a stretcher bar to pull the mesh toward the far terminal post.
-
When the fabric is tensioned, weave in a second tension bar at the far end and secure it to the terminal post with tension bands. The Lowe’s guide describes the desired tension as allowing the diamonds to be squeezed slightly; do not pull the mesh as tight as possible.
What’s actually slowing this PC down?
Pick the symptom - the matching free tool is one click away.
Special offer. See more information about Outbyte and uninstall instructions. Please review EULA and Privacy policy. -
Attach the mesh to line posts and the top rail with tie wires, following the spacing guidance for your product.
Rank #4
 ALEKO Chain Link Fence Kit - 4x50 ft. | 7 AWG| Black Coated KITCLFB7G4X50
- [Heavy-Duty 7 AWG Steel] – Built for security and durability, this fence is made from 7 AWG galvanized steel, providing superior strength to withstand impact, harsh weather, and daily wear. Ideal for protecting homes, businesses, and outdoor spaces.
- [Rust-Resistant Galvanized Coating] – The hot-dipped galvanized steel construction resists rust and corrosion, ensuring a long lifespan even in humid, rainy, or extreme weather conditions. Designed for reliable, maintenance-free outdoor use.
- [Black PVC Coating for Extra Protection] – A sleek black PVC coating adds an extra layer of corrosion resistance while enhancing durability and appearance. The coating also helps prevent scratches, wear, and damage from exposure to sun, wind, and moisture.
- [Tight Diamond Mesh for Maximum Security] – The 1.97-inch diamond mesh is designed to provide enhanced security by preventing gaps while maintaining visibility. The tightly woven design strengthens the fence, making it ideal for pets, property boundaries, and restricted areas.
- [Complete Kit for Easy Installation] – Includes fence fabric, 6 posts, 9 top rails, tension bars & bands, brace bands, rail ends, post caps, tie wires, and bolts. Everything needed for a secure, hassle-free installation in residential, commercial, or industrial settings.
For additional installation steps and illustrations, see the Lowe’s installation guide.
Independent reader supportYour contribution helps us test, update, and keep practical guides available for everyone.Finish the bottom edge and gate
A bottom tension wire can add rigidity to the fence. Its position and installation depend on the system and local requirements. A California Department of General Services construction specification places bottom tension wire within six inches of the fabric bottom for that project context; that measurement is not automatically a residential requirement. See the California DGS chain-link fence specification.
Install the gate and hardware according to their instructions. Check that the gate swings freely and has suitable clearance, secure hinges, and a working latch.
Best Value

- ADJUSTABLE WIDTH GATE KIT: Durable gate building kit lets you fix an existing gate or add a new entrance to any fence
- TELESCOPING FRAME: Chain link gate frame width telescopes to provide a custom fit to your gate opening; Contractor quality assembly; Fixed 6ft height
- ON-SITE INSTALLATION: Install on-site to perfectly fit your gate opening; Posts and post hinges not included
- INCLUDES: Steel gate frame, powder-coated chain link, lockable latch, gate hinges, and steel wire ties
- DURABLE DESIGN: Strong, powder-coated steel construction resists rust and corrosion even in wet weather; Dimensions (L x W x H): 1.38 x 70 x 72 inches; Weight: 28.10 pounds
Check the installation against your site and system
-
Confirm the fence route and gate locations against the property boundary and layout.
-
Verify that posts are plumb and aligned, and that spacing and footing details follow local requirements and system instructions.
-
Check that fittings match the posts, rails, fabric, and gate, and that bands and ties are secure.
-
Confirm the fabric is tensioned evenly, without pulling it maximally tight, and that the gate clears and latches.
Special offer. See more information about Outbyte and uninstall instructions. Please review EULA and Privacy policy.
Soil, slope, drainage, wind exposure, frost depth, setbacks, and local codes can affect the right design and installation details. This overview is not a site-specific design or code determination; follow your local authority and the instructions for the exact fence system you are installing.
Quick Recap
Product prices and availability are accurate as of the date/time indicated and are subject to change. Any price and availability information displayed on Amazon at the time of purchase will apply.