Quick wins for a faster PC:
Scan for outdated or missing drivers - takes under a minuteDriver Scan →Clear out junk files and repair common Windows errorsFree Scan →Fix the driver behind crashes, sound loss and screen glitchesFind Drivers →A concrete driveway is installed in a sequence: plan the site, prepare and compact the ground, build the specified base and forms, place and finish the concrete, add joints and traction texture, then cure it before allowing vehicle traffic. The details that determine thickness, reinforcement, drainage, concrete mix, permits and opening time depend on the site and local requirements, so confirm them before work begins.
Before you start: confirm the design and site requirements
There is no single residential driveway specification that suits every property. Before excavation or ordering concrete, confirm applicable permits and property constraints, where runoff should go, the vehicles the driveway must support, and the requirements for the slab, base, reinforcement and concrete mix. Have the design checked against local rules and the actual soil, climate and drainage conditions. The American Cement Association’s overview describes general pavement practice, not a universal residential design: Applications of Cement.
Plan the work so the concrete can be placed, finished, jointed and protected without interruption. Decide the driveway’s finished elevations and slope, form layout, joint pattern, finishing texture and curing method in advance. These choices are connected: forms establish grade, joint layout depends on slab geometry, and curing materials must be compatible with the finished surface and project instructions.
Step 1: Grade and compact the subgrade
The subgrade is the native soil directly beneath the pavement. Remove unsuitable material as the project design requires, shape the ground to the planned elevations and drainage, and compact it. A weak or poorly prepared subgrade can undermine the slab; do not simply cover unstable areas with concrete. Address soft spots and drainage problems according to the site-specific design. The American Cement Association identifies grading and compaction as essential pavement preparation: Applications of Cement.
The Tool Desk
Outbyte PC Repair FREEClear out junk files and repair common Windows errorsFree Scan →Outbyte Driver Updater FREEFix the driver behind crashes, sound loss and screen glitchesFind Drivers →#1 Best Overall

- Providing Multiple Choices: Goldblatt 8 pieces mason tool set contains almost everything you need to finish concrete in comfort and style. You don’t need to spend more time and more money to gather these tools. Time-saving and labor-saving, high efficiency
- Professional Grade: Every single mason’s tool is made of high quality material for long-term use. Trowels, groover, edger and twister all have hardened and tempered carbon or stainless steel blades or hook with mirror finish that are rust-resistant, corrosion-resistant and easy clean-up. Extruded alloy float and wood float are well-made and lightweight. All of them will help you finish better concrete hand work
- Ergonomic Handle: All the handles are designed for comfortable grip to reduce hand fatigue and provide superior balance and strength while working. Super-strong connection between handle and blades or hook are durable and long lifespan
- What You Will Get: Includes 16'' x 4'' Pro Finishing Trowel, 7'' x 3-3/8'' Gauging Trowel, 16''x 3-1/4'' Extruded Alloy Float, 15''x 3-1/2'' Wood Float, 6'' x 3'' Stainless Steel Groover, 6'' x 3'' Stainless Steel Edger, 7-1/3''x 1-1/3'' Wire Twister and 9'' x16''x12'' Tool Bag
- Easy Organized and Carrying: The concrete and cement tools set is coming with a very useful tool bag. Big 16'' tool bag with double zippers will organized all these tools in place. You can also put other small tools in. Designed extra padded handle and adjustable shoulder strap for easily carrying
Step 2: Install the specified subbase
A subbase, when specified, sits immediately beneath the concrete. It can help prevent soil displacement. The appropriate material depends on the project; possibilities include granular material, cement-treated material, lean concrete and open-graded material. The association lists these options but does not prescribe one for every driveway. Install and prepare the selected material to the project specifications rather than treating a particular subbase as universally required.
Step 3: Set forms and place specified reinforcement
Set forms to hold the planned driveway shape and finished elevations. Check that they are stable and aligned before the pour. Install reinforcement only as called for by the design, with the specified type, location and support. Pavement can be plain or reinforced; dowels, tie bars and reinforcing steel are not interchangeable requirements, and not every residential driveway needs the same reinforcement. Follow the project specifications and applicable local requirements.
Rank #2

- 【DIY Necessities】: Essential hand tools for concrete application projects at home
- 【Quality and Durability】: Stainless steel blade (thickness: 1.3mm), ergonomically designed handle, no-rivets construction for edger and groover; Polished stainless steel (thickness: 0.7mm), ergonomically designed handle, aluminium shank, no-rivets construction for flat trowel
- 【User Centered】: Polished stainless steel is rust-resistant, durable and easy to clean up; No-rivets construction provide finely finish to get smooth, clean application; Plastic and rubber handle offers lightweight, sturdy and comfortable grip that less fatiguing to work; Curved ends for edger, radiused edge for groover to move easier through concrete with no drag, stuck, catch
- 【In the Package】: Edger 1 PC, overall size (6" x 3"), 1/2" radius; Groover 1 PC, overall size (6" x 3"), 1/2" width, 1/2" depth; Flat trowel 1 PC (11" x 4")
Step 4: Place, consolidate and screed the concrete
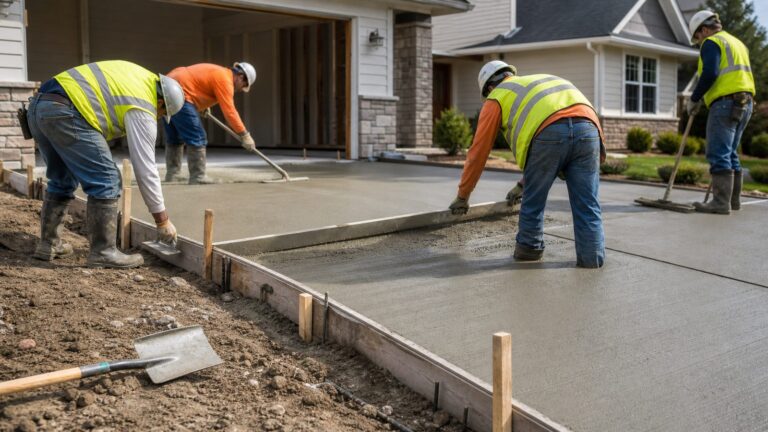
Place the specified concrete consistently within the forms. Consolidate it as appropriate so it fills around forms and embedded items and entrapped air is reduced. Then screed: move a straightedge across the forms to strike off excess concrete and bring the surface to the planned grade. The association’s working guidance describes consolidation and screeding in Working with Concrete.
Step 5: Float and finish for an exterior driveway
After screeding, use a bull float to level high and low areas and embed larger aggregate. A hand float can further prepare the surface for finishing. Exterior floating can leave a relatively even, slightly rough surface with useful slip resistance. Avoid prematurely steel-troweling an exterior driveway into an overly smooth finish: appearance should not come at the expense of traction. Select finishing practices to suit the application and project specifications. See the association’s concrete working guidance for descriptions of these operations.
Rank #3

- 8-IN-1 CONCRETE FINISHING TOOLS & MASONRY KIT: Master stucco repair, bricklaying, and concrete tools finishing with precision. Eliminate multiple purchases – includes magnesium float, edger tool, and brick trowels
- CONCRETE MAGNESIUM FLOAT: Achieve smooth surfaces on walkways, patios, and slabs with magnesium float. Chamfered edges prevent gouging while optimizing curing evaporation for concrete finishing perfection
- PROFESSIONAL CONCRETE TROWEL SET: Master masonry and plastering with specialized tools: Stainless Steel Finishing Trowel for coatings, Pool Trowel for large areas, High-Carbon Steel Gauging Trowel for mortar, and Brick Trowels for efficient bricklaying
- PRO-GRADE CRACK PREVENTION: Minimize slab cracking with Stainless Steel Concrete Groover for clean control joints. Create rounded edges on driveways and patios using the Concrete Edger Tool - essential for finishing concrete tools' durability
- ERGONOMIC HAND TOOLS WITH HEAVY-DUTY BAG: Welded steel concrete tools with TPR rubber grips reduce fatigue during extended brick laying and concrete work. Includes a tear-resistant storage bag for organization and transport
Step 6: Form contraction joints to guide cracking
Concrete shrinks as it hardens. Contraction joints create planned locations for cracks to form, helping control where shrinkage cracking occurs. Joints may be hand-grooved while the concrete remains workable or saw-cut after it is firm enough to avoid raveling. Plan their layout, depth and timing for the actual slab; a concrete hand groover is one tool for making joints in workable concrete, but tool choice does not replace a sound layout.
The American Cement Association’s jointing guidance gives spacing about equal to slab width for 4-inch and 5-inch driveway and walk slabs. It notes that wider drives may need a center longitudinal joint, and that panels with a length-to-width ratio greater than 1.5:1 are more likely to crack. These are general recommendations, not a design for every driveway; the technical PDF is an older publication, so use current project specifications for the actual pattern: Jointing and Curing.
Rank #4

- 【10-Piece Contractor-Grade Concrete & Masonry Tool Kit】Includes wood float, flat finishing trowel, pool trowel, gauging trowel, margin trowel, edger, groover, wire twister, anti-slip gloves, and a heavy-duty carry bag. From rough surface prep to detailed edgework and rebar tying, this concrete trowel set meets the demands of both contractors and serious DIYers
- 【Built for Full-Scale Finishing – From Base to Detail】Level ground with the large 11.8" wood float. Seal and polish with the 12" flat and 14" pool trowels. Create clean edges and joints using the edger and groover. Specialized trowel concrete tool support every phase — from concrete prep and smoothing to final detailing and trimming
- 【Professional-Grade Large-Size Tools – For Pros & DIYers】All major concrete trowels are sized to meet or exceed standard contractor-grade dimensions, providing wide coverage, enhanced efficiency, and excellent handling. Whether you’re pouring concrete on a construction site or working on a home renovation, this concrete finishing trowel set delivers professional performance for both pros and serious DIY enthusiasts
- 【Stainless Steel & High Carbon Steel – Built for Performance】Stainless steel concrete trowels resist rust and deliver smooth, flexible performance in wet conditions. High carbon steel margin and gauging trowels offer enhanced strength and wear resistance — ideal for grouting, masonry, and tough jobs that demand power and precision
- 【Comfortable Grip & Easy Storage — Portable and Organized with Carry Bag and Gloves】All cement trowel tools feature anti-slip rubber handles for a secure, comfortable grip. Includes a spacious 13.7" storage bag to keep your concrete trowel neatly organized and protected on the go, plus anti-slip gloves to safeguard your hands. A practical and professional choice for concrete workers, bricklayers, handymen, and DIYers alike
Step 7: Texture the surface for traction
After joint insertion, texture the surface for the driveway’s intended use and conditions. Pavement guidance places texturing around the point when the water sheen has disappeared and the concrete is about to become non-plastic. Brooming, drags and grooving are among the methods used; the right choice depends on environment, traffic and project requirements. Follow the specified finish rather than assuming every driveway should receive the same texture. The association describes timing and methods in Applications of Cement.
Step 8: Cure the concrete
Curing keeps moisture available for hydration and strength development. Possible methods include sprinkling or fogging, wet burlap or cotton mats, plastic or other waterproof covers, and curing compounds. They are alternatives, not a ranked list or a requirement to use all of them. Choose a method compatible with the surface and project instructions, and begin after finishing once the surface can resist being marred by the curing method. The association outlines curing approaches in its pavement guidance.
Best Value

- Manufactured from an aluminum magnesium alloy, it offers superior strength and lightweight maneuverability, making it ideal for large-scale concrete projects.
- The round ends ensure smooth and precise finishing, while the adjustable bull float bracket allows for customized positioning and control.
- Adjustable angle bracket: Allows flexible pushing and pulling motions for perfect surface finishing.
- Complemented by 4 extendable handles, this kit provides a comprehensive solution for efficient concrete screeding and finishing.
- With its robust construction and user-friendly design, this tool is a must-have for professionals in the construction industry. Seamlessly blend functionality and convenience with this high-quality concrete float set.
Step 9: Open the driveway only when requirements are met
Do not rely on a universal number of days before driving on new concrete. Opening should follow the specified curing period and evidence that the concrete has reached the required strength. Ask the concrete supplier or project professional what criteria apply to this driveway, and follow the project specification and local guidance before allowing vehicle traffic.
What most affects a durable result
- Grading and compaction provide the foundation; a specified subbase may help prevent soil displacement.
- Reinforcement is determined by the design rather than being identical for every driveway.
- Joint layout should suit the slab’s dimensions and project requirements so shrinkage cracks have planned locations.
- A driveway finish needs traction, not simply a smooth appearance.
- Curing and opening criteria are part of the construction plan, not afterthoughts.
For additional flatwork reference, the American Cement Association lists its Concrete Finisher’s Guide, which covers planning, building and finishing concrete flatwork, including driveways.
Quick Recap
Product prices and availability are accurate as of the date/time indicated and are subject to change. Any price and availability information displayed on Amazon at the time of purchase will apply.