The Tool Desk
Outbyte PC Repair FREEClear out junk files and repair common Windows errorsFree Scan →Outbyte Driver Updater FREEScan for outdated or missing drivers - takes under a minuteDriver Scan →To hang a picture well, plan its position first, measure the distance from the frame’s top edge to its loaded hanging point, then transfer that offset to the wall. Choose a fastener suited to both the wall and the framed piece, and check the result with a level. These ten practical hacks help you avoid unnecessary holes and get a stable, straight finish.
1. Choose the height in the room
A common starting point is to hang a picture so its center is about 57 inches above the floor. The Home Depot presents 57 inches as a practical guideline, while BLACK+DECKER gives a range of 57 to 60 inches; neither is a universal requirement. Adjust for the furniture below the picture, the room’s proportions, and where people will view it. The Home Depot’s picture-hanging guide was last updated September 7, 2023; BLACK+DECKER’s guide also treats the range as a guideline.
2. Mock up the placement before drilling
Use painter’s tape or a paper outline to mark the proposed frame position on the wall. Step back and check how it looks in context before committing to holes. A quick mock-up makes it easier to adjust scale or height while the wall is still untouched. Lowe’s picture-hanging guide and The Home Depot guide recommend planning placement before hanging.
3. Plan a gallery wall on the floor
For several frames, trace each one onto paper and cut out the shapes. Arrange the cutouts on the floor, adjust the composition and spacing, then tape the templates to the wall. This lets you judge the group as a whole and move pieces around before installing any fasteners. Lowe’s and The Home Depot describe paper templates as a way to plan a grouping.
#1 Best Overall
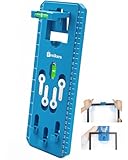
- 【𝐐𝐮𝐢𝐜𝐤 𝐚𝐧𝐝 𝐞𝐚𝐬𝐲 𝐦𝐚𝐫𝐤𝐢𝐧𝐠 𝐟𝐨𝐫 𝐩𝐞𝐫𝐟𝐞𝐜𝐭𝐥𝐲 𝐩𝐥𝐚𝐜𝐞𝐝 𝐟𝐫𝐚𝐦𝐞𝐬】Patent Pending*Our Picture Hanging Tool lets you mark exact nail points in seconds—just place, press, and hammer. The built-in bubble level ensures picture frames hang perfectly straight every single time. Perfect for wall decor, picture hangers, and picture hanging projects big or small.
- 【𝟒 𝐌𝐚𝐠𝐧𝐞𝐤𝐞𝐲𝐬 𝐰𝐨𝐫𝐤 𝐰𝐢𝐭𝐡 𝐦𝐮𝐥𝐭𝐢𝐩𝐥𝐞 𝐭𝐲𝐩𝐞𝐬 𝐨𝐟 𝐩𝐢𝐜𝐭𝐮𝐫𝐞 𝐡𝐚𝐧𝐠𝐞𝐫𝐬】Simply insert the magnetic key into sawtooth hangers, D-rings, or other common picture hardware. Press the frame to mark the exact spot on your wall—no measuring, no guessing. One person can hang a family photo in under 30 seconds. And because small parts can sometimes get misplaced, we include 4 magnetic keys—2 extra in case one ever goes missing, so you can hang with confidence and never get stuck.
- 【𝐎𝐧𝐞-𝐏𝐫𝐞𝐬𝐬 𝐌𝐚𝐫𝐤𝐢𝐧𝐠 𝐟𝐨𝐫 𝐖𝐢𝐫𝐞-𝐇𝐚𝐧𝐠𝐞𝐫 𝐏𝐢𝐜𝐭𝐮𝐫𝐞𝐬】Flip down foldable hooks and hang your wire frame,Then simply press the hook to instantly mark nail placement—no extra pins or other tools.Soft back pads protect your wall surface from scuffs and noise. Perfect for picture wire and wire-based wall art.
- 【𝐁𝐮𝐢𝐥𝐭-𝐈𝐧 𝐑𝐞𝐦𝐨𝐯𝐚𝐛𝐥𝐞 𝟏.𝟒'' 𝐁𝐮𝐛𝐛𝐥𝐞 𝐋𝐞𝐯𝐞𝐥 & 𝐌𝐞𝐚𝐬𝐮𝐫𝐢𝐧𝐠 𝐆𝐮𝐢𝐝𝐞𝐬】The extra-large 1.4″ removable level is easy to see at a glance . To prevent the level from feeling unstable or sliding off the frame, we added a weighted core for better balance and non-slip foam pads for extra grip, helping you hang frames straight with less effort. The fixed vertical level helps keep portrait frames and stacked artwork aligned top to bottom. Printed measuring guides make spacing multiple frames simple, so everything lines up evenly and looks intentionally placed—not “close enough.”
- 【𝟏𝟐'' 𝐄𝐱𝐭𝐞𝐧𝐝𝐞𝐝 𝐀𝐁𝐒 𝐓𝐨𝐨𝐥 𝐰𝐢𝐭𝐡 𝐅𝐨𝐥𝐝𝐚𝐛𝐥𝐞, 𝐒𝐩𝐚𝐜𝐞-𝐒𝐚𝐯𝐢𝐧𝐠 𝐃𝐞𝐬𝐢𝐠𝐧 】Built with reinforced ABS, this tool weighs under 7 oz, making it lightweight yet durable with a comfortable, solid feel that’s ideal for everyday use. The extended 12-inch design easily handles frames of all sizes—photos, artwork, and even mirrors. The foldable handle provides a secure, comfortable grip while in use, and when all foldable parts are collapsed, the entire tool becomes just 0.59 inches thick. Flat and compact, it stores easily in drawers, toolboxes, cabinets, or tucked into small corners and tight spaces around your home—without taking up extra room.
4. Measure the frame’s hanging offset
The fastener does not usually go at the frame’s top edge. Measure down from that edge to the sawtooth slot, D-ring, or point where the wire will rest when the frame is hanging. Mark the planned top edge on the wall, then measure down by that offset to locate the fastener.
For picture wire, pull it taut to the height and tension it will have under the frame’s weight before measuring. A loose wire changes the offset and can leave the picture higher or lower than intended. See The Home Depot’s heavy-picture guide and IKEA’s picture-hanging guide for practical measuring guidance.
Rank #2

- 【3-in-1 Multifunctional Hanging Tool, All-in-One Integrated Design】 Combines measuring ruler, built-in bubble level and push nail structure in one single tool. No need to prepare separate measuring or leveling tools. Fast measuring, leveling and nailing let you hang mirrors, canvases and wall art neatly within minutes, perfectly fit for gallery wall layout.
- 【Hammer-Free Labor-Saving Push Nail Operation, Safe for All Users】 Ergonomic stapler-style push design lets you drive nails into drywall by simple pressing. No hammer needed to prevent finger pinch injury and wall surface scratches. Simple one-hand operation friendly to new beginners and decoration amateurs.
- 【Dual & Single Convertible Nail Modes for All Decor Sizes】 Full assembly for dual-nail installation, great for large frames, canvas paintings and gallery collages. Detach one black press handle easily to switch into single-nail mode, perfect for small photos, wall clocks, lightweight ornaments and tiny wall decors.
- 【Precise Leveling & Adjustable Measuring Ruler, No Crooked Frames】 The white middle connector with high-sensitivity bubble level keeps your artwork perfectly horizontal. The long silver measuring sliding ruler supports flexible span adjustment to match frame hanging holes, pre-marked scales deliver accurate nail positioning and avoid repeated rework.
- 【Lightweight Durable Structure, Renter-Friendly Household Decor Tool】 Made of solid lightweight ABS plastic for long-term daily use. Nails leave tiny nearly invisible holes on walls, no wall damage worries for renters and homeowners. Compact portable design, ideal daily wall hanging helper and practical housewarming gift.
5. Check what is behind the wall
Locate a stud when possible, especially for a heavier framed piece. If the planned location does not line up with a stud, choose an anchor or hanging system made for the wall material and the load, then follow its installation instructions. Wall surfaces and installation conditions affect what a fastener can safely support, so do not assume a stated rating applies to every wall.
6. Match the support to the wall and full load
Choose the frame hardware and wall fastener for the complete framed piece, not just the frame alone, and for the actual wall surface. Check the manufacturer’s stated load limits and installation directions. The Home Depot’s heavy-picture guide advises choosing a hanger suited to the wall type and rated above the picture’s weight. Retailer and manufacturer guides do not establish one hanging system as best for every wall and frame.
Do these 3 things before closing this tab:
1Fix the driver behind crashes, sound loss and screen glitches2Repair Windows errors before they cause bigger problems3Scan for outdated or missing drivers - takes under a minuteRank #3

- THE ORIGINAL GO HANG IT! Easy picture hanging with zero measuring required. Our patented positioning system marks your nail holes accurately on the first try, so you're not guessing, patching drywall, or rehanging crooked frames. Works with sawtooth, wire, and D-ring picture hangers.
- INNOVATIVE MAGNETIC KEY SYSTEM. Our patented MagneKeys stay securely in the tool until you need them. When you're ready to hang, insert a key into the hanger on the back of your frame, hold the frame where you want it on the wall, and press. The key marks exactly where your nail goes. Works with our single-notch precision hangers, sawtooth hangers, and D-hooks. For wire hanger frames, built-in positioning hooks let you mark your nail placement just as easily.
- BUILT-IN LEVEL FOR A STRAIGHT HANG. No need to dig through your toolbox for a separate level. The detachable level is built right in, so you can make sure every frame is perfectly straight before a single nail goes in the wall. It's especially helpful for frames with multiple hanging points and for getting that perfect gallery wall where every piece lines up.
- COMPLETE 85-PIECE HARDWARE KIT. Includes 2 Single-Notch Precision Hangers, 24 self-tapping screws, picture hooks rated at 10, 20, and 30 lbs, 6 D-hooks, 8 ft of hanging wire, 20 nails, and a storage case to keep it all together. Invented in the USA.
- PERFECT GIFT FOR EVERY OCCASION. Whether it's weddings, housewarmings, graduations, or for the DIY enthusiast in your life, Go Hang It! is the must-have tool and gift for anyone who hangs pictures. It extends to fit everything from small photo frames to large wall art, so one kit handles a whole house worth of hanging.
7. Align two-point supports before fastening
If a frame has two D-rings or hooks, measure the distance between them and transfer that spacing to the wall. Use a level while marking the two fastener locations so the supports sit on the same horizontal line. This is especially useful for wide frames; verify that both supports suit the load and wall. BLACK+DECKER’s guide covers hanging pictures with two support points.
8. Pick an alignment tool for the layout
A basic level is useful for checking a single frame. For rows or columns in a gallery wall, a laser level can help carry a consistent line across several positions. Whatever tool you use, check the frame after it is hanging rather than relying only on the marks.
Rank #4

- Easily assemble the sliding rail to reach a full 30 inches of total length, providing the perfect adjustable span for most standard-sized frames and artwork. Whether you’re hanging a large canvas or a gallery wall, you’ll have the ideal spacing every time.
- Pre-marked measurements on the rail let you quickly adjust to your desired nail spacing. Load the nails into the magazines and press firmly to drive them straight into drywall in seconds—no extra measuring tools required. This cuts down your hanging time dramatically.
- The integrated central bubble level ensures your artwork hangs perfectly aligned every time. Simply check the bubble to confirm your positioning before nailing, eliminating the hassle of crooked frames and the need for repeated adjustments.
- Easily slide one handle off the rail to switch to single-nail mode, making it ideal for hanging small photos, lightweight decor, or other compact items. The same tool handles both large frames and small accents with equal ease, maximizing its value.
- User-Friendly for Beginners & ProfessionalsSimple operation, no complicated tools or professional skills required. Safe, labor-saving, and suitable for renters, homeowners, and decor lovers.
9. Hang the picture carefully
Set the frame fully onto the intended hook or supports, and confirm it is seated securely. If you are using two support points, make sure both are engaged before letting go. Follow the hardware maker’s instructions for installation and use; a correctly placed mark cannot compensate for an unsuitable fastener.
10. Check the final position and stability
Once the frame is supported, use a level to check that it is straight and adjust its position if needed. Confirm that it remains on its intended support points and sits where you planned it. A final check catches small shifts that can happen while placing the frame on the wall.
Free tools Windows power users keep installed
One-click scans. No signup required.
Quick Recap
Best Value

- 【3-in-1 All-in-One Hanging Tool】 – Combines a precision bubble level, measuring ruler (14.5 inches), and magnetic nail starter in one smart device. No more switching between hammers, tapes, or levels—just align, mark, and hang your frames in seconds. Perfect for DIY home decor projects.
- 【Smash-Free Magnetic Nail System】 – Innovative magnetic cylinders securely hold #17 brad nails and release them with a safe, stapler-like press—no hammer needed! Protects your fingers and walls from accidental damage, ideal for renters and beginners.
- 【Dual & Single Mode for Any Frame Size】 – Use the full 14.5" ruler for wide artwork, gallery walls, or mirrors requiring two hooks; slide off the handle for single-nail precision on small photos or clocks. One tool fits all your hanging needs.
- 【Built-In Level + Clear Alignment Guides】 – Features a highly visible bubble level plus top/side reference lines to ensure perfectly straight installation every time—even on canvas wraps up to 3 feet wide. Say goodbye to crooked frames!
- 【Ready-to-Use & Wall-Friendly Design】 – Includes 20 standard brad nails (1") so you can start hanging right out of the box. Made from durable, lightweight materials for easy storage, and designed to minimize wall damage—your go-to solution for stress-free home decoration.
Quick decision checklist
- Wall: Identify the surface and whether a stud is available at the planned location.
- Frame: Account for the complete framed piece’s load, width, and existing hanging hardware.
- Layout: Decide whether you need a single fastener, two aligned supports, or a planned gallery arrangement.
- Hardware: Check the product’s wall suitability, stated load limit, and installation directions before using it.
Product prices and availability are accurate as of the date/time indicated and are subject to change. Any price and availability information displayed on Amazon at the time of purchase will apply.