Quick wins for a faster PC:
Repair Windows errors before they cause bigger problemsFix Now →Scan for outdated or missing drivers - takes under a minuteDriver Scan →Most garbage disposal problems are not mysterious. On our kitchen remodels and service calls, a disposal that “stopped working” usually falls into one of five buckets: no power, an overload that needs resetting, a jammed flywheel, a clogged drain line, or a leak at the flange, discharge pipe, dishwasher connection, or disposal body.
The right fix depends on the symptom. A silent disposal is handled differently than one that hums. A disposal that spins but leaves standing water is usually a drain problem, not a motor problem. A leak from the metal or plastic body is rarely worth repairing. This guide walks through the safe checks a homeowner can do, what to avoid, and when the job crosses into plumber, electrician, or replacement territory.
Safety first: before reaching near the grinding chamber, opening a wiring cover, or working under the sink, turn the disposal switch off. If the disposal plugs into an outlet, unplug it. If it is hardwired, turn off the breaker and verify the unit will not turn on. Never put your hand inside the disposal. Use tongs, pliers, or a wooden handle.
Start With the Symptom, Not the Guess
A garbage disposal is a simple machine, but it connects to plumbing, electrical, cabinetry, and sometimes the dishwasher drain. Guessing can waste money or make the problem worse. Use the symptom to narrow the cause.
#1 Best Overall

- The release wrench is designed for easy removal of blockages or debris, and the impeller inserted for disposal only needs to be turned from above to easily handle blockages.
- Note: When repairing the garbage disposer, do not fill the sink with hot water to avoid the wrench getting hot and accidentally injuring the hand, and use the wrench when the power is cut off.
- Handy Tool: A handy tool when handling a garbage wrench prevents the turntable from spinning if you are experiencing a clogging of the garbage disposer. Then this wrench can just help you break the blockage from above the sink.
- Ease of use: The wrench is inserted into an unrunning unit to engage the disposal impeller, allowing for quick and efficient handling of blockages. It is convenient for users to clean the blockage of the garbage disposer from the top of the sink, and there is no need to deal with the clog from under the garbage disposer.
- High-quality material: Made of high-quality material, it is not easy to damage during use. It is recommended to wear special gloves when using.
| Symptom | Most Likely Cause | First Safe Check |
|---|---|---|
| Silent, no sound | No power, tripped reset, bad switch, bad outlet, failed motor | Check plug, GFCI, breaker, wall switch, and reset button |
| Hums but does not spin | Jammed flywheel or stuck object | Turn power off, free the flywheel from below, remove debris with tongs |
| Spins but drains slowly | Clogged P-trap, discharge pipe, branch drain, or air gap | Stop using the disposal and inspect downstream plumbing |
| Leaks only when water runs | Sink flange, discharge gasket, dishwasher hose, or body leak | Dry the cabinet, then test each water source in stages |
| Dishwasher backs up | Blocked hose, clogged air gap, missing high loop, or knockout plug left in place | Check the dishwasher hose routing and disposal inlet |
| Reset trips repeatedly | Overload, jam, failing motor, electrical fault, or undersized/old unit | Clear jams first; replace if trips continue |
Do not keep flipping the switch on a humming unit. That means the motor is energized but the turntable is not moving. Repeated attempts can overheat the motor and trip the overload protector. If the reset button will not stay in, wait about 10 minutes for the motor to cool before trying again.
If the Disposal Is Silent and Will Not Turn On
A dead disposal does not automatically mean a dead motor. Many under-sink disposals plug into a switched receptacle. Others are hardwired. Either way, power problems are common, especially after someone bumps a plug, trips a GFCI, or overloads the unit.
Check power in this order
- Make sure the wall switch is off.
- If the disposal is corded, confirm the plug is fully seated in the under-sink outlet.
- Look for a GFCI receptacle under the sink, on the countertop, in the garage, or on the same kitchen circuit. Press reset if it has tripped.
- Check the electrical panel for a tripped breaker. Move it fully off, then back on.
- Find the disposal reset button, usually a small red or black button on the bottom of the unit. Press it once after the unit has cooled.
- Turn on cold water, then briefly test the switch.
If the disposal still does nothing, the issue may be a failed wall switch, failed outlet, loose wiring, bad cord, or burned-out motor. Homeowners can safely check a plug and breaker. Opening a hardwired connection box under a sink is electrician territory unless you are qualified to work on household wiring.
Modern local electrical requirements vary. Some jurisdictions require GFCI protection for dishwasher or disposal outlets under current adopted code. Some kitchens may also involve AFCI protection depending on the local code cycle and circuit layout. During a kitchen update, we plan for code-compliant receptacle placement, grounding, accessibility, and shutoff before the cabinet and sink are locked in. Retrofitting that later can cost more than doing it correctly during the remodel.
If the Disposal Hums but Does Not Grind
A humming garbage disposal usually means the motor is trying to run but the flywheel is jammed. Common causes include a bone chip, fruit pit, bottle cap, utensil, screw, coffee spoon, thick fibrous scraps, or hardened debris wedged between the impellers and grind ring.
Do not put your hand in the chamber. Do not keep forcing the switch. The fix is to free the flywheel mechanically, remove the obstruction, then reset the motor if needed.
How to unjam it safely
- Turn the wall switch off.
- Unplug the disposal or turn off the breaker if it is hardwired.
- Insert the disposal wrench or a 1/4-inch Allen wrench into the hex socket in the center of the bottom of the unit.
- Rock the wrench back and forth. Do not just force it one direction. Work it both ways until the flywheel turns freely through a full rotation.
- From above, use tongs or needle-nose pliers to remove visible debris. A flashlight helps.
- Press the reset button on the bottom if it has popped out.
- Restore power, run cold water, and briefly test the disposal.
If your disposal does not have a bottom hex socket, use a wooden broom handle or similar wooden handle from above to gently move the turntable. Again, power must be off. The goal is to move the plate, not to pry aggressively against the sink or splash guard.
If the flywheel will not move after several careful attempts, the motor shaft may be seized, the internal grind parts may be badly corroded, or a hard object may be locked in a place you cannot reach. At that point, replacement often makes more sense than extended labor.
The Tool Desk
Outbyte PC Repair FREEClear out junk files and repair common Windows errorsFree Scan →Outbyte Driver Updater FREEScan for outdated or missing drivers - takes under a minuteDriver Scan →If It Runs but the Sink Will Not Drain
If the disposal spins normally but water sits in the sink, the clog is usually downstream of the grinding chamber. The likely locations are the discharge elbow, P-trap, trap arm, branch drain, air gap, or shared kitchen drain line.
Do not use chemical drain cleaner in a disposal or standing-water sink. It can damage seals and metal parts, and it creates a splash hazard for anyone who later opens the trap. On job sites, we treat chemical cleaner as a last-resort product, not a normal disposal repair tool.
What to check before calling
- Run the disposal only briefly with cold water. If water rises, stop.
- Look under the sink for a sagging, kinked, or poorly pitched discharge pipe.
- If there is a dishwasher air gap on the countertop, remove the cap and check for debris.
- If both sink bowls are backing up, the clog is likely in the shared trap or branch drain.
- If other fixtures are backing up, stop using water and call a plumber.
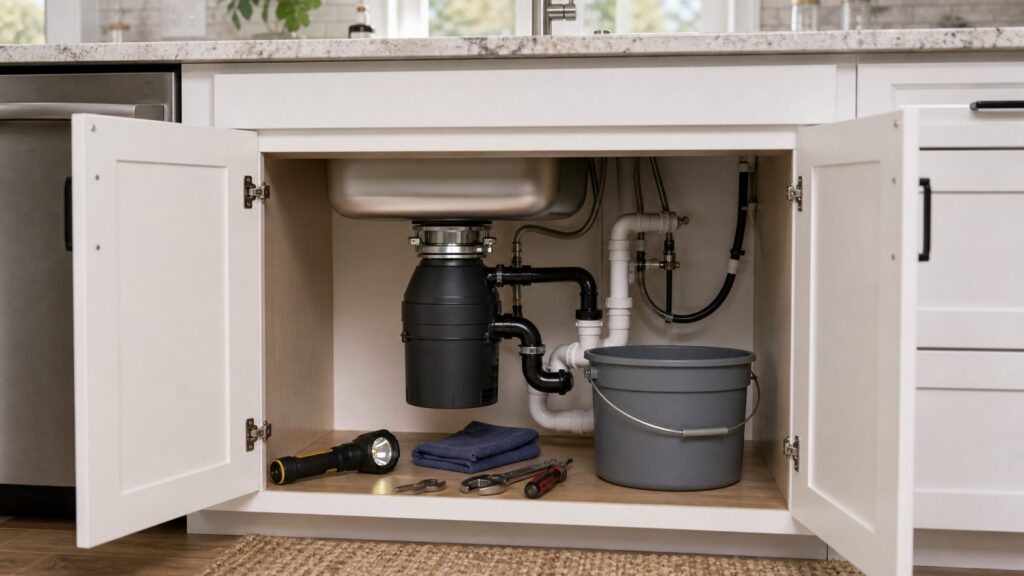
Cleaning a P-trap is a reasonable DIY task if the piping is plastic, accessible, and not corroded. Place a bucket underneath, take a photo before disassembly, loosen the slip nuts by hand or with gentle plier pressure, and keep track of washer orientation. If the trap is metal, rusted, painted together, or tied into old galvanized piping, forcing it can turn a clog into a leak.
Rank #2

- 𝗣𝗥𝗘𝗖𝗜𝗦𝗘 𝗙𝗜𝗧: This garbage disposal allen wrench is engineered with tight tolerances and a smooth finish. The standard 1/4" hex head fits most major garbage disposal units with a bottom hex hole—designed to match the fit found in popular brands on the market
- 𝗘𝗔𝗦𝗬 𝗝𝗔𝗠 𝗙𝗜𝗫: Insert the garbage disposal wrench tool into the hex hole underneath the disposal and twist back and forth to loosen stuck blades and clear blockages. For your safety, always disconnect power before use
- 𝗕𝗨𝗜𝗟𝗧 𝗧𝗢 𝗟𝗔𝗦𝗧: Made from high-strength alloy steel, this garbage disposal key resists bending and breaking under pressure. Perfect for handling tough jams across various disposal brands
- 𝗦𝗔𝗩𝗘 𝗢𝗡 𝗥𝗘𝗣𝗔𝗜𝗥𝗦: With our garbage disposal unjamming wrench, no special tools or plumbing experience are required. Fix jams yourself in minutes and avoid the cost of hiring a plumber—quick, clean, and convenient
- 𝗖𝗢𝗠𝗣𝗔𝗖𝗧&𝗛𝗔𝗡𝗗𝗬: Lightweight and easy to store in a drawer or under-sink cabinet. Keep this allen wrench for garbage disposal on hand to quickly restore kitchen flow whenever a clog strikes
Recurring kitchen sink clogs point to a bigger issue: poor pipe pitch, grease buildup, an undersized or corroded branch line, an old drum trap, or a disposal being used like a trash can. A plumber can cable or clean the branch line and tell whether the drain assembly needs correction.
If the Disposal Is Leaking
Leaks need a staged test. Under-sink cabinets hide water damage until the cabinet bottom swells, the toe kick stains, or mold appears behind stored cleaning products. Before testing, empty the cabinet and dry everything with towels.
Run this leak test
- With the disposal off, run water into the sink only. Watch the sink flange and upper mounting assembly.
- Turn the disposal on with cold water running. Watch the body seam, reset area, and bottom of the unit.
- If a dishwasher is connected, run a dishwasher drain cycle and inspect the dishwasher hose and disposal inlet.
- Fill the sink basin several inches, then release the stopper. Watch the discharge elbow, P-trap, slip nuts, and branch connection under higher flow.
A leak at the sink flange may mean the mounting assembly needs to be tightened or the flange needs to be removed and resealed with plumber’s putty or the manufacturer-approved gasket. A leak at the discharge elbow may be a failed gasket, loose screws, cracked plastic elbow, or misaligned drain pipe. A leak at the dishwasher hose may be a loose clamp, cracked hose, or stressed routing.
A leak from the disposal body is different. If water comes from the shell, motor housing, bottom plate, or an internal seam, replacement is usually the correct repair. The internal seals are not normally worth rebuilding in a residential unit, especially if the disposal is more than 8 to 12 years old.
Also look beyond the disposal. A long-term leak can damage the cabinet deck, side panels, back panel, flooring, and sometimes the wall cavity. In remodel work, we often find disposal leaks that turned a simple appliance swap into cabinet repair, subfloor patching, or mold remediation. If the cabinet bottom is soft or delaminated, address the water damage before installing a new unit.
Free tools Windows power users keep installed
One-click scans. No signup required.
If the Dishwasher Backs Up Into the Sink
Dishwasher backup after disposal work has one classic cause: the dishwasher knockout plug was not removed from the new disposal. New disposals are shipped with a plug inside the dishwasher inlet. If the dishwasher hose is connected without removing that plug, the dishwasher cannot drain through the disposal.
Other common causes are a clogged air gap, a dishwasher hose without a proper high loop, a kinked hose, or a clogged branch drain. Plumbing code and local enforcement vary, but dishwasher discharge usually needs protection against dirty sink water siphoning back toward the dishwasher. Depending on the jurisdiction and installation, that protection may be an air gap fitting at the sink deck or a high loop fastened under the counter.
For a high loop, the hose should rise as high as practical under the countertop before dropping to the disposal or tailpiece connection. Many installers target the underside of the counter, often roughly 32 to 34 inches above the floor in a standard base cabinet layout. If the hose lies low across the cabinet floor, sink water can migrate back toward the dishwasher.
If you recently replaced the disposal and the dishwasher will not drain, turn off power, disconnect the dishwasher hose from the disposal inlet, and check whether the knockout plug is still in place. Removing it requires tapping the plug out into the disposal chamber and retrieving it before reconnecting the hose. If you are unsure, call the installer back. It is a small correction, but it matters.
Recommended Free Tools
Bad Smells, Frequent Trips, and Weak Grinding
A disposal that technically runs can still be failing. Persistent odor, repeated reset trips, and weak grinding are signs to look closer.
Odor that does not go away
Most odors come from food film under the splash guard, inside the grind chamber, or in the drain line. With power off, lift the splash baffle edges and clean the underside with a brush and dish soap. Grind a few ice cubes with cold water to knock loose soft buildup, then flush with water. Citrus peels can freshen the smell but they do not fix a clogged or dirty drain.
Rank #3

- Compatible with Waste King and Moen garbage disposals/ InSinkErator WRN-00Garbage
- Disposer Unjamming Wrench can help you quickly and efficiently remove clogs and food debris above the sink, effortlessly loosen any clogs, effortlessly remove debris in seconds, easily fix clogs and stop worrying.
- EASY TO USE:Simply insert the wrench into the disposal impeller and turn it back and forth at the top to quickly release trash to clear debris and solve clogs in the garbage disposal, very quick and easy to use
- High-quality material: made of alloy steel and metal structure, good corrosion resistance, not easy to rust, sturdy and durable, no need to worry about easy breakage in the process of use, compact appearance is convenient for storage and use.
- Package includes one Garbage Disposer Unjamming Wrench and two hex wrenches
If odor returns quickly, the issue may be trapped sludge in the P-trap, a partially clogged branch line, dishwasher drain residue, or a failing disposal with internal corrosion. Persistent odor in an older unit is one reason replacement becomes practical.
Reset trips again and again
A one-time reset after a jam is normal. Repeated trips are not. If the reset button pops after normal use, the motor may be overheating, the unit may be underpowered for the household, the flywheel may still be dragging, or there may be an electrical issue.
Many homes do fine with a 1/2 HP to 3/4 HP disposal. Small 1/3 HP units are cheaper but less forgiving. Larger households, frequent cooking, and quieter premium models often justify 3/4 HP or 1 HP. Premium units with stainless grind components and heavier sound insulation cost more and are physically larger, so verify cabinet clearance, drain outlet height, dishwasher hose routing, and any pullout trash system before buying.
Repair or Replace? 2026 Cost Guide
In 2026, a simple jam or reset costs nothing if you handle it safely. Professional repair is usually worthwhile when the unit is newer, the problem is external, and the fix is quick. Replacement is usually smarter when the disposal is leaking from the body, has a seized or burned motor, repeatedly trips the reset, smells persistently despite cleaning, or is roughly 8 to 12 years old.
| Scenario | Typical 2026 US Cost | Best Use Case |
|---|---|---|
| DIY reset or unjam | $0 to $20 | Tripped overload, visible jam, no plumbing changes |
| Basic DIY replacement | $75 to $300 for many common units, plus small parts | Same-size swap, sound plumbing, corded unit, accessible cabinet |
| Premium DIY unit | $300 to $600+ | Quieter stainless models, batch-feed units, 1 HP units |
| Professional repair | About $100 to $350; many jobs near $175 to $250 | Newer unit, gasket leak, jam, switch/outlet diagnosis, trap issue |
| Professional replacement | Commonly $200 to $625 including unit and labor; averages often around $550 | Old unit, body leak, failed motor, corroded mounting parts |
| Basic store installation labor | About $97 to $339, with averages around $189 | Straightforward installation without electrical or major plumbing changes |
Cost drivers include horsepower, stainless versus galvanized grind components, noise insulation, continuous-feed versus batch-feed design, brand, same-size replacement versus drain rework, flange condition, corrosion, tight cabinet access, dishwasher connection, emergency service, and local labor rates.
Add-on costs can change the job quickly. A failed switch or outlet, missing grounded receptacle, GFCI or AFCI correction where required, corroded trap, illegal dishwasher drain connection, or clogged branch drain can turn a simple disposal swap into a plumbing and electrical repair. As a practical rule, if a repair quote approaches 50% to 70% of the installed cost of a new unit, replacement usually gives better value, especially on an older disposal.
When to DIY and When to Hire a Pro
Good DIY candidates are narrow: resetting the overload, freeing a simple jam with the hex wrench, cleaning the splash guard, tightening an accessible hose clamp, or replacing a clean plastic P-trap you can clearly reassemble.
Hire a licensed plumber when the sink keeps backing up, the trap or branch line is corroded, the disposal leaks from the flange and needs remounting, the dishwasher drain routing is wrong, or the cabinet has water damage. A plumber can also confirm whether the drain line is sized and pitched correctly and whether the disposal is appropriate for the sink setup.
Hire an electrician when the unit is hardwired, the outlet is dead, the switch is suspect, there is no grounded receptacle, wiring is exposed, breakers trip repeatedly, or a kitchen remodel triggers code updates. Under-sink electrical work lives in a damp, cramped area. That is not where we want guesswork.
Bring in a remodeling contractor when the disposal problem exposes a bigger kitchen issue: swollen cabinet decks, damaged flooring, poor sink support, tight pullout clearances, or a layout that needs plumbing and electrical moved together. A disposal is small, but it sits at the intersection of several systems.
Do these 3 things before closing this tab:
1Clear out junk files and repair common Windows errors2Scan for outdated or missing drivers - takes under a minute3Repair Windows errors before they cause bigger problemsHow to Prevent the Next Failure
Use the disposal as a food-scrap helper, not a trash can. Run cold water before, during, and after grinding. Feed waste gradually instead of packing the chamber. Let the water run for about 10 to 20 seconds after grinding so waste clears the trap and branch line.
Rank #4

- FREE DISPOSER JAMS: The Jam-Buster Wrench is a quick, effective tool to help free simple jams in your InSinkErator manufactured disposer. Heavy duty metal construction makes it durable and sturdy.
- EASY TO USE: To free up jams in your food waste disposal, simply insert the hex wrench into the center hole in the bottom of the disposer and turn back and forth.
- AMERICA'S #1 DISPOSER BRAND: There are more American-built InSinkErator garbage disposals in US homes than all other brands combined. A full line of models means there's one right for every need and budget.
- FASTER, CLEANER, SMARTER: From meal prep to cleanup, InSinkErator helps make it fast & easy to keep your kitchen clean with our iconic appliances: garbage disposals & instant hot water dispensers.
- A HISTORY OF INNOVATION FOR THE SINK: We invented garbage disposals in 1927, & we're the world’s largest manufacturer of garbage disposals & instant hot water dispensers for home & commercial use.
Keep grease, fats, cooking oil, large bones, shells, coffee grounds in volume, pasta, rice, potato peels, celery, corn husks, onion skins, artichokes, and other fibrous or expandable scraps out of the disposal. Very small soft scraps are usually fine, but large loads of starch and fiber are what we see clogging traps and branch drains.
If you are on a septic system, be more conservative. Some disposal manufacturers allow septic use, but extra ground food increases solids entering the tank. Many septic professionals prefer that most food waste go into the trash or compost instead. If you use a disposal with septic, keep loads small and stay current with tank pumping.
For replacement planning, measure before buying. Check the cabinet height, width, drain outlet elevation, dishwasher hose path, shutoff valve locations, and pullout organizers. Quieter premium disposals often have larger insulated housings. A model that fits the sink opening can still conflict with the trap, shelf, or storage hardware below.
What’s actually slowing this PC down?
Pick the symptom - the matching free tool is one click away.
Bottom Line
If your garbage disposal is not working, start with the symptom. Silent means power/reset checks. Humming means jam. Spinning with standing water means drain problem. Leaking means isolate the exact source. Dishwasher backup after replacement often means the knockout plug or drain routing needs correction.
The homeowner-safe fixes are reset, unjam, clean, and inspect. Once you get into hardwired electrical, repeated breaker trips, corroded plumbing, body leaks, cabinet damage, or code corrections, hire the right trade. A disposal is inexpensive compared with repairing a flooded sink base, damaged floor, or unsafe under-sink electrical connection.
Frequently Asked Questions
Why is my garbage disposal humming but not spinning?
The motor is getting power, but the flywheel is jammed. Turn off power, use the bottom hex socket with a disposal wrench or 1/4-inch Allen wrench to rock the flywheel both directions, remove debris with tongs, press reset if needed, then test with cold water.
Where is the reset button on a garbage disposal?
The reset button is usually on the bottom of the disposal, often red or black. If it will not stay in, the motor may still be hot; wait about 10 minutes, clear any jam first, then press it again.
Crashes, No Sound, or Screen Glitches?
Random freezes, missing sound and display glitches usually trace back to one bad driver. Find and replace yours safely.Free scan · under a minutePC Slower Than It Used to Be?
A free scan shows the junk files, broken settings and background clutter dragging Windows down - then fixes them in one click.Free scan · Windows 10 & 11Why won’t my garbage disposal turn on at all?
Common causes include a loose plug, tripped GFCI, tripped breaker, failed wall switch, tripped disposal overload, loose wiring, or failed motor. Check the plug, outlet, GFCI, breaker, and reset button before assuming the disposal is bad.
Can I use chemical drain cleaner in a garbage disposal?
It is not recommended. Chemical drain cleaner can damage disposal parts and creates a splash or burn hazard if the trap has to be opened. For standing water, the clog is often in the P-trap or branch drain.
Why is my dishwasher backing up after a new disposal was installed?
The most common cause is that the dishwasher knockout plug was left inside the new disposal inlet. Other causes include a clogged air gap, missing high loop, kinked hose, or clogged drain line.
How much does it cost to repair or replace a garbage disposal in 2026?
Professional repair commonly runs about $100 to $350, with many jobs near $175 to $250. Professional replacement commonly runs about $200 to $625 including unit and labor, with averages often around $550. DIY replacement is mostly the unit cost, commonly $75 to $300 for basic and midrange models.
Quick wins for a faster PC:
Repair Windows errors before they cause bigger problemsFix Now →Fix the driver behind crashes, sound loss and screen glitchesFind Drivers →Clear out junk files and repair common Windows errorsFree Scan →Quick Recap
Product prices and availability are accurate as of the date/time indicated and are subject to change. Any price and availability information displayed on Amazon at the time of purchase will apply.