What’s actually slowing this PC down?
Pick the symptom - the matching free tool is one click away.
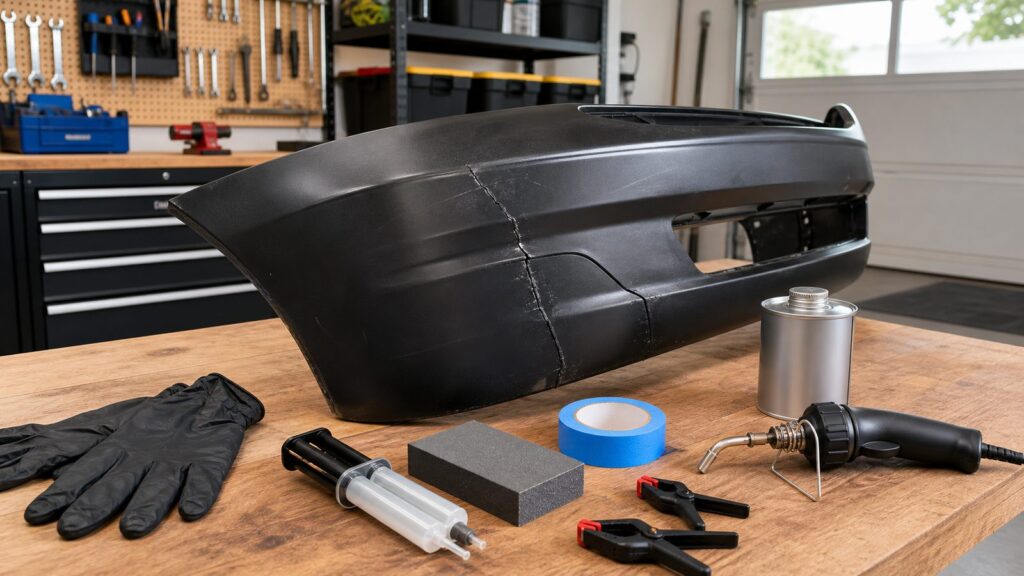
The best glue for plastic car parts is not one product. It depends on the plastic, the part, and how much movement that part sees. For a cracked bumper cover, a flexible two-part urethane repair material or plastic welding usually beats ordinary epoxy. For an emblem or side molding, automotive molding tape is often stronger and cleaner than liquid glue. For a small interior trim clip, a gel super glue or plastic epoxy may be enough.
On our job sites, we treat adhesive selection the same way we treat sealants, flashing tapes, and structural fasteners: the substrate decides the product. Plastic car parts are no different. A tube that bonds ABS beautifully may peel right off polypropylene. A rigid epoxy that feels strong on the bench can crack the first time a bumper flexes in cold weather.
If you want the fast answer, start with this table, then confirm the plastic ID stamp on the back of the part before you buy anything.
| Part or repair | Best repair choice | Typical DIY cost | What to avoid |
|---|---|---|---|
| Cracked bumper cover | Flexible bumper repair adhesive, two-part urethane, mesh reinforcement, or plastic welding | $30-$100 materials | Hard body filler alone or regular super glue |
| Broken bumper tab | Two-part urethane tab repair material, shaped after cure | $20-$60 | A surface bead around the broken edge |
| Emblem or side molding | Automotive molding tape or emblem adhesive | $7-$20 | Household glue or messy all-purpose adhesive |
| Interior trim piece | Plastic epoxy, gel cyanoacrylate, or plastic bonder | $7-$20 | Thin super glue on a flexible or load-bearing tab |
| Headlight mounting tab | Plastic-specific two-part adhesive or tab rebuild material | $20-$60 | Repairing if lamp alignment or safety is compromised |
| Underhood plastic | Heat- and chemical-resistant plastic adhesive only when appropriate | $10-$40 | Using interior trim glue near heat, oil, or vibration |
| Mirror housing or door handle trim | Flexible urethane, plastic bonder, or replacement depending on load | $10-$60 DIY; often more if painted | Gluing a structural handle or mirror mount that carries load |
Find the Plastic Type Before You Pick the Glue
The first step is to look for the molded plastic ID stamp. It is usually on the backside of the part, often in raised lettering inside angle brackets. You may see markings like PP, TPO, PP/EPDM, ABS, PC, PVC, SMC, FRP, PUR, acrylic, or vinyl. That stamp matters more than the brand name on the glue package.
Recommended Free Tools
#1 Best Overall
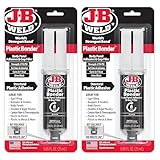
- Plasticbonder: Is A Quick-Set, 2 Part, Urethane Adhesive System That Provides Strong, Lasting Repairs And Works On Thermoset, Carbon Fiber Composites, Thermoplastics, Coated Metals, Concrete & More.
- Count On Us: For More Than 40 Years, Our Products Have Earned A Loyal Following From People Who Take Pride In Their Work. With Each Product We Innovate, We Continue To Provide The World'S Strongest Bond For Your Projects.
- Simple To Use: J-B Plasticbonder Has A 1:1 Mixing Ratio, Sets In 15 Minutes And Can Be Sanded After 30 Minutes. With A Tensile Strength Of 3770 Psi, Plasticbonder Cures To A Hard, Permanent Bond.
- Versatile And Dependable: Perfect For Indoor Or Outdoor Use, Epoxy & Adhesives, Plastic, Composite, Pvc, And More. Plastic Bonder Makes A Great Gap Filler And Dries Black In Color.
Many bumper covers are polypropylene, TPO, or PP/EPDM. These are low-surface-energy plastics, which means many ordinary epoxies and super glues do not wet the surface well enough to form a durable bond. That is why bumper repairs fail so often when someone simply smears epoxy over the front of the crack.
Rigid plastics such as ABS, PVC, and polycarbonate are more forgiving. Permatex Plastic Welder, for example, is intended for PVC, ABS, polycarbonate, and many rigid plastics. It sets in about 5 minutes and reaches usable strength in roughly 4 hours at 72 degrees F, but it is not a good choice for most polyethylene or polypropylene repairs. That detail is exactly the kind of fine print that decides whether the repair holds.
If the part is PP, PE, TPO, or PP/EPDM, plan on one of three routes: a bumper-specific urethane repair material with adhesion promoter, plastic welding with compatible rod, or replacement. For a flexible bumper crack, that is usually the difference between a repair that survives normal driving and one that opens back up after a week.
Best Glue by Repair Type
For cracked bumper covers
Use a flexible bumper repair adhesive or a two-part urethane system designed for automotive plastics. 3M and similar collision-repair systems use two-component urethane materials for backside reinforcement, tab rebuilding, and bumper repair. Bumper repair kits commonly include flexible adhesive, reinforcing mesh, and a spreader. That combination matters because a bumper cover moves. A hard repair across a flexible panel creates a stress point.
The Tool Desk
Outbyte PC Repair FREEClear out junk files and repair common Windows errorsFree Scan →Outbyte Driver Updater FREEFix the driver behind crashes, sound loss and screen glitchesFind Drivers →For a typical crack, the process is more important than the product name. Clean the back and front of the bumper. If the crack has a sharp end, drill a small stop hole at each end when the part shape allows it. A 1/8-inch hole is common for stopping crack travel. V-groove the crack so the adhesive has thickness, not just surface contact. Align the front face with tape or clamps. Reinforce the backside with mesh, staples, or compatible welding material, then finish the front after the repair cures.
Expect a consumer bumper repair to cost about $30-$100 once you include adhesive, sandpaper, cleaner, adhesion promoter, mesh, primer, paint, and clear coat. The tube alone may be $10-$30, but the full repair is rarely just the tube.
For broken bumper tabs
A broken tab should be rebuilt, not just glued at the fracture line. The repaired tab needs thickness, hole geometry, and enough surface area to spread the load. A two-part urethane tab repair material is the right category because it can be built up, cured, drilled, shaped, and sanded.
On a tab repair, roughen at least 1 inch around the break on the backside when you have room. Clean the surface, use adhesion promoter if the system calls for it, and use tape, plastic film, or a simple form to recreate the tab shape. After cure, drill the mounting hole back to size. If the hole is 6 mm, drill it cleanly instead of forcing the fastener through soft adhesive. A sloppy hole will crack again.
PC Slower Than It Used to Be?
A free scan shows the junk files, broken settings and background clutter dragging Windows down - then fixes them in one click.Free scan · Windows 10 & 11Crashes, No Sound, or Screen Glitches?
Random freezes, missing sound and display glitches usually trace back to one bad driver. Find and replace yours safely.Free scan · under a minuteFor emblems and side moldings
For exterior emblems, badges, and side moldings, use automotive molding tape or emblem adhesive. 3M molding tape is sold for permanent attachment of side moldings, trim, and emblems. This is one of those repairs where tape is not the shortcut. It is the correct material.
Remove every bit of old tape first. A plastic razor blade, adhesive remover, and patience are better than gouging paint with a metal scraper. Clean the surface, dry-fit the emblem, mark alignment with painter’s tape, and apply firm pressure across the full bond line. Temperature matters. A cold garage can weaken the initial bond, so try to work around 70 degrees F or warm the panel and emblem gently. Do not overheat paint or plastic.
For interior trim
Interior trim is usually lower risk, but it still needs the right adhesive. For small non-load-bearing pieces, gel cyanoacrylate can work because it stays where you put it. For a cracked rigid trim panel, a plastic epoxy or urethane plastic bonder is usually better. J-B Weld PlasticBonder is a two-part urethane adhesive with a 1:1 mix ratio, about a 6-minute set, a 1-hour cure, and stated strength of 3,770 PSI. It comes in black or tan and can be useful on many thermoplastics, thermosets, coated metals, carbon fiber composites, and similar materials.
Do not expect thin super glue to save a stressed clip that snaps in and out repeatedly. If the clip carries real load, replace the clip or reinforce the backside. A $12 trim clip assortment is often a better repair than trying to make a broken clip behave like new.
For underhood plastics
Underhood plastics see heat, oil mist, vibration, and cleaners. Before gluing anything under the hood, ask what happens if the repair fails. A cosmetic cover is one thing. A fan shroud mount, coolant reservoir tab, intake duct, or sensor bracket is another. Use only adhesives rated for the temperature and chemical exposure, and replace parts that affect cooling, latching, air metering, or safety.
Rank #2

- J-B Weld Plasticweld: A Hand Mixable Two Part Epoxy Putty Stick That Is Formulated To Repair And Rebuild Various Plastic Compounds And Surfaces. J-B Weld Plasticweld Is Designed For Diy Plastic Repairs On Abs, Pvc & Cpvc Pipes And Plastics, Auto Bumpers And More! Plasticweld Is Certified By The Nsf And Is Safe For Contact With Potable Water
- Cure And Set Time: After Kneading The Two Part Formula Together By Hand, Plasticweld Takes 25 Minutes To Set And Cures In 3 Hours. J-B Weld Plasticweld Set And Cure Color Is Off White
- Product Features And Strength: J-B Weld Plasticweld Has Lap Shear Strength Of 600 Psi. Plasticweld Can Withstand Continuous Temperatures Up To 250Of (121Oc) And Intermittent Temperatures Up To 300Of (148Oc) When Fully Cured. Plasticweld Does Not Shrink And Can Be Molded, Shaped, Sanded, Drilled And Cut
- Applications: Abs, Pvc & Cpvc Pipes And Plastics, Auto Bumpers And Trim, Vinyl Surfaces And Siding, Marine Repairs & Fiberglass Parts, Plastic Water Tanks, And Plumbing
- Repair and rebuild any rigid and semi-flexible plastic including ABS, PVC and CPVC
Product Categories That Work
Most DIY repairs fall into five adhesive categories: two-part urethane, flexible epoxy or bumper repair adhesive, plastic welding, cyanoacrylate gel, and molding tape. Each has a place.
| Category | Best use | Typical set or cure time | 2026 cost range |
|---|---|---|---|
| Two-part urethane plastic bonder | Bumpers, tabs, trim, semi-rigid plastics | Often sets in 5-6 minutes; cure varies from 1-24 hours | $7-$30 for consumer cartridges or syringes |
| Flexible bumper repair adhesive | Cracked bumper covers and flexible fascia | Depends on kit; allow extra time in cold garages | $20-$60 for many kits; $30-$100 all-in materials |
| Plastic welding or hot staples | PP/TPO cracks, through-cracks, stressed flexible parts | Usable after cooling, then finish and refinish as needed | About $20-$90 for tools; rods about $8 |
| Plastic epoxy | Rigid ABS, PVC, PC, interior trim | 5-minute set to several-hour usable strength | $7-$20 |
| Gel super glue | Small interior, non-load-bearing pieces | Seconds to minutes | $5-$15 |
| Molding tape or emblem adhesive | Badges, emblems, side trim | Immediate grab; full bond improves with time and pressure | About $7-$20 |
Permatex Black Plastic Welder is marketed for automotive trim, bumpers, and clips. It dries black, sets in about 5 minutes, fully cures in 24 hours, and lists strength up to 3,500 PSI. That makes it useful for many black trim repairs where color and sandability matter. Still, read the package for plastic compatibility and surface prep.
J-B Weld PlasticBonder is another common DIY option. Home Depot pricing has been around $6.98 for a 0.85-ounce package, making it inexpensive for small repairs. 3M emblem and trim adhesive has been listed around $9.09 at AutoZone. Adhesion promoter is commonly about $8-$20 at retail, and that small can may matter more than upgrading to a more expensive tube.
When Plastic Welding Beats Glue
Plastic welding is often the better choice when the part is polypropylene or TPO, the crack goes all the way through, the part flexes, or the repair area gets repeated stress. Instead of depending only on chemical adhesion, welding melts compatible plastic into the repair. Hot staples can also bridge a crack mechanically from the backside before adhesive or filler work.
Budget tools are not expensive. A basic 80-watt plastic welding iron kit can be about $20. A hot stapler kit may run about $30. A larger 1600-watt hot-air plastic welding kit can be about $90. Plastic welding rods are about $8 for a 50-piece pack. The trick is compatibility. Welding polyethylene rod into a polypropylene bumper is not the same as matching the base plastic.
For a daily driver with a cracked painted bumper, welding from the backside plus flexible finishing material on the front is often stronger than glue alone. For a textured black lower valance, a backside staple-and-weld repair may be perfectly acceptable if the front face can be cleaned up without full refinishing. For a painted bumper in a visible area, the repair may still need primer, base coat, and clear coat, which is where cost and skill start to climb.
Surface Prep: The Step That Decides the Repair
Adhesive failures usually come from surface prep, not advertised strength. A label may list 3,500 PSI or 3,770 PSI under controlled conditions, but a dusty, waxed, oily, glossy bumper is not a lab coupon.
Start by washing the part with soap and water. Dry it fully. Remove wax, silicone dressing, road film, and adhesive residue with a cleaner compatible with the plastic and paint. Sand the bond area with 80- to 180-grit paper for structural backside work, or follow the adhesive maker’s exact grit recommendation. The goal is a clean mechanical profile, not a polished surface.
For TPO and PP bumper repairs, adhesion promoter is often the missing step. Collision repair guidance commonly describes adhesion promoter as a chemical bridge that helps the adhesive bite into prepared plastic. Use it only as directed. Too much promoter, too little flash time, or promoter trapped under the wrong material can hurt the repair.
Dry fit before mixing. Many two-part products set fast. A 5- or 6-minute set time sounds generous until you are holding a tab, searching for tape, and trying to keep a screw hole aligned. Have clamps, tape, mesh, spreaders, mixing tips, gloves, and cleanup materials ready before you open the adhesive.
Step-by-Step: Repairing a Small Bumper Crack
This is a practical sequence for a minor bumper cover crack where the backside is accessible and no sensors, lamps, absorber, or structural mounts are damaged. If the crack is near a parking sensor, radar bracket, lamp mount, or torn mounting point, skip to the pro section.
Free tools Windows power users keep installed
One-click scans. No signup required.
- Remove or loosen the bumper cover if needed. Backside access matters. A front-only smear is not a reliable repair.
- Identify the plastic. Look for PP, TPO, PP/EPDM, ABS, or another stamp. Match the repair method to that plastic.
- Clean the area. Wash first, then use a compatible wax and grease remover. Let it dry.
- Stop the crack if appropriate. Drill a small stop hole, often about 1/8 inch, at the crack ends only where it will not create a new cosmetic or structural problem.
- V-groove the crack. Use a rotary tool or abrasive to create room for repair material. Do not thin the bumper so much that it loses shape.
- Align the face. Tape the visible side so the panel sits flush.
- Prepare the backside. Sand 1-2 inches around the crack, apply adhesion promoter if required, and place mesh or staples across the crack.
- Apply repair material. Mix the two-part adhesive correctly, wet out the reinforcement, and build a smooth backside patch.
- Allow proper cure. Many products publish data around 72 degrees F. In a 45-degree garage, give the repair more time or warm the work area safely.
- Finish the front. Sand, skim with compatible flexible material if needed, prime, paint, and clear coat. Keep the finish flexible on bumper covers.
A quick repair may take 1-2 hours of hands-on time, but paint and cure windows can stretch it across a day or weekend. If you rush sanding before the adhesive cures, the edge can feather poorly or tear.
Rank #3
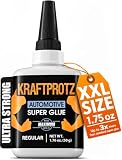
- FLOWS INTO TIGHT GAPS & MICROCRACKS: Thin cyanoacrylate formula penetrates trims, panels, headlight housings, and dashboard components – creates strong, invisible bonds in hard-to-reach areas where gel can't reach.
- DESIGNED FOR CARS, TRUCKS & MOTORCYCLES: Bonds plastic, rubber, and metal automotive parts – withstands engine vibration, road shocks, oil exposure, and temperature shifts from -40°F to 230°F (-40°C to 110°C).
- 1.76 OZ XXL = WORKSHOP-READY FORMAT: More glue per repair than standard automotive adhesive tubes – ideal for frequent users in garages, body shops, fleet maintenance, and emergency vehicle kits.
- PRECISION DROPPER TIP — NO OVERSPILL: Controlled flow even in tight spots – clean application on clips, seams, and wire harness mounts. Anti-clog cap prevents crusting and blockages between uses.
- PERFORMS IN OIL, HEAT & VIBRATION: Industrial-grade CA bond built for underhood conditions – holds on parts exposed to automotive fluids, grime, weather extremes, and constant mechanical stress. German-engineered formula for reliable shelf life.
DIY Cost vs Professional Repair
The tube price is only one line item. A realistic DIY bumper crack repair may include adhesive, adhesion promoter, mesh, sandpaper, masking tape, cleaner, primer, base coat, clear coat, gloves, and mixing tips. That is why the all-in DIY material cost commonly lands around $30-$100, even when the adhesive itself costs $7-$20.
| Repair path | Typical 2026 cost | Best fit |
|---|---|---|
| Small interior trim glue repair | $7-$20 | Cosmetic, low-load parts |
| DIY emblem or molding reattachment | $7-$20 | Clean paint, intact trim, no broken clips |
| DIY bumper crack materials | $30-$100 | Small crack, backside access, no sensors or torn mounts |
| DIY plastic welding setup | About $20-$90 for tool; rods about $8 | PP/TPO cracks and flexible parts |
| Professional cracked bumper repair | About $200-$600 for many minor or moderate cracks | Visible painted areas, better finish, stronger process |
| Broader bumper repair/refinish | About $300-$900 | Paint blending, larger damage, shop materials |
| Bumper repair or replacement | About $300-$1,500+ | Torn mounts, severe damage, replacement needed |
| Full bumper replacement with paint and sensors | Often $800-$2,500+ | ADAS, luxury vehicles, major damage |
Sensor-equipped vehicles change the math. Parking sensors, cameras, blind-spot radar, and adaptive-cruise components can add calibration or setup costs. Some 2026 collision estimates put ADAS-related calibration adders around $300-$800. That is not a glue problem; it is a vehicle systems problem.
Independent reader supportYour contribution helps us test, update, and keep practical guides available for everyone.When to DIY and When to Hire a Pro
DIY is reasonable when the part is cosmetic, the damage is small, the backside is accessible, and failure will not affect safety. Good DIY candidates include loose emblems, small interior trim cracks, minor bumper cover cracks away from sensors, and broken cosmetic tabs where the part still aligns properly.
Do these 3 things before closing this tab:
1Fix the driver behind crashes, sound loss and screen glitches2Repair Windows errors before they cause bigger problems3Scan for outdated or missing drivers - takes under a minuteHire a pro or replace the part when the repair involves sensor mounts, structural bumper damage, torn mounting points, latch areas, lighting mounts, mirror mounts, airbag-adjacent trim, or anything that affects visibility, restraint systems, cooling, or crash performance. Also get a shop estimate when paint failure covers a large area, the bumper cover is distorted, or the crack runs into a body line that will be hard to finish cleanly.
There is no permit issue for ordinary homeowner vehicle trim repair, but there are safety and liability issues. A glued-on emblem is one level of risk. A repaired mirror mount that shakes at highway speed is another. A bumper sensor bracket that sits 3 degrees off can affect driver-assistance systems. Use the same judgment you would use around stairs, railings, or deck ledgers: cosmetic fixes are one thing; load and safety are another.
Safety, Ventilation, and Disposal
Read the SDS and package directions before using any automotive adhesive. Two-part urethane products can involve isocyanate hazards. Many adhesives, cleaners, and adhesion promoters are flammable and give off vapors you do not want in a closed garage. Wear nitrile gloves, eye protection, and work with real ventilation. A cracked door is not the same as moving air through the space.
Keep adhesive away from skin and painted surfaces unless the product is meant for that surface. Do not use open flame to warm a panel or speed cure. If temperature is an issue, warm the garage or the part safely and give the product more time. Many cure schedules are based around 72 degrees F, so a winter repair in a cold garage can take much longer than the label’s best-case number.
Disposal matters. Leftover adhesives, solvents, contaminated rags, aerosol primer, and adhesion promoter may fall under household hazardous waste rules. The EPA treats many leftover home chemicals as household hazardous waste, and state programs may have specific drop-off rules. Let mixed adhesive cure in a safe location when the label allows, keep liquid chemicals in their original containers, and use your local household hazardous waste collection program for products that should not go in household trash.
Common Mistakes That Make Plastic Repairs Fail
The first mistake is choosing glue by brand reputation instead of plastic type. PP, PE, and TPO are common automotive plastics and frequent failure points for ordinary glue. If the adhesive says it does not bond polypropylene or polyethylene, believe the label.
The second mistake is making the repair too thin. A hairline bead over a crack has almost no strength. Use a V-groove, backside reinforcement, mesh, staples, or a tab rebuild method that creates real bond area and thickness.
Rank #4

- J-B WELD PLASTICBONDER (Tan): A quick setting and multipurpose two part urethane adhesive & gap filling system that provides a strong and lasting bond to many plastic surfaces. J-B Weld PlasticBonder is great for DIY plastic repairs, filling dents, bumper repairs and more! J-B Weld PlasticBonder now comes in a syringe allowing for an easy 1:1 mix ratio. The unique syringe has a re-sealable cap that prevents drying out and leaking, allowing for multiple uses!
- CURE AND SET TIME: After mixing the two part formula with the included mixing tray and stir stick, PlasticBonder takes 15 minutes to set and 30 hours to cure. J-B Weld PlasticBonder set and cure color is tan
- STRENGTH: J-B Weld PlasticBonder has tensile strength of 3770 PSI.
- SURFACE APPLICATIONS: Thermoset & Carbon Fiber Composites, Thermoplastics and Coated Metals, Plastic & PVC, Concrete, Ceramic & Tile, Fiberglass, and Aluminum.
- DO IT YOURSELF: Big or small, you can DIY it with J-B Weld. Our heavy duty epoxy and adhesives repair & restore it right the first time. J-B Weld delivers superior performance, quality, and results for the World’s Strongest Bond.
The third mistake is skipping adhesion promoter on bumper plastics when the system calls for it. On TPO and PP, promoter can be the difference between a bond and a peel-off.
The fourth mistake is ignoring temperature. A product that sets in 5 minutes at 72 degrees F may stay soft much longer in a cold garage. That affects sanding, clamping, and final strength.
The fifth mistake is using liquid glue where tape is better. Emblems and side moldings are a good example. Automotive molding tape gives a controlled bond thickness, clean edges, and broad contact. A runny glue can damage paint and still fail.
Bottom Line
For the best glue for plastic car parts, match the repair to the plastic. Use molding tape for emblems and side trim. Use gel super glue only for small, low-load interior pieces. Use plastic epoxy or urethane plastic bonder for rigid plastics like ABS, PVC, and polycarbonate when the label confirms compatibility. Use flexible bumper repair adhesive, two-part urethane, reinforcement, adhesion promoter, or plastic welding for bumper covers, tabs, and PP/TPO plastics.
If the part holds a sensor, lamp, latch, mirror, bumper absorber, or anything safety-related, do not make the decision based on a $10 tube. Get the part inspected or replaced. Good adhesive work is about judgment as much as chemistry, and the best repair is the one that still holds after heat, cold, vibration, car washes, and real road use.
Quick wins for a faster PC:
Scan for outdated or missing drivers - takes under a minuteDriver Scan →Repair Windows errors before they cause bigger problemsFix Now →Frequently Asked Questions
What is the best glue for plastic car parts?
For most exterior plastic car parts, a two-part urethane plastic bonder or flexible bumper repair adhesive is the best category. For emblems and side moldings, automotive molding tape is usually better than liquid glue. For small interior trim pieces, plastic epoxy or gel super glue can work if the part is not load-bearing.
Will super glue work on plastic car bumpers?
Super glue is not a good repair for most plastic bumpers. Many bumper covers are PP, TPO, or PP/EPDM, which ordinary super glue does not bond well. Bumpers also flex, so a brittle glue joint can crack. Use a bumper-specific flexible adhesive, two-part urethane system, reinforcement, or plastic welding.
How do I know what type of plastic my car part is?
Look for the molded ID stamp on the backside of the part. Common markings include PP, TPO, PP/EPDM, ABS, PC, PVC, SMC, FRP, and PUR. The stamp should guide the adhesive choice because products that bond ABS or PVC may not bond polypropylene or polyethylene.
What glue works on polypropylene or TPO bumpers?
For polypropylene or TPO bumpers, use a bumper-specific two-part urethane repair material with the recommended adhesion promoter, or use plastic welding with compatible material. Ordinary epoxy and super glue often fail on these low-surface-energy plastics.
Free tools Windows power users keep installed
One-click scans. No signup required.
How much does DIY plastic bumper repair cost in 2026?
A DIY adhesive-only repair may cost about $7-$20, but a realistic bumper crack repair is commonly $30-$100 after adhesive, mesh, sandpaper, cleaner, adhesion promoter, primer, paint, and clear coat. Professional cracked bumper repair often runs about $200-$600 for minor or moderate damage.
When should I replace the plastic car part instead of repairing it?
Replace the part or hire a pro when the damage affects sensor mounts, lighting mounts, mirrors, latches, bumper absorbers, airbag-adjacent trim, torn mounting points, or any safety-related load. Also consider replacement when the plastic is distorted, missing pieces, or located where a failed repair could affect visibility or crash performance.
Quick Recap
Product prices and availability are accurate as of the date/time indicated and are subject to change. Any price and availability information displayed on Amazon at the time of purchase will apply.




