The Tool Desk
Outbyte PC Repair FREEClear out junk files and repair common Windows errorsFree Scan →Outbyte Driver Updater FREEScan for outdated or missing drivers - takes under a minuteDriver Scan →You can true lumber without a jointer, but the method depends on what you are trying to fix. A thickness planer alone will not remove twist or cup. It will make the top face parallel to the bottom face, which means a twisted board can come out thinner and still twisted. To flatten one face, the board needs to be supported so it cannot rock. To straighten one edge, the cut has to follow a known-straight guide instead of the crooked factory edge.
On our job sites, we treat truing lumber as a controlled salvage operation, not a magic trick. It makes sense for trim, shelving, built-ins, cabinet parts, doors, gates, workbench tops, and small repairs where straight, flat stock matters visually. It is usually the wrong answer for structural framing if the board will end up undersized, ungraded, or questionable for inspection. A bowed shelf board can be rescued. A twisted joist, rafter, deck beam, header, or load-bearing stud usually needs to be replaced or approved by the designer before anyone starts planing away material.
As an Amazon Associate I earn from qualifying purchases.
The fastest no-jointer workflow is this: inspect the board, mark the cup, bow, and twist, crosscut long stock slightly oversize, flatten one face on a shimmed planer sled, plane the opposite face, straight-line rip one edge with a circular-saw guide or table-saw sled, then rip the second edge parallel. Done carefully, that gives you the same basic reference surfaces a jointer would create: one flat face and one straight edge square to that face.
Free tools Windows power users keep installed
One-click scans. No signup required.
Start With the Board, Not the Jig
The best jig in the shop cannot make bad stock economical. Before you set up a planer sled or clamp a saw guide, decide whether the board deserves the time. Sight down the length from both ends. Lay it on a flat surface if you have one. Check for four common defects: cup across the width, bow along the length, crook along the edge, and twist from corner to corner.
#1 Best Overall

- [3 Tools in 1 – More Than Just Stair Gauges] Designed for 3 essential shop tasks: (1) Circular saw rip guide – clamps onto flat-base saws, including flat-base skill saws (base ≤0.473''), for straight, parallel cuts; (2) Framing square stair/rafter layout – attaches to standard framing squares, marks repetitive angles quickly; (3) Universal angle stop – clamps onto straight edges, saw guides, drill guides, or any jig with a flat edge to set custom angles off-square. One tool for measuring, layout, and positioning – endless shop applications
- [Extra-Long 0.906" Legs – Reaches Where Short Gauges Can't] Standard stair gauges have short 1/4" legs that get blocked by beveled edges, rounded corners, or warped surfaces. Our tall 1.65" gauges feature extended 0.906" legs that reach past radius edges and bevels to contact the true reference surface. Great for working with dimensional lumber, reclaimed wood, or any material with irregular edges
- [Upgraded Tall Profile with Anti-Slip Features] 1.65" tall body with ruler-view cutouts ensures perpendicular alignment at a glance. Hexagonal edges and textured thumb grips prevent rolling and slipping during layout work. Large-diameter thumbscrews allow comfortable fingertip tightening (hand-tighten only; over-tightening may strip threads), no tools needed—just hand-tighten and go. Extended slot opening (0.473") accommodates thicker materials – improved from the standard 0.315" found on basic gauges
- [CNC-Machined Anodized Aluminum – Built to Last] Precision CNC-machined from high-grade aluminum alloy with an anodic oxidation treatment for rust-proof and corrosion-resistant performance. Lightweight yet durable enough for daily job site use—framing, deck building, roofing, and stair stringer layouts. Kit includes: 2× Tall gauges; 2× Thumbscrews; 1× Anti-loss carabiner clip; 1× Aluminum compact hook. All in a compact set that fits in your tool bag or apron pocket—ready to use right out of the box
- [COMPATIBILITY CHECK – PLEASE READ BEFORE ORDERING] For Circular Saw Rip Guide Use: Requires a FLAT base plate – no curved, stepped, or raised front edges; Maximum base thickness: 0.473" (12mm); (✓) Fits: Standard flat-base circular saws with base thickness ≤0.473"; (✗) Does NOT fit: Saws with curved/beveled bases or plates thicker than 0.473". Please check your saw's base shape and thickness before purchasing. Not sure? Measure your base thickness—if it's flat and 0.473" or less, you're good to go. For Framing Square / Straight Edge Use: Fits standard flat-edge framing squares and straightedges; Not suitable for squares with raised lips or edges exceeding 0.473"
Use winding sticks for twist. They can be purpose-made sticks, two straight scraps of plywood, or aluminum levels. Put one across each end of the board and crouch down until their top edges line up visually. If one stick appears higher at one corner, the board is twisted. Mark the high corners with pencil or chalk. That mark matters later, because the sled needs to support the board’s actual twist, not just the gaps you notice first.
Then check moisture. Construction lumber, hardwood, and appearance boards all move as they dry or acclimate. If a board is still wet and you mill it flat today, it can cup or twist again after installation. For interior built-ins and trim, allow lumber to acclimate in the conditioned space whenever the schedule allows. A practical minimum is several days for stable kiln-dried stock and longer for thick, damp, or recently delivered material. Use a moisture meter as a go or no-go check when the work matters. Interior finish material generally needs to be much drier than deck framing or temporary blocking.
Crosscutting is the first real trick. A 10-ft board with 3/4 in. of bow may be a fight. Cut that same board into three 38-in. shelf blanks, and each piece may only need light correction. Cut rough parts 1 to 3 in. long and at least 1/4 in. wide so you have room for trimming after the stock is flat and straight. Do not cut structural members shorter unless the design and span layout already allow it.
Quick wins for a faster PC:
Repair Windows errors before they cause bigger problemsFix Now →Fix the driver behind crashes, sound loss and screen glitchesFind Drivers →Clear out junk files and repair common Windows errorsFree Scan →How Flat and Straight Is Good Enough?
Truing is not one tolerance. A paint-grade baseboard, a cabinet door stile, and a deck rim joist do not need the same level of precision. Set the target before you remove material, because every pass costs thickness, width, and time.
For rough blocking, temporary bracing, and concealed framing accessories, a board that sits reasonably flat and fastens without forcing is often enough. For exposed trim, shelving, face frames, and built-ins, aim for a face that does not rock on the bench and an edge that shows no visible daylight against a straightedge. For glue-ups, the mating edges need to close tightly with clamp pressure alone. If you need to crank a clamp hard enough to bend the boards together, the edge is not ready.
As a working target, many finish carpenters will accept about 1/32 in. of variation over short trim parts and roughly 1/16 in. over several feet for utility shelving, painted built-ins, or shop fixtures. Fine furniture work may require tighter accuracy, but construction work usually rewards consistency, stability, and fit more than chasing theoretical perfection.
Expect material loss. Lightly cupped or crooked boards may clean up with 1/16 to 1/8 in. removed from the worst side. Twisted boards can cost 1/4 in. or more very quickly, especially if they are long. If truing removes more than about 1/8 to 1/4 in. from a structural or dimension-critical board, replacement is often cheaper and safer than forcing that piece into service.
Recommended Free Tools
Method 1: Flatten One Face With a Planer Sled
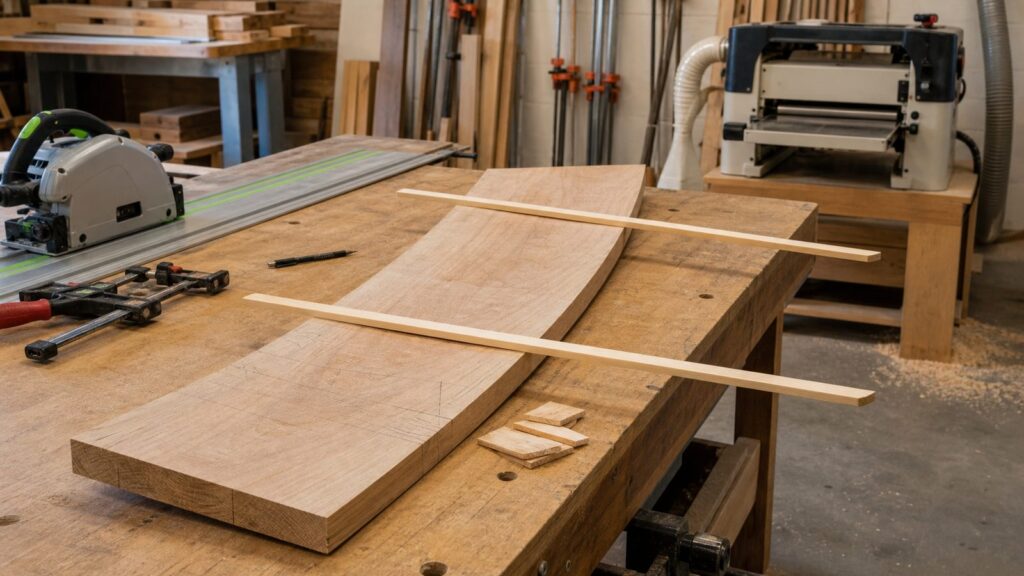
A planer sled is the most reliable no-jointer method for flattening a face. The sled is simply a flat carrier, usually plywood or MDF, that supports the warped board while it passes through the thickness planer. Shims hold the workpiece steady so the planer cuts the high spots instead of pressing the board flat and letting it spring back afterward.
What you need
Use a sled that is longer and wider than the workpiece. For a 6-in. wide shelf blank, a 10-in. wide sled is comfortable. For common 12 to 13 in. benchtop planers, 3/4-in. MDF or flat plywood works well. If you are buying new material in 2026, a 1/2-in. to 3/4-in. 4×8 MDF sheet commonly runs about $45 to $50 at Home Depot, while scrap plywood and wedges can bring the jig cost down to $0 to $25.
Add a small cleat at the leading end of the sled so the board cannot slide backward. Keep the cleat thinner than the board after its first pass, or place it outside the cutter path. Use hot-melt glue, wedges, playing cards, cedar shims, or thin plywood scraps to support every low spot. The goal is simple: when you press any corner of the board, it should not rock.
Step-by-step planer sled process
Place the board cup-down or stable-side down on the sled. Shim the corners and low areas until the board is fully supported. Check with winding sticks again. If the board has twist, the shims should preserve the twisted position so the cutter removes the high corners first. Lock the shims with hot-melt glue if needed, but keep glue away from the planer knives.
Do these 3 things before closing this tab:
1Clear out junk files and repair common Windows errors2Scan for outdated or missing drivers - takes under a minute3Repair Windows errors before they cause bigger problemsTake light passes. For most benchtop planers, 1/32 in. per pass is a reasonable correction cut, and even lighter passes are smarter on cupped, knotty, or figured hardwood. Do not try to flatten the board in one aggressive pass. Listen to the motor, watch for tear-out, and stop when the top face has one continuous clean surface or the areas that matter for your part are flat enough.
Once one face is flat, remove the board from the sled, flip it flat-face-down on the planer bed, and plane the opposite face. Now the planer can do what it is designed to do: make the second face parallel to the first. Plane to final thickness after the board has had a chance to relax. For high-value hardwood parts, many shops flatten one face, remove some material from the opposite face, let the board sit overnight, then take final passes the next day.
Rank #2
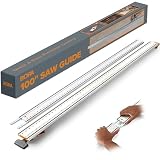
- 100 Inch Circular Saw Guide Rail: Professional track saw guide rail system combines 50 inch clamp edge and 50 inch extension; delivers precise straight edge cuts on plywood and large sheet materials with any circular saw
- Built-In T-Track System: Integrated dual T tracks transform this saw guide into a versatile workbench accessory; clamp edge saw guide adds instant functionality for routers, jigsaws and other circular saw accessories
- Quick Lock Clamp Technology: Ergonomic clamp handle provides one-sided adjustability for fast setup; straight edge clamp secures tightly to materials without movement, saving time on every cut with reliable grip
- Heavy-Duty Aluminum Construction: Rigid straight edge tool crafted from thick aluminum ensures your saw track stays perfectly straight; this cutting guide for circular saw delivers stable, consistent results on any project
- Universal Compatibility Kit: Complete saw guide rail for circular saw works with all brands; bora track saw guide includes connectors and large locking handles; perfect straight cut guide for woodworking and remodeling
Method 2: Straighten an Edge With a Circular Saw Guide
For construction jobsites, the circular saw and straightedge method is the most practical substitute for edge-jointing. It is fast, portable, and accurate enough for trim, shelving, fascia repairs, fence boards, gate parts, and many built-ins. The key is that the saw rides against a known-straight guide, not the bad edge of the board.
Use a factory-straight strip of plywood or MDF, an aluminum straightedge, a clamp-edge guide, or a track. Clamp it on the waste side of the cut line. Measure the offset from the saw blade to the edge of the saw shoe before you clamp the guide. On many 7-1/4 in. circular saws, that offset is roughly 1-1/2 in. on one side and 3 to 4 in. on the other, but you should measure your actual saw. A 1/16 in. mistake in the offset will show up for the full length of the board.
Support the board so both halves stay stable through the cut. Ripping a 1×8 on two sawhorses with the waste piece hanging loose is a good way to pinch the blade near the end. Use foam insulation, a sacrificial plywood sheet, or multiple supports. Set blade depth about 1/4 in. deeper than the lumber thickness. For a 3/4-in. board, a 1-in. blade depth is usually enough.
After the first edge is straight, rip the second edge parallel on a table saw, with a track saw, or by measuring from the new edge and using the guide again. If the edge will be exposed, clean it with a sharp hand plane, block plane, or sander. If it will be buried in a wall, cabinet, or fence assembly, a clean saw-cut edge may be all you need.
Method 3: Use a Table-Saw Straight-Line Sled
In the shop, a table-saw straight-line ripping sled is faster than fussing with a circular-saw guide for repeated parts. The sled is a known-straight carrier that rides against the table-saw fence while the rough board is clamped to it. The carrier defines the cut. The crooked lumber edge does not.
A simple sled can be a 10 to 12 in. wide strip of 3/4-in. plywood with one factory-straight edge. Add toggle clamps or hold-down clamps so the board cannot shift. Clamp the workpiece with the crooked edge overhanging the sled just enough for the blade to remove the defect. Run the sled’s straight edge against the fence. After one clean pass, remove the board from the sled and use the newly straightened edge against the fence to rip the other side parallel.
This method is excellent for face-frame stock, shelf edging, cabinet parts, narrow trim blanks, and small batches of lumber. It is less attractive for long, heavy, or severely warped boards unless you have infeed and outfeed support. If the board rocks on the sled, shim it before clamping. A twist that is not supported can create a cut that looks straight unloaded but changes when the clamps come off.
Method 4: Joint Two Boards at Once With a Router
For edge glue-ups, a router can solve a different problem: the mating edges do not always have to be perfectly straight in space as long as they perfectly match each other. By routing both mating edges together, any slight waviness is mirrored. When the boards are opened like a book, the joint closes tightly.
Lay the two boards side by side with the mating edges close together. Place narrow spacers between them so the router bit can pass between the boards. Clamp both boards firmly to a flat work surface. Use a straightedge or guide for the router base, and make a full-length pass with a straight bit. The bit trims both edges in one operation. When you remove the spacers and bring the boards together, a slight curve on one edge is matched by the opposite curve on the other.
This is a strong method for tabletops, wide shelves, panels, and long boards that are difficult to edge-joint on a small machine. It is not the best choice for making one board’s edge parallel to the opposite edge. After routing the mating edges, you still need to square and size the full panel.
Outdated Drivers Are Slowing You Down
One free scan finds every outdated or missing driver and matches the right update for your exact hardware.Free scan · exact hardware matchPC Slower Than It Used to Be?
A free scan shows the junk files, broken settings and background clutter dragging Windows down - then fixes them in one click.Free scan · Windows 10 & 11Method 5: Use Hand Planes When Accuracy Matters More Than Speed
A sharp hand plane can flatten and straighten lumber without machines, but it is not free. The cost is time, sharpening skill, and patience. Used jack planes and jointer planes can be inexpensive, but many need sole flattening, blade tuning, and sharpening before they perform well. Premium new planes cost much more. Sharpening stones, a honing guide, and setup time belong in the real cost.
For edge straightening, mark the high spots with pencil, secure the board vertically, and take long overlapping strokes with a jointer plane or jack plane. Check often with a straightedge. For face flattening, work diagonally across the high areas first, then with the grain. Winding sticks are the fastest way to see whether twist remains.
Hand planes shine on exposed edges, final fitting, and small corrections after a saw or router has done the heavy work. They are slow for removing 1/4 in. of twist from a 10-ft 2×10. They are excellent for taking three whisper-thin passes off a shelf edge so it sits tight against a wall.
Rank #3

- Compatibility: Circular saw edge guide is designed to be compatible with the Ryobi P508 circular saw and router, Replacement Part # 204585001.
- Quality Material: Constructed from high-quality materials,durable, choose high-quality products, and enjoy a better life.
- Easy Installation: Providing smooth, precise results, it eliminates repeated measuring and marking on rip cuts by making it easy to secure,saving time and effort during setup.
- Practicability: This circular saw guide provides a stable guide for Ryobi circular saw allowing for straight and consistent cuts or routing width.minimizing errors and enhancing the cutting experience.
- Excellent Service: For any reason, if you are not satisfied with the product, please contact us! We will provide you with a prompt response and satisfactory solution. Customer satisfaction is our relentless pursuit.
Method Comparison and 2026 Cost Guide
The right method depends on the tools you already own, the lumber value, and the required accuracy. In 2026, the cost decision is also affected by uneven lumber pricing. Lumber futures were about $614 per 1,000 board feet on July 31, while NAHB reported framing lumber prices up 1.4 percent week over week as of July 24, 2026, 3.1 percent higher than one month prior, and 0.3 percent lower than one year prior. Gordian’s Q3 2026 construction cost data put lumber around $936.05 per MBF, up 6.42 percent from Q2. Retail prices at the store can move differently from futures because species, grade, dryness, length, trucking, regional inventory, tariffs, storm demand, and mill capacity all matter.
| Method | Best use | Typical 2026 cost | Accuracy | Main risk |
|---|---|---|---|---|
| Planer sled | Flattening one face of cupped or twisted boards | $0-$25 with scrap, about $45-$50 for a new MDF sheet, plus a $350-$750 benchtop planer if needed | High for faces when shimmed well | Board can shift or spring back if poorly supported |
| Circular-saw guide | Job-site straight-line ripping | $30-$100 for many clamp-edge guides; longer track systems cost more | Moderate to high with a sharp blade and solid support | Blade pinch, offset error, rough exposed edge |
| Table-saw sled | Repeated straight edges in a shop | $0-$50 for plywood and clamps if you own the saw | High for edges | Kickback if the board is not clamped or supported |
| Router paired-edge jointing | Glue-ups, panels, tabletops, wide shelves | Usually $20-$80 for bit or guide upgrades if router is owned | High for mating edges | Bit deflection, tear-out, poor clamping |
| Hand plane | Final fitting, exposed edges, small corrections | Varies widely; used planes may be cheap, sharpening gear adds cost | High in skilled hands | Slow learning curve and inconsistent results when dull |
| Buy a jointer | Production shop milling | Bench jointers listed from about $238 to $4,541, with WEN 6-in. spiral benchtop units around $273.83 and larger stand models roughly $1,195-$2,199 | High within machine capacity | Tool cost, width limits, setup, storage |
Hardwood changes the equation. A current hardwood price list showed common 4/4 examples from about $3.75 per board foot for knotty alder to $6.25 per board foot for FAS ash and $6.00 per board foot for cherry. Spending 30 minutes to save a cherry board may be sensible. Spending the same 30 minutes to rescue a badly twisted 2×4 often is not.
When to True the Board and When to Replace It
Use a practical decision tree. First, ask whether the board is structural. If it is a joist, rafter, stud, header, beam, stair stringer, deck joist, or guardrail post, do not plane it down casually. The member must still meet the required grade, span, size, and design assumptions. If milling removes a grade stamp needed by an inspector, keep purchase documentation and talk with the building department or engineer before installation.
Second, look at the defect. Light cup, mild crook, and manageable bow are good candidates for truing. Severe twist, checks extending beyond the trimmed ends, knots directly in the cut line, loose knots at joinery, active splits, and wet lumber that is still moving are usually reject signals. If a board has to lose more than 1/4 in. to become usable, replacement is usually the cleaner answer.
Third, compare time to replacement cost. A hired handyperson in 2026 commonly costs about $60 to $125 per hour nationally per HomeAdvisor, with other market guides showing about $50 to $150 per hour depending on region, insurance, skill, and job minimums. If a pro spends one hour saving a $9 framing board, nobody wins. If that same hour saves a wide hardwood shelf, an out-of-stock trim profile, or a custom door part, the math changes.
Fourth, ask what failure looks like. A slightly imperfect garage shelf edge is low risk. A planed-down deck joist or a twisted stair component is not. Cosmetic work gives you room to solve problems with joinery, fasteners, sanding, and paint. Structural work gives you code, load path, and inspection requirements.
Independent reader supportYour contribution helps us test, update, and keep practical guides available for everyone.Structural, Permit, and Inspection Notes
Truing lumber is usually not a permit issue by itself. The project that uses the lumber may be. Built-ins, shelving, trim, and furniture-style work generally do not trigger the same review as framing changes. Structural alterations, decks, additions, headers, new openings, stair work, and load-bearing repairs often do. Local rules vary. Arlington, Virginia, for example, publishes residential permit requirements separately from the building code itself, and states such as New Mexico provide residential building guides that point homeowners back to local permitting and inspection procedures.
The 2024 International Residential Code sets the broad scope and administration framework, but local adoption, amendments, and enforcement decide what applies on a specific property. A small interior trim repair is not the same as modifying rafters. If you are changing structure, changing egress, touching stairs or guards, or replacing framing that will be concealed, call the local building department before the work is buried.
For inspected structural lumber, keep grade stamps visible when practical. If a board has to be milled and the stamp will be removed, keep receipts, bundle tags, or documentation showing grade and species. Better yet, do not mill structural members unless the designer has allowed for the final actual size. A nominal 2×10 already has an actual size of about 1-1/2 in. by 9-1/4 in. Removing another 1/4 in. from the depth is not a harmless cosmetic change in a span member.
What’s actually slowing this PC down?
Pick the symptom - the matching free tool is one click away.
Safety Controls That Matter
Most accidents in this work come from unstable stock, pinched blades, missing guards, and dust. OSHA’s construction rules require safe operation and guarding of woodworking tools, and table-saw guidance focuses heavily on guarding, kickback prevention, and proper feeding. Even in a home shop, those principles are the right baseline.
For planers, never send a loose, rocking board through without a sled and shims. Keep hands away from the infeed and outfeed openings. Stand out of the direct line of feed when possible. Listen for chatter or slipping, and stop if the board moves on the sled. Do not plane pieces shorter than the planer manufacturer’s minimum length.
For table saws, use a riving knife or splitter, blade guard when the cut allows it, push sticks, and outfeed support. Do not trap a cutoff between the blade and fence. On a straight-line sled, clamp the workpiece so it cannot rotate. A rough board that pivots into the blade can kick back hard.
For circular saws, support both sides of the cut, keep the cord clear, set the blade depth correctly, and clamp the guide securely. Do not hold narrow pieces by hand while ripping. For routers, take reasonable passes, move against the bit rotation, and clamp the work so both hands can control the tool. For all methods, use eye protection, hearing protection, and dust collection or a respirator, especially with MDF, pressure-treated lumber, and hardwood dust.
Rank #4

- Saw Guide Compatibility: This saw guide turns your circular saw into a precision edge-guided tool; works best with a regular (side-blade) circular saw, corded or cordless, that has a blade guard or base that allows the sled to clamp securely
- Woodworking Tools: Universal sled holds guide rail and edge guide, making the circular saw guide portable; not ideal for saws with plastic upper blade guard because guard might interfere with the sled clamping or alignment
- Versatile Carpenter Tools: Works for left- or right-bladed saws and users; please note, this guide does not work with worm drive saws, as the base or motor housing tends to interfere with the sled’s ability to sit flat and clamp properly
- Accessible Workshop Accessories: Large handle on the edge guide maintains contact with the material;, this saw guide is not ideal for saws with bulky or odd shape guards that prevent a flat fit with the sled plate
- Premium Kreg Tools: We offer products that help woodworkers close the gap between idea and outcome
When to DIY vs When to Hire a Pro
DIY makes sense when the boards are non-structural, the defects are mild, the stock is valuable enough to save, and you already own at least the core tool. A homeowner with a circular saw, clamps, a straightedge, and patience can straighten shelf boards and trim stock accurately enough for many projects. A planer sled is also reasonable for a careful DIYer who already owns a thickness planer and understands light passes.
Hire a pro when the lumber is part of a structural repair, when the work has to pass inspection, when the finished piece is expensive or highly visible, or when the boards are too long to control safely with your setup. Also hire out milling when the job requires consistent results across many boards. A cabinet shop or finish carpenter with a planer, jointer, table saw, and dust collection can process material faster and with less waste.
Be realistic about minimum charges. Even if the work only takes 30 minutes, many tradespeople have a service minimum. With 2026 handyman rates commonly around $60 to $125 per hour and some markets closer to $50 to $150, it may be cheaper to buy better stock than pay someone to rescue warped commodity lumber. For custom hardwood, historic trim, matching repairs, or built-in parts, professional milling can be the best money in the project.
A Practical No-Jointer Workflow
For most homeowners and small contractors, the best sequence is predictable. First, inspect the stock and reject the obvious losers: severe twist, deep splits, unstable knots, or wet boards. Second, rough-cut long boards to project length plus 1 to 3 in. Third, mark twist with winding sticks and cup with pencil. Fourth, flatten one face on a shimmed planer sled if face flatness matters. Fifth, plane the opposite face to thickness. Sixth, straighten one edge with a circular-saw guide, table-saw sled, router method, or hand plane. Seventh, rip the second edge parallel and trim the ends square.
Windows Errors? Fix Them Before They Spread
Repair common Windows errors and clear accumulated junk for a smoother, more stable PC - no reinstall needed.Free scan · no reinstallOutdated Drivers Are Slowing You Down
One free scan finds every outdated or missing driver and matches the right update for your exact hardware.Free scan · exact hardware matchDo not skip the stock selection step. It is the difference between skilled work and wasted effort. Truing lumber without a jointer is absolutely workable, but it is most successful when you are improving decent material, not trying to turn a badly warped framing board into something it was never going to be.
The contractor’s rule is simple: create one trustworthy face, create one trustworthy edge, then make everything else parallel or square from those references. Whether the tool is a planer sled, a circular-saw guide, a table-saw sled, a router, or a hand plane, the principle does not change. Control the board, cut from a reliable reference, take light passes, and stop before the cure costs more than the lumber.
Frequently Asked Questions
Can you flatten a board with only a thickness planer?
Not reliably. A thickness planer makes one face parallel to the other, so a twisted or cupped board can stay twisted. Use a shimmed planer sled first to hold the board steady while one face is flattened.
What is the best way to straighten a board edge without a jointer?
On a job site, clamp a straight plywood strip, aluminum guide, or track to the board and make a guided circular-saw rip. In a shop, a table-saw straight-line sled is usually faster and more repeatable.
Do these 3 things before closing this tab:
1Repair Windows errors before they cause bigger problems2Fix the driver behind crashes, sound loss and screen glitches3Clear out junk files and repair common Windows errorsHow much wood will I lose when truing warped lumber?
Mild defects may clean up with 1/16 to 1/8 in. removed. Severe twist can require 1/4 in. or more, which often makes replacement smarter, especially for structural or dimension-critical lumber.
Should I true warped framing lumber or replace it?
Replace it in most structural situations. Joists, rafters, studs, headers, beams, and deck framing must still meet grade, span, and size requirements. Do not plane structural members smaller unless the design still complies.
Is a planer sled safe for twisted lumber?
Yes, if the board is fully shimmed, cannot rock, and is held securely on a flat sled. Take light passes and follow the planer manufacturer’s minimum length and safety rules.
Do I need a permit to plane or rip lumber?
Usually not for the milling step alone. Permits depend on the project using the lumber. Structural repairs, decks, stairs, new openings, additions, and concealed framing work may require local approval and inspection.
Recommended Free Tools
Quick Recap
Product prices and availability are accurate as of the date/time indicated and are subject to change. Any price and availability information displayed on Amazon at the time of purchase will apply.

