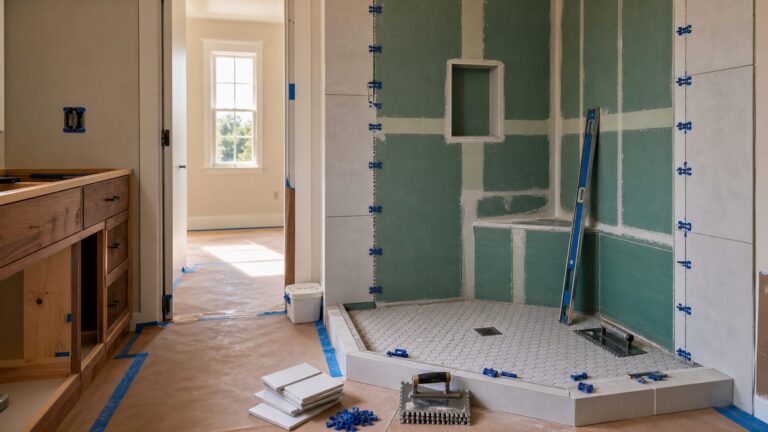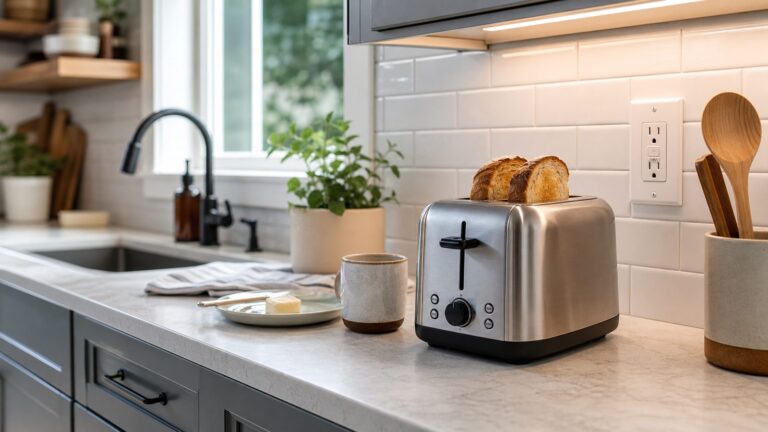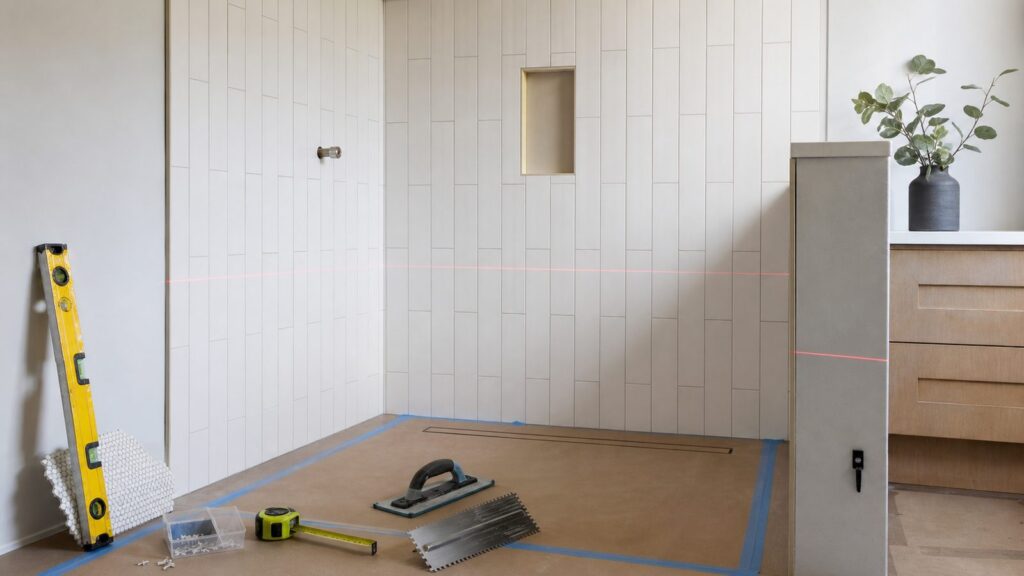
Stack bond tile, often called stacked tile, straight stack, grid tile, or vertical stacked subway tile, is a tile layout where the grout joints line up both vertically and horizontally. Instead of the familiar running-bond subway pattern, every tile sits directly above and beside the next one, creating a clean architectural grid.
For homeowners, the appeal is obvious: stacked tile looks modern without needing an unusual tile shape. A basic 3-by-12 subway tile, a 2-by-8 handmade-look ceramic, a square porcelain tile, or a narrow finger mosaic can all feel more current when installed in a straight stack. In 2026, we are seeing the pattern used in showers, backsplashes, fireplace surrounds, laundry rooms, mudrooms, vanity walls, and feature walls.
From a builder’s point of view, the key point is this: stacked tile is visually simple, but it is not automatically easier to install. A running bond pattern hides small errors because the joints are staggered. A stacked layout exposes every bowed wall, uneven tile, crooked outlet, poor cut, and inconsistent grout joint. When it is planned and installed well, it looks crisp and intentional. When it is rushed, it looks cheap fast.
This guide covers where stack bond tile works, what it costs in the U.S. in 2026, how to choose materials, what details matter in wet areas, and when a homeowner can reasonably DIY versus when it is time to hire a tile pro.
#1 Best Overall

- Professional Tile Leveling System: DGSL Tile Installation Set - tools for floor/wall setting. The system ensures flatness between tiles avoiding movements during the mortar setting
- Installation Tile Tool: The Tile Leveling System helps DIY and Professional tile layers increase the efficiency of laying tiles and obtain a lippage-free finish
- Disposable Tile Clips: The leveling system carries 300 clips to secure the tile position and prevent movement, use on Tiles 1/8 inch (3 mm) up to 1/2 inch (12 mm) thick, extremely fast and easy to install and remove. 1/8 Inch tile spacers can apply to 1/8 inch (3 mm) tile gap and also used for Flooring and Walling
- Reusable Wedges: 100 Pcs wedges, The wedge allows for a 1/16 inch minimum grout joint, and it firmly holds the tile in place, This is the most economical tile leveling system available (1 tile requires 4 wedges and 4 spacers)
- Package Includes: 300 Piece Leveling Spacer Clips and 100 Piece Reusable Wedges and 1 Tile Plier. Our Tile push pliers help you clamp the wedge and clips quickly, making the tiles more flat and save time
What Is a Stack Bond Tile Pattern?
A stack bond tile pattern is a layout where tile edges align in a straight grid. The joints are continuous from tile to tile. If you stand back from the wall, your eye reads the installation as clean vertical and horizontal lines.
Common versions include:
- Horizontal stack: rectangular tile installed with the long side running left to right. This can make a backsplash, shower wall, or small bathroom feel wider.
- Vertical stack: rectangular tile installed upright. This draws the eye upward and can make a shower, vanity wall, or fireplace surround feel taller.
- Square grid: square tile installed in rows and columns. This can feel modern, mid-century, commercial, or spa-like depending on tile size and grout color.
- Stacked kit-kat or finger tile: narrow mosaic tile, usually mounted on mesh sheets, installed in vertical or horizontal rows.
- Large-format stacked panels: large porcelain or ceramic panels aligned with minimal joint interruption. This is more demanding and typically belongs in professional hands.
The pattern works because it reduces visual noise. The tile shape, glaze, texture, and grout become the design instead of the layout itself. That is also why the workmanship matters so much. A stacked tile wall is basically a measuring tool on display.
Why Stacked Tile Is Still Popular in 2026
Stacked tile has stayed popular because it gives familiar tile a sharper look. Homeowners who do not want ornate tile, heavy veining, or busy patterning can still make a bathroom or kitchen feel designed. A simple white ceramic subway tile in a running bond pattern can read traditional. The same tile stacked vertically can read clean, tailored, and current.
On our job sites, the strongest uses are usually not the loudest ones. A stacked shower wall in soft white, warm gray, green, blue, or clay-toned ceramic can age better than a highly graphic trend tile. A kitchen backsplash in a horizontal stack can support wood cabinetry, quartz counters, and black or brass hardware without fighting the rest of the room.
Do these 3 things before closing this tab:
1Fix the driver behind crashes, sound loss and screen glitches2Clear out junk files and repair common Windows errors3Scan for outdated or missing drivers - takes under a minuteThe look also fits several 2026 design directions: quieter minimal bathrooms, warm modern kitchens, handmade-look surfaces, narrow vertical tile, earthy colors, and large-format porcelain. The common thread is restraint. The grid gives structure, while the tile finish brings warmth or texture.
That said, stack bond is not the right answer everywhere. In older houses with wavy plaster walls, out-of-square corners, sloped ceilings, and imperfect framing, a perfect grid can highlight conditions the homeowner never noticed before. In those rooms, we either correct the substrate first or choose a tile and grout combination that has enough texture and forgiveness to look intentional.
Where Stack Bond Tile Works Best
Stacked tile can work in many rooms, but the best locations share one thing: the layout has a clear focal point and enough uninterrupted surface area for the grid to read cleanly.
Kitchen Backsplashes
A stacked tile backsplash is one of the most practical uses of the trend. Most backsplashes are 18 inches high between the counter and upper cabinets, though full-height backsplashes behind a range hood or open shelving may run 30 to 60 inches or more. With a 3-by-12 tile, a horizontal stack gives long clean lines across the counter. With a 2-by-8 or 2-by-10 tile, a vertical stack adds rhythm behind a range, sink, or coffee bar.
Free tools Windows power users keep installed
One-click scans. No signup required.
The main planning details are outlet placement, countertop level, cabinet bottoms, exposed ends, and the range hood centerline. We do not like starting a backsplash from one side and hoping it works out. We establish the most visible centerline first, dry-check the cuts, and decide where partial tiles will land before mortar is mixed.
Showers and Tub Surrounds
Stacked tile works very well in showers, but the tile is only the finish layer. The real performance comes from the waterproofing system behind it, the slope of the shower floor, properly treated penetrations, and movement joints at changes of plane.
For shower walls, vertical stacked subway tile can make an 8-foot ceiling feel taller. Horizontal stack can make a narrow tub surround feel longer. Around niches, valves, benches, and glass door channels, the layout should be planned before backer board and waterproofing are complete. A niche that misses the grout grid by 1 inch can make the whole wall look poorly coordinated.
Fireplace Surrounds
Stack bond tile is a good fit for fireplace surrounds because the grid can frame the opening cleanly. Heat-rated materials and clearances matter, especially with wood-burning appliances or high-output gas inserts. The best fireplace layouts usually center the tile on the firebox opening, not on the full wall, unless the surrounding millwork requires a different reference point.
Recommended Free Tools
Laundry Rooms and Mudrooms
These are good spaces for stacked tile because the look is clean and easy to maintain. A stacked backsplash behind a utility sink or a wainscot behind hooks can handle moisture and dirt better than painted drywall. For floors, though, do not choose by appearance alone. Wet shoes, pet bowls, and laundry spills call for suitable texture and slip-resistance data.
Rank #2
- Professional Tile Leveling System: DGSL Tile Installation Set - tools for floor or wall setting. The system ensures flatness between tiles avoiding movements during the mortar setting
- Installation Tile Tool: The Tile Leveling System helps DIY and Professional tile layers increase the efficiency of laying tiles and obtain a lippage-free finish
- Disposable Tile Clips: The leveling system carries 300 clips to secure the tile position and prevent movement, use on Tiles 1/8 inch (3 mm) up to 1/2 inch (12 mm) thick, extremely fast and easy to install and remove. 1/16 Inch tile spacers can apply to 1/16 inch (1.5 mm) tile gap and also used for Flooring and Walling
- Reusable Wedges: 100 Pcs wedges, The wedge allows for a 1/16 inch minimum grout joint, and it firmly holds the tile in place, This is the most economical tile leveling system available (1 tile requires 4 wedges and 4 spacers)
- Package Includes: 300 Piece Leveling Spacer Clips and 100 Piece Reusable Wedges and 1 Tile Plier. Our Tile push pliers help you clamp the wedge and clips quickly, making the tiles more flat and save time
Feature Walls
A stacked tile feature wall can work behind a vanity, bar, reception desk, or built-in shelving. The bigger the wall, the more the layout matters. Small alignment errors compound across 8, 10, or 12 feet. If the tile is glossy, nearby lighting can exaggerate lippage and surface variation.
Vertical Stack vs Horizontal Stack
The right orientation depends on the room, the tile size, and what you want the eye to notice first.
| Layout | Best Use | Visual Effect | Watchouts |
|---|---|---|---|
| Vertical stacked subway tile | Shower walls, vanity walls, fireplaces, powder rooms | Makes the surface feel taller and more tailored | Shows plumb errors, uneven ceilings, and crooked niches quickly |
| Horizontal stacked subway tile | Kitchen backsplashes, tub surrounds, laundry rooms | Makes the surface feel wider and calmer | Long rows reveal out-of-level counters, tubs, and cabinet lines |
| Square grid tile | Bathrooms, mudrooms, commercial-style spaces | Creates a clean modern grid | Can make out-of-square rooms obvious, especially on floors |
| Stacked finger or kit-kat tile | Accent walls, niches, bars, powder rooms | Adds texture while keeping a linear look | Mesh sheet alignment and grout consistency are critical |
For a small bathroom, vertical stack is often the better choice on shower walls because it emphasizes height. For a long kitchen backsplash, horizontal stack often feels more natural because it follows the counter. For a fireplace, we usually center the pattern on the firebox and let the architecture decide the orientation.
The Construction Details That Make or Break Stacked Tile
The difference between a high-end stacked tile job and an awkward one is usually not the tile price. It is layout control, substrate prep, edge planning, and grout execution.
Start With a Flat Substrate
Stacked tile is only as clean as the surface behind it. A bowed stud, lumpy drywall patch, uneven cement board seam, or poorly floated shower wall will telegraph through the tile. Large-format tile and glossy tile make this worse.
Before setting tile, we check walls with a straightedge and floors for flatness, deflection, and plane changes. Floors may need patching or self-leveling. Walls may need shimming, floating, or corrected backer board. Skipping this step is one of the most common reasons a simple stacked pattern looks amateur.
Establish the Visible Centerline
With stacked tile, the eye reads the grid immediately. We use a laser level and establish the most visible reference line first. That might be the center of a range hood, shower valve, vanity mirror, window, fireplace opening, or niche.
The Tool Desk
Outbyte PC Repair FREERepair Windows errors before they cause bigger problemsFix Now →Outbyte Driver Updater FREEFix the driver behind crashes, sound loss and screen glitchesFind Drivers →The goal is not always to have equal cuts everywhere. The goal is to have the cuts make sense from the normal viewing position. In a shower, that may mean centering the back wall and wrapping cuts into the side walls. In a backsplash, it may mean centering the range wall and accepting different cuts at a pantry return.
Plan Grout Joint Width
Rectified porcelain can often handle tighter joints than handmade or non-rectified ceramic. Many common subway tiles use grout joints around 1/16 inch to 1/8 inch, while handmade-look tile may need 1/8 inch, 3/16 inch, or more depending on size variation. The tile manufacturer’s instructions matter.
Too-small joints with irregular tile create visible lippage and inconsistent spacing. Too-wide joints can make the grid look heavy. We mock up questionable tile before committing, especially with zellige-style tile, glass tile, and mosaics.
Control Lippage
Lippage is the height difference between adjacent tile edges. In a running bond pattern, some lippage can be visually softened by staggered joints. In stack bond, the grid draws attention to it. Bowed rectangular tile, uneven mortar coverage, and substrate variation all contribute.
Quick wins for a faster PC:
Fix the driver behind crashes, sound loss and screen glitchesFind Drivers →Clear out junk files and repair common Windows errorsFree Scan →Scan for outdated or missing drivers - takes under a minuteDriver Scan →For larger tile, leveling clips can help, but they do not replace proper surface prep or correct mortar selection. For glossy tile, we also look at lighting. A wall washer or sconce placed close to tile can create grazing light that makes tiny surface changes look larger than they are.
Blend Boxes and Inspect Tile
Handmade-look tile, zellige-style tile, and some ceramic glazes vary in color, thickness, and edge shape. That variation can be beautiful, but it needs control. We blend from multiple boxes, inspect for excessive size variation, and pull obvious defects before installation. A 10-square-foot mockup can prevent a much more expensive disagreement after 100 square feet is installed.
Rank #3

- Tile Tools: The Tile Leveling System 1/8 an excellent tool for setting up floors and walls. Tile clips are suitable for 1/8 "(3mm) to 1/2" (12mm) thick tiles, with multiple sizes available (1/8 ", 1/16", 1/32 "). Tile leveling wedges can be reused to reduce waste
- Tile Spacer Leveling System: This professional tile leveling system ensures the flatness between tiles, making them less likely to move during the laying process, reducing the difficulty of tile laying, and improving the efficiency of tile laying
- Easy to Install: The tile spacers leveling system does not require other assembly tools and is easy to install. It can also be disassembled quickly and easily. You can use a foot kick or a rubber hammer to remove the clips, reducing cleaning trouble caused by incomplete disassembly
- Good Material: The tile leveling clips is made of PVC material, which is not easily deformed. The ceramic tile leveling wedge adopts a reinforced design of lengthening and widening, which is not easy to break. The hammer is made of rubber, and the handle provides anti slip and comfortable grip. The tile pliers can also help you quickly grip wedges and clips
- The Packaging Includes: 1000 tile spacers 1/8, 200 tile wedges, 1 rubber hammer and 1 tile pliers, which can be applied to kitchens, living rooms, bedrooms, classrooms, and offices. If you have any questions, you can contact us at any time
Decide on Trim Before Ordering
Exposed edges are where many tile jobs lose their polish. Before ordering, decide whether the project will use bullnose, pencil trim, metal profiles, mitered edges, tile returns, or a finished drywall termination. This matters at backsplash ends, shower niches, outside corners, half walls, pony walls, windows, and fireplace returns.
Do not leave trim as an install-day decision. The tile thickness, edge finish, metal profile color, and grout color should be coordinated as one package.
Best Tile Materials for a Stacked Pattern
Almost any tile can be stacked, but some materials are more cooperative than others.
Ceramic Subway Tile
Ceramic subway tile is cost-effective, widely available, and easy to clean. Common sizes include 3-by-6, 3-by-12, 2-by-8, 2-by-10, and 4-by-12 inches. For walls, ceramic is a solid choice. For wet floors, verify that the tile is rated for floor use and has appropriate slip-resistance data.
Rectified Porcelain
Rectified porcelain has mechanically finished edges, which can support a cleaner grid and tighter joints when installed correctly. It is denser than ceramic and often a better choice for floors, showers, and high-use areas. Porcelain costs more to cut and install, especially in large formats, but it performs well when the substrate and setting materials are right.
Glass Tile
Glass tile can look excellent in a stacked backsplash or shower accent, but it requires compatible mortar, careful cutting, and a clean substrate. Some glass tile shows trowel marks, shadowing, or adhesive inconsistency if installed poorly. We are cautious with large glass tile in high-movement areas.
PC Slower Than It Used to Be?
A free scan shows the junk files, broken settings and background clutter dragging Windows down - then fixes them in one click.Free scan · Windows 10 & 11Outdated Drivers Are Slowing You Down
One free scan finds every outdated or missing driver and matches the right update for your exact hardware.Free scan · exact hardware matchHandmade-Look and Zellige-Style Tile
These tiles bring texture and variation, which can soften the rigidity of a grid. They also require realistic expectations. Edges may not be perfectly straight, thickness can vary, and glossy surfaces may reflect light unevenly. Wider grout joints and a mockup are usually smart.
Mosaics and Finger Tile
Stacked mosaics can be efficient because they come on sheets, often around 12 by 12 inches. The challenge is sheet alignment. If each sheet is even 1/16 inch off, the wall can show repeating seams. A good installer adjusts sheets as they go instead of treating the mesh backing as automatically accurate.
Large-Format Porcelain
Large-format porcelain can create a refined stacked-panel look, but handling, cutting, mortar coverage, wall flatness, and movement accommodation become more demanding. This is usually not a casual DIY material. Large pieces can be heavy, brittle at cutouts, and unforgiving around plumbing penetrations.
Stacked Tile Costs in 2026
In 2026, basic tile installation is commonly advertised around $6.50 per square foot in big-box installation pricing, while broader U.S. trade pricing often ranges from roughly $5 to $45 per square foot for labor depending on material, layout, room type, region, demolition, substrate condition, and detail level. Material alone can range from about $0.50 to $35 per square foot, from budget ceramic to premium porcelain, glass, natural stone, handmade tile, mosaics, and designer lines.
Those numbers need context. A small stacked backsplash may be only 25 square feet, but the job still has mobilization, layout, cuts, outlet work, edge finishing, and grout. A shower may be 80 to 140 square feet of tile, but the real cost is not just tile setting. It may include demolition, backer board, waterproofing membrane, shower pan work, niche framing, plumbing coordination, and glass preparation.
| Project Type | Typical Size | 2026 Cost Context | Why Price Changes |
|---|---|---|---|
| Simple ceramic backsplash | About 20-35 sq. ft. | Often a few hundred to low thousands installed; a 25 sq. ft. backsplash may run about $600-$700 for installation only at big-box pricing | Outlets, wall repair, trim, tile price, and minimum trip charges |
| Bathroom floor | About 35-80 sq. ft. | Labor may fall within the broad $5-$45 per sq. ft. range depending on prep and tile | Demolition, floor flatness, underlayment, door cuts, toilet reset, and floor rating |
| Tub surround | About 60-90 sq. ft. | Commonly a multi-thousand-dollar scope when waterproofing and prep are included | Backer board, waterproofing, plumbing penetrations, corners, and trim |
| Walk-in shower | About 90-140+ sq. ft. | Bathroom tile projects average around $2,100 nationally, with high-end shower work reaching about $6,000 or more | Shower pan, slope, niches, benches, waterproofing, layout precision, and glass coordination |
| Fireplace surround | About 20-80 sq. ft. | Varies widely based on tile type and substrate correction | Heat clearances, edge finish, mantel details, and cuts around the opening |
Hourly installer data also varies by market. In major U.S. metros, reported tiling hourly rates can run around $50 in Los Angeles and Orange County, about $68 in New York City, about $69 in the San Francisco Bay Area, about $70 in Seattle, and about $83 in Boston. Small invoices in those same types of markets may still average a few hundred dollars because travel, setup, layout, and cleanup do not disappear just because the tile area is small.
Stack bond can cost more than a basic running bond layout when the room is out of plumb, the tile is irregular, the grout is high contrast, or the design has niches, windows, valves, exposed edges, or tight cut planning. The pattern itself is not complex. The tolerance is.
Rank #4

- Professional tile leveling system ensures perfect alignment and prevents lippage during installation. Our anti-lippage spacers create consistently level surfaces across all format tiles, eliminating the need for post-installation corrections.
- Complete installation kit includes 200 base plates (spacers), 100 reusable caps, and 100 protection plates. This system provides everything needed for precise tile spacing and leveling, making it perfect for both professional and DIY installations.
- Our technology combined with our leveling wedges creates optimal pressure distribution across tiles. The leveling clips and spacers work together to maintain perfect spacing while the adhesive sets, preventing tiles from shifting during installation.
- Floor and wall tile compatible system works excellently with ceramic, porcelain, and stone tiles. These tile leveling spacers ensure consistent grout lines and proper alignment whether you're installing floor tiles or creating feature walls.
- Easy-to-Use leveling Kit features a simple 4-step installation process clearly shown in the instruction manual on the box. The self-leveling spacers and clips system creates professional results every time, even on challenging large format tile installations and uneven surfaces.
Grout Color: Quiet Surface or Graphic Grid
Grout choice has a bigger effect on stacked tile than many homeowners expect. With a running bond pattern, contrast grout gives a traditional subway look. With stacked tile, contrast grout creates a strong graphic grid. That can be excellent in the right room, but it demands tight workmanship.
What’s actually slowing this PC down?
Pick the symptom - the matching free tool is one click away.
A matching grout color gives a quieter, more monolithic surface. White tile with warm white grout, green tile with muted green-gray grout, or beige tile with light taupe grout will soften the grid and make small variation less obvious. This is usually the safer choice for handmade-look tile or older walls.
High-contrast grout should be used intentionally. Black grout with white stacked tile, for example, will show every joint width change, sheet seam, and cut inconsistency. It can look sharp in a powder room or commercial-style backsplash, but it is not forgiving.
For showers and heavy-use areas, grout type also matters. Cement grout is common and cost-effective. High-performance cement grouts can resist staining better than older products. Epoxy grout costs more and can be harder to install, but it offers strong stain and water resistance in the right application. No grout choice replaces waterproofing behind the tile.
Can Stack Bond Tile Be Used on Floors?
Yes, stacked tile can be used on floors, but floors need a different level of scrutiny than walls. A wall tile that looks beautiful in a vertical stack may be too glossy, too slippery, or too delicate for a bathroom floor or shower floor.
For floors, check that the tile is rated for floor use, review dynamic coefficient of friction data where applicable, and consider real-world texture. Wet bare feet, soap, shampoo, and cleaning products change the slip profile. A marketing phrase like “bathroom tile” is not enough by itself.
Stacked floor tile also highlights room geometry. If a room is out of square, a grid layout can make tapered cuts obvious along walls, tubs, or vanities. In those cases, we plan the layout around the most visible lines and avoid tiny sliver cuts. Sometimes a larger grout joint, a different tile size, or a less rigid pattern is the better choice.
Floor structure matters too. Tile does not like bounce. Before installing tile over wood framing, the floor system needs adequate stiffness, proper underlayment, and suitable preparation. Cracked grout or tile is often a structure and substrate problem, not simply a grout problem.
Independent reader supportYour contribution helps us test, update, and keep practical guides available for everyone.Showers, Waterproofing, and Permits
In showers, the tile is not the waterproofing. The water management system is behind and beneath it. A proper shower assembly may include a sloped pan, drain integration, waterproof membrane, treated seams, backer board or foam board, sealant at changes of plane, and correct treatment around niches, benches, valves, and pipe penetrations.
Movement joints are also part of a durable installation. Changes of plane, perimeters, and transitions should not be treated like ordinary field grout joints. Rigid grout in the wrong places can crack as the building moves. A stacked pattern makes those cracks easy to see.
Permit requirements vary by jurisdiction. Simple cosmetic tile replacement may not require a permit in some areas. A bathroom remodel that changes plumbing, electrical, shower pan construction, structural framing, ventilation, or waterproofing inspections may trigger permits. Some local residential bathroom remodel guidance specifically distinguishes finish replacement from work involving plumbing, electrical, and shower assemblies.
Our practical rule is straightforward: if the project touches a shower pan, drain, plumbing layout, electrical devices, structural framing, or ventilation, check the local building department before work starts. A permit question is much cheaper before demolition than after a failed inspection or a leak.
Common Mistakes With Stacked Tile
The most common mistake is assuming the layout is easier because the pattern is simple. In reality, the aligned joints remove camouflage. That means the prep and layout need more discipline, not less.
Outdated Drivers Are Slowing You Down
One free scan finds every outdated or missing driver and matches the right update for your exact hardware.Free scan · exact hardware matchPC Slower Than It Used to Be?
A free scan shows the junk files, broken settings and background clutter dragging Windows down - then fixes them in one click.Free scan · Windows 10 & 11Best Value

- Professional Tile Leveling System: DGSL Tile Installation Set - tools for floor/wall setting. The system ensures flatness between tiles avoiding movements during the mortar setting
- Installation Tile Tool: The Tile Leveling System helps DIY and Professional tile layers increase the efficiency of laying tiles and obtain a lippage-free finish
- Disposable Tile Clips: The leveling system carries 600 clips to secure the tile position and prevent movement, use on Tiles 1/8" (3mm) up to 1/2" (12mm) thick, extremely fast and easy to install and remove. 1/12 Inch tile spacers can apply to 1/8 inch (3mm) tile gap and also used for Flooring and Walling
- Reusable Wedges: 200 Pcs wedges, The wedge allows for a 1/8" minimum grout joint, and it firmly holds the tile in place, This is the most economical tile leveling system available (1 tile requires 4 wedges and 4 spacers)
- Package Includes: 600-Piece Leveling Spacer Clips and 200-Piece Reusable Wedges and 1 Tile Plier. Our Tile push pliers help you clamp the wedge and clips quickly, making the tiles more flat and save time
- Starting from a corner without a layout plan: Corners are often out of plumb. Starting there can push the whole grid off course.
- Ignoring the focal point: Shower valves, niches, range hoods, vanity mirrors, and fireplace openings should inform the layout.
- Skipping substrate correction: Tile cannot make a wavy wall flat. It usually makes the problem more visible.
- Using contrast grout casually: Dark grout on light tile turns every inconsistency into a line drawing.
- Installing over drywall in wet areas: Showers need a complete waterproofing assembly, not just tile and grout.
- Trusting mosaic sheets blindly: Mesh-mounted tile still needs adjustment sheet by sheet.
- Forgetting edge trim: Exposed tile edges, outside corners, and niche returns need a planned finish.
- Choosing wall tile for wet floors: Floor use and slip resistance must be confirmed.
- Ordering no overage: Stacked layouts, directional tile, breakage, cuts, and future repairs require extra material. Ten percent overage is a common starting point; complex layouts may need more.
When to DIY vs When to Hire a Pro
A careful homeowner can DIY some stacked tile projects, but the right scope matters. A small dry-area backsplash with ceramic tile, simple edges, and no major wall repair is the most realistic DIY candidate. Expect the work to take a full weekend or longer if you are new to tile: one day for prep and layout, one day for setting, and another visit for grout and cleanup.
DIY becomes less attractive when the tile is expensive, the grout is high contrast, the surface is large, or the room has many interruptions. Every outlet, niche, window, valve, corner, and exposed edge adds layout decisions and cutting risk.
Hire a pro for showers, shower pans, large-format porcelain, glass tile, steam showers, complex niches, heated floors, major substrate correction, or any project where a leak would create expensive damage. A waterproofed stacked-tile shower is not just a tile job. It is a wet-area assembly that has to manage water every day for years.
A good tile contractor should be willing to discuss layout before starting, explain waterproofing materials, verify tile suitability, plan trim, and show how movement joints will be handled. If the installer wants to “figure it out as we go” on a highly visible stacked wall, that is a warning sign.
How We Plan a Stacked Tile Installation
On our job sites, we treat stacked tile like finish carpentry. The visible lines have to be intentional. Our process usually looks like this:
- Confirm the tile and application: We verify wall or floor use, wet-area suitability, tile thickness, edge finish, shade variation, and manufacturer instructions.
- Check the substrate: Walls are checked for flatness and plumb. Floors are checked for flatness, stiffness, and transition height.
- Map focal points: We mark centerlines for valves, niches, mirrors, range hoods, windows, sinks, and fireplaces.
- Dry-plan the layout: We calculate cuts at ends, ceilings, floors, inside corners, outside corners, and penetrations.
- Resolve trim: Bullnose, metal profiles, returns, and miters are decided before installation begins.
- Set with constant checking: Spacers help, but they do not replace a laser, level, and straightedge.
- Protect the finish: We manage cure time, grout timing, cleanup, sealers where needed, and owner expectations for maintenance.
For a backsplash, the process may be simple. For a shower, it is more involved because waterproofing, slope, penetrations, and changes of plane are part of the finished performance. Either way, the layout should be decided before the first tile is set.
Is Stacked Tile Right for Your Project?
Stack bond tile is a strong choice if you want a clean, architectural finish and are willing to invest in the prep that makes it look right. It works especially well with rectified porcelain, quality ceramic subway tile, handmade-look ceramic, glass tile, finger mosaics, and large-format porcelain installed by qualified crews.
It may not be the best choice if the surface is badly out of flat, the budget does not allow substrate correction, or the design depends on dark contrast grout over irregular tile. In those situations, the pattern will expose problems instead of hiding them.
Do these 3 things before closing this tab:
1Repair Windows errors before they cause bigger problems2Fix the driver behind crashes, sound loss and screen glitches3Clear out junk files and repair common Windows errorsThe smartest approach is to price the whole assembly, not just the tile. Include demolition, wall or floor repair, backer board, waterproofing, mortar, grout, trim, sealant, overage, labor, and permit-related work if plumbing or wet-area assemblies are involved. A stacked tile project that looks effortless at the end usually got there because the planning was anything but casual.
Frequently Asked Questions
What is a stack bond tile pattern?
A stack bond tile pattern lines up tile joints vertically and horizontally, creating a straight grid. It is also called stacked tile, straight stack, grid tile, or stacked subway tile.
Is stacked tile still in style in 2026?
Yes. Stacked tile remains popular in 2026 because it gives standard ceramic, porcelain, glass, and subway tile a cleaner, more architectural look than a traditional offset pattern.
Is stacked tile more expensive to install?
It can be. The layout is simple, but it is less forgiving. Out-of-flat walls, high-contrast grout, handmade tile, exposed edges, niches, and plumbing penetrations can all add labor.
Free tools Windows power users keep installed
One-click scans. No signup required.
Should stacked subway tile be vertical or horizontal?
Vertical stack emphasizes height and works well in showers, vanity walls, and fireplaces. Horizontal stack emphasizes width and often works well for kitchen backsplashes and tub surrounds.
Can stacked tile be used in a shower?
Yes, but the shower needs a complete waterproofing assembly behind the tile. Tile and grout are finish materials, not the water barrier.
Do I need a permit to retile a bathroom?
Permit rules vary locally. Cosmetic tile replacement may not require one, but work involving plumbing, shower pans, electrical, framing, ventilation, or waterproofing inspections often can.
Quick Recap
Product prices and availability are accurate as of the date/time indicated and are subject to change. Any price and availability information displayed on Amazon at the time of purchase will apply.