Quick wins for a faster PC:
Fix the driver behind crashes, sound loss and screen glitchesFind Drivers →Repair Windows errors before they cause bigger problemsFix Now →A good raised garden planter box is not complicated, but it does need to be built like an outdoor structure. Soil is heavy, wet boards move, cheap screws fail, and a bed that looks square on day one can bow badly after the first few soaking rains.
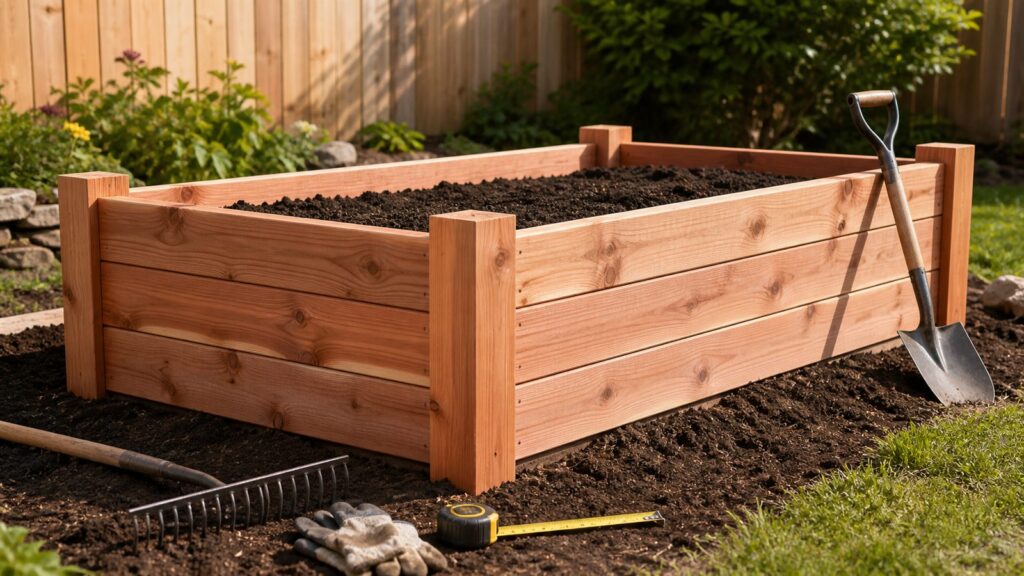
This plan builds a bottomless 4 ft. by 8 ft. wood raised garden bed that is about 11 inches tall using two courses of nominal 2×6 lumber. That size is popular for a reason: it gives you 32 square feet of growing area, keeps the center reachable from both long sides, and holds about 32 cubic feet, or 1.19 cubic yards, of growing media at 12 inches deep.
On our job sites, we treat this as a small exterior carpentry project, not a craft project. Use compatible exterior fasteners, pre-drill near board ends, brace longer spans when the bed gets taller, and plan the soil and irrigation before the box is full.
Finished Size and Best Use
The flagship plan here is a 4 ft. by 8 ft. bottomless raised bed with two stacked 2×6 courses. Since a nominal 2×6 is usually about 1.5 inches thick by 5.5 inches wide, two courses give you roughly 11 inches of wall height before any slight grade variation.
#1 Best Overall

- Elevate Your Garden - Opt for a brilliantly engineered raised garden bed to revolutionize your gardening. Its spacious design, measuring 48x24x30 inches, allows for the cultivation of multiple vegetable varieties alongside a plethora of herbs, optimizing your gardening space for ease and diversity.
- Premier Cedar Construction - Experience the wonders of cedar wood, known for its natural insect-repelling properties, adding an aesthetic and functional edge to your garden. This appealing timber is paintable, allowing for personal customization. Its 30-inch tall legs are designed for ergonomic gardening, providing a back-friendly experience.
- Durability Meets Simplicity - Crafted for strength, this garden bed confidently supports up to 200 pounds of soil, plants, and water, ensuring stability without any wobble. Assembly is straightforward, presenting an enjoyable DIY venture that promises satisfaction. The components seamlessly connect, simplifying the construction process.
- Benefits of Elevated Planting - This raised design not only safeguards the wood from direct soil contact, prolonging the planter's lifespan but also minimizes weed growth and deters animals, enhancing plant health and productivity.
- Project with Purpose - Not only does this garden bed serve as an excellent home improvement project, but it also offers an educational opportunity for children to learn about the origins of their food. It arrives complete with all necessary parts and hardware, eliminating the need for measuring, cutting, or drilling. It's accompanied by clear, easy-to-understand instructions.
This bed works well for herbs, greens, peppers, tomatoes with supports, bush beans, onions, strawberries, and many annual flowers. For deeper root crops or better soil buffering in hot climates, add a third course to reach about 16.5 inches, or a fourth course to reach about 22 inches.
Keep the width at 4 feet for adult gardeners. Wider beds force people to step into the soil, which compacts the growing zone and defeats one of the main reasons to build raised beds. For children, tight accessible layouts, or gardeners who work from one side only, use a 3 ft. width instead.
Leave at least 3 feet of path where you want wheelbarrow access. A 24-inch path can work for foot traffic, but it becomes frustrating once you are moving soil, compost, cages, irrigation supplies, or harvest bins.
Materials and Cut List for a 4×8 Bed
This cut list assumes two courses of 2×6 lumber, four inside corner posts, and optional mid-span stakes. It creates a sturdy rectangular box with replaceable side boards.
Do these 3 things before closing this tab:
1Fix the driver behind crashes, sound loss and screen glitches2Clear out junk files and repair common Windows errors3Scan for outdated or missing drivers - takes under a minuteLumber
- Six 2x6x8 boards for the walls: four boards stay full length for the long sides, and two boards are cut in half for the short sides.
- One 4x4x8 post for corners: cut into four 16-inch pieces.
- Optional: one 2x4x8 or 4x4x8 for mid-span stakes if the bed is taller than 11 inches or if your soil mix is dense.
- Optional cap rail: two 2x4x8 boards and two 2x4x10 boards if you want a sitting ledge or finished top edge.
Fasteners and Hardware
- Exterior-rated structural screws, #9 or #10, 3 inches long, hot-dip galvanized or stainless.
- For pressure-treated lumber, use fasteners specifically rated as compatible with treated wood.
- Optional 1/4-inch galvanized hardware cloth for burrowing pests.
- Landscape staples for securing hardware cloth, if used.
- Drip irrigation tubing, a hose bib splitter, or a capped sleeve if you plan to add irrigation later.
Tools
- Circular saw or miter saw
- Drill/driver
- 1/8-inch pilot bit and driver bits
- Tape measure
- Speed square
- Level
- String line or marking paint
- Shovel, rake, and garden fork
- Wheelbarrow
Do not use drywall screws. They are brittle, they corrode outdoors, and they are not made to hold wet lumber under lateral soil pressure.
Wood Options: Cedar, Redwood, or Pressure-Treated Lumber
The right lumber depends on budget, appearance, local availability, and how long you want the bed to last. For most homeowners, the practical choices are cedar, redwood, or modern ground-contact-rated pressure-treated lumber.
| Material | Best For | Typical Tradeoff | 2026 Cost Notes |
|---|---|---|---|
| Cedar | Premium garden beds, visible yards, food gardens where natural decay resistance is preferred | Costs more and can split near ends if not pre-drilled | Regional pricing varies sharply; 2x6x8 cedar can be many times the cost of treated lumber in some markets |
| Redwood | Long-lasting beds in regions where redwood is readily available | High material cost and limited availability outside certain markets | Often priced as a premium exterior lumber choice |
| Ground-contact pressure-treated lumber | Budget-friendly durable beds, utility gardens, larger multi-bed layouts | Use current labeled material only; avoid old treated salvage | Common 2×6 treated boards often fall around $13-$22 per board depending on store, grade, and region |
| Untreated pine or fir | Temporary beds or very low-budget builds | Shorter service life in wet soil contact | Lower upfront cost, but replacement may come sooner |
For vegetable gardens, avoid railroad ties, creosote-treated timbers, old CCA-treated lumber, unknown reclaimed lumber, painted salvage with possible lead paint, and chemically contaminated pallets. Modern MCA and ACQ pressure-treated lumber is commonly considered acceptable for raised beds when used as directed, but use ground-contact-rated stock, follow the label, and keep questionable material out of food-growing projects.
If you want the cleanest premium build, use cedar boards with stainless or high-quality coated exterior screws. If you want the most practical cost-to-life ratio for multiple beds, ground-contact-rated pressure-treated lumber is the budget workhorse.
Cost to Build a 4×8 Raised Garden Planter Box in 2026
For a basic DIY wood raised bed, expect roughly $100 to $300 in materials before premium upgrades, heavy soil delivery, irrigation, cap rails, or pest barriers. A cedar version can exceed that range quickly depending on local lumber prices. Professionally built and installed raised beds commonly land around $200 to $1,500 per bed depending on height, material, site prep, access, soil, and labor market.
The soil can surprise homeowners. A 4 ft. by 8 ft. bed at 12 inches deep needs about 1.19 cubic yards of fill. Bagged soil is convenient for small containers, but at raised-bed volume it often costs more than bulk material. Bulk topsoil and garden soil commonly runs about $10 to $50 per cubic yard for basic material, while specialty raised-bed blends can be higher; some local suppliers list raised garden blends around $85 per cubic yard. Delivery fees and minimum orders can matter as much as the soil price itself.
| Item | Budget Range | Notes |
|---|---|---|
| Basic pressure-treated lumber and screws | $100-$180 | Varies by local board pricing and fastener choice |
| Cedar lumber and stainless or coated screws | $220-$600+ | Cedar pricing has wide regional variation |
| Hardware cloth pest barrier | $25-$70 | Useful for burrowing pests; not needed everywhere |
| Bulk soil for 12-inch-deep 4×8 bed | $15-$105+ | About 1.2 cubic yards before delivery and settlement allowance |
| Drip irrigation starter materials | $25-$100 | Depends on hose distance, timer, and layout |
| Professional build and installation | $200-$1,500 per bed | Driven by material, height, soil handling, and site access |
For a realistic DIY budget, include a 10 to 15 percent soil settlement allowance. Fresh mixes settle after watering, especially if compost is a major ingredient.
Rank #2

- 100% Natural Western Red Cedar from North America: Our raised garden beds are made from 100% natural western red cedar from North America, a naturally weather-resistant and durable wood.
- Superior Strength and High-Quality Construction: Built to last with strong corners that won't tear out the way dovetail construction corners do.
- Easy Assembly: Our raised garden beds are easy to assemble. All boards are pre-cut and pre-drilled to allow for easy assembly by simply inserting the bolts and tightening the nuts. They can be left unfinished to age naturally, or painted or stained to your liking.
- Durable and Low Maintenance: Our raised garden beds are made from high-quality materials and are designed to withstand the elements. They are low maintenance and require no special treatment or sealing.
- Perfect for Beginners and Experts: Our raised garden beds are equally suited for beginners who are interested in starting to garden or experts looking to expand their raised gardening operations. They provide a convenient and elevated platform for growing plants, and the sturdy construction makes them easy to care for.
Soil Volume Calculator
Use this formula before ordering material:
Length in feet x width in feet x depth in feet = cubic feet. Divide cubic feet by 27 to get cubic yards.
For the standard 4 ft. by 8 ft. bed:
- At 12 inches deep: 4 x 8 x 1 = 32 cubic feet, or 1.19 cubic yards.
- At 18 inches deep: 4 x 8 x 1.5 = 48 cubic feet, or 1.78 cubic yards.
- At 22 inches deep: 4 x 8 x 1.83 = 58.6 cubic feet, or 2.17 cubic yards.
- At 24 inches deep: 4 x 8 x 2 = 64 cubic feet, or 2.37 cubic yards.
Many vegetables perform well in 8 to 12 inches of quality growing media, but 16 inches or more gives you more flexibility for carrots, parsnips, potatoes, deeper tomato roots, and beds built over poor native soil. A practical vegetable mix is equal parts compost and soilless growing mix. For beds at least 16 inches deep, topsoil can be included up to about 20 percent by volume to add mineral content and reduce cost.
Do not fill the entire bed with dense clay topsoil. It drains poorly, gets heavy, and increases outward pressure on the boards.
Site Prep and Layout
Choose the sunniest practical location first. Most vegetables need 6 or more hours of direct sun. If you have a choice, orient long beds north-south for more even sun exposure across both sides, but do not sacrifice a better sunny location just to hit a compass direction.
Mark the 4 ft. by 8 ft. footprint with stakes and string. Check diagonals before digging: when both diagonal measurements match, the rectangle is square. For a 4×8 rectangle, the diagonal should be about 8 ft. 11 inches.
What’s actually slowing this PC down?
Pick the symptom - the matching free tool is one click away.
Remove turf inside the bed footprint and a few inches beyond the outside edges. Loosen the native soil 6 to 8 inches deep with a garden fork. This improves drainage and lets roots extend below the bed. A bottomless bed over loosened soil usually performs better than a box lined with plastic.
If you have burrowing pests, lay 1/4-inch galvanized hardware cloth across the bottom before setting the box. Overlap seams by at least 6 inches and staple or pin it so it stays flat. Do not use solid plastic as a bottom liner; it traps water unless you engineer real drainage.
Step-by-Step Assembly
1. Cut the Short Boards
Cut two 2x6x8 boards in half to make four 48-inch pieces. These become the two courses on each short end. Leave the other four 2x6x8 boards full length for the long sides.
Cut the 4×4 post into four 16-inch corner posts. These posts can sit flush with the top course or extend slightly below grade for anchoring. If you plan to add another course later, cut taller posts now.
Free tools Windows power users keep installed
One-click scans. No signup required.
2. Pre-Drill the Board Ends
Pre-drill screw holes near the board ends, especially with cedar, redwood, or dry treated stock. Keep screws roughly 1 inch from board edges and 1.5 to 2 inches from board ends to reduce splitting.
3. Build the First Course
Lay out two long boards and two short boards around the corner posts. Put the posts inside the corners so the soil pushes the boards against the posts. Fasten each board into the post with two 3-inch exterior structural screws at each end.
Rank #3

- 100% Natural Western Red Cedar from North America: Our raised garden beds are made from 100% natural western red cedar from North America, a naturally weather-resistant and durable wood.
- Superior Strength and High-Quality Construction: Built to last with strong corners that won't tear out the way dovetail construction corners do.
- Easy Assembly: Our raised garden beds are easy to assemble. All boards are pre-cut and pre-drilled to allow for easy assembly by simply inserting the bolts and tightening the nuts. They can be left unfinished to age naturally, or painted or stained to your liking.
- Durable and Low Maintenance: Our raised garden beds are made from high-quality materials and are designed to withstand the elements. They are low maintenance and require no special treatment or sealing.
- Perfect for Beginners and Experts: Our raised garden beds are equally suited for beginners who are interested in starting to garden or experts looking to expand their raised gardening operations. They provide a convenient and elevated platform for growing plants, and the sturdy construction makes them easy to care for.
Check that the box is square by measuring diagonally corner to corner. Adjust until both diagonal measurements match.
4. Add the Second Course
Stack the second course directly above the first. Fasten every board independently into the corner posts. This matters because it lets you replace one damaged board years later without dismantling the whole bed.
If you want extra stiffness, stagger screw locations slightly so the upper screws do not split into the same grain line as the lower screws.
5. Install Mid-Span Stakes if Needed
For an 11-inch-tall bed with light raised-bed mix, mid-span stakes are optional. For beds over about 16 to 18 inches tall, or any bed filled with heavier soil, add stakes at the midpoint of each 8-foot side. Drive a 2×4 or 4×4 stake inside the bed and fasten each course into it.
For beds 22 to 24 inches tall, add cross-ties or internal blocking across the narrow dimension. Wet soil is heavy, and an 8-foot side can bow outward if it is treated like a fence board instead of a retaining wall.
6. Level the Box
Set the box in place and level it side to side and end to end. Scrape high spots rather than burying half the box in a trench. A little grade variation is fine, but a twisted box makes caps, irrigation, and row covers harder to fit later.
Recommended Free Tools
7. Add Irrigation Before Filling
Run a hose, drip mainline, or empty conduit sleeve into the bed before adding soil. Even if you do not install drip irrigation now, a simple sleeve keeps you from digging through finished soil later.
8. Fill in Lifts and Water In
Add soil in 6-inch lifts, rake it level, and water lightly as you go. Do not compact it with your feet. Leave the finished soil surface 1 to 2 inches below the top edge so mulch and irrigation water stay inside the bed.
Bottomless, Lined, or With a Wood Bottom?
For most garden beds, bottomless is best. It drains better, gives roots more room, encourages beneficial soil biology, and avoids trapping water against wood.
A liner on the inside walls can slow wood decay, but it can also trap moisture if installed poorly. If you line the sides, use a breathable or purpose-made barrier and keep drainage open. Never wrap the bottom in plastic.
The Tool Desk
Outbyte Driver Updater FREEScan for outdated or missing drivers - takes under a minuteDriver Scan →Outbyte PC Repair FREEClear out junk files and repair common Windows errorsFree Scan →A wood bottom makes sense only when you are building a true elevated planter on legs, not a raised bed sitting on soil. Once the box has a bottom, drainage holes, structural floor framing, rot protection, and soil weight all become larger design issues.
Rank #4

- LONG-LASTING: Made from rot resistant, 1" thick, North American Western Red Cedar
- EASY TO ASSEMBLE: Raised beds assemble in minutes, with no tools required
- SUPERIOR STRENGTH: No screws or nails to loosen; No dovetail corners that could break
- 100% NATURAL: No chemical or stains added
- SUPERIOR QUALITY: Handmade in Maine with unmatched 5 Year Warranty
How to Keep the Bed From Bowing or Rotting
The two big enemies are lateral soil pressure and trapped moisture. Build for both from the start.
- Use 2x lumber, not thin fence pickets, for the main walls.
- Fasten every course into corner posts instead of relying on screws through end grain alone.
- Add mid-span stakes on long sides when the bed is taller than 16 to 18 inches.
- Use cross-ties for tall beds around 22 to 24 inches.
- Keep the bottom open so water can leave the bed.
- Set the box on a prepared, draining base instead of burying boards in a wet trench.
- Use compatible exterior screws, not interior screws.
- Pre-drill near ends to prevent splits that invite water.
- If adding a cap, leave drainage gaps and slope or detail it so water does not sit on a flat ledge.
On exterior carpentry, we also avoid sealing wet lumber immediately. If pressure-treated boards are still damp from the yard, let them dry before applying an exterior stain or sealer. Follow the coating manufacturer’s timing guidance.
Independent reader supportYour contribution helps us test, update, and keep practical guides available for everyone.Safety and Permit Notes
A simple 11-inch-tall bottomless garden bed usually does not require a building permit, but local rules vary. The issue changes when a planter starts functioning like a retaining wall, sits near a property line, affects drainage, or becomes part of a larger landscape structure.
Many jurisdictions exempt ordinary low garden boxes, but retaining walls often trigger review based on height, surcharge, slope, or location. A 24-inch planter built on flat ground is different from a 24-inch wall holding back a sloped yard or supporting a fence. If the bed is tall, terraced, close to a structure, or changing where stormwater flows, check local requirements before building.
Call 811 before digging posts, trenching irrigation, or disturbing unknown areas. Even shallow landscape work can hit low-voltage lighting, irrigation, gas, or utility lines.
Wear eye protection when cutting lumber and gloves when handling treated stock or hardware cloth. Hardware cloth edges are sharp, and treated lumber dust should not be inhaled.
When to DIY vs. When to Hire a Pro
This is a good DIY project if the site is level, access is easy, you are building one or two beds, and you are comfortable making square cuts and driving structural screws. A careful homeowner can usually build the box in 3 to 5 hours, not including shopping, soil delivery, or irrigation work.
Windows Errors? Fix Them Before They Spread
Repair common Windows errors and clear accumulated junk for a smoother, more stable PC - no reinstall needed.Free scan · no reinstallCrashes, No Sound, or Screen Glitches?
Random freezes, missing sound and display glitches usually trace back to one bad driver. Find and replace yours safely.Free scan · under a minuteHire a professional when the project includes multiple beds, grading, drainage correction, irrigation zones, accessible-height construction, cap rails with finished carpentry, stone or masonry edges, or any bed that also retains soil on a slope. Soil handling alone can justify help. A 12-inch-deep 4×8 bed needs about 1.2 cubic yards of fill, and a 24-inch version needs about 2.4 cubic yards. Moving that by wheelbarrow across a tight yard is real labor.
A pro-built raised bed makes the most sense when the bed is part of a larger outdoor plan: paths, fencing, lighting, water lines, compost area, seating, or a kitchen-garden layout. That is where layout mistakes get expensive and where good construction details pay off over years.
Common Mistakes to Avoid
The most common mistake is building too wide. Stay at 4 feet or narrower unless the bed is accessible from all sides and the user has unusually long reach.
The second mistake is underestimating fill. A 4×8 bed at 12 inches deep takes more than a cubic yard. If you price only the lumber, you are not pricing the project.
Best Value
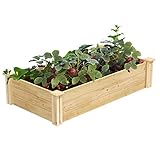
- 🪵 Solid American Cedar: Crafted from untreated 100% solid American cedar boards, it is ideal for growing vegetables, herbs, and flowers.
- 🧩 Tool-Free Dovetail Assembly: Greenes Fence signature dovetail system allows boards to slide securely into routed corner posts for quick and frustration-free assembly.
- 🌱 10.5 in. Deep Growing Bed: Provides generous soil depth for vegetables, herbs, flowers, and deep-root crops while supporting healthy plant growth.
- 📏 Compact 2 ft. x 4 ft. Garden Bed: Perfect for small yards and starter gardens.
- 🌿 Safe for Vegetable Gardening: Untreated cedar construction creates a natural growing environment with no chemical treatments or glue laminations.
Third, do not skip bracing on taller beds. Soil gets heavier after rain, and long boards bow when they are not restrained. Once a bed is full, retrofitting bracing is harder than installing it during assembly.
Fourth, do not use questionable wood around food. Avoid creosote, unknown salvage, old treated lumber, lead-painted boards, and contaminated pallets.
Finally, plan water early. A finished raised bed without a convenient hose or drip line often gets watered inconsistently, and inconsistent watering is hard on vegetables.
Final Builder Notes
For a durable all-around build, use 2×6 cedar or ground-contact-rated pressure-treated lumber, four 4×4 corner posts, exterior structural screws, an open bottom, and a quality raised-bed mix. Keep the bed 4 feet wide, leave 3-foot working paths where possible, and add bracing as soon as you go above two courses.
Free tools Windows power users keep installed
One-click scans. No signup required.
The finished box should look simple, square, and solid. The real value is in the details you cannot see from the sidewalk: the right fasteners, the open drainage, the loosened subsoil, the soil-volume planning, and the bracing that keeps the boards straight after several seasons of wet soil pushing against them.
Frequently Asked Questions
What is the best wood for a raised garden planter box?
Cedar and redwood are premium choices because they naturally resist decay and insects. Ground-contact-rated pressure-treated lumber is the budget-friendly durable option. Avoid railroad ties, creosote-treated wood, unknown reclaimed lumber, old CCA-treated lumber, and painted salvage with possible lead paint.
How much does it cost to build a 4×8 raised garden bed in 2026?
A basic DIY wood raised bed commonly runs about $100 to $300 in materials before premium upgrades or major soil delivery costs. Cedar, cap rails, hardware cloth, drip irrigation, and bulk soil delivery can push the total higher. Professionally installed raised beds often range from about $200 to $1,500 per bed.
How much soil do I need for a 4×8 raised garden bed?
A 4 ft. by 8 ft. bed that is 12 inches deep needs 32 cubic feet of growing media, which equals about 1.19 cubic yards. At 18 inches deep, it needs 48 cubic feet, or about 1.78 cubic yards. Add 10 to 15 percent if the mix is loose and likely to settle.
Should a raised garden bed have a bottom?
Most raised garden beds should be bottomless when installed over soil. An open bottom improves drainage and lets roots extend into loosened native soil. Use 1/4-inch galvanized hardware cloth only when burrowing pests are a concern. Avoid solid plastic bottoms because they trap water.
Can I use pressure-treated lumber for a vegetable garden bed?
Modern MCA or ACQ pressure-treated lumber can be used for raised beds when it is current, ground-contact rated, and used according to the manufacturer label. Do not use old CCA-treated lumber or treated salvage of unknown origin, especially for food gardens.
Do I need a permit to build a raised planter box?
A low, bottomless garden bed usually does not need a permit, but local rules vary. Check before building tall terraced beds, planters near property lines, structures that alter drainage, or anything that acts like a retaining wall on a slope.
Quick Recap
Product prices and availability are accurate as of the date/time indicated and are subject to change. Any price and availability information displayed on Amazon at the time of purchase will apply.