What’s actually slowing this PC down?
Pick the symptom - the matching free tool is one click away.
A convincing outdoor Halloween display does not require every prop to be expensive or store-bought. Handmade silhouettes, layered lighting, recycled containers, fabric, and one or two focal pieces can create depth from the sidewalk to the front door. These 31 ideas range from renter-friendly accents to larger yard installations, with practical guidance for choosing materials and keeping the display safe.
A convincing outdoor Halloween display does not require every prop to be expensive or store-bought. A few handmade silhouettes, layered lighting, recycled containers, fabric, and one or two focal pieces can create depth from the sidewalk to the front door. The ideas below range from renter-friendly, low-cost accents to larger yard installations, so you can combine the projects that suit your space, budget, and weather exposure.

As an Amazon Associate I earn from qualifying purchases.
Safety first: Use decorations, lights, and cords intended for outdoor use. Keep electrical connections protected from moisture, inspect cords before using them, anchor lightweight decorations, and keep flames away from fabric, paper, dried foliage, and cobweb material. Treat the sidewalk, steps, handrails, driveway, mailbox access, and door swing as no-prop zones. Check local fire, electrical, HOA, rental, and public-right-of-way rules before installing a large display.
Free tools Windows power users keep installed
One-click scans. No signup required.
Materials to gather before you start
You can make many of these projects with cardboard, poster board, paint, markers, reusable containers, yarn, rope, fabric scraps, plastic bottles, faux leaves, and removable adhesive. Projects exposed to rain or wind may also need garden stakes, landscape-fabric pins, wire, weather-resistant zip ties, plastic sheeting, foam board, outdoor-rated string lights, solar stake lights, battery-operated lights, and an outdoor extension cord.
For convenient shortcuts, consider ready-made skeletons, skulls, pumpkins, tombstones, scarecrows, lanterns, inflatables, projectors, or fog machines. They are optional accents—not requirements for a successful display. Exact products, prices, availability, and weather ratings change, so verify those details at the time of purchase.
31 DIY outdoor Halloween decorating ideas
1. Pumpkin stair clusters
Look: A welcoming but spooky staircase layered with pumpkins of different sizes. Materials: Real pumpkins, painted pumpkins, or lightweight faux pumpkins. Effort: Low. Placement: Alternate pumpkins along the sides of steps, never in the walking lane.
The Tool Desk
Outbyte PC Repair FREEClear out junk files and repair common Windows errorsFree Scan →Outbyte Driver Updater FREEScan for outdated or missing drivers - takes under a minuteDriver Scan →Use a few painted or faux pumpkins so the arrangement lasts longer, then vary height and color rather than placing identical pumpkins in a straight row. Leave every tread, handrail, and landing clear.
2. Monochrome painted pumpkins
Look: A graphic black, white, and gray pumpkin display. Materials: Pumpkins, outdoor-suitable paint, brushes, and markers. Effort: Low. Placement: Porch steps, a table, window box, or sheltered entry.
Paint pumpkins matte black, white, or gray, then add simple lettering, stripes, dots, or spiderweb lines. A limited palette makes a group of inexpensive pumpkins look coordinated.
3. Pumpkin topiary
Look: A vertical stack that draws attention beside the door. Materials: Lightweight faux pumpkins, a stable planter or urn, and a method of securing the stack. Effort: Medium. Placement: On a broad porch corner or beside an entry, away from the door swing.
Windows Errors? Fix Them Before They Spread
Repair common Windows errors and clear accumulated junk for a smoother, more stable PC - no reinstall needed.Free scan · no reinstallCrashes, No Sound, or Screen Glitches?
Random freezes, missing sound and display glitches usually trace back to one bad driver. Find and replace yours safely.Free scan · under a minuteChoose lightweight pumpkins and a heavy, stable base. Secure the stack so individual pumpkins cannot roll or tip into the walkway. A topiary is especially useful when floor space is limited.
4. Witch-broom bundles
Look: A cluster of witches’ brooms framing the entrance. Materials: Inexpensive brooms, cord, ribbon, or wire. Effort: Low. Placement: Against a porch rail, wall, large planter, or covered-door corner.
Tie several brooms together at different angles. Keep bristles and handles out of the path, and attach the bundle if wind could knock it over.
5. Broom parking station
Look: A small themed sign that turns a simple broom bundle into a joke. Materials: Scrap wood, weather-suitable board, paint, and a stake or removable hanging hardware. Effort: Low to medium. Placement: Near the broom bundle or beside the porch.
Recommended Free Tools
Make a plaque that says “Witch Parking,” “Broom Parking,” or another short message. Mount it where it can be read from the sidewalk without blocking a handrail or mailbox.
6. Hanging cheesecloth ghosts
Look: Drifting porch ghosts with a translucent, aged texture. Materials: Lightweight forms, black cheesecloth or gauze, string, and a covered support. Effort: Medium. Placement: Under a covered porch, from a beam, or beneath a protected overhang.
Shape the fabric over a safe, lightweight support and hang it at varied heights. Black cheesecloth for ghost decorations can create the right texture, but keep the material away from candles, heaters, and hot bulbs. Do not assume fabric is weatherproof; use this project where exposure is limited.
7. Tomato-cage ghosts
Look: Full-size standing ghosts for the lawn. Materials: Inverted tomato cages, white or pale fabric, black fabric or paint for faces, stakes, or weights. Effort: Low to medium. Placement: Lawn beds, garden edges, or beside a walkway—with the path kept clear.
Turn each inverted cage into a tapered ghost body and cover it with fabric. Use stakes or weights appropriate to the location so the form does not shift in wind. Leave enough clearance for mowing and walking.
8. A ghost family
Look: Three or more ghosts that appear to be a family group. Materials: Ghost forms, fabric, and different face treatments. Effort: Medium. Placement: A lawn corner, porch edge, or broad planting bed.
Use different heights and facial styles—a tall adult, a smaller child, and an expressive central character—to make the scene feel intentional. Repeat one fabric or color detail across the group for cohesion.
9. Foam-board graveyard
Look: A compact cemetery scene with custom names and epitaphs. Materials: Weather-suitable sheet material or foam board, paint, markers, stakes, and fasteners. Effort: Medium. Placement: Lawn or planting bed, set back from the walking route.
Do these 3 things before closing this tab:
1Clear out junk files and repair common Windows errors2Fix the driver behind crashes, sound loss and screen glitches3Repair Windows errors before they cause bigger problemsCut tombstone shapes, paint cracks and lettering, and anchor each marker with stakes. Select materials according to exposure: a covered porch allows more flexibility than an open lawn. Do not describe craft foam or board as waterproof unless its product instructions say so.
10. Cardboard crypt doorway
Look: A faux-stone or coffin-shaped surround around the entrance. Materials: Cardboard or weather-suitable panels, paint, removable fasteners, and optional faux-stone texture. Effort: Medium. Placement: Around the door frame, provided the door, steps, handrails, and lighting remain unobstructed.
Build the surround in sections so it can be removed easily. Keep the door swing, peephole, house numbers, and emergency access fully usable. Cardboard is best reserved for a sheltered entry rather than a rain-exposed installation.
11. Skeletal hands from the soil
Look: A low-profile “something is rising” effect. Materials: Faux hands or arm props, soil, mulch, a planter, and perhaps a small grave marker. Effort: Low. Placement: Flower beds, planters, or around a graveyard marker.
Partially bury or conceal the prop so only the hands and wrists show. Keep it out of areas where children, pets, or gardeners could trip over a hidden support.
12. Skeleton seating vignette
Look: A skeleton appearing to wait on the porch. Materials: A purchased skeleton, sturdy chair, handmade sign, pumpkins, and a lantern or other accent. Effort: Low to medium. Placement: A porch corner or covered seating area.
Rank #2
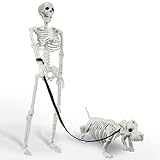
- 【A Posable Human Skeleton and His Dog Friend】 Stop settling for generic Halloween Decorations! Make your house the absolute talk of the neighborhood! Turn your yard into a cinematic horror scene with the ultimate "Graveyard Keeper and His Zombie Dog" duo, out-of-the-box spooky storytelling.
- 【Perfect Halloween Decorations Outdoor/Indoor】 Dictate your own fright night setup with endless display options. Suitable for Halloween garden decoration, haunted house decoration, family courtyard, bar, cemetery site, amusement park and other Halloween pranks or Halloween themed party Halloween props. it is your first choice for halloween festival supplies and props decoration.
- 【Spine-Chilling Nighttime Glow】 The human skeleton boasts 7 hyper-flexible movable joints—allowing it to wave, sit on a porch rocking chair, or scale your gutters. Combined with the articulated neck, jaw, and tail of the undead hound, you can customize terrifying poses that look alive.
- 【Built for the Storm: Premium Weather-Resistant Build】 Don't let autumn rain or heavy winds ruin your holiday display. Crafted from heavy-duty, this durable set is strictly engineered to resist cracking, warping, and fading under harsh outdoor elements.
- 【Instant Festive Setup: From Haunted Porch to Indoors】 Transform any space in seconds. The ultra-lightweight design makes it incredibly easy to hang from trees, prop against front porch pillars, or place right at the center of an indoor Halloween party. It is the perfect all-in-one prop kit for lawn graveyards, haunted houses, or spooky office decor.
Pose the skeleton in a stable chair and add a sign such as “Waiting for Treats.” Tie or otherwise secure the prop if the chair or skeleton could move, and keep the setup clear of the entrance.
13. Bone pathway
Look: A trail of bones leading toward the display. Materials: faux bones, landscape pins if needed, and optional low lighting. Effort: Low. Placement: Along one edge of a walkway, not across it.
Arrange the bones in a loose trail that guides the eye to the porch. The edge of the path is safer and more practical than scattering props where feet, wheels, or snow shovels need to pass.
14. Giant spiderweb
Look: A large web filling a porch corner, tree, or fence. Materials: Rope, yarn, commercial webbing, wire, and removable or outdoor-suitable fasteners. Effort: Low to medium. Placement: Porch corners, fences, or tree trunks with clear passage below.
Create a few strong radial lines first, then tie cross-lines between them. Keep webbing away from stairs, eyes, door hardware, and anything that could snag clothing.
15. Pool-noodle spider
Look: An oversized spider with exaggerated curved legs. Materials: black pool noodles, a lightweight body form, black covering or paint, and a wall, base, or stakes. Effort: Medium. Placement: On a garage wall, porch wall, fence, or stable lawn base.
Bend the noodles into legs around a lightweight body. Attach the spider securely rather than relying on its weight, and avoid placing it where a falling leg could obstruct the path.
16. Hanging bat swarm
Look: Bats flying upward from the porch or roofline. Materials: Weather-suitable sheet material, scissors or a craft knife, string, and removable attachment points. Effort: Medium. Placement: Beneath a covered porch, along a fence, or in a sheltered window area.
Cut several silhouettes and suspend them at varied heights and angles. Choose a material suited to the exposure, and do not attach decorations where they could damage roofing, siding, gutters, or electrical equipment.
17. Window silhouette
Look: A monster, witch, or cat appearing as a shadow behind the glass. Materials: Black poster board or removable dark material, tape or removable adhesive, and optional interior lighting. Effort: Low. Placement: Inside a street-facing window.
Quick wins for a faster PC:
Scan for outdated or missing drivers - takes under a minuteDriver Scan →Repair Windows errors before they cause bigger problemsFix Now →Fix the driver behind crashes, sound loss and screen glitchesFind Drivers →Cut a simple profile and place it behind the window so it reads from the street. Keep the silhouette removable and avoid covering required emergency egress windows.
18. Monster-door surround
Look: The front door becomes a large monster face. Materials: Removable eyes, teeth, brow pieces, fabric, paper, and removable adhesive. Effort: Low. Placement: Directly on or around the front door.
Use lightweight pieces that will not scratch the finish or interfere with the lock, doorbell, handle, peephole, or door swing. A fabric or paper brow can add expression without permanently changing the door.
19. Witch crash scene
Look: A witch who appears to have landed headfirst in a shrub or planter. Materials: Witch hat, broom, boots, clothing, and a stable shrub or planter. Effort: Low. Placement: Beside a garden bed, shrub, or porch planter.
Lean the broom, hat, and boots together to suggest a character hidden in the foliage. Secure the pieces discreetly and avoid harming living plants or blocking the view from a driveway.
20. Faux cauldron corner
Look: A bubbling-witch focal point without a heavy or open-flame setup. Materials: A large black planter or cauldron-style container, lightweight fabric, faux bones, and battery-powered lighting. Effort: Low to medium. Placement: A porch corner, garden bed, or sheltered outdoor table.
Fill the container with layered fabric and props, then hide battery-operated lights beneath or inside the arrangement. Keep the installation stable and do not use a candle or other flame beneath the fabric.
21. Glowing milk-jug ghosts
Look: A row of small, softly glowing ghosts. Materials: Opaque plastic jugs, markers or paint, battery-operated lights, and stakes or a tray. Effort: Low. Placement: Porch edges, garden borders, or a sheltered walkway edge.
The Tool Desk
Outbyte PC Repair FREEClear out junk files and repair common Windows errorsFree Scan →Outbyte Driver Updater FREEScan for outdated or missing drivers - takes under a minuteDriver Scan →Reuse clean opaque jugs, draw simple faces, and place a battery-operated light inside each one. Keep the jugs away from open flames and arrange them where they cannot roll into the walking surface.
22. Lantern-lined steps
Look: A warm, repeating glow that defines the porch. Materials: Flameless or battery-powered lanterns, optional faux candles, and stable bases. Effort: Low. Placement: Along the outer edge of steps or the porch.
Leave enough room for safe footing and keep every lantern stable. Flameless lights are the practical choice around paper, fabric, dry leaves, and busy entrances.
23. Purple-and-orange light border
Look: A crisp outline around the porch, window, or fence. Materials: Outdoor-rated seasonal string lights, clips or ties, and an outdoor extension cord if needed. Effort: Low to medium. Placement: Roofline, porch railing, window surround, or fence.
Use outdoor-rated lights and follow the product instructions for installation and connection limits. Inspect cords before use, avoid overloading, and keep electrical connections protected from water. An outdoor Halloween string lights search can be a starting point, but confirm the specific product is rated for the location you have in mind.
24. Solar stake-light eyes
Look: Two glowing eyes watching from a shrub. Materials: Solar or low-voltage stake lights, garden stakes, and shrubs or a dark planting bed. Effort: Low. Placement: Behind shrubs, near a fence, or at the edge of a garden.
Rank #3

- Big hairy spider for Halloween decorations. (When the spider is standing, the height from base to top is 15 inches, the depth from front to back is 26 inches, and the width is 43 inches)
- Creepy Realistic Halloween Decor: Our Halloween Black Hairy Spider boasts a spine-chillingly realistic design and is covered with soft plush.
- Adjustable Legs: The legs of the spiders are bendable and adjustable, which makes it easy to hang on your fence, doors, windows, trees, and so on.
- Premium Quality: Crafted with durable materials like iron wire, our Halloween spider is built to last through countless Halloweens.
- Versatile Use: Whether you're decking out your outdoor space, or adding an eerie atmosphere to your indoor decor, our giant spider is the good choice.
Position a pair of lights close together and conceal most of each fixture behind foliage. Keep the stakes outside the mowing route and place them where they receive whatever charging exposure the product instructions require. Solar pathway lights can also provide a practical way to add low-level definition near—but not across—the path.
25. Projected moon
Look: A moon, bats, or moving clouds across a blank wall or garage door. Materials: A suitable outdoor projector, protected power connection, and a clear projection surface. Effort: Low to medium. Placement: Garage door, blank exterior wall, or sheltered porch-facing surface.
Secure cords so they cannot become trip hazards and keep connections dry. Check the projector’s instructions for outdoor placement, operating conditions, and ventilation rather than assuming every projector is weather-suitable.
26. Foggy entry
Look: A low mist that makes the entrance feel theatrical. Materials: A fog machine and the fluid specified by its instructions. Effort: Medium. Placement: Only where ventilation, visibility, power, and local conditions make it appropriate.
Keep stairs, steps, handrails, and the route to the door visible. Follow the product instructions and consider neighbors, children, pets, smoke alarms, local rules, and changing weather. Never let fog become a substitute for safe lighting or clear footing.
27. Scarecrow sentinel
Look: A central character guarding the display. Materials: A sturdy frame, clothing, stuffing, hat, face covering, stakes, and ties. Effort: Medium. Placement: Beside the mailbox, garden, walkway, or driveway edge.
What’s actually slowing this PC down?
Pick the symptom - the matching free tool is one click away.
Build or dress a scarecrow with a stable internal frame and anchor it at the base. Position it where it acts as a visual focal point without narrowing vehicle access or blocking the mailbox.
28. Haunted mailbox
Look: A small, readable detail that extends the theme toward the street. Materials: Removable eyes, faux cobwebs, a small sign, and removable fasteners. Effort: Low. Placement: On or immediately beside the mailbox, without affecting delivery.
Add eyes, a few cobwebs, or a small “Beware” sign. Keep the mailbox door, flag, post, address, and delivery access clear. Avoid anything that could snag a carrier’s hand or interfere with a vehicle.
29. Coffin prop
Look: A dramatic backdrop for a skeleton or graveyard. Materials: Lightweight coffin-shaped panel or ready-made prop, paint, stakes, and optional lettering. Effort: Medium. Placement: Behind the display, against a wall, or in a broad lawn area.
Windows Errors? Fix Them Before They Spread
Repair common Windows errors and clear accumulated junk for a smoother, more stable PC - no reinstall needed.Free scan · no reinstallCrashes, No Sound, or Screen Glitches?
Random freezes, missing sound and display glitches usually trace back to one bad driver. Find and replace yours safely.Free scan · under a minuteA lightweight panel is easier to position and remove than a bulky structure. Anchor it securely, especially if it has a broad surface that could catch wind, and keep its edges away from paths.
30. Dead tree
Look: A bare branching silhouette covered with bats, ravens, or ghosts. Materials: Pruned limbs or lightweight craft materials, a stable base, wire or ties, and hanging decorations. Effort: Medium to high. Placement: A lawn corner, large planter, or graveyard backdrop.
Use sound, dry branches or a lightweight artificial frame and secure the base before adding ornaments. Decorate with a restrained number of hanging pieces so the tree remains visually legible and does not become a hazard.
31. Full themed porch vignette
Look: A finished scene that feels collected rather than cluttered. Materials: One focal prop, one handmade piece, pumpkins, a few lights, and one fabric or texture element. Effort: Medium. Placement: The porch, entry, or front-yard area where the display is most visible.
Free tools Windows power users keep installed
One-click scans. No signup required.
Start with one focal point—perhaps a skeleton, scarecrow, coffin, or pumpkin cluster. Add one handmade element, layer pumpkins at different heights, repeat two or three colors, and finish with controlled lighting. Restraint often makes a small porch more effective than filling every available surface.
Independent reader supportYour contribution helps us test, update, and keep practical guides available for everyone.How to make the display work as one scene
- Choose a focal point. Put the largest or most characterful item where it can be seen from the sidewalk, such as a skeleton vignette, scarecrow, ghost family, or coffin backdrop.
- Build a visual route. Use pumpkins, bones, lanterns, or low lights to guide attention from the yard to the porch without placing anything in the walking path.
- Repeat a small color palette. Purple and orange are classic, while black, white, and gray create a more graphic look. Repeat your chosen colors across signs, pumpkins, fabric, and lights.
- Layer height and texture. Combine ground-level pumpkins or bones with a standing scarecrow, hanging bats, or a porch ghost. Mix hard surfaces with cheesecloth, fabric, foliage, or webbing.
- Match materials to exposure. Use sheltered projects for cardboard, paper, and delicate fabric. Reserve fully exposed locations for materials and products whose instructions support that use.
- Test the view at night. Check the display from the sidewalk and from the driver’s approach. Make sure lighting is useful rather than glaring, and that props do not obscure steps, house numbers, or the door.
Outdoor Halloween lighting and prop safety checklist
- Keep sidewalks, steps, handrails, driveways, mailbox access, and door swings clear.
- Anchor or weight fabric ghosts, foam-board tombstones, signs, inflatables, and other lightweight pieces.
- Use outdoor-rated lights, cords, and connection hardware where the installation is exposed.
- Inspect cords before use and do not overload outlets, power strips, or extension cords.
- Protect electrical connections from rain, standing water, irrigation, and snow.
- Use battery-operated lights inside milk-jug ghosts, lanterns, fabric props, and other enclosed decorations unless the product is specifically designed for that electrical use.
- Keep candles, heaters, and other ignition sources away from paper, cardboard, fabric, dried foliage, and artificial cobwebs.
- Follow the instructions for projectors and fog machines, including ventilation, visibility, placement, and operating conditions.
- Check local fire, electrical, HOA, rental, and right-of-way requirements before installing the display.
- Remove or secure decorations when weather, maintenance work, or visitors make the setup unsafe.
Final design formula
For a polished result, choose one focal point, repeat two or three colors, and layer handmade pieces with a few purchased accents. Before switching on the display, ask: Is the route clear? Are lightweight props anchored? Are the lights and cords rated for outdoor use? Are every electrical connection and flame hazard controlled? If the answer is yes, even a modest porch can read as a complete ghoulish scene.
Frequently Asked Questions
How do I make my outdoor Halloween decorations look coordinated?
Choose one focal point first, such as a skeleton vignette, scarecrow, ghost family, coffin backdrop, or large pumpkin arrangement. Then add one handmade piece, repeat two or three colors, and use pumpkins, bones, lanterns, or low lights to guide the eye toward the door.
What should I avoid when decorating my front yard for Halloween?
Keep sidewalks, steps, handrails, driveways, mailbox access, and the door swing free of decorations. Anchor lightweight props, use outdoor-rated lights and cords, protect electrical connections from moisture, and keep flames away from fabric, paper, cardboard, dried foliage, and cobweb material.
Recommended Free Tools
Which materials are best for weather-exposed Halloween decorations?
Covered porches are better for cardboard, paper, delicate fabric, and other materials that are not intended for full exposure. Open lawns and exposed fences need materials and products whose instructions support outdoor use. Do not assume a material is waterproof or wind-resistant without product information.
Are battery-powered lights safer for DIY Halloween decorations?
Battery-operated lights are a suitable choice for milk-jug ghosts, lanterns, fabric props, and enclosed decorations unless a product is explicitly designed for the intended outdoor electrical use. For powered displays, inspect cords, avoid overloading, use outdoor-rated products, and keep connections dry.
The Bottom Line
The strongest DIY Halloween displays usually need only one focal prop, a few handmade details, repeated colors, and layered lighting. Keep every path and entry feature clear, anchor anything lightweight, and use only materials and electrical products suited to their exposure.
Quick Recap
Product prices and availability are accurate as of the date/time indicated and are subject to change. Any price and availability information displayed on Amazon at the time of purchase will apply.




