Free tools Windows power users keep installed
One-click scans. No signup required.
You can make a noticeable improvement to a home for less than $100 without hiring a contractor—but the project has to stay small. The prices below assume a single door, fixture, room accent, or small area and cover materials only. They do not include labor, tax, shipping, permits, or tools you do not already own.
These are U.S. price ranges based on representative retail pricing researched on August 10, 2026. Prices vary by location, finish, brand, promotions, and availability. The easiest upgrades are bulbs, hardware, aerators, showerheads, motion lights, and smart plugs. Dimmer switches, thermostats, hardwired alarms, gas equipment, and damaged building materials require substantially more caution.
As an Amazon Associate I earn from qualifying purchases.
Quick comparison
| Upgrade | Typical cost | Time | Difficulty | Biggest benefit |
|---|---|---|---|---|
| Paint the front door | $20–$50 | Half day to a weekend | Easy | Curb appeal |
| Replace cabinet hardware | $15–$75 | 1–3 hours | Easy | Kitchen or bathroom refresh |
| Recaulk a wet area | $10–$35 | 2–4 hours, plus cure time | Easy with care | Appearance and water protection |
| Add peel-and-stick wallpaper | $35–$90 | 1–4 hours | Easy to medium | Accent wall or nook |
| Replace bathroom accessories | $30–$90 | 1–3 hours | Easy to medium | Coordinated finish |
| Add motion-sensor lighting | $10–$50 | 15–60 minutes | Easy | Convenience |
| Replace incandescent bulbs with LEDs | $8–$30 | 10–30 minutes | Easy | Energy and light quality |
| Install a compatible dimmer | $20–$60 | 30–90 minutes | Electrical caution | Lighting control |
| Seal a drafty door or window | $7–$45 | 30–90 minutes | Easy | Comfort and draft reduction |
| Add or replace a door sweep | $7–$20 | 15–45 minutes | Easy | Blocks under-door drafts |
| Install a WaterSense showerhead | $20–$60 | 15–30 minutes | Easy | Water and water-heating savings |
| Replace a bathroom faucet aerator | $2–$15 | 5–20 minutes | Easy | Low-cost water savings |
| Install smoke and carbon-monoxide alarms | $20–$50 each | 15–30 minutes each | Easy if battery-operated | Life safety |
| Add smart plugs | $15–$50 | 15–45 minutes | Easy | Scheduling and control |
Important scope note: A full-house alarm replacement, whole-room wallpaper installation, complete cabinet-hardware replacement, or large exterior repair can easily exceed $100. The budget applies to the limited project described in each section.
1. Paint the front door
Typical cost: $20–$50
Time: Half a day to a weekend, depending on drying conditions
Difficulty: Easy
#1 Best Overall
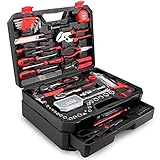
- [Toolbox Included] - Includes 1-Drawer storage box with independent sliding drawer to enlarge the capacity more than common toolbox. Assortment of necessary tools are in one tool chest, durable plastic case with internal molded compartments to keep each component protected and easily accessible. All tools meet or exceed ANSI standard.
- [High Quality Material] - Made of high-quality steel and finished in heat treated chrome, durable and corrosion resistance. Handles made of TPR material, comfortable for grip.
- [Muti-purpose Tools Kit] - 325Pcs tools set for most small repairs and DIY projects around the house. It is perfect for handyman, construction workers, mechanics, work shops etc. This tool set is also a good gift choice for family member, friends, partners, etc.
- [Complete Varieties] - Comprehensive assortment of professional-grade wrenches, a complete range of 1/4 inch and 3/8 inch metric-sized sockets and precision screwdrivers, hammer, tape measure, pliers etc. The 72-tooth ratchet. Variety of 1/4-inch screwdriver bits: Phillips, slotted, square, star and pozi. Soft-grip handle on screwdrivers, pliers, srtipper and hammer provides excellent comfort and control.
- [Great Gift Choice] -This tool kit is easy to carry and stock. It is a good gift choice for men and women. Also this tool set is perfect for Father's Day, and is a great option as gift for Dad, Boyfriend & Brothers when chrismas.
A fresh color on one exterior door creates more visual impact than its price suggests. A quart of exterior paint is often enough for one standard door; representative current prices were approximately $18–$25, such as this exterior paint example.
What to buy
- Exterior-rated paint compatible with the door material
- Sandpaper and a basic brush or small roller
- Painter’s tape and, if necessary, a small amount of filler or primer
How to do it
- Remove the doorknob, lock hardware, or masking plates where practical.
- Wash the door and let it dry completely.
- Lightly sand glossy areas. Scrape loose paint and repair damaged spots.
- Mask hinges, glass, weatherstripping, and adjacent trim.
- Apply thin, even coats of exterior-rated paint, following the label’s recoat time.
- Allow the paint to harden sufficiently before reinstalling hardware and closing the door normally.
Satin or semi-gloss is generally easier to clean than flat paint. Match the coating to a wood, metal, fiberglass, composite, or vinyl door rather than choosing solely by color. Dark paint can absorb more heat and may be unsuitable for some composite or vinyl doors, so check the manufacturer’s instructions.
Watch for: Paint applied over dirt or chalking can peel. Excess paint around weatherstripping can stop the door from closing or sealing. A warped, rotten, or water-damaged door needs repair before painting; paint will not correct the underlying problem.
Outdated Drivers Are Slowing You Down
One free scan finds every outdated or missing driver and matches the right update for your exact hardware.Free scan · exact hardware matchWindows Errors? Fix Them Before They Spread
Repair common Windows errors and clear accumulated junk for a smoother, more stable PC - no reinstall needed.Free scan · no reinstall2. Replace cabinet knobs or pulls
Typical cost: $15–$75 for a small cabinet run
Time: 1–3 hours
Difficulty: Easy
New hardware changes the visual style of a kitchen, bathroom, laundry room, or built-in without replacing the cabinets. Current ten-packs of cabinet knobs commonly fall around $16–$30, although premium materials and larger quantities cost more; see representative cabinet hardware pricing.
Measure before ordering
- Count every knob and pull.
- For pulls, measure the distance between screw holes from center to center. Do not measure the outside length of the pull.
- Buy one sample before ordering the full quantity.
- Photograph the existing hardware and keep the old screws in case the replacement screws are the wrong length.
Installation tips
Knobs are the most forgiving because they usually use one hole. Replacement pulls must match the existing center-to-center measurement exactly. A cabinet-hardware template helps keep new holes aligned. Tighten screws securely, but do not overtighten and crush the cabinet finish.
Choose a finish that coordinates with the faucet, hinges, lighting, and appliances—or use a deliberate mixed-metal scheme. Solid metal hardware is usually a better choice for heavily used kitchens than thin decorative pieces.
Do these 3 things before closing this tab:
1Clear out junk files and repair common Windows errors2Fix the driver behind crashes, sound loss and screen glitches3Repair Windows errors before they cause bigger problemsPotential complication: Older cabinets may have nonstandard hole spacing. Filling and redrilling holes is possible, but it turns a quick hardware swap into a small refinishing job. Renters should store the original hardware and reinstall it before moving out.
3. Recaulk a shower, tub, sink, or backsplash
Typical cost: $10–$35
Time: 2–4 hours, plus curing time
Difficulty: Easy with care
Fresh caulk can improve a bathroom immediately and help keep water out of joints. Treat it as a waterproofing task, not merely a cosmetic touch-up. Representative sealant prices include roughly $9 for a kitchen-and-bath product and about $9–$10 for 100% silicone, such as these DAP and GE examples.
Choose the correct sealant
- Use 100% silicone or a product specifically rated for kitchen and bath in constantly wet areas.
- Use paintable acrylic latex or siliconized acrylic for paintable trim and suitable dry joints.
- Do not use ordinary painter’s caulk in a shower joint.
How to recaulk
- Remove all loose and deteriorated caulk. Score stubborn material carefully with a utility knife.
- Scrape residue without damaging the tub, tile, fiberglass, or countertop.
- Clean away soap film and residue.
- Remove mold or mildew and let the joint dry completely.
- Apply painter’s tape along the edges if you want a cleaner line.
- Cut the nozzle at approximately a 45-degree angle and apply one continuous bead.
- Tool the bead immediately, then remove the tape while the sealant is still workable.
- Follow the product’s instructions for cure time and water exposure.
DAP’s shower-recaulking guidance likewise emphasizes removing old caulk, cleaning and drying the joint, taping, applying a steady bead, tooling it, and observing the cure requirements.
Recommended Free Tools
Do not simply caulk over a problem: New caulk over old caulk usually creates a weak, unattractive bond. Sealing over trapped moisture can hide a continuing leak. Silicone is generally not paintable. A soft wall, loose tile, rotted substrate, persistent leak, or spreading mold requires repair or professional assessment. Never mix bleach with ammonia or other cleaners.
Rank #2
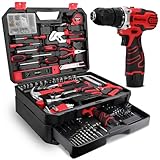
- Upgrade & Durable Toolbox: The Upgrade toolbox is a multi-functional solution that combines aesthetics and practicality. It features a storage compartment with a separate sliding drawer, offering greater capacity than standard toolboxes. This design allows for organized storage of various tool types, making it easier and quicker to find the tools you need
- Fully Functional & Highly Practical: The 276 Pcs tool set meets Daily Work Needs, easily handling tasks such as furniture repairs, appliance installations, and simple renovations. It includes a variety of common tools, such as screwdrivers, wrenches, pliers, hammers, Needle-Nose Pliers, Saw, drill, They provide convenience and efficiency for our daily lives
- 12V Cordless Drill: 276 Pcs home tool kits includes a 1.5 Ah Cordless Lithium-ion Drill with a 3/8" (10 mm) max keyless chuck, two-speed control and a maximum speed of 1500 RPM. Weighing in at just 1.76 LB, it's incredibly lightweight, it's your ideal companion for tackling various DIY projects
- High-Quality Materials: The tools are crafted from premium materials with a heat-treated chrome finish, ensuring durability and reliability for long-lasting use. The handles are made from TPR material, providing a comfortable grip
- Ideal Gift Choice: The upgraded 276-piece tool set meets the needs of daily home repairs and small projects. This comprehensive and practical hand tool kit makes a thoughtful and useful gift for Father’s Day, Christmas, or any occasion, perfect for fathers and friends alike
4. Add peel-and-stick wallpaper to one small area
Typical cost: $35–$90
Time: 1–4 hours
Difficulty: Easy to medium
Peel-and-stick wallpaper is a high-impact upgrade when used for an accent rather than a whole room. Current rolls commonly cost about $35–$60 and cover approximately 30–45 square feet, although pattern matching and waste can change the amount needed. Browse representative peel-and-stick wallpaper options.
Good applications include a powder-room accent wall, the back of a bookcase, an entry nook, the inside back of a cabinet, or a backsplash-style accent away from direct heat and standing water.
What’s actually slowing this PC down?
Pick the symptom - the matching free tool is one click away.
Installation steps
- Measure the area and add extra material for pattern matching and mistakes.
- Test a sample on the actual surface.
- Clean the wall and let it dry.
- Repair loose paint, holes, and flaking areas.
- Use a level or plumb line to establish a straight vertical starting point.
- Peel back only a small section at a time.
- Smooth the material with a wallpaper tool or clean squeegee.
- Trim edges with a sharp blade and match the pattern before cutting the next strip.
Textured, greasy, damp, dusty, or freshly painted walls may not hold the adhesive reliably. Removal can pull off weak paint or drywall paper, so renters should obtain permission and test an inconspicuous area first. “Removable” does not guarantee residue-free or damage-free removal from every surface.
5. Replace bathroom accessories
Typical cost: $30–$90
Time: 1–3 hours
Difficulty: Easy to medium
A coordinated towel bar, towel ring, robe hook, or toilet-paper holder can make a dated bathroom feel intentional without changing the vanity or tile. A basic three-piece set was priced around $45 in the research sample; see a representative bathroom hardware set.
Installation steps
- Decide which pieces need replacing and mark proposed locations with painter’s tape.
- Check for studs where possible.
- Use anchors rated for the wall material if you are mounting to drywall or tile.
- Keep the accessories level.
- Tighten mounting screws securely without overtightening.
- Seal penetrations in wet locations when the manufacturer recommends it.
Match the finish to existing plumbing fixtures, or choose mixed metals deliberately. Stainless steel or corrosion-resistant construction is preferable in a humid bathroom.
Safety boundary: An adhesive-only mount can fail under the weight of wet towels. Anchors too close to the edge of tile can crack it. A towel bar mounted only into drywall is not a grab bar and must never be treated as one. Avoid locations where a falling towel could contact an electrical outlet or heater.
6. Add motion-sensor lighting to a closet, pantry, stair, or cabinet
Typical cost: $10–$50
Time: 15–60 minutes
Difficulty: Easy
Rechargeable, battery-powered motion lights add convenience without running new wiring. Current rechargeable fixtures commonly cost about $10–$25 each, with longer or linkable versions costing more; compare representative motion-sensor lighting.
How to install one
- Charge the light fully.
- Choose a location where the sensor can see someone approaching.
- Clean the mounting surface.
- Use the supplied magnet, adhesive, or screws.
- Test the activation range and shutoff delay.
- Make sure shelves or doors do not block the sensor.
- Set the brightness and color temperature for the space.
Warm white light around 2700K–3000K is comfortable in bedrooms and closets. Neutral or cool white can be more useful in pantries, workshops, and utility areas. A manual-on mode is helpful when the light will be used for an extended task.
The Tool Desk
Outbyte Driver Updater FREEScan for outdated or missing drivers - takes under a minuteDriver Scan →Outbyte PC Repair FREEClear out junk files and repair common Windows errorsFree Scan →Adhesive can fail on dusty, porous, or rough surfaces. Motion sensors may trigger through an open doorway or fail when blocked by clothing. Use indoor fixtures only in dry locations, and remember that rechargeable batteries require periodic charging and eventually lose capacity.
Rank #3

- Toolbox Storage Case with Drawer The newly designed 1-drawer storage toolbox features a sliding-out mechanism and offers significantly more capacity than standard toolboxes. Equipped with a full set of commonly used hand tools, this sturdy toolbox with its complete tool accessories meets users' daily needs
- High Quality Material This mechanics tool set all product accessories are crafted from premium steel through forging, undergo heat treatment for hardening, and feature surface rustproofing to withstand high-intensity and prolonged operational maintenance. Tools are neatly organized within a sturdy plastic toolbox for easy access and portability
- Home Tool Kit For All Purpose 328-Piece Tool Set, ideal for homeowners' daily maintenance, organization, and DIY projects, including but not limited to homes, apartments, garages, workshops, trucks, cars, and mechanic shops; a highly versatile and comprehensive tool kit
- Comprehensive 328-Piece Tool Set This comprehensive home tool kit includes a wide range of versatile manual tools such as screwdrivers, precision screwdriver bits, wire cutters, pipe wrenches, claw hammers, adjustable wrenches, hex keys, spirit levels, 40-piece bit sets, and full sets of 1/4“ and 3/8” sockets. Suitable for most household repairs, it's the ideal choice for craftsmen, mechanics, and homeowners
- AS A GREAT GIFT This 328-piece tool set offers comprehensive coverage, exceptional value for money, and outstanding practicality, delivering remarkable value. It makes the perfect gift for men, fathers, boyfriends, or friends—whether for birthdays, Father's Day, Christmas, housewarming celebrations, or personal use—serving as the ideal foundational household tool kit
7. Replace frequently used incandescent bulbs with LEDs
Typical cost: $8–$30 for several bulbs
Time: 10–30 minutes
Difficulty: Easy
Replacing bulbs is one of the simplest upgrades with a measurable energy benefit. Representative four-packs of common A19 60-watt-equivalent LEDs cost about $8–$15. According to ENERGY STAR, certified LEDs use up to 90% less energy than incandescent bulbs and last substantially longer. ENERGY STAR also estimates that replacing five frequently used fixtures can save about $40 per year in energy, although actual savings depend on use and electricity rates.
Buy the right bulb
- Match the base and shape.
- Choose brightness by lumens rather than relying only on the old wattage comparison.
- Choose the color temperature: 2700K–3000K for warm residential light, 3500K–4100K for neutral light, and 5000K or higher for a very cool daylight appearance.
- Confirm whether the bulb is dimmable.
- Check enclosure, damp-location, and outdoor ratings.
Turn off the fixture and allow a hot incandescent bulb to cool before replacing it. A dimmable LED still needs a compatible dimmer, and not every LED is approved for a totally enclosed fixture. The ENERGY STAR lighting guidance explains why dimmer compatibility, enclosure, color quality, and application matter. Avoid mixing visibly different color temperatures in the same room unless the contrast is intentional.
8. Install a compatible dimmer switch
Typical cost: $20–$60 for one dimmer and faceplate
Time: 30–90 minutes
Difficulty: Electrical caution
A dimmer changes the atmosphere of a room and can reduce light output when full brightness is unnecessary. Basic models may fit within $20–$60, but smart and premium dimmers can cost more.
Before touching the wiring
- Confirm that the fixture uses dimmable bulbs.
- Determine whether the switch is single-pole or three-way.
- Turn off the circuit breaker.
- Verify that power is off with a properly rated tester.
- Photograph and label wires by terminal function before disconnecting anything.
- Install a dimmer specifically rated for the bulb type and electrical load.
- Reassemble the box and wall plate, restore power, and adjust the low-end setting if the dimmer provides one.
This is not a project for guessing based on wire color or copying a diagram that does not match your box. Stop and hire an electrician if you find unfamiliar wiring, aluminum wiring, multiple circuits, damaged insulation, or a configuration not covered by the instructions. Some smart dimmers require a neutral wire and others do not. Lutron’s compatibility guidance and Leviton’s dimmer information are useful starting points.
Flickering, buzzing, faint light when switched off, or poor low-end control usually indicates an incompatible bulb-dimmer combination, an adjustment issue, or a wiring problem. Do not continue operating a setup that becomes hot or behaves unpredictably.
Quick wins for a faster PC:
Clear out junk files and repair common Windows errorsFree Scan →Scan for outdated or missing drivers - takes under a minuteDriver Scan →Repair Windows errors before they cause bigger problemsFix Now →9. Seal one drafty door or window
Typical cost: $7–$45
Time: 30–90 minutes
Difficulty: Easy
Air sealing one noticeably drafty opening can improve comfort without replacing the window or door. Representative weatherstripping products range from approximately $7 to $24, with more specialized profiles costing more.
Find the leak first
- Look for daylight around the frame.
- Feel for moving air.
- Use a tissue or thin strip of paper to identify airflow.
- Check whether the door is rubbing or misaligned; weatherstripping will not correct a structural alignment problem.
Installation steps
- Clean and dry the mounting surface.
- Measure the frame.
- Choose the correct profile: adhesive foam, rubber bulb, kerf-in, compression, or screw-on.
- Cut pieces accurately.
- Install weatherstripping on the stationary stop so the moving door compresses it.
- Close the door and confirm that the latch still engages.
- Replace damaged or compressed material rather than stacking multiple layers.
The Department of Energy distinguishes caulk from weatherstripping: caulk seals stationary joints, while weatherstripping seals moving components such as doors and operable windows. Both are simple air-sealing measures, but no payback period is guaranteed for every home or climate.
Do not block required window drainage paths, intentional ventilation openings, or combustion-air openings. If the gap is caused by a sagging door, damaged threshold, or foundation movement, repair the cause instead.
10. Add or replace a door sweep
Typical cost: $7–$20
Time: 15–45 minutes
Difficulty: Easy
Rank #4

- 173-piece hand tool set for basic household repairs and everyday projects; includes 8 combination wrenches, 3/8-inch ratchet wrench, 22 hex keys, 6-inch slip-joint pliers, 6-inch long nose pliers, and more (scroll down to view complete list)
- Made of durable heat-treated and chrome-plated alloy steel for long-lasting, corrosion-resistant strength
- Plastic non-slip handles provide enhanced comfort and control
- Blow-molded case provides secure tool storage and convenient portability
- Measures 16.89 by 12.68 by 3.35 inches
A door sweep addresses the gap beneath the door, where drafts, insects, dust, and light often enter. Adhesive sweeps are quick and inexpensive; screw-on aluminum-and-vinyl models are generally more durable for high-traffic exterior doors. See representative door sweep options.
How to install it
- Measure the door width.
- Inspect the floor gap and choose adhesive or screw-on construction.
- Cut the sweep to width if necessary.
- Position it so the seal contacts the threshold lightly, without dragging.
- Attach it according to the product instructions.
- Test the door swing, latch, and lock.
A sweep must not cover a required sill drain or interfere with an exterior door’s weatherproofing system. It also will not correct a large uneven gap caused by a sagging door, damaged threshold, or foundation movement.
11. Install a WaterSense-labeled showerhead
Typical cost: $20–$60
Time: 15–30 minutes
Difficulty: Easy
A showerhead upgrade can refresh the bathroom while reducing water and water-heating use. Look for the WaterSense label rather than simply choosing the lowest gallons-per-minute rating. EPA requires WaterSense showerheads to use no more than 2.0 gallons per minute and meet performance requirements. A basic 1.75-gpm Delta example was priced at about $29.
For context, standard showerheads are commonly rated at 2.5 gallons per minute. The EPA estimates that an average family can save about 2,700 gallons of water and more than $75 in annual water and energy costs by replacing a showerhead. That estimate varies with shower duration, household size, local water and sewer charges, and energy rates.
Installation steps
- Remove the old head with a wrench protected by a cloth.
- Clean mineral buildup from the shower-arm threads.
- Check and install the supplied washer.
- Thread on the new head by hand.
- Tighten only enough to stop leaks.
- Turn on the water and inspect the connection.
- Use thread-seal tape only if the product instructions call for it; the washer usually makes the seal at this connection.
In a low-pressure home, an extremely restrictive model may feel unsatisfactory. Check the spray pattern and coverage, not just the flow number. Local utilities may offer rebates or free fixtures; use the EPA WaterSense rebate finder to check.
12. Replace a bathroom faucet aerator
Typical cost: $2–$15
Time: 5–20 minutes
Difficulty: Easy
This may be the cheapest upgrade on the list. A WaterSense faucet aerator or insert can reduce bathroom-sink flow without replacing the faucet. Representative products range from about $2 to $6.
WaterSense bathroom faucets and accessories use no more than 1.5 gallons per minute—at least 30% less than the standard 2.2-gpm faucet flow. The EPA estimates that replacing inefficient bathroom faucets or aerators can save an average family about 700 gallons of water per year, but actual results depend on use and the existing fixture.
Installation steps
- Identify whether the faucet housing has male or female threads.
- Remove the old aerator with a cloth-covered wrench or pliers.
- Clean mineral deposits from the faucet threads.
- Install the supplied washer.
- Hand-tighten the new aerator.
- Turn on the water and check for leaks and acceptable flow.
Some designer faucets use proprietary aerators, and hidden cache aerators require a special key. Choose the correct product category: an extremely low-flow bathroom aerator may be frustrating at a kitchen sink. An aerator will not repair a leaking cartridge, damaged faucet, or poor household water pressure.
Independent reader supportYour contribution helps us test, update, and keep practical guides available for everyone.13. Install or replace smoke and carbon-monoxide alarms
Typical cost: $20–$50 per battery-operated combination alarm
Time: 15–30 minutes per unit
Difficulty: Easy if battery-operated; electrical caution if hardwired
This is the most important safety upgrade in the list. A single ten-year sealed-battery combination alarm was priced at approximately $40 in the research sample, but a home may need several units.
Best Value

- 【Lightweight Red Cordless Drill】The 8V drill set can be used for drilling in wood and plastic, and tightening/loosening screws.Press the switch to adjust the speed of the electric drill, the maximum no-load speed of the mini drill is 800r/min. The net weight of the hand drill is only 1.65 pounds, and it is easy to operate with one hand.
- 【Rechargeable Battery】This red drill is supplied with a type-C 1.5A charging cable.A universal charger or USB output(5Vd.c) can charge the small drill.The battery indicator light is at the back of the drill.
- 【Be a Handy Women】This cordless drill combo kit are made of alloy steel, chrome plated to prevent corrosion, grip is anti-skid and comfortable.It is a good tool sets for women to do general DIY.
- 【Multi-functional Tool Kit with Drill】This Red tool set contains the most practical and advanced tools for design, repair or maintenance. This red tool box is perfect for decoration, furniture assembly, drilling, cutting, gardening, office or daily home maintenance.
- 【Package Included】8V Cordless Drill, hex nut screwdriver, Screwdriver, precision Screwdriver, twisted drills, hex key, magneitc bits holder, 50L bits, 25I bits, 1/4" sockets, Measure Tape Ruler, fasteners, claw hammer, adjustable wrench, Utility Knife Blade, Utility knife, Long Nose Pilers, User Manual.
Placement and replacement basics
- Install smoke alarms inside bedrooms, outside sleeping areas, and on every level of the home.
- Install carbon-monoxide alarms on every level and outside sleeping areas.
- Replace smoke alarms generally every 10 years from the manufacture date.
- Test alarms monthly.
- Replace batteries at least annually unless the unit uses a sealed ten-year battery.
These recommendations are consistent with guidance from the U.S. Fire Administration and the Consumer Product Safety Commission.
Installation steps
- Check the manufacture date on existing alarms.
- Replace units that are about 10 years old or have unreliable sensors.
- Choose alarms certified to applicable safety standards.
- Install battery-operated units according to the manufacturer’s instructions.
- Test every unit after installation.
- For hardwired alarms, turn off power and use a qualified electrician unless you are specifically qualified to perform the work.
Do not paint over an alarm or disable it because of nuisance alarms. A CO alarm does not replace annual inspection of fuel-burning equipment. Follow the manufacturer’s placement instructions, including restrictions on placing an alarm directly beside a fuel-burning appliance. Also check for recalls and conformity concerns; the CPSC has warned consumers about combination smoke and CO detectors that failed to alert occupants, including the 2025 Tiergrade warning.
14. Add smart plugs or a smart power-control setup
Typical cost: $15–$50
Time: 15–45 minutes
Difficulty: Easy
Free tools Windows power users keep installed
One-click scans. No signup required.
Smart plugs can add scheduling, remote control, voice-assistant integration, and sometimes energy monitoring to suitable plug-in devices. A representative two-pack with energy monitoring cost about $19; see current smart plug pricing.
How to set one up
- Confirm that the plug’s voltage, amperage, and wattage ratings cover the intended device.
- Plug it directly into a properly grounded receptacle.
- Install the manufacturer’s app.
- Connect to the required Wi-Fi band or smart-home platform.
- Name the device clearly.
- Create a schedule or automation.
- Test manual control and confirm how it behaves after a power outage.
Good uses include lamps, decorative lighting, suitable plug-in fans, entertainment equipment, seasonal lighting, and devices that benefit from scheduled operation.
Do not casually use a smart plug with a space heater unless both the plug and heater manufacturer specifically permit it. Avoid medical equipment, refrigerators or freezers unless the manufacturer allows power interruption, pumps, compressors, and motors that exceed the rating. Never automate a device whose loss of power could create a safety hazard.
A smart plug does not automatically save money. It creates the opportunity to avoid runtime that would otherwise occur. ENERGY STAR’s smart-home criteria distinguish plug-load control from energy reporting; neither proves that every smart plug will produce meaningful savings in a particular home.
Quick wins for a faster PC:
Clear out junk files and repair common Windows errorsFree Scan →Fix the driver behind crashes, sound loss and screen glitchesFind Drivers →Could a thermostat be your better under-$100 upgrade?
A thermostat is a legitimate budget upgrade for some compatible HVAC systems, but it is not universally plug-and-play and is therefore not included as one of the 14 general-purpose projects above. Some basic programmable or Wi-Fi thermostats cost approximately $80–$100, while many popular smart models cost more.
The Department of Energy says setting a thermostat back approximately 7–10°F for eight hours a day can save up to 10% annually on heating and cooling costs, with results varying by home and system. ENERGY STAR says certified smart thermostats save approximately 8% of heating and cooling bills, or about $50 per year on average, but climate, equipment, occupancy, and behavior all matter.
Check compatibility before buying
- Use the thermostat manufacturer’s compatibility tool.
- Photograph the existing wire positions.
- Label wires by terminal designation, not wire color.
- Turn off HVAC power.
- Install the base and connect wires according to the model’s instructions.
- Configure the system type, schedule, Wi-Fi, and temperature units.
- Test heating and cooling separately.
A C-wire may be required. Heat pumps need the correct equipment configuration, and millivolt, line-voltage, multi-stage, dual-fuel, electric-baseboard, and proprietary systems may require specialized thermostats. Honeywell Home’s C-wire guidance and the ENERGY STAR thermostat FAQ explain common compatibility issues. If the wiring is unfamiliar, use an HVAC technician.
Choose the upgrade by your goal
For the biggest visual change
- Paint the front door.
- Replace cabinet hardware.
- Add peel-and-stick wallpaper to a small accent area.
- Replace bathroom accessories.
- Install a dimmer and warmer LEDs.
For comfort or efficiency
- Seal a drafty door or window.
- Add a door sweep.
- Replace incandescent bulbs with LEDs.
- Install a WaterSense showerhead.
- Replace a bathroom aerator.
- Use a properly programmed thermostat.
For the lowest initial cost
- Replace a faucet aerator.
- Install LED bulbs.
- Add a door sweep.
- Recaulk a deteriorated joint.
- Replace cabinet knobs.
Best choices for renters
LED bulbs, motion-sensor lights, smart plugs, showerheads and faucet aerators, and cabinet hardware are usually the easiest reversible choices when the original parts are retained. Peel-and-stick wallpaper requires more caution: obtain permission, test a hidden area, and do not assume the adhesive will leave the wall undamaged.
Recommended Free Tools
Before you buy
- Measure first: Check cabinet-hole spacing, door width, frame dimensions, wallpaper coverage, faucet threads, and shower-arm connections.
- Check compatibility: This matters especially for LEDs, dimmers, thermostats, heat pumps, alarms, and smart plugs.
- Verify rebates: Check your utility and the WaterSense rebate finder before buying a showerhead or faucet fixture.
- Keep original parts in a rental: Store hardware, aerators, showerheads, and other replaced components together.
- Budget for small supplies: Anchors, washers, sandpaper, caulk-removal tools, tape, and shipping can push a project over $100.
- Respect the stop signs: Do not proceed with live or unfamiliar electrical wiring, gas lines or fuel-burning equipment, persistent water intrusion, rotten framing or subfloor, hardwired alarms, or unusual HVAC wiring without qualified help.
- Do not disable safety equipment: Investigate nuisance alarms and replace or relocate equipment according to the manufacturer’s instructions instead of removing batteries or disconnecting the device.
Frequently Asked Questions
Which under-$100 home upgrade has the best return for a first-time DIYer?
For the lowest risk and cost, start with LED bulbs, a bathroom faucet aerator, a WaterSense showerhead, cabinet hardware, or a door sweep. For the biggest visible change, painting the front door usually offers the strongest impact for one small purchase.
Are all 14 projects safe for beginners?
No. Bulbs, aerators, showerheads, cabinet hardware, motion lights, smart plugs, and many door sweeps are generally beginner-friendly. Painting, wallpaper, caulking, and weatherstripping need preparation. Dimmer switches, thermostats, hardwired alarms, unfamiliar wiring, gas equipment, and structural or water damage require additional expertise or a professional.
Can these projects really stay under $100?
Usually, if the scope is limited to one door, one fixture, one small accent area, or a small cabinet run and you already own basic tools. Materials, shipping, tax, primer, specialty anchors, permits, and unusually large areas can raise the total. A whole-room or whole-house version of many projects will cost more.
The Bottom Line
The best under-$100 upgrade depends on the problem you want to solve. Choose paint, hardware, wallpaper, or bathroom accessories for appearance; LEDs, weatherstripping, a door sweep, WaterSense fixtures, or a compatible thermostat for comfort and efficiency; and smoke/CO alarms for safety. Keep the scope small, verify compatibility before buying, and stop when a project involves unfamiliar wiring, HVAC controls, gas equipment, leaks, or structural damage.
What’s actually slowing this PC down?
Pick the symptom - the matching free tool is one click away.
Quick Recap
Product prices and availability are accurate as of the date/time indicated and are subject to change. Any price and availability information displayed on Amazon at the time of purchase will apply.




