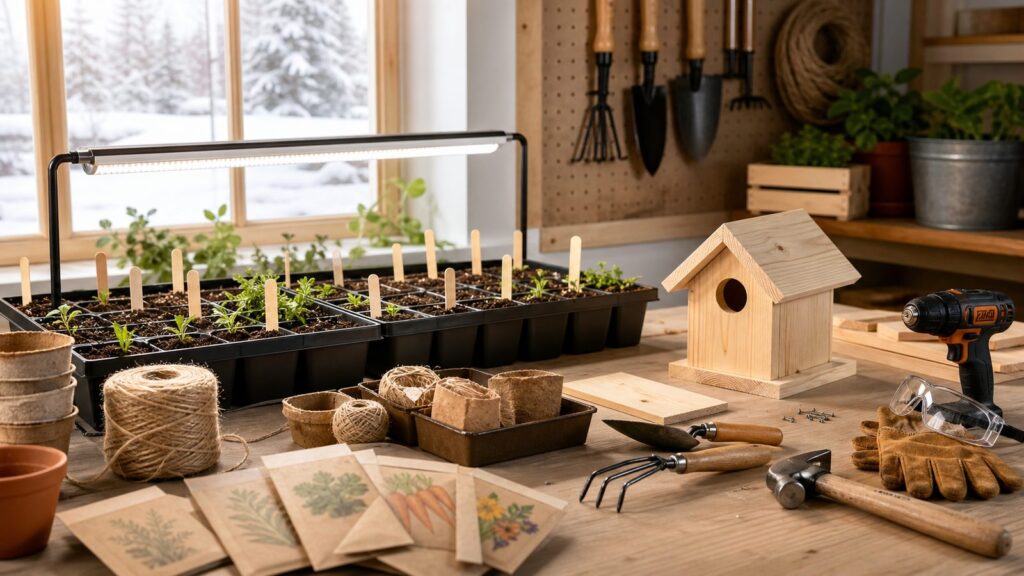
Winter is the right time to start spring garden work because the best garden projects are not rushed after the weather breaks. Seeds need lead time. Wood needs layout and pre-drilling. Containers need drainage. Trellises need a plan for anchoring before vines get heavy. If you wait until the first warm weekend, you end up buying whatever is left on the shelf and guessing your way through the build.
These six indoor garden crafts are simple enough to do at a kitchen table or workbench, but they are not throwaway projects. Done well, each one becomes a working piece of your spring garden: seed trays that produce healthy transplants, markers that survive weather, habitat boxes that are maintainable, supports that do not fold under wet vines, and containers that protect floors and windowsills from water damage.
For most homeowners, the winter version of these projects costs anywhere from $10 to $150 depending on size and materials. The larger spring upgrades they point toward, such as raised beds, irrigation, garden paths, greenhouse foundations, and drainage work, can run much higher. That is why we treat indoor garden crafts as prototypes. Build small, learn what works, then scale outdoors with better materials, good drainage, and a clear site plan.
1. Start Seed Trays or Upcycled Pots the Right Way
Seed starting is the highest-return indoor garden project you can do in winter. A basic setup costs about $20 to $75 if you use seeds, seed-starting mix, labels, trays or clean upcycled containers, and a spray bottle. A small kit with a tray, humidity dome, heat mat, and grow light usually lands around $55 to $150. Multi-shelf setups with better lights and reusable trays can run $150 to $400 or more.
PC Slower Than It Used to Be?
A free scan shows the junk files, broken settings and background clutter dragging Windows down - then fixes them in one click.Free scan · Windows 10 & 11Crashes, No Sound, or Screen Glitches?
Random freezes, missing sound and display glitches usually trace back to one bad driver. Find and replace yours safely.Free scan · under a minute#1 Best Overall

- EASIER SEED STARTING: Our Burpee SuperSeed tray with 36 flexible pop-out cells is designed to simplify indoor seed starting for all your favorite vegetables, flowers and herbs. Just add seed starting mix, seeds, water and light to get growing! Rows are labeled alphanumerically for seedling identification with included Plant-o-Gram diagram. Tray dimensions: 11.5" x 10-3/8" x 2-1/4"
- SMARTER WATERING SYSTEM: Molded corner slots in each cell improve drainage and soil aeration to set your seeds up for germination success. Deep channels in the watering tray draw excess away from the cells, while the raised perimeter edge keeps water contained in the tray - no spills! Seed tray side handles make it easy to lift and pour off excess water or check seedlings daily.
- SIMPLER TRANSPLANTING: Soft food-grade silicone cells cradle seedlings and gently flex to pop out when it’s time to transplant into your outdoor garden! This system is specially designed to reduce stress on your seedlings, so you don't damage their roots. After transplanting, trays are easy to clean and reuse or simply store for next growing season. Top shelf dishwasher safe.
- SEED STARTER TIP: Many favorite vegetables, including peppers and tomatoes, must be started indoors before warmer weather arrives. Start pepper seeds 8-10 weeks before your area’s average last frost date, and tomato seeds 6-8 weeks before last frost. Check your Burpee seed packets for instructions on when and how to plant any of your herb, flower and vegetable seeds.
- 100% GUARANTEED: Burpee is committed to the success of all gardeners. We treat each order with care to ensure healthy seeds, plants, soil mixes and gardening supplies are packaged and sent in excellent condition. If you are unsatisfied with your purchase, we aim to make it right!
The timing matters more than the container. Most indoor seed starting is planned about six weeks before your local last frost date. Do not use a generic national calendar. Check your ZIP code, local extension office, or county planting guide, then count backward by crop. Tomatoes, peppers, herbs, cool-season greens, and flowers all have different transplant windows.
Materials and specs
Use seed-starting mix, not garden soil. Garden soil compacts in small cells, drains poorly indoors, and can introduce disease. Seed-starting mix is lighter, more uniform, and easier to keep evenly moist without becoming muddy.
For containers, use cell trays, soil blocks, newspaper pots, egg cartons, yogurt cups, or cut-down nursery pots. If you upcycle containers, wash them first and add drainage holes. A 1/8-inch to 1/4-inch hole pattern is enough for most small cups. Set everything in a waterproof tray so water does not reach a wood windowsill, cabinet top, or floor.
Seedlings need more light than a winter window usually provides. Use a grow light 12 to 16 hours per day, positioned close to the seedlings and raised as they grow. A simple outlet timer is worth the $8 to $15 because it removes guesswork. Many vegetables germinate well around 65 to 75 degrees F, while some guidance gives a wider 68 to 86 degrees F range depending on the crop. A heat mat can help germination, but once seedlings sprout, unplug it unless the crop still needs bottom heat. Too much warmth after sprouting encourages weak, leggy growth.
Do these 3 things before closing this tab:
1Repair Windows errors before they cause bigger problems2Fix the driver behind crashes, sound loss and screen glitches3Clear out junk files and repair common Windows errorsBuilder’s setup tip
On our job sites, we label anything that will be hidden later: blocking in walls, buried lines, framing changes, and finish samples. Use the same discipline here. Label every tray with plant, variety, sowing date, and expected transplant window. A $5 pack of labels can prevent a $60 tray of mystery seedlings.
Add a small fan on low for a few hours a day. Gentle air movement strengthens stems and reduces damp surface conditions. Keep the fan indirect; you want movement, not windburn.
Hardening off before planting
Seedlings raised indoors are not ready for full sun, wind, and cool nights on day one. Plan a 7- to 10-day hardening-off period before transplanting. Start with a short protected outdoor visit, then gradually increase time, sun exposure, and wind exposure. Skipping this step is one of the fastest ways to lose otherwise healthy plants.
2. Make Seed Bombs or Seed Paper With Native Seeds
Seed bombs and seed paper are good winter crafts because they force you to think about plant selection before spring. The basic project costs about $10 to $35 if you already have paper, bowls, trays, or clay at home. Native wildflower seed mixes, specialty seeds, or larger batches can raise the price.
The key is to use the right seed in the right place. Choose native seed mixes matched to your region, sun exposure, and soil moisture. A sunny curb strip, a damp low area, and a dry slope do not need the same mix. Also, do not toss seed bombs into parks, natural areas, vacant lots, private property, or roadside spaces without permission. Useful gardening starts with control of the site.
Simple seed bomb recipe
For a basic clay-style seed bomb, mix roughly 3 parts dry clay powder, 1 part compost or fine potting mix, and seeds according to the packet coverage rate. Add water slowly until the mixture holds together, then roll into 1/2-inch to 1-inch balls. Dry them on a tray for 24 to 48 hours. Store them in a cool, dry place until spring.
For seed paper, tear plain uncoated paper into small pieces, soak it, blend it into pulp, stir in seeds by hand, press it thin on a screen or towel, and let it dry completely. Avoid glossy paper, heavy inks, and aggressive blending after seeds are added.
Rank #2
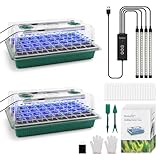
- 【360°Spectrum Seed Starter Tray with Grow Light】 The Larger 360°full-spectrum plant grow light in our seed start tray promotes healthier roots, faster germination, stronger seedlings. Seed starter kit with 4 full spectrum strip, mounted on the dome of garden plant starter kit. White & blue grow light helps seedlings grow faster and healthier. 3 lighting modes, 3 timer settings (3H/6H/12H), 5 brightness modes fully adjustable to your plants' needs. Your journey from seed to harvest starts here!
- 【Higher Dome & Deeper Cell Trays】80 powerful lamp beads (40 per tray) provide full & even plant light for every seed. More grow lights, more growth, this is our secret to healthier seedlings. Give every plant starter room to grow. 9cm tall humidity dome lets seedlings grow taller indoors. 1.96in deeper seed cell trays help build stronger roots for healthier plants. 0.31in drainage holes prevent overwatering and root rot. Every cell of seed starting kit is engineered for a perfect start.
- 【Adjustable Humidity & Grow Light】Upgraded seed starting trays with adjustable grow light timer & ventilation vents, for superior seed starting & precise humidity control. Remote indicator: red for 3-hour timer, blue for 6-hour, red & blue for 12-hour. With this greenhouse germination kit, you can add grow light strips to cultivate seeds. Easily adjust vent covers to change the humidity of plant starter trays, adjust moisture for different growth stages.
- 【Durable ABS & Clear Dome】 Our seeding starter trays are made of high-quality, thickened, unbreakable ABS plastic. It is a great seed starter kit, anti-UV, corrosion-resistant, water-saving, and dry-resistant. Clear seed trays let you monitor soil condition, while clear dome allows tracking seedling growth without lifting it. Super lightweight, easy to carry & clean, our reusable seed starter tray is ready for the next season. Plant germination trays — from seeding tray to harvest.
- 【Versatile for All Plants】Seed starter trays powered by USB or plug-in adapter, 2 ways to use seedling trays (adapter included). Our seed starter tray create ideal growing conditions for a wide range of plants—flowers, vegetables, fruits, tomatoes, herbs, and more. Whether you're beginner or seasoned gardener, this planting trays let you learn and get fun of planting at home with your family.
Where they work best
Seed bombs are not magic. They work best on prepared soil where seed can contact the ground. If you throw them onto mulch, turf, compacted clay, or weed pressure, germination will be poor. In spring, rake the soil lightly, remove debris, place the seed bombs, and keep the area evenly moist through germination.
Think of this craft as a planting plan, not a decoration. If you are converting a larger bed, sketch the area first. Measure length and width, note sun hours, mark water access, and identify where runoff goes during heavy rain.
3. Paint Plant Markers That Survive Weather
Painted plant markers are easy to dismiss until you lose track of six tomato varieties or forget which perennials went dormant. A basic batch costs about $5 to $30 using craft sticks, stones, scrap lumber, paint pens, or outdoor acrylic. More durable versions use cedar stakes, exterior paint, UV-resistant markers, and a clear exterior sealer.
For outdoor use, avoid thin craft sticks if you expect them to last more than one season. They swell, cup, and snap. Untreated cedar is a better choice when the budget allows because it handles outdoor exposure without heavy chemical treatment. Cut stakes around 1 inch wide, 8 to 12 inches long, and 1/4 to 1/2 inch thick. Sand the top face, pre-paint if desired, and write the label where it will remain visible above mulch.
Durability details
Use exterior acrylic paint or paint pens rated for outdoor use. Let the paint cure fully before sealing. If you add a clear coat, cover the top, edges, and bottom end. End grain absorbs water first, which is why outdoor wood often fails at the ends before the face looks bad.
What’s actually slowing this PC down?
Pick the symptom - the matching free tool is one click away.
For vegetable beds, keep the label simple: crop, variety, sowing or transplant date, and days to maturity. For perennials, include mature size if spacing matters. Example: “Coneflower, 24-36 in., full sun.” That small note helps when you are dividing plants or filling gaps next season.
Construction crossover
We use layout marks to reduce mistakes before the expensive work starts. Garden markers do the same thing. If you are planning raised beds, irrigation zones, or a new planting border, make temporary markers indoors now and use them outside to test spacing before you dig. A 36-inch path feels different in real life than it does on graph paper.
4. Build a Modest Bee Hotel or Species-Specific Birdhouse
Winter is a good time to build habitat boxes because careful dimensions matter. A DIY birdhouse or nest box typically costs about $15 to $60 using untreated cedar or pine boards, screws, drill bits, and exterior finish. A native bee hotel usually costs about $15 to $75 using untreated wood blocks, paper tubes or reeds, a small roof, and mounting hardware.
The mistake is building something decorative that creates problems later. Habitat projects need drainage, ventilation, cleanable parts, and correct placement. Bigger is not better, especially with bee hotels. Keep bee hotels modest, with fewer than about 100 nesting tunnels, and make the nesting materials replaceable. Unmanaged bee houses can do more harm than good because they can concentrate pests, mold, and disease.
The Tool Desk
Outbyte PC Repair FREEClear out junk files and repair common Windows errorsFree Scan →Outbyte Driver Updater FREEScan for outdated or missing drivers - takes under a minuteDriver Scan →Bee hotel specs
Use untreated wood for the housing and include a roof or overhang that sheds rain. Nesting holes or tubes should be smooth inside and closed at the back. Common tunnel diameters range from about 1/8 inch to 3/8 inch for different native solitary bees. Depth often ranges from 4 to 6 inches. Paper liners, cardboard tubes, or removable reeds make maintenance easier than permanent drilled holes.
Mount the bee hotel in a sunny, protected location, ideally facing morning sun and sheltered from hard rain. Keep it stable so it does not swing in the wind. Plan to inspect it seasonally and replace used or damaged nesting materials. If you are not willing to maintain it, skip this project and plant more native flowers instead.
Rank #3

- Pro Grow Lights with Advanced Chips: Equipped with 56 high-efficiency beads per tray, these LED strips simulate natural sunlight for optimal seedling growth. Adjustable brightness and timer functions let you customize lighting for every plant stage, promoting faster, healthier growth—perfect for herbs, flowers, and more
- Simple Self-Watering System: Ensures consistent moisture with an efficient design that prevents overwatering or drying out. One watering supports seeds from germination to transplanting, making gardening stress-free and beginner-friendly
- Built for Practicality and Durability: Made from high-density, BPA-free PET material, the 1.5mm thick dome and base tray lock in temperature and humidity while providing ample space for seedlings. Designed for long-lasting performance, this kit is a reliable choice for years of use
- Adjustable Humidity & Optimal Ventilation: Features two adjustable vents for precise humidity and airflow control, ideal for every growth stage. The 60-cell tray’s enlarged drainage holes remove excess water, maintaining optimal moisture and air circulation for healthy roots
- Complete Starter Kit for Effortless Gardening: Includes 1* humidity dome, 2* humidity vents, 1* 60-cell seed tray, 1* base tray, 1* capillary mat, 1* plant stand, a grow light system (2 LED strips, controller, detachable adapter), 20 plant labels, and 2 gardening tools. Packaged beautifully with a user manual, this kit is perfect for beginners and makes an ideal gift
Birdhouse specs
For a birdhouse, pick one target species and build to that bird’s entrance-hole size and box dimensions. A decorative one-size-fits-all box may attract the wrong species or fail to protect nestlings. Drainage and ventilation are not optional. Include small drainage holes or cut corners at the floor and ventilation near the top under the roof overhang.
Use screws rather than nails for a box you plan to clean. A hinged side or removable front panel makes annual maintenance practical. Avoid pressure-treated lumber for the nesting chamber. Untreated cedar is a strong choice; untreated pine is cheaper but may not last as long outside.
Safety and placement
Clamp small boards before drilling. Use eye protection. Keep hands clear of the bit path, especially when drilling entrance holes with a hole saw or spade bit. Outside, mount boxes securely to a post, structure, or tree according to the needs of the target species. Do not fasten a heavy box to weak fence pickets or rotted trim.
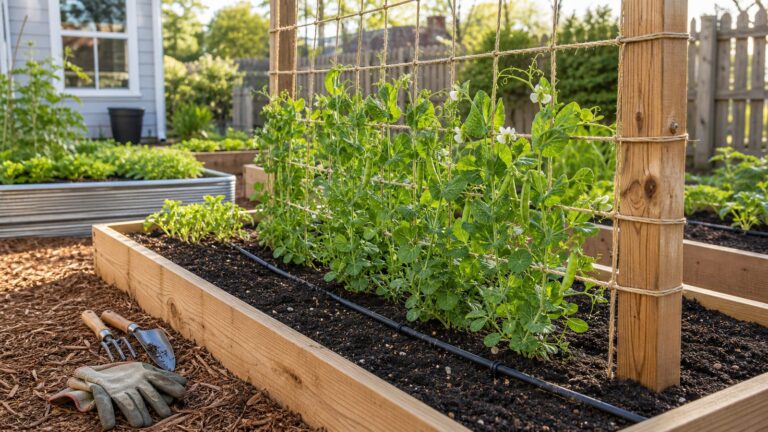
5. Assemble a Mini Trellis or Plant Support
A mini trellis is a useful indoor build because spring vines get heavier than homeowners expect. A small plant support costs about $10 to $50 using bamboo stakes, wood lath, twine, wire, or small cattle-panel sections. Cedar, metal frames, decorative finishes, and exterior anchoring hardware increase the cost.
The basic physics are simple: wet vines have weight, wind adds side load, and soil softens after rain. A support that looks fine in a pot indoors can fold outdoors if it has no bracing or anchoring. Build the tabletop version now, then decide how it will be scaled and secured outside.
Good indoor trellis projects
For peas or small flowers, tie three or four bamboo stakes into a teepee with jute twine. For cucumbers or beans, build a rectangular ladder frame from 1×2 cedar or exterior-rated wood lath. A tabletop version might be 18 to 24 inches tall; the outdoor version may need to be 48 to 72 inches tall depending on the crop.
Free tools Windows power users keep installed
One-click scans. No signup required.
Pre-drill wood lath before driving screws to avoid splitting. Use corrosion-resistant fasteners outdoors, such as exterior deck screws or stainless fasteners for higher-exposure locations. If the trellis will sit near siding or a fence, leave clearance for airflow and maintenance. Plants pressed tight to siding trap moisture and make painting, cleaning, and pest control harder.
Anchoring matters
For a spring garden bed, plan for at least 8 to 12 inches of stake embedment for light supports and more for tall or exposed trellises. In windy areas, use cross-bracing or attach the trellis to a proper post system. Do not attach a loaded trellis to vinyl siding, thin trim, or a fence panel that is already leaning.
If your trellis is integrated with a fence, retaining wall, pergola, or privacy screen, that moves beyond a craft project. Loads, setbacks, post depth, and local rules start to matter.
6. Grow a Windowsill Herb or Lettuce Garden That Can Move Outdoors
A windowsill herb or lettuce garden gives you something edible while you wait for spring. Expect to spend about $25 to $100 for containers with drainage, saucers, potting mix, herbs or seeds, and a light if needed. Self-watering planters, ceramic containers, and better grow lights push the price up.
Quick wins for a faster PC:
Scan for outdated or missing drivers - takes under a minuteDriver Scan →Clear out junk files and repair common Windows errorsFree Scan →Fix the driver behind crashes, sound loss and screen glitchesFind Drivers →Use containers with drainage holes and a tray. This is not optional indoors. Water damage from a planter is slow and quiet: swollen MDF sills, stained wood, peeling paint, cupped flooring, and mold behind trim. Put cork, felt, or rubber feet under trays if they sit on finished wood. Empty standing water after watering.
Rank #4

- 【Value Package】The kit contain 4 pcs base trays, 4 pcs seed trays with 12 cells in each, 4 pcs humidity lids with dome, and 50 pcs peat pellets, not need soil to fill the cells, help you keep clean and tidy when planting, and creates a moist and warm environment needed for seed germination.
- 【High Quality Material】Seed start trays are made of thick plastic, sturdy and durable, holds up to multiple uses, easy to wash and dry, the seed starter pod soil is made of peat and degradable non-woven fabric, safe and eco-friendly, make plant quickly sprout and grow.
- 【Considerate Design】The transparent lid can help seeds absorb more sunlight to grow, dome works well to control humidity and air circulation for tray, the drain holes at the bottom help breathe and prevent the root oversaturating, peat pellet can well keep moist even if it is not watered for a few days.
- 【Easy to Use】You just put peat pellet in warm water to expand them, insert the seeds or cuttings, keep moist and warm and done. Then transplant them into your garden when they are grown, you can cut the netting off to prevent the roots stifled due to the plant grows too fast but the netting has not been biodegraded.
- 【Application】Starting seeds or cuttings, also can be used for plant cloning, propagating flowers, vegetables, herbs, succulents or as an ideal gift for planting enthusiast, gardener. It won't take up too much space, can put in windowsill, kitchen or outdoor.
Container size and planting
For herbs, use a container at least 4 to 6 inches deep. Basil, parsley, cilantro, chives, thyme, and oregano all work indoors with enough light. Lettuce and baby greens can grow in shallow containers, but 4 inches of soil depth gives you more stable moisture. Space leaf lettuce about 2 to 4 inches apart for baby harvests.
Use potting mix, not garden soil. Place the container where it gets bright light, or use a small grow light for 12 to 16 hours per day. Rotate containers every few days if light comes from one side. Harvest herbs by cutting above a node so the plant can keep growing.
Moving outdoors in spring
When temperatures are appropriate, harden container plants off over 7 to 10 days just like seedlings. Start them in shade or filtered light, then gradually increase exposure. Outdoor containers dry faster than indoor ones, so check moisture daily during the first warm week.
If the container will live on a deck, porch, or balcony, think like a builder. Use saucers where water needs control, but do not leave pots sitting in water. Keep heavy planters away from weak railings and deteriorated deck boards. Use pot feet or risers to improve drainage and reduce staining.
2026 Cost Comparison for Winter Garden Crafts
Costs vary by region, seed type, lumber pricing, delivery fees, and how much you already own. The table below gives realistic 2026 U.S. planning ranges for the six projects, plus what usually drives the final number.
| Project | Typical 2026 DIY Cost | Time Required | Main Cost Drivers |
|---|---|---|---|
| Seed trays or upcycled pots | $20-$75 basic; $55-$150 with light/heat kit | 1-2 hours setup, then daily checks | Grow light quality, tray count, reusable cells, timers, heat mat |
| Seed bombs or seed paper | $10-$35 | 1-2 hours plus drying time | Native seed mix, clay or paper supplies, batch size |
| Painted plant markers | $5-$30 | 1-3 hours plus cure time | Cedar stakes, exterior paint, UV markers, sealer |
| Birdhouse or nest box | $15-$60 | 2-4 hours | Cedar vs. pine, hardware, predator guards, finish |
| Native bee hotel | $15-$75 | 2-4 hours | Replaceable tubes, roof, mounting hardware, weather protection |
| Mini trellis or plant support | $10-$50 | 1-3 hours | Cedar, metal, fasteners, outdoor anchoring hardware |
| Windowsill herb or lettuce garden | $25-$100 | 1 hour setup, then regular watering | Containers, saucers, potting mix, starter plants, grow light |
For comparison, larger spring garden work moves into a different budget category. Flower bed installation is often priced by square footage and labor conditions. Topsoil, mulch, and compost costs vary heavily by delivery distance and volume. Small hobby greenhouses can range from modest kit pricing to several thousand dollars when you add foundation work, ventilation, benches, utilities, and site preparation.
Independent reader supportYour contribution helps us test, update, and keep practical guides available for everyone.Safety, Moisture, and Permit Notes Homeowners Should Not Skip
Indoor garden projects are low-risk, but they still involve water, electricity, sharp tools, and materials that may later become outdoor structures. A little planning prevents the common failures we see around homes: stained floors, rotted trim, overloaded fences, and improvised electrical setups.
Recommended Free Tools
Water and electrical safety
Keep grow lights, timers, and extension cords off wet surfaces. Use drip trays under seed trays and containers. Do not let cords sit in saucers or cross areas where water is poured. If you use a heat mat, follow the manufacturer’s spacing and temperature guidance. Heat mats are for germination, not for drying out soggy trays.
Indoors, put waterproof protection under any seed-starting station on wood, laminate, carpet, or painted trim. Outdoors, plan drainage before you build. Raised beds, containers, and greenhouse floors all need somewhere for water to go.
Tool safety
For birdhouses, bee hotels, and trellises, clamp small stock before cutting or drilling. Wear eye protection. Pre-drill cedar and thin lath to avoid splits. Keep finishes and sealers away from seed-starting surfaces until fully cured. If children are helping, let them paint, label, fill pots, and press seed paper while an adult handles saws and drills.
Permit triggers
Small indoor crafts do not need permits. Outdoor structures sometimes do. Rules vary by city and county, but many jurisdictions exempt small detached accessory structures below certain square-foot thresholds while still regulating setbacks, easements, utilities, height, electrical work, plumbing, and foundations. Some places may exempt a small shed or greenhouse from a building permit but still require zoning approval. Others require permits for retaining walls above a certain height, electrical outlets, plumbing, or work in floodplain or historic areas.
Best Value

- Upgraded with Adjustable Ventilation - Gardzen seed starter tray has been newly upgraded with two air vents added to the top, allowing you to easily adjust the ventilation for optimal seed growth. Say goodbye to stagnant air and hello to thriving plants!
- High Quality and Durable - These seedling starter trays are made from premium plastic material, ensuring long-lasting use for all your seed starting needs. Comes with thoughtfully attached stickers, you can achieve a tighter fit of dome and base for maximum efficiency.
- 40-Cell Capacity - Each seed starter kit in our set comes with a generous 40-cell capacity, providing ample space for all your seeds to sprout and thrive. Whether you're a beginner or experienced gardener, this plant starter kit is perfect for starting your own garden paradise.
- Easy to Manage Kits - The 40-cell insert tray provides a simple, straightforward way to start seeds and grow plants from cuttings. The drain hole at the bottom of the seed tray prevents over watering. The clear dome allows you to clearly see the growth status.
- Versatile and User-friendly - This seed germination kit is not only suitable for starting seeds but also perfect for propagating cuttings and nurturing young plants.
Before building a greenhouse, large pergola, fence-integrated trellis, shed, retaining wall, or hardscape garden area, check your local building department and HOA rules. Confirm setbacks, maximum structure size, drainage requirements, utility locations, and whether electrical service is involved. Calling 811 before digging is a basic step if posts, trenching, irrigation, or drainage lines are part of the spring plan.
When to DIY and When to Hire a Pro
DIY is a good fit when the project is light, movable, and easy to correct. Seed trays, seed paper, painted markers, small containers, tabletop trellises, and modest habitat boxes are appropriate homeowner projects if you follow basic safety and maintenance practices.
Hire a pro when the garden project affects drainage, structure, access, utilities, or long-term layout. Multi-bed garden plans, retaining walls, patios, irrigation, drainage correction, fence-integrated trellises, greenhouse foundations, greenhouse electrical outlets, and ADA-accessible garden paths need more than craft-level planning.
On construction projects, the expensive mistakes usually come from ignoring site conditions. The same is true in gardens. A raised bed placed in a drainage path can stay saturated. A path without base prep can settle. A trellis fastened to a weak fence can pull it further out of line. A greenhouse without proper anchoring can shift in wind. A garden that looks simple on paper can still involve slope, soil quality, disposal, buried utilities, delivery access, and local fees.
Outdated Drivers Are Slowing You Down
One free scan finds every outdated or missing driver and matches the right update for your exact hardware.Free scan · exact hardware matchWindows Errors? Fix Them Before They Spread
Repair common Windows errors and clear accumulated junk for a smoother, more stable PC - no reinstall needed.Free scan · no reinstallIf you are planning to scale one of these winter crafts into a larger spring build, make a simple site sketch now. Measure the space. Mark sun exposure, water access, doors, gates, utilities, downspouts, low spots, and existing hardscape. That one-page plan gives a contractor something concrete to price and helps you separate weekend DIY work from work that needs equipment, layout, and code awareness.
A Practical Winter-to-Spring Plan
Start with the project that has a living deadline: seeds. Find your local last frost date, count backward about six weeks for common indoor starts, and set up trays with good light. While seeds germinate, make labels and choose a few seed paper or seed bomb mixes for prepared areas. Then build one habitat project and one plant support, keeping both small enough to maintain and strong enough to survive outdoors.
By late winter, you should know what you are growing, where it will go, what needs drainage, and what needs a stronger spring build. That is the real value of these crafts. They turn winter energy into a working plan, and they expose the details before the garden season gets expensive.
Done well, these are not just projects to pass a cold weekend. They are the first phase of a better spring garden: healthier starts, clearer layout, smarter materials, fewer water problems, and outdoor upgrades that are built with the same practical thinking we bring to a job site.
Quick wins for a faster PC:
Clear out junk files and repair common Windows errorsFree Scan →Fix the driver behind crashes, sound loss and screen glitchesFind Drivers →Repair Windows errors before they cause bigger problemsFix Now →Frequently Asked Questions
When should I start seeds indoors for a spring garden?
A common rule is about six weeks before your local last frost date, but check your ZIP code or county extension office and count backward by crop.
Do seedlings really need a grow light?
Usually, yes. Most winter windows do not provide enough consistent light. Plan on 12 to 16 hours per day under an adjustable grow light placed close to the seedlings.
What is the best wood for outdoor plant markers and small garden builds?
Untreated cedar is a strong choice because it resists rot better than many craft woods without relying on heavy chemical treatment.
Are bee hotels a good idea?
They can be, but only if they are modest, weather-protected, and maintained. Use replaceable nesting materials and keep the hotel under about 100 tunnels.
Do I need a permit for garden projects?
Small crafts do not need permits, but larger outdoor structures may. Check local rules for greenhouses, sheds, retaining walls, electrical work, fences, setbacks, and drainage changes.
Quick Recap
Product prices and availability are accurate as of the date/time indicated and are subject to change. Any price and availability information displayed on Amazon at the time of purchase will apply.