Free tools Windows power users keep installed
One-click scans. No signup required.
Some links on this page are affiliate links: if you buy through them we may earn a commission, at no extra cost to you.
A good under-$100 home upgrade should do one of four things: make the house look cleaner, work better, feel more comfortable, or prevent a small maintenance problem from becoming an expensive repair. The trick is keeping the scope tight. One bathroom vanity, one exterior door, one pantry wall, one sink area, or the five light fixtures you use every day will usually look better than spreading the same $100 across the whole house.
The prices below are 2026 U.S. material ranges. They assume you are doing the labor yourself. That distinction matters. A plumber visit commonly lands around $175 to $450, and hourly plumbing rates can run roughly $45 to $200, so hiring out even a simple fixture swap usually breaks the under-$100 target. Electrical work is similar: a $30 dimmer can become a permitted service call depending on your jurisdiction, wiring, and panel condition.
As an Amazon Associate I earn from qualifying purchases.
On our job sites, the small upgrades that look best are the ones where homeowners measure twice, prep longer than they think they need to, and stop when they uncover something unsafe. If you find active leaks, soft drywall, mold, scorched wiring, loose electrical boxes, or water-damaged trim, do not dress it up. Fix the cause first.
Quick Cost Guide: 14 Home Upgrades Under $100
Use this as a planning table before you shop. The “budget breaks when” column is where most cheap-looking DIY projects go wrong.
Popular on Amazon
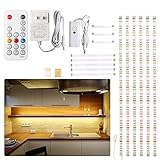
- DIY LED light strip: 6 PCS pre-cut strips, total 9.8 ft,many kinds of connection option,Great way to upgrade your cabinets,closet,desk,bookshelf,bed,wardrobe,display case,bedroom,workbench etc
- Super Bright & Brightness adjustable:Super bright LED cabinet lights delivers total 1500 lumen,Came with RF dimmer to adjust the brightness. LED's CRI is greater than 82,providing high-quality lighting
- RF Wireless remote control: 17 Key RF remote has timing off,dimming,hot buttons,rematch and dynamic function,60 feet control distance
- Reliable kit: High quality adapter and strip light,The LED tape light working voltage is DC12 V,extremely Low voltage and heat.24W adapter can be Max connected to a total of 14PCS (22.96ft )WOBANE LED light bar
- Easy installation: All installation accessories are included. No tools required. Install light bars by yourself in minutes, just Clean - stick on -connect. Backed with strong adhesive tape, screw-free to protect your furniture
| Upgrade | Typical 2026 Materials Cost | Time | Budget Breaks When |
|---|---|---|---|
| Cabinet knobs or pulls | $25-$95 | 1-3 hours | You replace a full kitchen with premium pulls or need to drill new holes |
| Faucet aerators | $5-$20 each | 10-20 minutes | Old threads are corroded or the faucet is damaged |
| Showerhead swap | $20-$80 | 20-45 minutes | The shower arm leaks, is seized, or the wall connection moves |
| LED bulb upgrade | $15-$60 | 20-60 minutes | You replace every bulb at once or need specialty dimmable lamps |
| Door weatherstripping | $10-$40 per door | 30-90 minutes | The door is warped, out of square, or the jamb is damaged |
| Door sweep | $10-$35 | 30-60 minutes | The threshold is uneven or the sweep must be custom fit |
| Interior caulking | $10-$35 | 1-3 hours | Gaps are wide, wet, or caused by movement |
| Tub or shower caulk refresh | $15-$45 | 2-4 hours plus cure time | There is rot, mold behind the joint, or loose tile |
| Switch and outlet plates | $10-$50 per room | 30-90 minutes | Devices or boxes are cracked, loose, scorched, or outdated |
| Dimmer switch | $20-$60 | 30-60 minutes | Local rules require a permit or electrician, or wiring is not compatible |
| Stick-on under-cabinet lights | $15-$80 | 30-90 minutes | You need concealed hardwiring or long continuous runs |
| Peel-and-stick backsplash accent | $40-$100 | 2-5 hours | The wall is uneven, damp, glossy, dusty, or too close to high heat |
| Front door or accent paint | $25-$90 | 3-6 hours plus dry time | You need primer, repairs, multiple coats, or exterior-grade prep |
| Closet or pantry organizers | $20-$100 | 1-3 hours | You need heavy-duty shelves, custom sizes, or stud-mounted systems |
1. Replace Cabinet Hardware in One Focused Area
New knobs and pulls are one of the fastest ways to make a kitchen, bath, laundry room, or built-in cabinet look current. The best under-$100 version is not usually a whole kitchen. It is a powder room vanity, a coffee bar, a mudroom cabinet, or the most visible run of drawers.
Budget about $25 to $95 for a small vanity or partial kitchen using value packs. Basic pulls often fall around $2.36 to $3.89 each in multi-packs, while decorative pulls can run $9 or more per piece. Count every door and drawer before you shop, then add one or two extras in case a finish gets discontinued.
The Tool Desk
Outbyte PC Repair FREEClear out junk files and repair common Windows errorsFree Scan →Outbyte Driver Updater FREEFix the driver behind crashes, sound loss and screen glitchesFind Drivers →The cleanest result comes from reusing the existing hole spacing. Measure center-to-center on pulls, commonly 3 inches, 3-3/4 inches, 5 inches, or 6-5/16 inches. If you switch from knobs to pulls or change spacing, buy a cabinet hardware template and test one drawer before drilling the rest. On our punch lists, misaligned pulls are one of the easiest DIY mistakes to spot from across the room.
DIY-safe: Yes, if the doors and drawer fronts are sound and you are reusing holes or using a template. Call a pro: if you are modifying expensive cabinet fronts, repairing stripped hinge areas, or drilling into stone, metal, or custom millwork.
2. Install Low-Flow Faucet Aerators
A faucet aerator is the small threaded screen at the end of many bathroom and kitchen faucets. Replacing it can improve the feel of the water stream and reduce water use without replacing the faucet. Material cost is usually $5 to $20 per aerator, depending on thread type, finish, and flow rate.
For bathrooms, many homeowners like 1.0 to 1.5 gallons per minute. For kitchen sinks, 1.5 to 1.8 gallons per minute often feels more practical for rinsing. Bring the old aerator to the store if you are unsure about male versus female threads or metric sizing.
Use a towel or rubber strap wrench so you do not scratch the faucet finish. If the old aerator is stuck from mineral buildup, soak the end with vinegar and try again gently. Do not crush the faucet spout with pliers.
Budget breaks when: the old threads are corroded, the faucet body is damaged, or the faucet uses a recessed cache aerator that needs a special key. DIY-safe: usually yes. Call a pro: if the faucet leaks at the handle, base, or supply lines after the work.
3. Swap the Showerhead
A showerhead replacement can make a bathroom feel better in less than an hour. Common WaterSense-style fixed showerheads and basic handheld models usually cost $20 to $80. Finish, spray pattern, flow rate, and handheld hose quality are the main cost drivers.
Most showerheads thread onto a 1/2-inch shower arm. Remove the old head, clean the threads, apply a small amount of plumber’s tape if the manufacturer calls for it, and hand-tighten the new head. Over-tightening can crack plastic fittings or stress the shower arm.
Do these 3 things before closing this tab:
1Scan for outdated or missing drivers - takes under a minute2Clear out junk files and repair common Windows errors3Fix the driver behind crashes, sound loss and screen glitchesIf the shower arm twists inside the wall, stop. That movement can indicate a loose fitting behind the wall, and forcing it can create a hidden leak. Also stop if you see active dripping at the wall escutcheon, soft drywall, or tile movement.
Budget breaks when: the shower arm is seized, the escutcheon needs repair, or the valve is the real problem. DIY-safe: yes for a simple head-only swap. Call a pro: for valve work, wall movement, recurring leaks, or damaged tile.
4. Replace Your Most-Used Bulbs With LEDs
Do not start by replacing every bulb in the house. Start with the fixtures that run the longest: kitchen ceiling lights, bath vanity lights, porch lights, lamps in living areas, and laundry or garage fixtures. A practical first round usually costs $15 to $60.
LEDs use about 75% less energy than incandescent bulbs and last much longer, so this is one of the more defensible value upgrades under $100. The key is choosing the right lamp, not just the cheapest box. For living rooms and bedrooms, 2700K to 3000K gives a warmer light. Kitchens and baths usually look better around 3000K to 3500K. For closets, laundry rooms, workbenches, and vanities where color accuracy matters, look for high CRI bulbs, often 90 CRI or better.
Also popular on Amazon
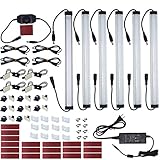
- 【Super Bright】 ---31W bright warm white cabinet lighting kit. No LED dots. No light glaring.
- 【Easy to Install】---Sufficient self-adhesive pads, mounting clips, wire clips, extension cords will help you to install this under cabinet led lighting kit quickly and easily.
- 【Dimmable ONLY by included LED dimmer】---Rotary switch dimmer included for 0%~100% stepless dimming. NOT compatible with existing Wall Dimmers.
- 【Premium Quality】 ---Premium higher quality certified power supply included with US plug with 115CM cable. Licensed electricians can cut off the US plug and hardwire it to an ON/OFF switch.
- 【Reliable & Long Lifespan】--24-Months Warranty when they are installed and used as per the User Manual.
If a fixture is on a dimmer, buy bulbs clearly marked dimmable and compatible with LED dimmers. Flicker, buzzing, or poor low-end dimming usually means the bulb and dimmer are not playing well together.
Budget breaks when: you need smart bulbs, candelabra bulbs, recessed trims, or dimmer replacements. DIY-safe: yes for standard bulb swaps. Call a pro: if a fixture is hot, scorched, loose, or flickering after new bulbs are installed.
5. Weatherstrip One Exterior Door
Air sealing is not glamorous, but it pays. ENERGY STAR notes that sealing air leaks and adding insulation can save up to 10% on annual energy bills. For less than $100, the most realistic target is one leaky exterior door, not the whole house.
Weatherstripping usually costs $10 to $40 per door. Foam tape is inexpensive and easy to install, but it compresses and wears faster. Vinyl, silicone, and kerf-style compression weatherstripping tend to last longer when the door and jamb are in decent shape.
Before shopping, check where the light or draft is coming through: latch side, hinge side, top, or bottom. After installation, use the paper-strip test. Close the door on a dollar bill or strip of paper. It should resist being pulled out, but the door should still latch without slamming.
Budget breaks when: the door is warped, the jamb is out of square, the threshold is failing, or the lockset no longer aligns after adding compression. DIY-safe: yes for surface-applied weatherstripping. Call a pro: if the door needs adjustment, planing, threshold replacement, or rot repair.
6. Add or Replace a Door Sweep
If you can see daylight under an exterior door, a door sweep may be the cheapest comfort upgrade in the house. Basic sweeps cost about $10 to $35. They come in screw-on, slide-on, adhesive, and U-shaped styles, with vinyl, rubber, brush, or silicone sealing edges.
Measure the door width, usually 30, 32, 34, or 36 inches, and the under-door gap. Many sweeps can be cut to length with a hacksaw and utility knife. The sweep should contact the threshold evenly without dragging so hard that the door becomes annoying to use.
Recommended Free Tools
Pair this with weatherstripping if the whole door leaks. A sweep alone will not fix side or top gaps.
Budget breaks when: the threshold is uneven, the slab is rotten, or the door bottom is damaged. DIY-safe: yes for basic screw-on or slide-on sweeps. Call a pro: if water is entering under the door or the sill system is failing.
7. Caulk Interior Gaps Around Trim and Windows
Fresh caulk can make a room look sharper and help reduce small drafts. For interior trim and window gaps, materials usually run $10 to $35 for paintable caulk, a caulk gun, scraper, tape, and rags. Exterior-grade window and door sealants are often $8 to $15 per tube, but exterior work requires more attention to drainage and substrate condition.
The mistake is treating caulk as filler for every gap. For a clean result, remove loose old material, vacuum dust, wipe the surface, and let it dry. For wider gaps, use backer rod so the sealant has the right shape and depth. Filling a deep void with a giant bead wastes material and fails faster.
Use paintable acrylic latex or siliconized acrylic for interior trim that will be painted. Use the product the manufacturer recommends for the substrate, especially around windows, doors, masonry, and exterior joints.
Budget breaks when: the gap is caused by structural movement, water damage, or missing trim. DIY-safe: yes for dry, stable interior trim gaps. Call a pro: if you find mold, rot, active water intrusion, or large moving cracks.
Also popular on Amazon

- Voice Control: Hands-free Alexa and Google Assistant voice commands to control lights on and off, change colors, adjust brightness
- DIY Lighting: 10 pre-cut 20-inch light strips and 9 connectors for flexible under-cabinet lighting installation
- Four Control Methods: Voice, app, remote, and control box for on/off, color changes, brightness adjustments
- Easy Installation: No tools required, adhesive tape backing for quick and simple mounting
- Perfect for Home: Suitable for lighting kitchen cabinets, shelves, TV backs, displays, stairs, bookcases, beds, closets
8. Refresh Tub or Shower Caulk
Old, stained, cracked tub caulk makes a bathroom look neglected and can let water reach places it should not. A proper refresh usually costs $15 to $45 for silicone or hybrid sealant, a scraper, tape, cleaning supplies, and possibly a caulk-removal tool.
Removal is the job. New silicone does not reliably bond to old silicone, soap film, or damp surfaces. Cut out the old bead, clean the joint, kill surface mildew where appropriate, rinse, and let the area dry completely. Tape both sides if you want a straight bead. Tool the caulk once, then leave it alone for the cure time listed on the tube, often 24 hours or more before water exposure.
What’s actually slowing this PC down?
Pick the symptom - the matching free tool is one click away.
For tubs, fill the tub with water before caulking if the manufacturer’s instructions and joint conditions support it. The weight can open the joint slightly so the new bead is not stretched the first time the tub is used.
Budget breaks when: grout is missing, tile is loose, drywall is soft, or mold appears to be behind the joint. DIY-safe: yes for surface caulk replacement. Call a pro: if there is water damage, recurring mildew from behind the wall, or loose tile.
9. Replace Switch and Outlet Plates
New wall plates are a low-cost way to make a room feel cleaner, especially after painting. Expect $10 to $50 per room depending on the number of devices, toggle versus decorator style, screwless covers, and finish.
Keep this upgrade simple. Replace cracked, yellowed, mismatched, or paint-caked plates with clean white, almond, black, or a restrained metal finish that matches the room. Oversized plates can hide minor drywall scars, but they can also look clumsy if used everywhere.
Crashes, No Sound, or Screen Glitches?
Random freezes, missing sound and display glitches usually trace back to one bad driver. Find and replace yours safely.Free scan · under a minuteWindows Errors? Fix Them Before They Spread
Repair common Windows errors and clear accumulated junk for a smoother, more stable PC - no reinstall needed.Free scan · no reinstallTurn off power if you are doing anything beyond removing the cover screws. Plates are cosmetic; devices and wiring are not. If an outlet is loose, scorched, warm, cracked, buzzing, or no longer grips plugs, the issue is not the cover plate.
Budget breaks when: devices need replacement or boxes are loose. DIY-safe: yes for plate-only replacement. Call a pro: for device replacement where required by local code, GFCI issues, loose boxes, bathroom/kitchen electrical concerns, or signs of heat damage.
10. Install a Compatible Dimmer Switch Where Allowed
A dimmer can make a dining room, bedroom, hallway, or living room feel more finished for $20 to $60 in materials. The catch is that “easy” does not mean code-free. Electrical device replacement may require a permit or licensed electrician depending on your city, state, building type, and whether the circuit serves a kitchen, bath, exterior, or other regulated area.
Before buying, confirm three things: single-pole versus 3-way switching, LED compatibility, and whether the dimmer requires a neutral wire. Many older switch boxes do not have a neutral present. Also make sure the bulbs are dimmable. A good LED dimmer with non-dimmable bulbs will still perform badly.
Quick wins for a faster PC:
Scan for outdated or missing drivers - takes under a minuteDriver Scan →Repair Windows errors before they cause bigger problemsFix Now →Our practical recommendation: if you are not comfortable verifying power is off with a tester, identifying conductors, and making tight listed connections inside a box with enough capacity, hire an electrician. The device cost may be under $60; the risk is not.
Budget breaks when: a permit, electrician, neutral wire, box repair, or fixture compatibility issue enters the picture. DIY-safe: only where legal and within your skill level. Call a pro: for aluminum wiring, scorched conductors, loose boxes, multi-location switching confusion, or any uncertainty.
11. Add Stick-On Under-Cabinet Lighting
Under-cabinet lighting is useful in kitchens, laundry rooms, pantries, desk nooks, and coffee bars. Battery pucks, rechargeable bars, and plug-in LED tape usually cost $15 to $80. The best under-$100 versions are small and targeted: one prep zone, one dark pantry shelf, or one coffee station.
Look for color temperature in the 3000K to 3500K range for kitchens and task areas. Warmer 2700K can look good in a bar or display area, but it may feel dim for food prep. If color matters, choose higher CRI. For LED tape, check length, cut points, adhesive quality, controller type, and whether the power supply is included.
Windows Errors? Fix Them Before They Spread
Repair common Windows errors and clear accumulated junk for a smoother, more stable PC - no reinstall needed.Free scan · no reinstallOutdated Drivers Are Slowing You Down
One free scan finds every outdated or missing driver and matches the right update for your exact hardware.Free scan · exact hardware matchAlso popular on Amazon

- DIY Design: 8 pcs 20inches light strips(L:20in, W: 0.3in), 4 pcs 5.9inches connectors and 4 pcs 2.8inches connectors available, many kinds of connection options. 8 pcs connectors are designed to bend and fold around corners and they can freely combine to cross different gaps.
- Adjustable Brightness: 2700k warm white, super bright, 6 levels of brightness, control your brightness level with the remote or dimmer easily.
- Dual Control: Cabinet lights can be controlled by wireless remote and mini dimmer. Remote has turn on/off, 6 levels of brightness, 2 light modes and 5 timing off option function, mini dimmer can control on/off and brightness.
- Timer and Memory Function: 30 minutes, 1/2/3/4 hours timing off available, choose a time to turn off your lights if you need. Under cabinet light can save personal settings to ensure that it has the same brightness each time it is activated.
- Widely Used: With strong self adhesive, just clean the place to be installed and paste it. Only take few minutes to install by yourself, then you can enjoy the lighting for a super long time. Suitable for kitchen, cabinet, closet, counter, shelf, desk, TV back, showcase and corner.
Clean the mounting surface with a residue-free cleaner and let it dry. Adhesive strips fail quickly on dusty, greasy, textured, or damp surfaces. For a more finished look, keep cords straight, use small clips, and avoid running exposed wires across a backsplash unless that look fits the room.
Budget breaks when: you want concealed hardwiring, long runs, in-wall controls, or perfect cabinet-integrated lighting. DIY-safe: yes for battery, rechargeable, and plug-in products used as directed. Call a pro: for hardwired lighting or new outlets.
12. Create a Small Peel-and-Stick Backsplash Accent
Peel-and-stick backsplash can work under $100 when the area is small: a sink wall in a powder room, a coffee bar, a laundry counter, or a short kitchen accent. Plan on $40 to $100 for panels or tiles, edge trim, a utility knife, straightedge, and waste from cuts.
The wall matters more than the sticker. Adhesive tile over dusty, glossy, uneven, damp, or freshly painted surfaces often fails early. Patch dents, degrease, dull glossy paint if the product calls for it, and let paint cure fully before installing. Lay out the pattern first so tiny slivers do not end up at the most visible edge.
What’s actually slowing this PC down?
Pick the symptom - the matching free tool is one click away.
Be careful near heat. Keep peel-and-stick products away from direct high-heat zones unless the product is explicitly rated for that application and local clearance rules are satisfied. Around ranges, cooktops, fireplaces, and wet areas, the wrong adhesive product can discolor, loosen, or become a safety issue.
Budget breaks when: you try to cover a full kitchen, need heat-rated material, need wall repair, or want real tile durability. DIY-safe: yes for small, dry, properly prepared accent areas. Call a pro: for full tile backsplashes, wet walls, damaged drywall, or range-adjacent installations with clearance questions.
13. Paint a Front Door, Accent Wall, or Small Feature
Paint is still one of the highest-impact upgrades under $100, but only if the scope is realistic. A front door, one accent wall, a powder room vanity wall, or a small built-in can usually fit between $25 and $90 for a quart or gallon of paint, brush, roller, tray, tape, sandpaper, patching compound, and possibly primer.
For a front door, use exterior-rated paint and pay attention to sheen. Satin and semi-gloss are common because they clean better than flat paint. Remove or tape hardware carefully, sand glossy areas, patch dents, clean the surface, and respect dry times. Closing a painted door too early can stick the door to the weatherstripping.
The Tool Desk
Outbyte PC Repair FREERepair Windows errors before they cause bigger problemsFix Now →Outbyte Driver Updater FREEScan for outdated or missing drivers - takes under a minuteDriver Scan →For interiors, avoid choosing a color from a tiny chip under store lighting. Put a sample on the actual wall and check it morning and evening. Neutral, resale-minded colors usually age better than extreme accent colors, especially in small rooms.
Budget breaks when: the surface needs primer, stain blocking, heavy patching, or multiple coats for a dark-to-light color change. DIY-safe: yes for sound surfaces. Call a pro: if exterior trim is rotten, lead paint may be present in an older home, or the door needs repair before paint.
Independent reader supportYour contribution helps us test, update, and keep practical guides available for everyone.14. Add Closet or Pantry Organizers
Storage upgrades are where $100 can make daily life easier. Basic bins, shelf dividers, hooks, baskets, labels, door racks, and simple wire or wood components usually cost $20 to $100. The best target is one problem area: a pantry wall, linen closet, entry closet, laundry shelf, or under-sink cabinet.
Measure the opening, depth, shelf spacing, and door swing before buying. A 12-inch-deep bin that fits a shelf may still block the door from closing if the trim or hinges reduce clearance. For mounted hooks and shelves, use the right fasteners and hit studs when load matters. Drywall anchors are not all the same; lightweight plastic anchors are not for heavy shelves, tool storage, or packed pantry loads.
Do not buy organization products before discarding expired items and grouping what remains. On job closeouts, the most useful storage is usually simple: one zone for tall items, one for small loose goods, one for daily-use items at eye level, and one for backstock.
Budget breaks when: you need custom shelving, heavy-duty pantry loads, pull-out hardware, or repairs to the closet walls. DIY-safe: yes for freestanding bins and light-duty accessories. Call a pro: for wall-mounted systems carrying serious weight or when you are unsure what is behind the wall.
Also popular on Amazon

- DIY Design. 6 pcs 12 inches rigid LED strips with easy connectors. Power splitter and extension cables included for different layouts. This under cabinet light set is perfect to work as undercabinet lighting, above kitchen counter lights, or any other cabinet lighting, shelf lighting, cupboard lighting, closet lighting, gun safe lights, display cabinet light, bookcase lights, TV back lighting, gun safe light, etc.
- Firm Installation Design. Those LED light strips are rigid with screw holes. They can be installed firmly by those screws easily and quickly. Self-adhesive pads of high bond are included too. Free from the usual problem of “constant falling off” with many other LED strips.
- Easy Installation. The screws, high bond self-adhesive pads, small extension cables and connectors, cable tiers will help you to install those very slim rigid LED strip quickly. And all the parts can be well hided easily.
- DIY & Extendable. Following the “Recommended Layout” , add-on LED light strips can be added into this under cabinet lighting. You can also purchase other compatible extra parts, i.e, motion-activated switch or door-open-switch, for DIY.
- Super Bright & Dimmable & Relaible. Super bright LED light strips with aluminum back. 0~100% stepless dimming dimmer included for you to get any brightness level you prefer. Reliable branded LEDs, high quality Class-2 certified power adapter.
When to DIY and When to Hire a Pro
Under-$100 home upgrades work best when they stay cosmetic, surface-level, and reversible. Hardware, bulbs, aerators, organizers, wall plates, paint, weatherstripping, door sweeps, and small adhesive accents are usually reasonable DIY projects for a careful homeowner.
The line changes when the work touches active plumbing, hardwired electrical, structural framing, exterior water management, or hidden damage. A $30 part does not make the job low-risk. If a showerhead swap reveals a moving pipe in the wall, if caulk hides soft drywall, or if a wall plate exposes scorched wiring, the correct move is to stop and diagnose the system.
Electrical work deserves special caution. Local rules vary widely for switches, outlets, GFCI-protected areas, bathroom devices, exterior fixtures, and hardwired lighting. Some jurisdictions allow homeowners to do limited work on their own single-family homes with permits. Others require licensed electricians for specific tasks. Check the local building department before replacing devices, not after.
Plumbing has the same practical rule. Replacing an aerator or showerhead is usually simple. Replacing valves, supply lines, traps, shutoffs, or anything inside a wall is different work. Professional labor typically pushes the total above $100, but that is cheaper than repairing hidden water damage later.
How to Make Cheap Upgrades Look More Expensive
The difference between budget-friendly and cheap-looking is usually alignment, proportion, finish consistency, and prep. Buy one cabinet pull before ordering 30. Check that a door sweep seals without scraping. Use a level on peel-and-stick tile. Match bulb color temperatures within the same room. Replace all wall plates in one visible area instead of mixing old ivory, bright white, and metal covers at random.
Keep finishes disciplined. A bathroom can handle chrome, brushed nickel, matte black, or brass, but too many finishes in a small room look accidental. If your faucet is chrome and your hinges are brushed nickel, cabinet hardware in a simple satin nickel or chrome is usually safer than adding a third bold finish.
Recommended Free Tools
Spend more time preparing surfaces than installing the visible product. Clean greasy cabinets before adding lights. Scrape old caulk completely. Patch and sand before paint. Degrease backsplash walls. Small projects fail when the new material is installed over dirt, moisture, movement, or old failed material.
Finally, complete one small area fully. A $90 powder room refresh with new pulls, matching plates, a clean bead of caulk, and better bulbs will usually look more intentional than $90 scattered across five unfinished projects.
Frequently Asked Questions
What home upgrades can I do for less than $100 in 2026?
Good under-$100 material-only upgrades include cabinet hardware, faucet aerators, a showerhead swap, LED bulbs, weatherstripping, a door sweep, interior caulking, tub caulk, wall plates, a compatible dimmer, stick-on under-cabinet lights, a small peel-and-stick backsplash, paint for one feature area, and closet or pantry organizers.
Which under-$100 home upgrades add the most value?
The strongest value upgrades are usually LED bulbs, air sealing with weatherstripping and caulk, fresh cabinet hardware in a visible area, bathroom caulk repair, and small paint updates. They improve daily use, energy performance, or perceived condition without major demolition.
Free tools Windows power users keep installed
One-click scans. No signup required.
Can I replace a light switch or dimmer myself?
Only if local rules allow it and you know how to verify power is off, identify the wiring, use the correct LED-compatible device, and make safe connections. Some jurisdictions require permits or licensed electricians for device replacement, especially in kitchens, baths, exterior areas, or multi-family buildings.
Are smart thermostats available for under $100?
Some smart thermostats can be found under $100 in hardware, especially sale-priced models around $60 to $80. The budget breaks if your HVAC wiring is incompatible, you need a C-wire adapter, or professional installation is required. Many popular models exceed $100 at regular pricing.
Is peel-and-stick backsplash worth it?
It can be worth it for a small dry accent area such as a coffee bar, laundry counter, or powder room sink wall. It is less reliable over dusty, glossy, uneven, damp, or heat-exposed surfaces. For full kitchens, wet walls, or range-adjacent areas, real tile or a rated panel system is usually a better long-term choice.
Does the $100 budget include labor?
Usually no. These are material budgets for DIY projects. Professional labor commonly pushes even simple plumbing, electrical, or finish work over $100, but hiring a pro is the right call when the project uncovers leaks, unsafe wiring, damaged drywall, mold, rot, or code questions.
Quick wins for a faster PC:
Scan for outdated or missing drivers - takes under a minuteDriver Scan →Repair Windows errors before they cause bigger problemsFix Now →Quick Recap
Product prices and availability are accurate as of the date/time indicated and are subject to change. Any price and availability information displayed on Amazon at the time of purchase will apply.

