Never use a crooked, rough, or waney board edge as the first reference against a table-saw rip fence. First create one straight reference edge—by jointing suitable stock or using a securely clamped straight-line ripping jig—then use that edge to rip the opposite side to width. Inspect the board before cutting: cracks, splits, checks, knots, or foreign objects can make it unsuitable for this operation.
The cost-saving goal is to remove only enough material to leave a continuous, usable straight edge, not to rescue every inch of defective stock. If the board cannot be supported, secured, or safely controlled with your machine and setup, stop and choose another method or have a qualified shop assess it.
Inspect the Board Before Choosing a Method
Check both long edges and both faces for crook, wane, checks, splits, cracks, knots, and signs of embedded metal or other foreign objects. Do not make a table-saw rip just to find out whether the stock is stable. OSHA identifies poor-quality lumber and defective or unsuitable blades as kickback contributors, and warns against using stock with checks, splits, cracks, or knots.
Lay out the intended edge before committing to a cut. Estimate the narrowest finished width that can still yield a continuous straight edge, and mark the least-wasteful line that achieves it. A slight irregularity may need only a narrow cut; severe crook can consume substantial width. Unsafe defects are a reason to stop, not to optimize the cut around them.
Quick wins for a faster PC:
Fix the driver behind crashes, sound loss and screen glitchesFind Drivers →Repair Windows errors before they cause bigger problemsFix Now →#1 Best Overall
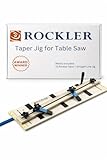
- Rockler’s Taper & Straight Line Jig: The taper drill jig allows you to make tapered cuts quickly, easily, and accurately at your table saw. With the miter bar removed, this wood working jig also doubles as a stable, straight-line ripping jig.
- Easy To Fit: This straight-line hole jig fits snug in any standard 3/8" x 3/4" miter slot and features a large, ergonomic handle for smooth push-action performance throughout the cut. The guidance booklet in our jig table saw is available so you can make it your very own.
- Multipurpose Drill Jig For Angled Holes: With a simple indexed angle setting system, heavy-duty hold-down clamps, and a smooth sliding design, the table saw jig makes tapered cuts fast, easy, and more precise. Our jig tools are perfect for chair legs, table legs, and more.
- Easy To Setup: In tapering mode, these woodworking tools and accessories are intended for use in the miter slot to the right of the blade. On many saws, your initial cut will remove a narrow piece of the tablesaw jig’s base to create zero-clearance support
- Where To Work? These wood working tools works with table saws on which the left edge of the right miter slot is 3-3/4” to 4-3/8” from the blade or 5” to 5-5/8” from the blade.
Choose a Method That Fits the Board and Machine
| Method | Use it when | Key condition |
|---|---|---|
| Jointer | The machine is correctly set up and the board is within its safe handling capacity. | Keep the best flattened face firmly against the fence; follow the machine manual. |
| Table-saw straight-line ripping jig | You do not have a suitable jointer and can secure and support the stock on the saw. | The straight jig rides the rip fence; the rough board edge does not. |
| Stop and seek another process | The board has unsafe defects, unstable geometry, or cannot be controlled with the available setup. | Do not force unsuitable stock through the saw. |
Check your saw, fence, jig, blade, and safety-device manuals. Do not assume a particular board length, cut depth, or jig dimension is safe for every machine and setup.
Joint an Edge When a Suitable Jointer Is Available
A properly set-up jointer is the dedicated method for making a straight edge when the stock is within the machine’s safe capacity. Inspect the grain and stock first. When applicable, begin from a concave edge and remove only the material needed to obtain a straight edge. Keep the best flattened face against the jointer fence so the new edge is square to that reference.
Use push blocks wherever the machine procedure permits, especially with thin or short stock, and follow the jointer’s manual for setup and technique. Oliver’s Model 4265 manual, for example, limits a single edge-jointing cut to no more than 1/8 inch; that is a model-specific instruction, not a universal setting for all jointers. Once the edge is genuinely straight, it becomes the table-saw reference for ripping the opposite edge to final width.
Rank #2

- ASSEMBLY CONTAINS: 36” Miter Bar, Base, Adjustable Fence, Push Knob, Hold Down Clamps, Tape Measure, Abrasive Grip Strips, T-Bolts, Hardware Screws, Washers and Mini Screw Driver
- FUNCTIONS: Primarily serves as a taper cutting jig for table saw – Secondarily operates as a stable straight line ripping jig – Your creativity is the limit
- PREMIUM BUILD: This woodworking taper jig is manufactured with high quality components; The base measures 32” x 7-7/8” ½” with MDF construction and melamine coating on both sides; Features a safe and easy-to-use design, indexing marks for easy angle setting, ergonomic anti-slip push knob, adjustable fence and hold down clamps to prevent shifting stock, abrasive grip strips to help stabilize your workpiece and detailed instructions for all skill levels
- VERSATILE: Perfect for cutting tapered compound angles, straight line table saw ripping, making handmade furniture, and a wide range of applications such as making chair legs, building tables, custom built shelves or base cabinets and more. PLEASE NOTE: It fits tight and securely in any standard 3/8" x 3/4" miter slot.
- PLEASE NOTE: The taper jig is designed to fit full-sized table saws with miter slots measuring ¾” x 3/8” and an inside edge of the right miter slot between 3-3/4” to 4-3/8”, 5” to 5-5/8”, or 6-1/4” to 6-7/8” from the blade. It is compatible with the DWE7491RS but may not fit some job site or bench top saws. Please check your saw's specifications before ordering.
Make a First Straight Edge With a Table-Saw Jig
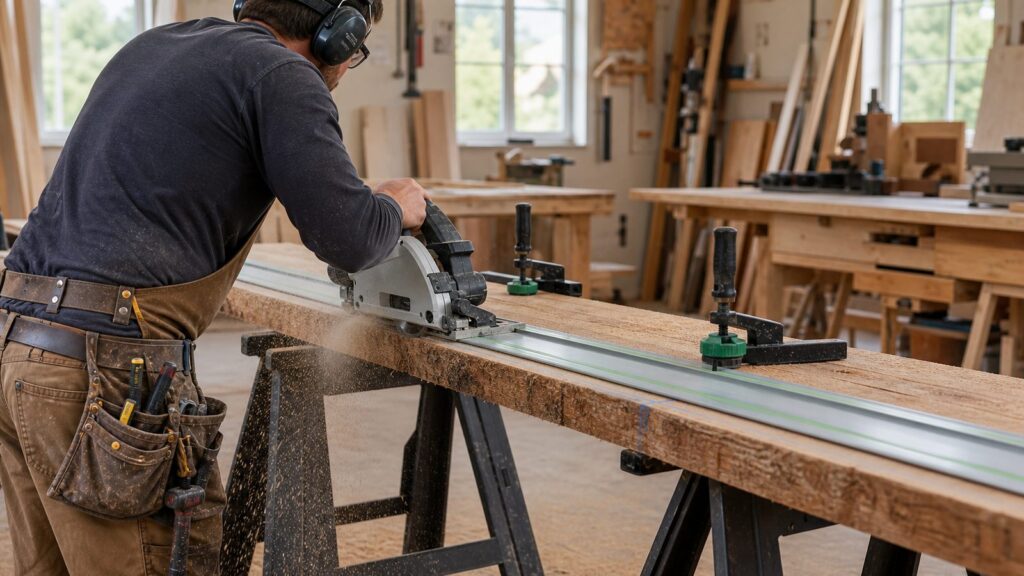
A table saw straight line ripping jig gives the saw a straight reference without asking the rough board edge to guide the cut. The board is secured to the jig, and the straight jig runs against the rip fence as both travel through the saw.
- Prepare a suitable jig. Use a rigid, straight base large enough to support the actual board. Secure the board with clamps or hold-downs so it cannot shift. Keep clamps and hardware clear of the blade path.
- Orient the stock. Place the irregular material to be removed on the blade side. Do not put the crooked board edge against the rip fence.
- Set the fence for minimum waste. Arrange the jig and fence to remove only enough material to create one continuous, usable straight edge, then lock the fence.
- Check the saw setup. Use the guard where compatible with the operation, the saw’s compatible riving-knife or spreader function, a sharp appropriate blade, and sufficient infeed and outfeed support. Have a push stick ready.
- Feed the assembly steadily. Keep the jig against the fence, keep hands out of the blade line, and do not reach over or behind the blade to collect material. Do not force or twist the stock.
- Use the new edge as the reference. After the cut, stop the saw and remove the board from the jig. Put the freshly sawn edge against the fence to rip the opposite edge to the desired width.
If the board cannot travel smoothly and remain supported, do not proceed with this setup. Check that the jig and accessories suit the exact saw model and operation; no jig or accessory should be assumed to fit every saw.
Safety Checks to Prevent Kickback and Hand Injuries
OSHA describes kickback as the saw seizing stock and throwing it toward the operator; it occurs more often during ripping than crosscutting. OSHA’s guidance is U.S. workplace-safety material, not a substitute for your machine manual, training, local requirements, or judgment.
Rank #3

- 【EASY TO USE】GOINGMAKE thin rip jig is easy to use. Just slide the guide into T-track miter slot of your table saw and lock it in front of the saw blade. Fits for 3/8" x 3/4" T slot and U shape slot and 1/4" x 3/8" T slot. The thin rip jig can extend to 8 inch from the center of miter slot to blade. Thin rip table saw accessories makes thin strips cut consistent and easily.
- 【SAFE AND FAST】GOINGMAKE table saw jig thin ripping guide provides safe and fast thin strips cutting. The one way roller bearing ensures the workpiece moves forwards and does not kickback, making safe and fast repetitive narrow strip cutting with ease. You can keep the same thickness thin strips cutting consistent with this table saw thin rip jig.
- 【PRECISE THIN RIPPING】GOINGMAKE table saw thin rip jig guide is precise and adjustale. Including mm and inch laser engraving scales. The zero clearance design is easy for set the right distance. Repeat with each strip the same size as the first for precison cutting. Set up the scale to the saw is easy. First take the bearing close to the saw blade and adjust the scale indicator to the nearest mark, then set the dimension of your strips.
- 【HIGH QUALITY】GOINGMAKE thin rip guide is made of high quality metal for durable, long lasting use. You can cut the thin strips as thin as 1/32" accurately. GOINGMAKE thin rip jig table saw jig guide is a must have table saw accessories for cutting repeat thin strips.
- 【WIDE APPLICATION】GOINGMAKE thin ripping guide is compatible with standard band saw, table saw and router table. Extended range of GOINGMAKE table saw guide is from 2-5/8 inch to 8 inch. GOINGMAKE thin rip table saw jig is easy to setup and use. GOINGMAKE thin rip gauge is a must have table saw accessories for safer and accurate cutting thin strips.
- Fence and feed: Guide stock parallel to the rip fence. Do not let a warped or unreliable edge wander as the first reference.
- Guarding: Use the self-adjusting blade guard for ordinary through cuts when compatible with the operation. Do not treat a jig demonstration or photograph as permission to remove a guard.
- Anti-kickback controls: Use the saw’s compatible riving knife or spreader function. OSHA also identifies anti-kickback fingers as an additional control.
- Hands and position: Keep hands out of the cut line, use a push stick for small pieces and to move stock past the blade, and stand to the side rather than directly behind the blade.
- Support: Support the workpiece and both resulting pieces so neither can tip, twist, bind, or pull the cut out of line.
- Blade condition: Use an appropriate blade in good condition. Stop using a blade that is dull, damaged, badly set, improperly tensioned, or gummed; OSHA warns that such conditions can cause sticking, jamming, or kickback.
Do not trap an offcut, reach over a running blade, pull stock backward through a running blade, or defeat a guard or riving knife without the exact manufacturer-approved procedure and a suitable alternative safeguard. For non-through cuts, very short pieces, severely warped stock, slabs with unpredictable geometry, or any operation that requires guard removal, use machine-specific instructions and suitable alternative guarding or jigs—not generalized web advice.
Make the Cut That Preserves Usable Material
The straightest-looking line is not automatically the best one. Mark the least-wasteful line that leaves a continuous straight edge and enough width for the intended part. A narrow first cut may be enough on one board; a severely crooked board may lose substantial width even when handled safely.
Recommended Free Tools
The cheapest cut is the one that leaves a straight usable edge; the second-cheapest is deciding early that a board cannot safely yield the part you planned. Do not count unsafe or unsuitable material as recoverable yield.
Rank #4

- Taper & Straight Line Jig: The taper drill jig allows you to make tapered cuts quickly, easily, and accurately at your table saw. With the miter bar removed, this wood working jig also doubles as a stable, straight-line ripping jig
- Fit For: The wood working tools works with table saws on which the left edge of the right miter slot is 3-3/4” to 4-3/8” from the blade or 5” to 5-5/8” from the blade
- Widely Use: This straight-line hole jig fits snug in any standard 3/8" x 3/4" miter slot and features a large, ergonomic handle for smooth push-action performance throughout the cut
- Multipurpose Drill Jig for Angled Holes: With a simple indexed angle setting system, heavy-duty hold-down clamps, and a smooth sliding design, the table saw jig makes tapered cuts fast, easy, and more precise. Perfect for chair legs, table legs, and more
- Easy To Setup: In tapering mode, these woodworking tools and accessories are intended for use in the miter slot to the right of the blade. On many saws, your initial cut will remove a narrow piece of the tablesaw jig’s base to create zero-clearance support
Frequently Asked Questions
Can I put a rough edge against the table-saw fence?
No. A rough, crooked, or waney edge is not a reliable first reference. Establish a straight edge first, then use it against the fence for the opposite-edge rip.
How does a straight-line ripping jig work?
The board is secured to a rigid, straight jig. The jig—not the board’s rough edge—rides against the rip fence while the irregular edge faces the blade.
Should I use a jointer or a table-saw jig?
Use a jointer when it is correctly set up and the board is within its safe handling capacity. Otherwise, a securely clamped straight-line jig may work on a properly equipped table saw if the stock can be controlled and supported. Follow the relevant machine and jig instructions.
Best Value
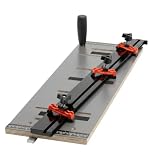
- Dual-Scale Taper Setup: Outfeed and Infeed scales with Imperial, Metric, and Angle Indexing Dots help simplify taper angle setup. Recessed channels help keep the scales securely in place and reduce the risk of lifting or shifting during use
- Adjustable Stop Block for Width Control: The included stop block can be mounted on the fence face or side track; once the taper angle is set, position the stop block against the workpiece to help maintain cutting width and improve repeatability for multiple matching parts
- Secure Stock Holding with Clamps and Grip Strips: 3 adjustable hold-down clamps work with included #100 abrasive grip strips to help hold stock firmly in place and reduce workpiece movement during cutting
- Birch Plywood Base and Aluminum Fence: Built with a 5/8" birch plywood base and rigid aluminum extrusion fence to help reduce flexing, support the workpiece, and maintain stability for taper cuts and straight line ripping
- Adjustable Miter Bar Helps Reduce Side-to-Side Play: The anodized aluminum miter bar includes adjustable expansion washers for a closer fit in standard 3/4" x 3/8" miter slots, helping the jig track more smoothly with less unwanted movement
How much material should I remove?
Remove only enough to create a continuous, usable straight edge, while preserving the width needed for the part. If defects or severe crook prevent a safe, useful result, stop rather than forcing the board through the saw.
When should I stop instead of ripping the board?
Stop if you find checks, splits, cracks, knots, foreign objects, or unstable geometry, or if the board cannot be secured and supported for the operation. Choose another safe process or have a qualified shop assess it.
Quick Recap
Product prices and availability are accurate as of the date/time indicated and are subject to change. Any price and availability information displayed on Amazon at the time of purchase will apply.